We may receive a commission when you use our affiliate links. However, this does not impact our recommendations.
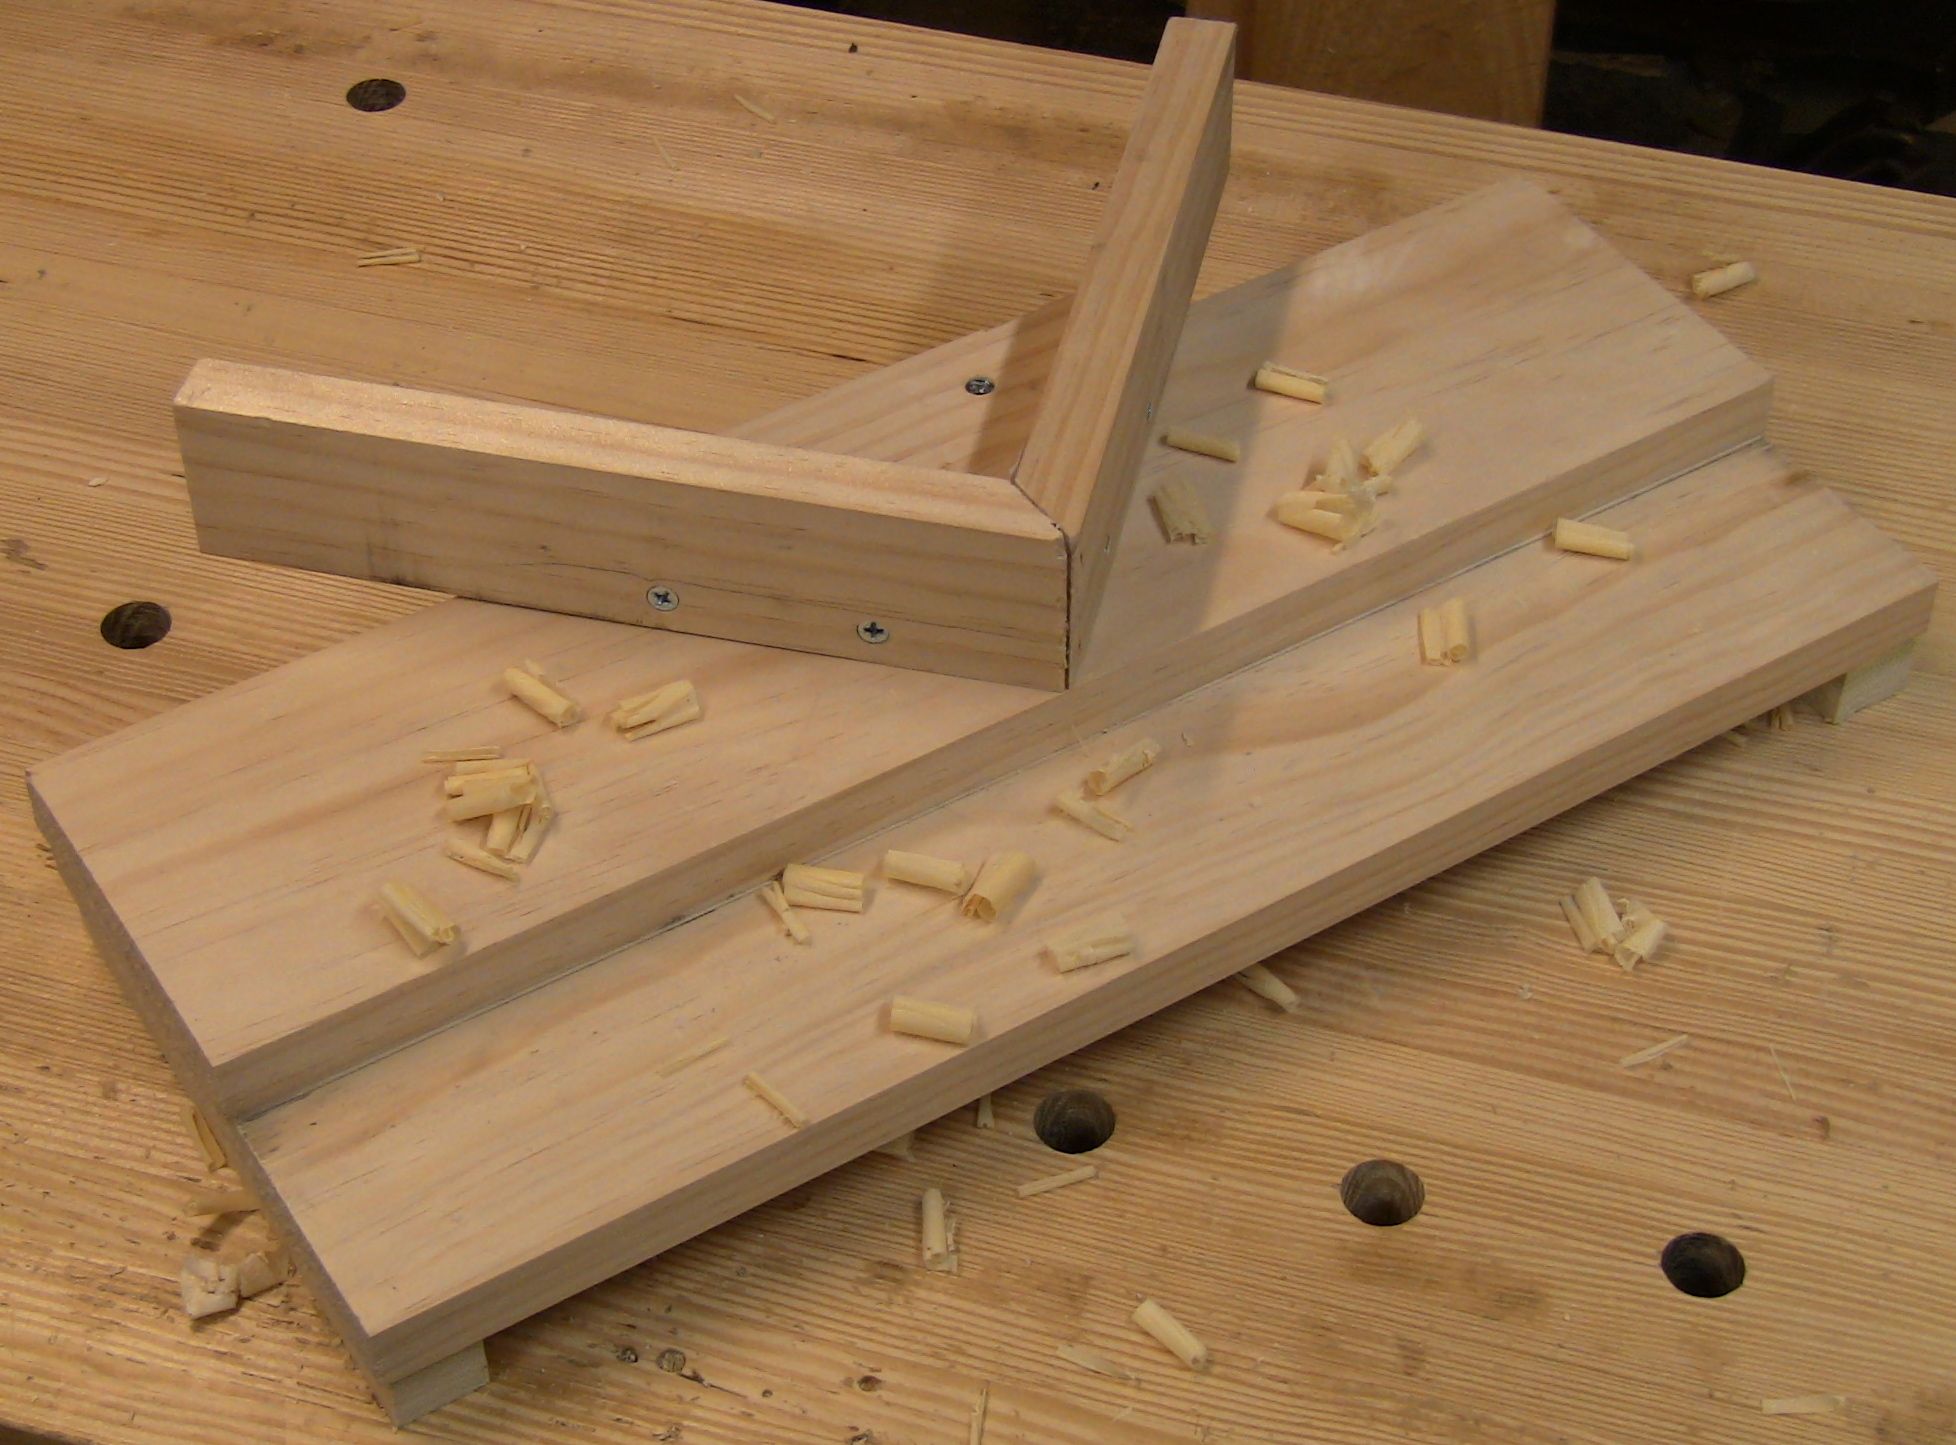
A miter shooting board with added shimmable faces.
Many shop-made workholding devices for hand tools can be fairly crude, made quickly from scraps. Shooting boards aren’t like that. They’re precision instruments, and need to be made with care. Because they act as reference guides, any errors in their alignment will result in errors in your work.
Miter shooting boards are particularly tricky because you’re pairing matched mitered pieces to close a joint at a specific angle. Even the tiniest error can make for a poor joint.

Rough sawing a miter on the end of a face strip.
One strategy for dealing with this is to make the board with micro-shimmable faces on the stops. Then spend a few minutes tuning and adjusting it, and you’ll enjoy perfect miters consistently. It’s easy to readjust if necessary over time due to use or wood movement.
Here’s a miter shooting board I’ve built this way. It’s a simple adaptation of a simple design from Bernard E. Jones’ books The Practical Woodworker and The Complete Woodworker (and is probably far older).
The original design consists of a flat right triangle block mounted on the bed of the shooting board. The right angle is rotated 45 degrees from the bed edge so you can use both the left and right sides to shoot the opposing miters of a joint. One side is a push shot, the other a pull shot.
This design requires a good job making the right angle, and a good job mounting the block. Errors in either step will result in poor miter joints. The addition of shimmable faces allows you to correct for any error.
I laid out the right triangle block with the hypotenuse aligned to the grain. That put each angle side on angled grain. After carefully sawing it out and planing the sides flat and square to the face, I screwed a 2″-wide face strip to each angled side. I didn’t’ glue them. The ends met at a roughly-sawn miter. Since I wanted to be able to adjust the angle where they met, I left a gap between them.
I aligned this block assembly to 45 degree lines I had drawn on the shooting board with my combination square. I secured it with glue and screws, keeping the glue away from the face pieces.
To prepare for tuning the board, I squared up two pieces of 2″-wide test stock and sawed rough miters across their ends. I sharpened my plane iron and set it for a light cut, and secured the board to the bench with a holdfast.
I tuned each face of the stop independently. Gripping the first test piece up against the push side of the stop, I carefully shot the end down with the plane. Then I repeated this with the second piece. Because these were squared pieces, I could shoot both sides of the miter on the same stop face.

Shooting a miter on a test piece.
I flipped the second piece to its proper orientation and matched it to the miter on the first one against an engineer’s square. I could see a small gap at the outside corner of the joint. That meant the face was just a bit less than 45 degrees.
I loosened up the screws holding the face strip to the stop block, inserted a strip of paper as a shim between face and block at the right end, and tightened the screws back up. That increased the angle of the face just a touch.
I reshot the test miter ends and checked them against the square. Better, but still a bit of gap. I added a second shim layer and retested. That did it, giving me a good tight mitered corner.
I repeated the whole process on the pull side of the stop. This one only required one layer of paper.
As a final check, I shot one piece on the push side and the other piece on the pull side, since this is the way it would be used for stock that was wasn’t square all around, such as complex mouldings. This confirmed that the two tuned faces were at 90 degrees to each other.

The back side of the board showing the shimmed faces.
While the tuning process may sound tedious, now I can trust this shooting board to give me perfect miters every time. However, it’s always worth doing a quick test joint to verify nothing has affected the tuning.
My right triangle block turned out to be pretty close because I had done a careful job of sawing it out and planing down the sides, but this process allows even a fairly crude one to be tuned up. It might take several layers of paper to shim up. Instead of increasing the face angle, you might need to reduce it, shimming the opposite end of a face.
Here are some supplies and tools we find essential in our everyday work around the shop. We may receive a commission from sales referred by our links; however, we have carefully selected these products for their usefulness and quality.