


We may receive a commission when you use our affiliate links. However, this does not impact our recommendations.
 One of my best woodworking tools is one I don’t write about much: my sketchbook. It’s an inexpensive spiral-bound thing I get at the grocery store, right by the romance novels. It’s always in my bag when I travel, and it’s on my lap when I’m “encouraged” to watch “Project Runway” with my lovely wife.
I keep a mechanical pencil clipped to its metal spirals and use it to solve tricky joinery or design problems. This activity is not even the tiniest bit artistic. Instead, I use it to record tiny brainstorms or shapes I’m playing with.
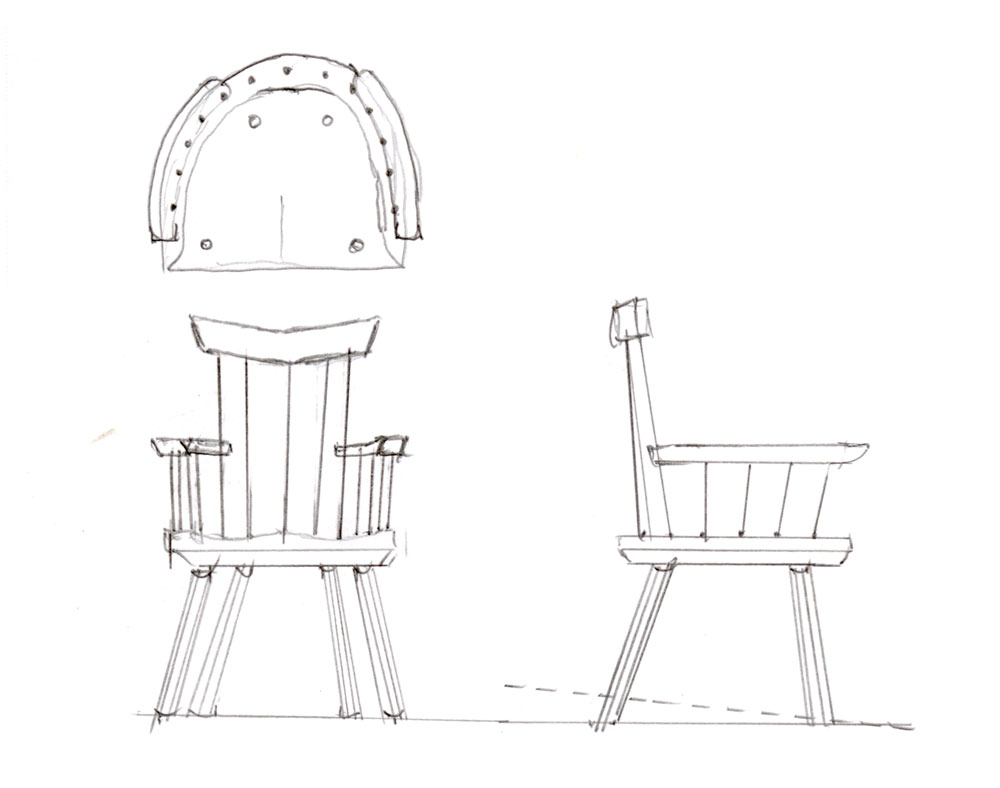
For example, the above sketch is for a chair that has been kicking my butt since June. I’ve twice aborted it in the shop, but with the help of my sketchbook I finally figured out the shape of the crest rail – a shallow “V” that I’m very happy with. And I finally resolved the arms.
To be honest, I think the crest rail started as a slip of the hand. A line that was supposed to be more curved came out flatter than I intended it. Then I just went with it.
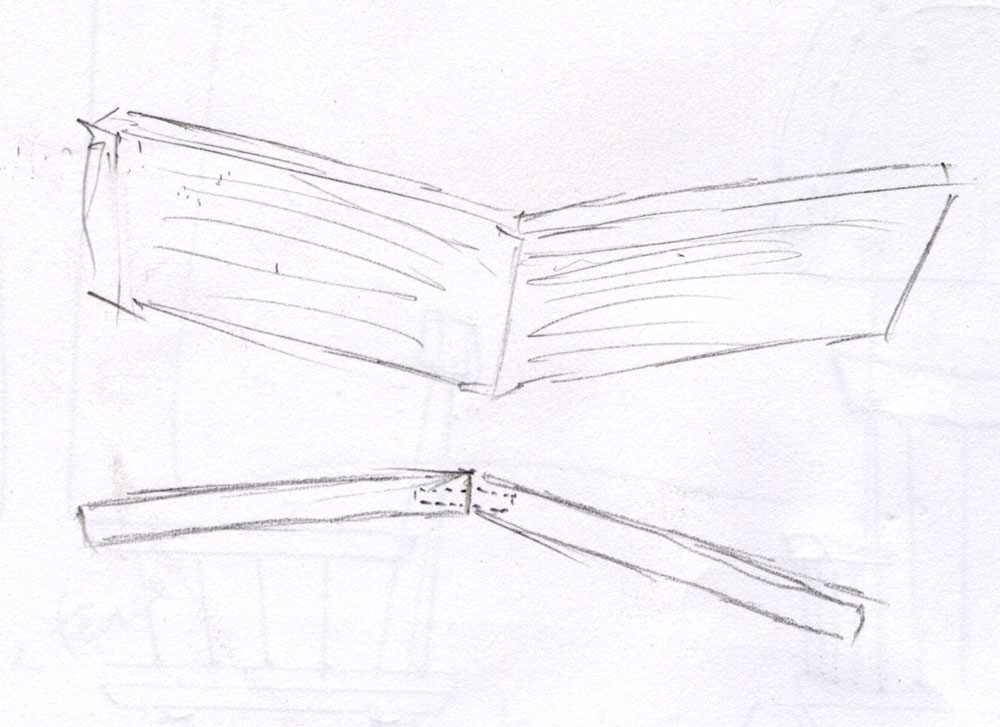 Of course, just because you can draw it doesn’t mean you can build it in our 3-dimensional world (some architectural prints I’ve worked with require four or even five dimensions….). The crest should end up as two pieces joined in the center at their ends.
This is, of course, a tricky joint to make strong. So it’s back to my sketchbook to work out the details of how to do this: Dominos? Small splines? Really long splines that pass horizontally through a good section of the crest pieces?
Where Can You Learn to Draw?
You don’t have to take a class. Just like any set of skills, it’s mostly about using the muscles over and over – your eyes and your hands. A class on drawing at a local art center will jumpstart your skills. I plan to take one someday – just as soon as I can escape mandatory couch hour.
— Christopher Schwarz
There are lots of good design resources at ShopWoodworking, including “Furniture Design: From Process to Problem-Solving” and “Design & Techniques for Building Curvy Furniture” both by Jeff Miller.
Here are some supplies and tools we find essential in our everyday work around the shop. We may receive a commission from sales referred by our links; however, we have carefully selected these products for their usefulness and quality.


You would waste some wood but why not cut it out of one piece?
Kudos for this:
“It’s an inexpensive spiral-bound thing I get at the grocery store, right by the romance novels. I keep a mechanical pencil clipped to its metal spirals …”
An opportunity to send many down a rabbithole looking for acid free, open bound, textured, phantom, perspective lined, or dot grid; and don’t even get started on pencils.
WHy I read your blog.
Great post. I appreciate the praises of sketching being sung.
Also. Just to hopefully kind of put some of the other comments at ease; I am 27 years old, I worked as a draftsman for almost a decade, during which I began building furniture (primarily with hand tools for lack of space for machinery).I am now currently apprenticing (Yeah, in my late twenties) as a manual machinist.
There are those of us who love to work with our hands, want to preserve crucial elements of our history, and are trying to keep the flame going. While I certainly piss on most of my generation, there are a few of us out there trying to keep things alive. We pay attention to history, we wish we had had better shop classes if we had them at all, and we want to keep working with our hands, eyes and minds.
We may not be able to save “ANYTHING”, but there are young people out there who are doing good things with their hands… not to look cool on a social media platform, but because we actually sincerely love it. We want to learn, and we are learning. However haphazardly at times.
Keep the faith!
I vote for finger joints and a veneer on both side to hide the joint.
I learned drafting in H.S. too and that skill has led to many a fine project including my new kitchen. Too bad it’s gone the way of all of the “industrial arts” departments. That said, as they weaned the school system off teaching such arcane skills, I was able to snatch up many accoutrements for my own shop, i.e. solid maple bench tops, a drill press, a 12″ jointer, a 15″ planer, hand-tools, etc. all at severely reduced prices. I just feel bad that younguns won’t have the opportunity to whittle wany boards into something useful. There’s a lot to be said for raising blisters on young hands. Nowadays they’re more likely to raise callouses on their thumb tips than suffer the wrath of an angry splinter. Too bad…
I would be interested someday reading how you tackled “tricky joints”… what worked, what failed … and the reasons why. An annotated compendium of successes and failures.
I see you used the classic top/front/side view for your chair – awesome sketch. Sadly, they don’t teach drafting anymore in high school. My drafting skills have served me well throughout my life. But if you have the mechanical skill to be a woodworker – you could learn to sketch. Free class on sketching out designs in Instructables.com.
I agree with DaveS2
I sketched it with my drawing pad (Sketchup) LOL, but the comments don’t allow pictures.
A good way to learn is to watch you tube tutorials. I personally watch Mark Crilley, he doesn’t draw furniture but shows how to sketch and shade and get the negative ( white) space right.
Some basics then sketch, sketch, and more sketching.
My sketching has improved tremendously, plus he uses a hb wooden pencil and paper, nothing flash
Fine, but I have a fever, and the only cure is more dugout chair. I’ve stopped caring about anything else!
A long-fingered box joint could be interesting, with the fingers visible on the reverse of the crest rail. Should be strong too.
I agree with you 1000% as far as always be sketching, by far the most useful for solving issues in the shop before they happen and increasing productivity in the shop.
I have a design for a crest rail similar to yours that I’ve made a few models of but not yet executed (typical for me) my plan was to use dovetails, but I think mine is far more acute than your sketch. splines or any type of scarf joinery should work well given it’s almost all long grain at that angle.