


We may receive a commission when you use our affiliate links. However, this does not impact our recommendations.
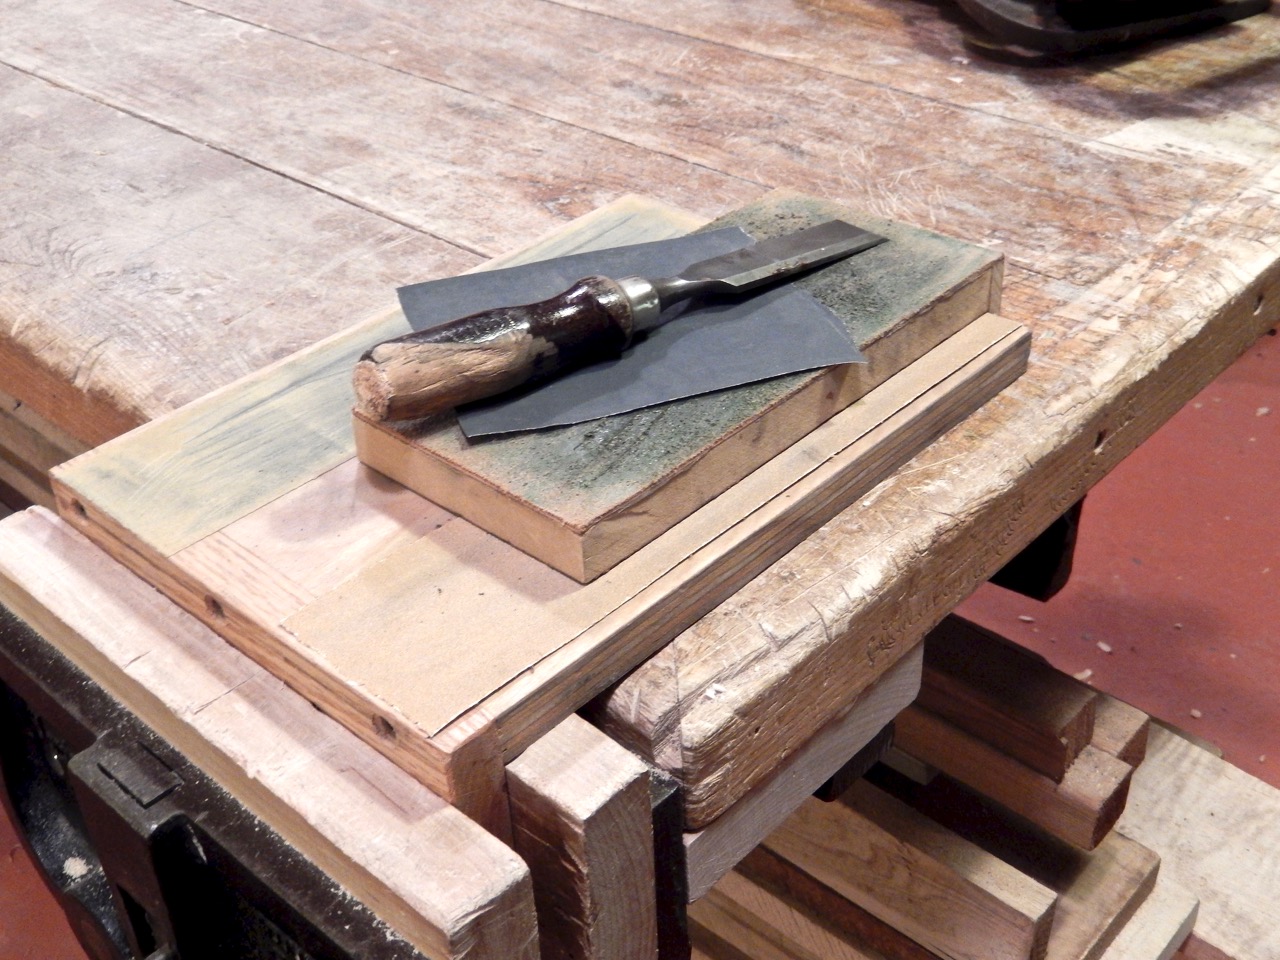
My sandpaper plate sharpening system is made of two plates and a piece of #600-grit sandpaper.
In my last post, I showed how I made a dedicated slip form (a slipstone made of wood) for one of my gouges. This week, I’ll explain how to make a complementary sandpaper sharpening stone that is surprisingly effective and inexpensive to build.
First, let me explain why I began using this sandpaper technique in the first place.
In the middle of a carving class, for example, a student will ask me to sharpen his or her gouge (most of our 4th grade students have not yet mastered the art of sharpening) – so I need to do this as fast as I can, and resume supervising the class. If not, I risk the eruption of full-scale classroom pandemonium. In addition, I prefer not to use rotating tools such as a grinder, a belt sander or a buffing wheel during class because these (along with the sparks they create) attract the students like bees to honey. Using stones would just take too much time because I would have to negotiate carving out a work area near the sink or place a waterproof tray on a bench. Then, I would have to make sure that every sharpening stone (not all of them are the same size) was secure before I could work on it. And we all know that stones sprayed with water may slide, even if we put a non-skid liner underneath. Not to mention that needing paper towels or rags for blade clean-up adds to the hassle….
By now you get my point: It can be awkward incorporating the stone system in the middle of a bustling classroom.
As a solution, I came up with a sharpening system made of two laminated sanding and honing plates. The first one, a plywood plate, is laminated with two grits of self-adhesive sandpaper strips, and the other plate (MDF) with a leather strop. Each plate includes a ledge that allows me to hold it in a vise or hook it over its sister plate to prevent it from sliding.
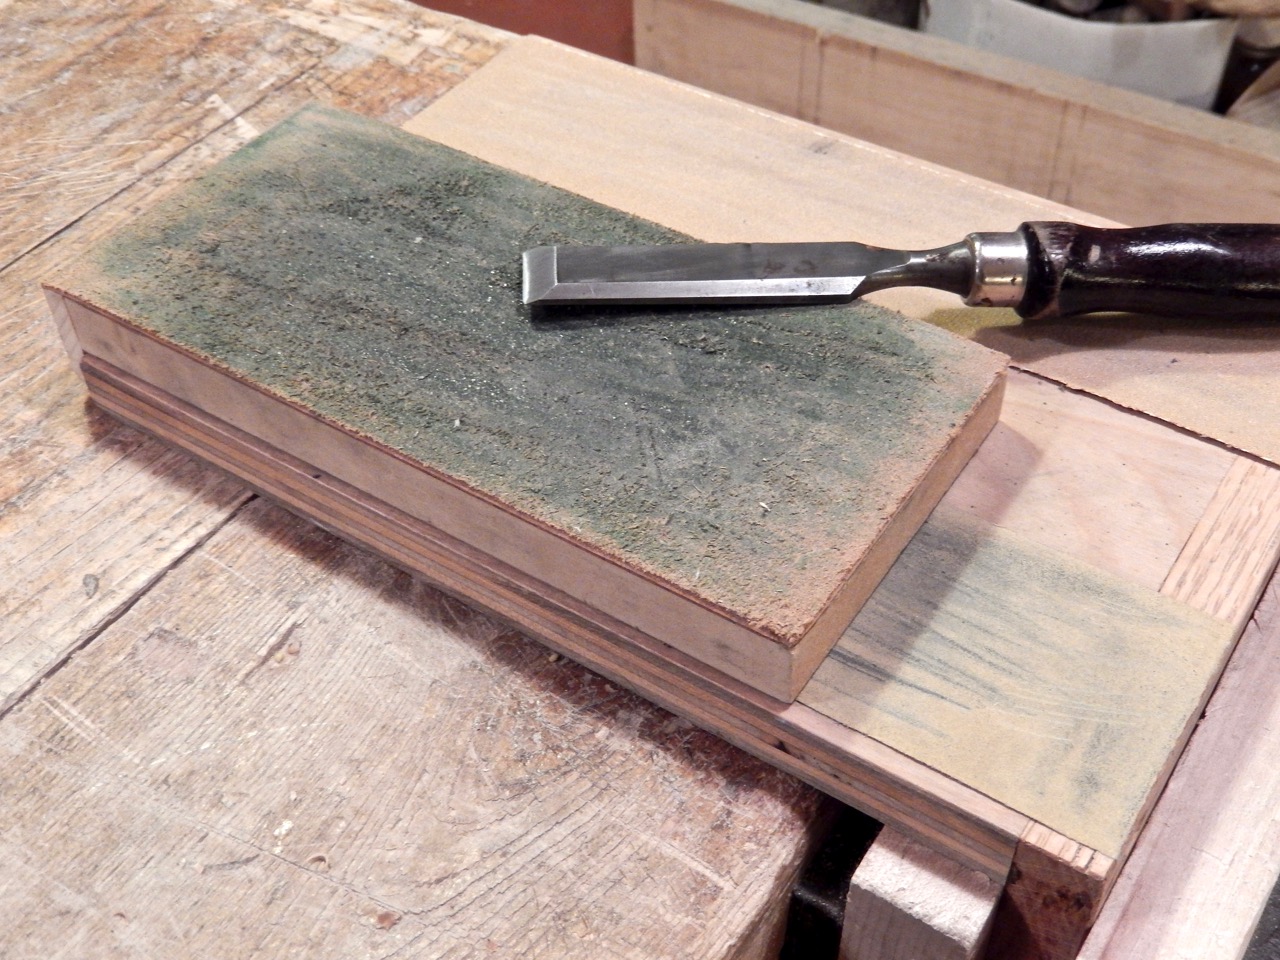
Sharpening & honing: My sandpaper plate is laminated with #120- and #180-grit strips, which is great for rapid removal of material. When sharpening a chisel I move the bevel sideways at about 60°, and in the case of a gouge, I add to this skew angle a rolling motion to cover the crescent bevel circumference.
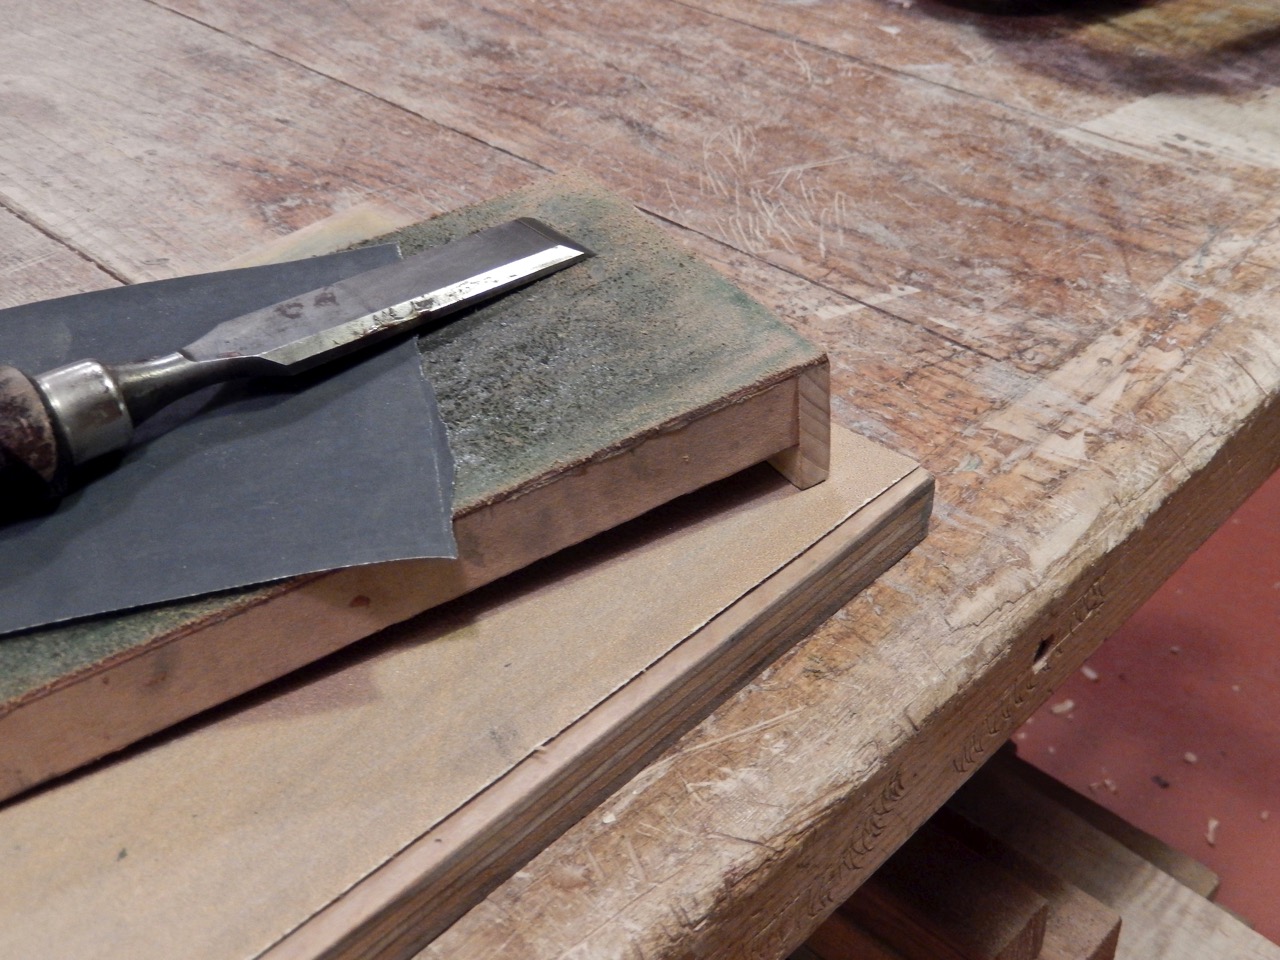
After I finish sharpening the bevels on the #180 grit, I place #400 or #600-grit sandpaper over the #180-grit strip to break the burr (in the case of a chisel) and for the initial honing process on the bevel. I admit it would be easier if I had #600-grit paper glued to a third wooden plate, and I might do it at some point in the future. But for the time being, I see an advantage in having the freedom to replace the smaller sheet of fine-grit sandpaper strip as needed and not have to hassle with gluing them down on a plate. And by the way, the #180-grit sandpaper particles provide good traction for the finer sandpaper and prevent it from sliding during honing.

When sharpening a gouge, I move the bevel sideways using a rolling motion to cover the entire crescent bevel circumference.


My sandpaper plate is laminated with #120- and #180-grit self-adhesive sandpaper strips, which is great for rapid removal of material.

I place #400- or #600-grit sandpaper over the #180-grit strip to break the burr (in the case of a chisel) and for the initial honing process on the bevel.
The final buffing: At this point, I mount the leather plate over the sandpaper plate and proceed with final buffing of the blade. Remember, when sharpening and honing with sandpapers you have to pull the blade away from the leather to avoid the risk of having the cutting edge dive into the paper and ruin everything you have done.
I mount the leather plate over the sandpaper plate and proceed with final buffing of the blade

Sometimes I decide to place the #600-grit sandpaper over the strop instead of over the#180-grit paper plate.
In my next post, I will show another methodthat incorporates the use of regular sandpaper.
Editor’s Note: For more on sharpening, check our Christopher Schwarz’s video “The Last Word on Sharpening” and Ron Hock’s book “The Perfect Edge.”
Here are some supplies and tools we find essential in our everyday work around the shop. We may receive a commission from sales referred by our links; however, we have carefully selected these products for their usefulness and quality.


Hi Yoav,
Thanks for the great instruction. I don’t know much about leather. Would you describe the type of leather to use for the final buffing, ie. thickness and hardness? Which side of the leather is used for buffing, the smooth or rough? Where can I find/buy a peice? How did you adhere it to the plate? Finally, I’ve read about microbevels, is it necessary to put a microbevel on the chisel?
Thanks,
Ho
Two quick questions:
1 – Is the tape run the length of the sandpaper (sticking it all down) or just across the ends?
2 – Are the 4th graders easier to teach than the harvard students? I’d try to sneak into your class but I probably would stick out…
Hi Yoav,
Fairly new to this and also with a secondary classroom full of students. How do you maintain your plane irons’and chisel’s bevel angles using this system? Is it just for immediate touch ups by free hand, or do you use some form of attachable guide to keep the angles correct when doing tool maintenance after class?
Neil
Lovely perspective and shadow on that first sketch Yoav!
First, I’m amazed that you work in a school that lets you give 4th graders sharp chisels and gouges to handle. Second, I’m missing the point of the article. Using the ‘Scary Sharp’ sandpaper method of sharpening is nothing new so I’m missing the point you are trying to make.