


We may receive a commission when you use our affiliate links. However, this does not impact our recommendations.
Editor’s note: This dovetail method is referenced in the October 2021 issue of Popular Woodworking, so we are republishing it to the home page. The blog below was originally published in September 2012 to coincide with the release of the video.
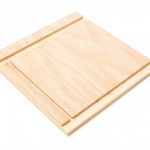
 I’m in the midst of making a place to put my woodworking stuff, a la Christopher Schwarz’s “The Anarchist’s Tool Chest.” The picture at left shows my dire need for just such a receptacle. (And it perhaps also shows a need to cull my collection.)
It’s the same chest build Chris is teaching to a full house of students right now at Roy Underhill‘s The Woodwright’s School in Pittsboro, N.C., and although we started on the same day, as Chris’s blog reveals, the students are well ahead of me. (I’m guessing they’ve had fewer meetings to attend in the last few days.)
This chest, when finished, will be painted on the exterior (likely a slate blue – which will surprise exactly no one who knows me), so the dovetail joinery won’t show. And, I want it to look sturdy and rugged (and actually be sturdy and rugged). So I elected to lay out big tails and fairly big pins rather than fuss around with delicate and refined.
I’m gang-cutting the tails (which is why I’m going tails-first on this one) because even though they’re large, there are still a lot of them. I might even be brave enough to “gang cope” the majority of the waste before separating the two tailboards for chopping. Maybe.
But no matter what size tails you like, I think it’s easiest to lay them out using two sets of dividers – it’s a lot faster and simpler than measuring the layout on all four ends of the tailboards. Plus, as long as you don’t adjust either set of dividers after you’ve determined the spacing, all of your dovetail layout will match perfectly (something that’s a challenge to achieve when using a tape measure or rule). I make no promises, however, about perfection once the sawing starts.
I used a pencil to mark the tails, because I find it’s a waste of time to bother knifing in whichever part of the joint you choose to cut first. When I transfer to the pin board, then I’ll grab my marking knife.
While we’ve written about this dovetail layout method several times over the years, until I actually saw it done, I didn’t really get it. So I’ve filmed a short video to show the method. Apologies for the several title cards and words. I was planning a voice over, but one of the cats kept meowing in the background (they love to play in the shavings pile when I’m in my shop/study). So instead, you get guitar music (because I’m not cool enough for the banjo).
Here are some supplies and tools we find essential in our everyday work around the shop. We may receive a commission from sales referred by our links; however, we have carefully selected these products for their usefulness and quality.


very helpful reading it twice and with seeing the video show once
I watched the videos this morning as I was just about to mark out a set of dovetails for a project. It took a couple of watches to get the concept before it finally clicked. The “director’s cut” video really helped. Thanks! And yes, I was late for work this morning. 🙂
Megan: Thanks again for the videos. I preferred the Director’s Cut as the directions were clear. The shorter video confused me on the starting and ending points as the left half-tail was blocked from view so I couldn’t see where you started the second set of dividers. No matter as the longer video showed quite clearly how to do this.
The website for WoodJoyTools must have been updated. Here is the new link for your DT gague: http://www.woodjoytools.com/layout/precision-dovetail-template
Great job!
Bruce.
Megan,
Thank you for this video. I had a whole bunch of kitchen cabinet drawers to make and this video cleared up the concept better than a thousand words. After building the Anarchist’s tool chest and a couple other boxes the actual cutting of dovetails is becoming reasonably routine and accurate but laying them out has remained a puzzlement. Your video really made it easy and it made it easy to vary the ratios to get narrow pins or more or less tails. Next step will be to control the pin width to match my paring chisel.
THANK YOU
Megan
Consider this next time. Gang-up both the front and back pieces of your chest in your vice. Run through your layout process for both boards as you did for the one shown. Now flip one board end for end, keeping the tops together, and use the marks from the one end and extend them to the other end. Flip the other and extend your layout to the fourth edge. You will now have the four boards marked out in less than half the time you were going to take – and all four layouts should match. Now cut both boards together at one time. You have just cut tails for one end of your chest in a little more time than it would take you to cut one set of tails on one piece. Flip both boards, keeping the tops together, and cut the other ends. This whole process will cut your time spent cutting tails in about half. Layout and cutting or your pins will still take about the same amount of time, but I think you will see more regularity or consistancy in both your tails and pins.
Give it a shot, Kevin
This activated my inner geek. I think I figured out how to set the second divider. Decide how many tails you want (N) and the desired pin width (W). Mark the arbitrary half pins at each end. Then measure between those marks (X). Set the second divider to: X/N + W/N.
okay that sounds good though now how would you mark the joining piece for the dovetails. Do you use the same markers?
As an armchair observer and semi-perfectionist, I have the following nit to pick:
When using the dovetail gauge to mark a line, first put the pencil in the hole, then move the gauge to the pencil. That will eliminate the tiny registration error that happens when you align the marking gauge to the hole by eye.
It also demonstrates the tiny bit of improved accuracy you get with divider instead of pencil.
Nice video, Megan.
megan
great video. out of curiosity, who makes the dovetail marking gauge that you use in the video
thank you
You now need to do a video on cutting the dovetails.
Thanks for sharing.
I just found this today. This is great and I can’t wait to try it, exceptitis 15 degrees in the garage so maybe next week. Thanks!
I sure am glad I tracked this down and reread it.
That second video cleared up a lot of misconceptions about half pins. I had thought they were supposed the be as wide as the inner pins, yet you are making them much bigger. Much better for a tool chest. I think I may have been trying to make them too small even on small boxes.
Excellent! Clear, consice, and complete. Thanks. 🙂
Cats rule!
Thank you Megan,
today I was going nuts how to layout my dovetails. I tried around for some hours and it didn’t work out.
At lunch I thought I should look at popwood and there it was!
You made my day!
Regards from Germany
Nikk
That’s a very old technique for marking out dovetails, probably reaching back to our earliest woodworking ancestors. In fact, Rob Cosman teaches that technique in his DVD on making dovetails. You can use a ruler to mark out the half pin, rather than a set of dividers, so you really only need one set of dividers for layout.
It’s a very technique for laying out evenly spaced dovetails.
That’s a very old techniq
Megan – I decided just to watch the second video, since I’m new to dovetails. It was perfect – clearly shown and explained. I might actually go out and try it! Thanks so much.
Thanks Megan!! That was really awesome to see, very simple and elegant. To read about… not so much 🙂 Thanks for making the video and good luck with the rest of the chest.
Megan:
Thanks very much for the demonstration….I never quite got that either, from written instructions!
Hi Megan It would be far easier using a Gifkins B jumbo jig.
No need for measuring or marking out, cuts timber up to 22mm thick and 480mm wide, very easy and simple to use on any length timber. Less than 20 minutes to cut all joints using the router bits supplied with the jig on any router table.
Please – redo the video. Watched the it twice and could not figure out how the pin width was set. You’re not showing the whole process, and the second half of step 4 (above, walking back from the other end) is critical.
Cheers – Miles
The title (no measuring) leads us to believe that you divined the tails width by means other that a rule. So how does that work?
Would not hermaphrodite calipers be better for the half pin layout. Heck, a mortising gauge would be better than guessing where the edge is.
I had never used dividers until I started practicing hand dovetails. I think it’s a great way to work. Then building the tool chest caused me to acquire a small collection of dividers to reserve the various dovetail spacings and other measurements. I gang-sawed and gang-coped. I didn’t mess up any more than I would with a single board, so I say give it a try, you’re surely better than I am. I stopped and redirected further from the baseline when I got nervous.
Peggy: I used federal blue milk paint and like the color. It’s more cheerful than the dark, dull shades I’ve seen on most tool chests.
As I understand it you use this whole procedure, including the many placings of the template, for all four ends of the tail boards. I do something similar one time, complete the first set of tails, then use that finished set of tails as a template for marking the tails on the second board with a single placement of the template. When those are cut, one end of the second board becomes the template for the other end of the first board. This means much less freehand placing of dividers and angle gauges, and consistency on all 4 corners. Pins are still marked (with a knife) from the tails they will match with.
I’m going to paint my tool chest federal blue (not a surprise to anyone who knows me, either), if I ever get it done.
I would have enjoyed cat meows as background music, especially Siamese!
Megan,
Like you, I have seen this but didn’t “get it.” This is very helpful, but I am still with Travis (above) with the question, exactly where did you start in/on the half-pin with your 2nd set of dividers? If it doesn’t matter, just anywhere on/in the half-pin, then shall I assume (dangerous) that the pins will not come out “centered” or will come out closer to one end than the other? BUT, I may be getting it — when you start anywhere in the first half pin, are you just marking one side of the pins? And, then when you start in the other half pin to go back the other way, are you then marking the “other” side of the pins? Therefore, they are coming out uniformly? Hope this makes sense. Alan
Nice and concise, and twice the price.
I sometimes mark out dovetails on a story stick of appropriate length, and transfer the tick marks from the stick to the board ends. That way, I’m better assured of consistency from one set to the next, even if I knock my dividers onto the floor, or a ferret runs off with them, etc.
-Steve
Megan, thats neat but where did you start with your 2nd pair of dividers?
Where did you get that neat little layout gauge?