


We may receive a commission when you use our affiliate links. However, this does not impact our recommendations.
Shop organization is likely a recurring topic throughout anyone’s woodworking career. That’s why we devoted several articles to the topic in our Woodworking Essentials column in Popular Woodworking Magazine back in 2007. The column has returned as a new book compiling those articles into one handy volume, “Woodworking Essentials: Timeless Techniques for Woodworkers.” While some of photos from the book are vintage (see if you can spot some oldies, but goodies), the ideas, techniques and instruction continue to hold up. See for yourself: The following excerpt is from the book’s chapter “Small Tool Organization” by Scott Gibson. If you’re looking for some ideas to help keep the tools you need close at hand, this article might just have the solution you’re looking for.
Many of us plan our workshops around big things – workbenches, table saws, planers and jointers. It’s a challenge to arrange these large tools so the shop is efficient and comfortable, especially when space is limited. But as we ponder the best layout for these giants it’s the small tools that can catch us by surprise.
The problem of small tool organization begins innocently enough. We typically have so few tools at the start that it hardly seems to matter where we store them; many woodworkers dive in with only a few used hand tools and a couple basic power tools. They all seem to fit handily in a couple of cardboard boxes. But in time, shops and tool collections have a way of getting bigger and more complicated. Eventually we have to deal with a jumble of small tools that accumulated in our shops while we weren’t paying attention.
Cardboard boxes won’t work any longer. There are too many tools, and they are too valuable to dump together in a box or a drawer where they can bang against each other. Moreover, some of them are used all the time, some only rarely. And mixing layout tools with router bits, or chisels with sandpaper, will seem a lot less than helpful when you’re in a hurry to find the right tool for the job.
Start by Identifying Tools You Need All the Time
 For a lot of furniture makers, the workbench is the hub of the shop, like a traffic circle through which every major road must pass. Dozens of tasks take place here: joinery is laid out and cut, lumber planed and sanded and furniture parts glued and assembled. We might even eat lunch here.
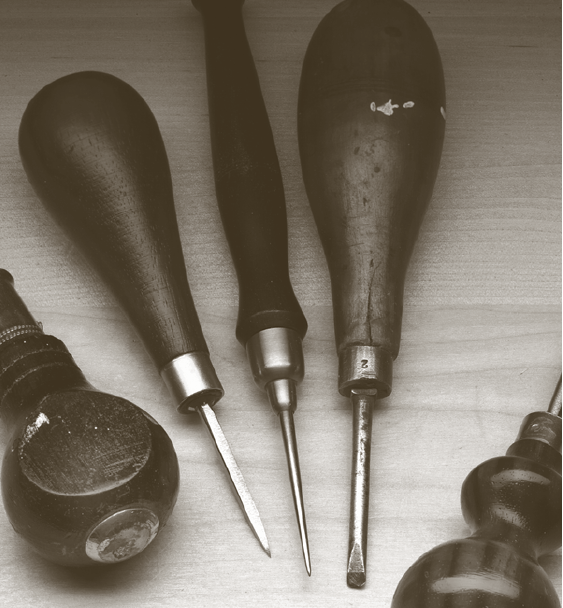
Given this central role for the workbench, one way to organize small tools is by gathering the ones you use most frequently and keeping them nearby. It’s not hard to come up with a good list: chisels, planes, a square or two, a hammer or mallet, a marking knife (or a handful of sharp pencils), rules or measuring tapes, scrapers and a few other odds and ends.
These tools should be the first ones that are housed at or near the bench, within arm’s reach of where you will be using them. Although it may take a little experimentation, when the arrangement works you will know it. You should be able to reach for exactly the tool you need without spending any unnecessary time scouting for it and without moving your feet.
Tool collections can become more specialized as time goes on, forcing you to make decisions about which tools need a front-row seat and which can be relegated to more distant storage. For example, you may routinely need a block plane, a smoothing plane, a small rabbeting plane and a jointer. That’s four planes you use frequently. But you use that old moulding plane you picked up at a flea market only once in a blue moon. Why clog up shelves or cabinets near the bench with tools you rarely need?
Virtually any tool category can use the same kind of attention. An adjustable square or try square is something you’ll pick up a dozen times a day so keep it close at hand. But a framing square may not be used more than once a month so it can happily live on an overhead rafter or on a nail in the wall some distance away. A little common sense will go a long way in helping you identify what you need close at hand.
No one’s list of “must haves” will be exactly the same. Every discipline has its own list of everyday tools, and those needs and habits will become evident with time in your shop as well.
A Tool Cabinet Keeps Important Tools Close
Thumb through any book about woodworking shops and you’re likely to see all kinds of bins, shelves and cabinets that inventive woodworkers have devised to organize their tool collections. Browsing is an excellent way of getting ideas for your own shop. After all, few ideas are really brand-new.
Building a first-rate cabinet to hold personal tools is a long-standing tradition for carpenters and furniture-makers. It’s a chance to develop furniture making and design skills and in the end you’ll have something that will serve you for many years.
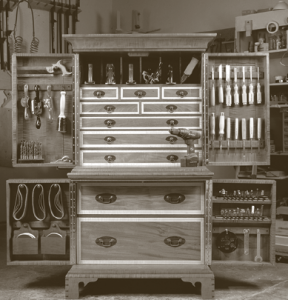
Glen and Malcolm Huey, a father/ son team in Ohio, built this grand cabinet when they moved into a new shop.
Tool cabinets can be infinitely variable, made to house only planes, a collection of chisels and carving tools or an entire suite of hand tools. What may be the most photographed American tool chest ever was made by a Massachusetts piano maker named Henry Studley over a 30-year career. It’s a marvel of planning and design, deceptively small, only 39″ high, 9″ deep and 18″ wide. Yet it holds 300 individual tools packed tightly together but still accessible. A more modern version of a grand cabinet was one built by Glen and Malcolm Huey to celebrate their move into a new workshop.
If you have the space, a wall cabinet can grow into more of a tool locker with space for small power tools as well as hand tools. A larger cabinet not only helps keep shop clutter to a minimum but it also can provide security if you live in an area where crime is a worry.
You might want to leave a tool cabinet of any size and complexity for the future, until individual preferences and needs are a little clearer (to say nothing of developing the skills required to make one). Start with a more modest wall cabinet for tools. It’s an excellent project that doesn’t have to consume a lot of expensive materials or take a lot of time. Tool chests can be very simple and as your skills improve you can move on to more complex designs.
Another possible route is to buy inexpensive storage cabinets at used office-supply or furniture stores. Older steel cabinets and open shelving units can handle a lot of weight. Even if they need a fresh coat of paint and have a dent or ding here and there, these cabinets will provide a lot of useful storage at a relatively low cost.
Tool Boards Keep Everything in Sight
If your workbench is against a wall, you can arrange a surprising number of tools directly in front of you on nails or hooks. The down side is that you’re not going to squeeze the volume of tools here that you would be able to put in a well-designed cabinet. But they are in plain sight and instantly accessible.
We’ve all probably been in a highly organized garage or two where one wall was devoted to 1⁄4″ perforated hardboard and the outlines of different tools neatly painted in red or white. But driving nails or screws right into the wall works just as well. If your workshop has been clad in drywall, you might want to add a layer of plywood so you can put a nail or screw in wherever you want. T1-11 plywood 3⁄8″ or 1⁄2″ thick is inexpensive and attractive.
For tools that won’t hang (chisels, files, carving tools, screwdrivers and the like), you can make simple racks and attach them to the wall. One easy way to make a rack for chisels or files is to cut a series of slots in a board with a dado blade and then glue another board to it. The width and depth of the slots can be made to suit tools of different sizes. A series of holes in graduated sizes bored through the face of a board will handle chisels or screwdrivers. Magnetic strips will accomplish the same thing. Racks don’t have to be fancy to be useful.
For the variety of odds and ends that almost always end up on a bench, drill holes in scrap blocks of wood and put them on a low shelf over the back of your bench. Blocks can store drill bits, nail sets, awls and similarly slender tools with points or sharp edges. You won’t lose track of them and their delicate edges will be well protected.
Rolling Cabinets Keep Like Tools Together
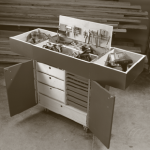 There are two good approaches to making a tool cabinet mobile. One is, in effect, to take the cabinet off the wall and stick a pair of casters underneath it to create a rolling tool garage and workbench. The other is to make one or more rolling workstations dedicated to a single power tool.
Mobile workbenches and tool caddies can be as elaborate or as simple as you want to make them. For example, a design by David Thiel, Popular Woodworking Videos editor, is actually a modular bench consisting of two 213⁄4″-high rolling boxes and a 6′-long bench that spans them. Adjustable support assemblies attached to the sides of the boxes can be raised to support the benchtop at a variety of working heights or hold a tool, such as a drill press, router table or a hollow-chisel mortise machine, when it’s needed.
It’s a good design for a small shop because the boxes can be used alone or together depending on the need, and parked out of the way when it’s time to bring the cars in for the night. Another successful design from Thiel and Michael Rabkin incorporates fold-out lids, roomy storage compartments and a series of shallow drawers for fasteners and tools. In this or a similar work cart, drawers can be built to suit your interests and internally divided in whatever manner makes the most sense for the user. Use a power sander a lot? Devote one of the drawers to your collection of random-orbit and block sanders with separate trays for different grades of sandpaper and other accessories. A heavy bottom shelf could be used for a belt sander. Repair a lot of chairs? Build a mobile tool station that houses just those supplies and can be rolled to any part of the shop where it might be needed.
A rolling cabinet devoted to a single tool saves space in a small shop because it can be pushed into a corner when it’s not needed. More than that, having one or more of these rolling workstations helps parcel tools and their many accessories into dedicated spaces where they won’t get lost.
As an example, consider the router. Many woodworkers eventually will own several: A laminate trimmer, a mid-size router and a big plunge router all might be found in a single shop. Each has a collet wrench (or wrenches), one or more bases, edge guides and a trammel for cutting circles and curves. Plus there are a lot of bits in one or more shank diameters. It all adds up to a lot of tooling. Building a rolling cart around a router table is a good way of keeping it all straight. Devote a drawer to bits, divided for 1⁄4″ and 1⁄2″ shanks, and another for bases and edge guides. Routers themselves can go in a large enclosure at the base of the cabinet.
Keeping Up with the Clutter
Providing specialized storage cabinets, shelving and rolling racks is certainly a big part of winning the war against shop clutter and keeping small tools organized. These fixtures can represent a significant investment of time and materials, but you don’t have to build a shop full of them right away. Let your ideas percolate for a while, take a look at what other woodworkers have done to solve the same problems you have and then set about to fix one storage problem at a time.
The other side of it, of course, is taking the time to keep tools organized once you’ve made room for everything. Few people return a tool to its proper place the instant they’ve finished using it. We’re more likely to put it aside and get the next tool we need. In the end, though, shops with plans for managing that mountain of small tools will be more efficient, safer and happier places to work.
 For more great ideas on everything from shop organization to tool use, safety and maintenance, check out “Woodworking Essentials: Timeless Techniques for Woodworkers.”
Here are some supplies and tools we find essential in our everyday work around the shop. We may receive a commission from sales referred by our links; however, we have carefully selected these products for their usefulness and quality.


I tried the French-cleated tool board method as I did like having my tools out and visible at all times. But I found that they collected dust (saw and other varieties) and I was spending valuable shop time vacuuming the tool boards. I don’t have a pristine, operating room wood shop so I was spending too much time doing this.
Moved to a hanging wall cabinet.