We may receive a commission when you use our affiliate links. However, this does not impact our recommendations.
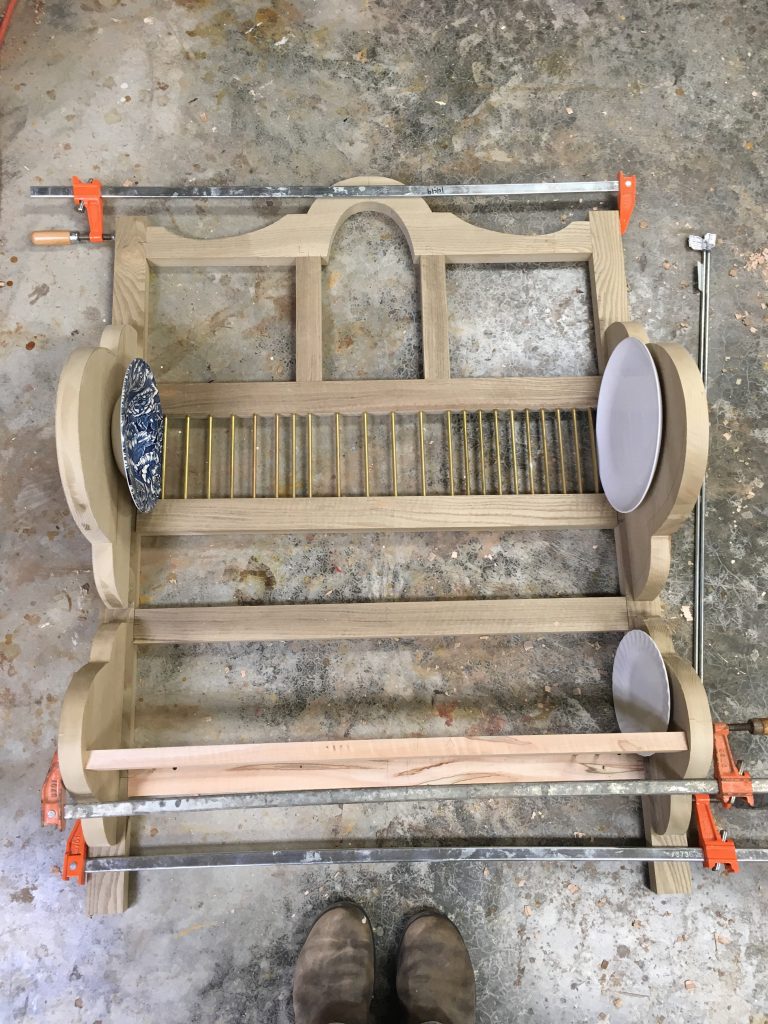
In the works. The New Century plate rack in curly sassafras, nearly ready for glue-up.
Plate racks are practical pieces of kitchen furniture that also happen to be delightfully decorative. Some people question their usefulness on the grounds that they hold a limited number of dishes; also, being open, they offer no protection from dust. Traditionally, these racks were used over a sink, where their open structure allowed freshly washed dishes to drain and dry; obviously doing so will cause water damage to the wood–another drawback cited by critics.
Where these racks really come into their own is in storing dishes that are used every day. Plates, soup dishes, and other types of tableware are readily visible and easy to grab from the rack, whereas plates and bowls stored in cupboards must be pulled from a stack stored behind closed doors.
While the sky’s the limit in terms of aesthetic possibilities for plate rack design, there are just a few basic arrangements for supporting the contents. Some racks have dowel supports (round or square) at both front and back; others have vertical dowels at the back with horizontal counterparts underneath. Some have vertical dowels at the back and a second set of dowels run diagonally from the floor at the front of the rack to 2/3 or more of the way up the back. Still others have dowels at the back with a decorative cutout front rail; the low spots in the cutout provide support (albeit limited compared to dowels).
The book I’m writing on kitchens for Lost Art Press will include plans for three plate racks: the one featured here, a casework version with dowels at both front and back, and a third with front support provided by a decorative frieze. In this post I’ll introduce some of the design considerations that go into this furniture form.
1. Choose the aesthetic of your traditional plate rack
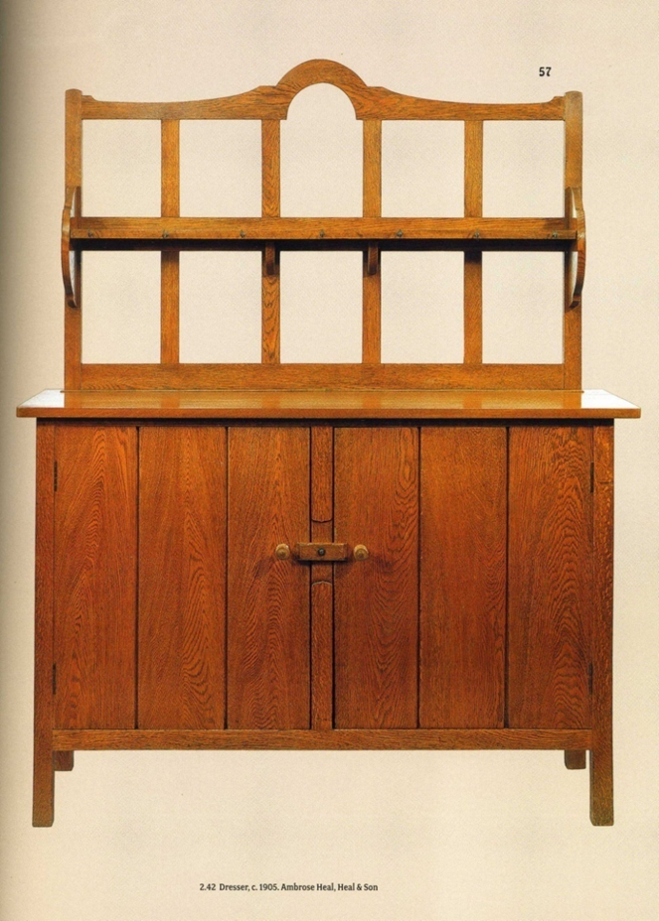
The primary inspiration for my New Century plate rack is this 1905 dresser by Ambrose Heal. (Illustration from Wendy Kaplan, The Arts & Crafts Movement in Europe & America.)
For this rack I wanted to focus on the low-profile form of some of my favorite English Arts and Crafts dressers (Brit-speak for a shallow, open shelf upper cabinet). The shape of the top rail is based on that of a 1905 dresser made by English furniture designer Ambrose Heal, of Heal & Son (and more recently, Heal’s of London). However, translating this general look into a plate rack with one section deep enough to hold dinner plates took some doing; the bosses that support the rails between which plates will be stacked had to be deeper than those on the 1905 dresser. My first efforts bore too close a resemblance to pregnant guppies for my taste, so I looked to Victorian book illustrator Kate Greenaway and American decorative artist Candace Wheeler for guidance in making those bosses feel a bit more bubbly–perhaps “frothy” would be a better word. I wanted them to look cheerful and charming, like the puffy sleeves of Edwardian ladies’ shirts and dresses.

2. Think about the specific items you want to store, then plan for them
Designing a plate rack is as much about accommodating the pieces you need to store–and offering them the necessary support–as it is about aesthetics. This means you need to think about the depth of the horizontal sections as well as their height. Many racks have a shallow shelf at the bottom with a deeper one above, a rhythm I wanted to follow with this one. I thought it would be cool to use 1/4″-diameter metal rod instead of wood dowels, so I bought a couple in brass and a couple of galvanized steel, to consider how each looked. I chose the brass.
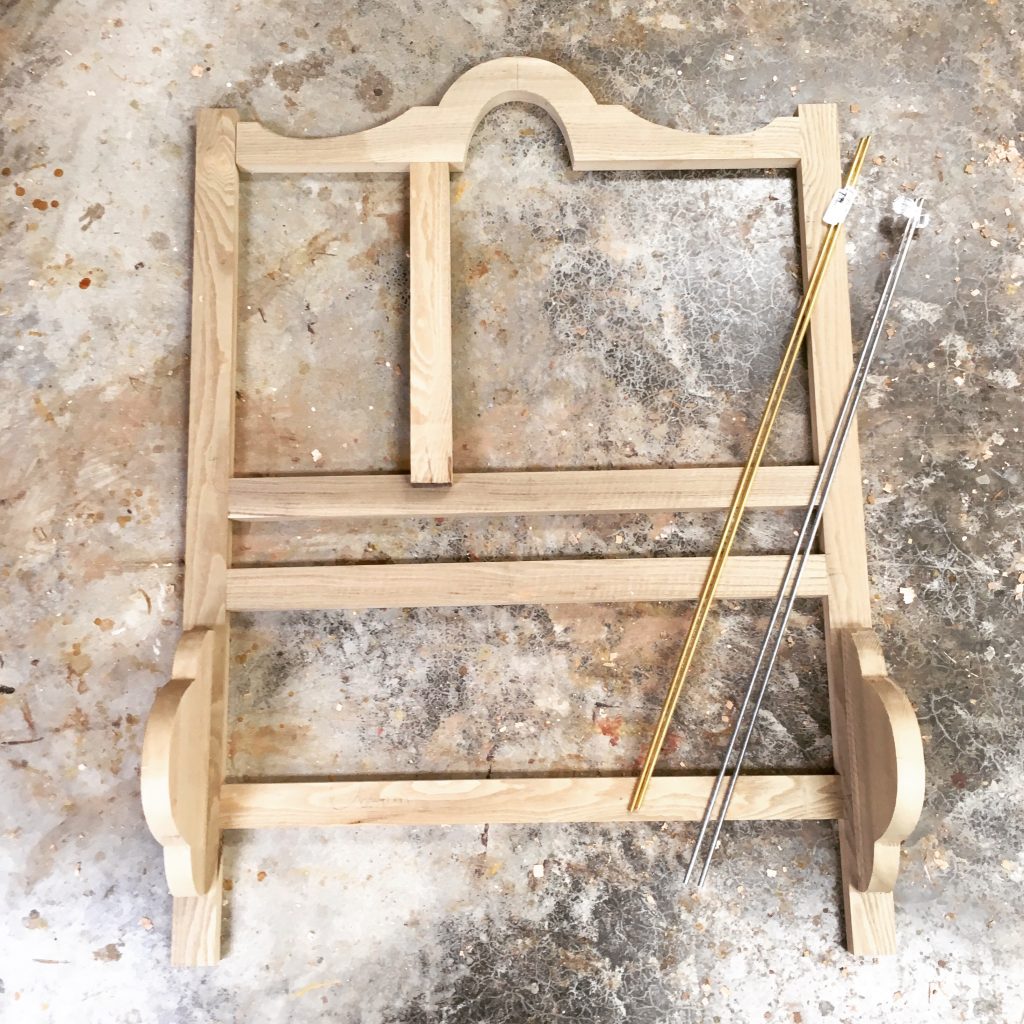
For this kind of piece I start with the knowns, so to speak, i.e. the elements that come straight from the drawing. So I laid out the basic parts, then set the bosses in place, moving things around until I liked the proportions, while keenly aware that I might have to make adjustments for practical support.
The structural frame rails for this design are one length; the rails across the front of the rack, which will be joined to the bosses, are longer. I determined that length by setting one end in place at the back of the rack, then marking the inside edge of the boss on the opposite side.

Marking the length of the front rail for the bottom section by direct measurement between the bosses. The front rail here was a mock-up in maple, which I used to get the relevant layout before reproducing it in sassafras.
Next I had to consider the spacing of the dowel rods. A plate rack with dowels below and at the back of the structure calls for different spacing than one with dowels at the front. The latter, which is the more common type (and the type I will be teaching in a class at the Lost Art Press storefront on the weekend of June 22-23, 2019), needs the dowels to be spaced wide enough so that the full depth of the plate can pass between them, as illustrated by the following two pictures. Plates are often significantly deeper than they appear, so I always plan a plate rack with front and back dowels by using the specific plates, bowls, and other tableware that need to be stored.

To determine the spacing of dowels, I use a scrap of wood clamped to the bench. I stick a pair of dowels in the trial holes, then see whether the plate or soup dish will fit between them.

Although this early-’70s plate is ultra-low profile, it didn’t fit between 1/4″ dowels placed 3/4″ on center. Were I making a plate rack with dowels at the front, I would need to make them at least 1″ on center to accommodate these plates.
For the New Century plate rack, however, only the edges of the plates need to fit between the dowels.

Because the frame rail and front rail are different lengths, line them up by their center points instead of measuring from an end when marking out the dowel holes.

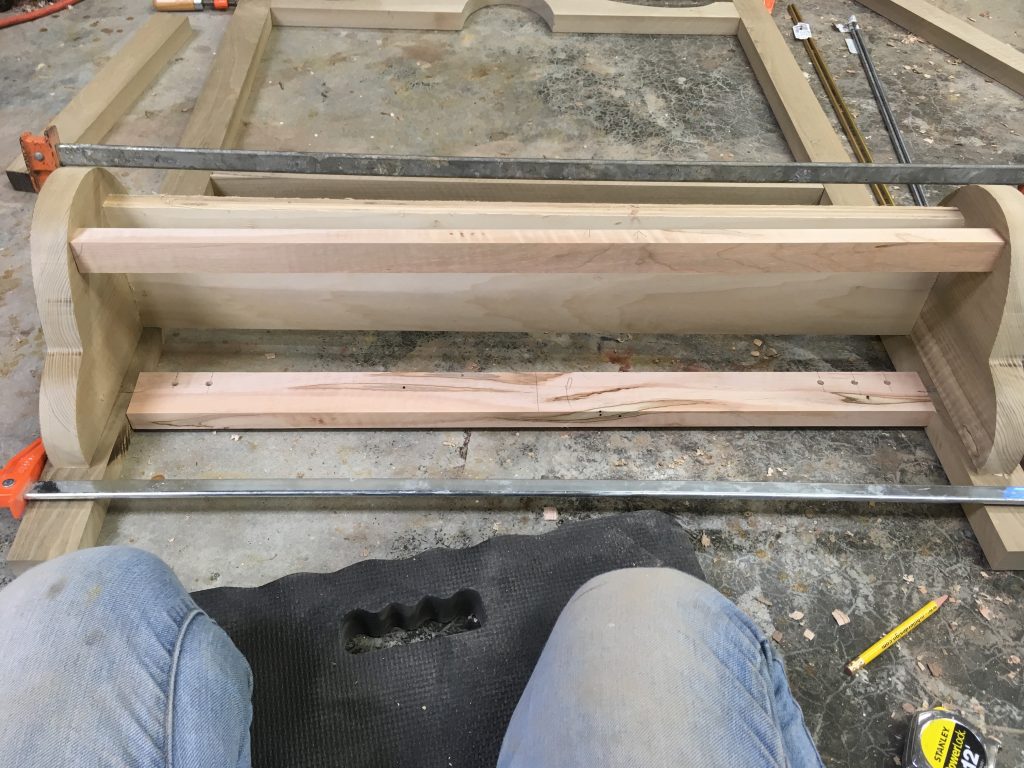
Looking down at the rails as though from the top of the rack, you can see that the lower front rail is lying on top of the lower back rail in this image. Horizontal dowels will run between them to support the plates’ lower edges. The next step is to determine the distance of the front rail from the back rail, in addition to its height.
The next step is to determine the location of the front rail in terms of depth and height. I began by holding the bosses in place with a plywood spacer the same length as the front rail, then holding smaller plates, which will go on the lower section, up to the mock-up and adjusting the front rail as necessary.
Plates need to be supported at front and back by the lower wooden rails, while also extending below them enough to engage with the horizontal dowels for support. But there’s another consideration to bear in mind: Ideally the plates’ back edges will not hit the wall behind the plate rack; hitting the wall would damage it. So the next step is to hold the plates you will actually be storing in place between the horizontal dowels and make sure that the plates will not hit the wall. To do this, you need to adjust the vertical placement of the upper frame rail.

A proper fit. There should be a small space behind the dishes when they are put away in the rack. The upper back rail is critical in determining how the plates will sit.
Once I had adjusted the spacing between the front rail and the upper back rail so the plates would not hit the wall, I measured the space between the back and front rails, added 3/8″ for the depth of each hole, and cut some trial dowels.

The dowel holes in the front rail are drilled at 90 degrees, but those in the back rail are drilled at 6 degrees off square to accommodate the slightly higher position of the front rail, which will tilt the plates slightly back, helping to keep them solidly in place.
Next I laid out the rest of the holes in the front and back rails and drilled them in the front rail. I drilled the holes in the back rail with the drill press table tilted to a 6-degree angle, because I wanted the back rail to be slightly lower than the front, to help keep the plates in place.
I squared the position of the holes from the face of the back rail to its top edge, then drilled those, which would line up with holes in the rail above; the vertical dowels would be sandwiched between these.
I repeated all of these steps for the upper bosses and rails, using the larger-diameter plates that will be stored there.
Next week I’ll go through the rest of the steps to complete the New Century plate rack and show you the finished piece on the wall. I will also have details of the class I’ll be teaching at Lost Art Press in June.

English Arts & Crafts Furniture explores the Arts & Crafts movement with a unique focus on English designers. Through examination of details, techniques, and historical context, as well as projects, you’ll discover what sets these designers and their work apart from those that came before and after, as well as gain a deeper understanding of the Arts & Crafts movement and its influence.
Here are some supplies and tools we find essential in our everyday work around the shop. We may receive a commission from sales referred by our links; however, we have carefully selected these products for their usefulness and quality.