


We may receive a commission when you use our affiliate links. However, this does not impact our recommendations.

When I build a reproduction, I try to remain as faithful as I can to the construction of the original – even if my modern brain says it’s not ideal.
The original builder of this early 18th-century table used several techniques that wouldn’t fly in a modern shop. For one: The bottom of the drawer is simply nailed on to the drawer sides – no groove. And the solid wood tabletop is attached to the base using wooden pegs driven in through the top.
When I saw this table at the Museum of Early Southern Decorative Arts, I observed how the top was split – most likely because of the pegs. (You can see a slideshow from my trip here.) The top wants to move; the pegs want it to stay put. So one of four things happen:
1. Nothing. The wood movement isn’t enough to bust anything apart.
2. The top splits.
3. The pegs break.
4. The table base is pulled apart (a rare thing in surviving tables).
In this case, the top split. Now, I could have attached the top using metal clips or wooden buttons – both of those techniques would have allowed the top to expand and contract freely. And I could have then added some false pegs to the top so it still looked like the original.
But that doesn’t make me happy. It’s the same reason I left the marks from the fore plane on the underside of the tabletop and drawer bottom. That texture is a reminder of how this was built.
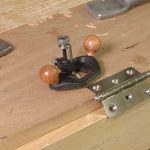
Plus, I figure that if the original survived more than 300 years, I should give that technique some respect. The video above shows how I attached the top to this table using a brace-and-bit, oak pegs and a hammer.
— Christopher Schwarz
Notes on this Table
This table will be featured in an upcoming issue of Popular Woodworking Magazine and is one of the plans in the forthcoming book “Furniture in the Southern Style” (Popular Woodworking). You can pre-order this book for less than $20 at ShopWoodworking.com. If you like period furniture, you are going to want this book. Period.
P.S. You can download the music from this video from the Free Music Archive.
Here are some supplies and tools we find essential in our everyday work around the shop. We may receive a commission from sales referred by our links; however, we have carefully selected these products for their usefulness and quality.


One thing that I wonder about the original is if the top was quartersawn or split radially out of the log? If so I would guess the builder figured the wood wouldn’t move enough to screw things up any time soon. But those flitch sawn boards on the new one could move quite a bit if the humidity changes significantly for a week or two.
One thing I have read about and seen a couple of times in boat building when using treenails or pegs in that way is to use a spoon bit, and then you can curve the hole inside the wood a bit by using the difference in diameter between the bits shaft and it’s spoon. Allows the pegs to hold better when they are forced to curve inside the hole.
Didn’t you build stuff early on that violated good woodworking practices just because you were ignorant? I certainly did. If you were reproducing a table you had built when you were a novice woodworker, would you make the same mistakes again on purpose out of nostalgia for your ignorant self?
Did you ever build something – like utility shop cabinets or shelves, for example, that you didn’t think of as fine or intended for posterity or where you didn’t have time to indulge every best practice you could think of? Perhaps the table builder wasn’t thinking he was building fine furniture, but instead just had a limited time to devote to needed family project to set in the kitchen.
That’s all to say: why emulate mistakes or compromises. If the original builder, given the knowledge and the time would have done it differently, why not make a piece of furniture that will better serve its users? Is the split part of the aesthetic to your eye? Is a nailed drawer bottom more charming?
I apologize, I don’t make reproductions, so I no doubt just don’t get it.
Thanks,
Sean
I wonder if the table top would have split if left in it’s original environment. The humidity level in the south is fairly high in both the summer and winter. This in no longer true given air conditioning in the summer and a well sealed buildings with heat in the winter. Pegging the top in the past may have worked just fine but may need design adjustments given the change in indoor environment.
I think I saw a hesitation before you bore through the top. Yup, I am in the right spot.
I would have taken several long breaks to build up my courage before I could do that! I hit that spot often on my projects, and I find a woodworking yellow streak begins to glow at those moments.
Chris, how about getting the original X-Rayed? There seems to be enough differentiation in the low contrast areas (wood) that you should be able to see the pegs.
http://nttreasurehunt.wordpress.com/2011/06/23/seeing-beneath-the-surface-at-knole/
What kind of chisel are you using to taper the peg? Am I seeing what I think I’m seeing?
When doing a proper reproduction it is always satisfying when the piece splits in the same place as the original!
If you don’t peg into the legs but just peg into the aprons staying away from the legs, pegging the cross grain aprons about 4 inches each side of center and pegging the aprons parallel with the grain of the top 5 or 6 inches in from the leg, the long aprons can then flex in and out a bit with the wood movement. I generally prefer to stick with the original plan and listen for the split in the middle of the night when the house is quiet.
I am boring into the legs. The angle helps keep the top secured to the base when the table is (inevitably) lifted by its top. If the pegs were vertical, the top would come off much easier.
Note with this table that there are also pegs through the top and into the aprons. I just haven’t been able to figure out exactly where they are on the original – I’m still studying several photos.
Hope this helps.
New Bedrock bevel-up jointer? Looks like a 7.
Chris –
Two questions…
1. Why are you boring at an angle?
2. Are you going into the stretcher or legs?
Jonathan
==============================