


We may receive a commission when you use our affiliate links. However, this does not impact our recommendations.
This week I am finishing up the carcase for a special tool chest for an upcoming pair of articles in Popular Woodworking Magazine and I turned my attention to the lifts – the handles you use to grab the chest when you have to move it.
There are three common ways to create chest lifts. You can use metallic hardware, you can make “beckets” with rope or you can make stout all-wood grips. For this chest, I am already up to my neck in custom blacksmith hardware, so I decided to make oak handles for this chest using a cool technique I learned from Roy Underhill.
I call these “dog bone” chest lifts because of their shape before you turn them. Each lift is made from one piece of oak that starts out as 1-1/4” x 2-1/2” x 12”. You turn the center section to its finished round shape and then saw the square bits to an ogee shape.
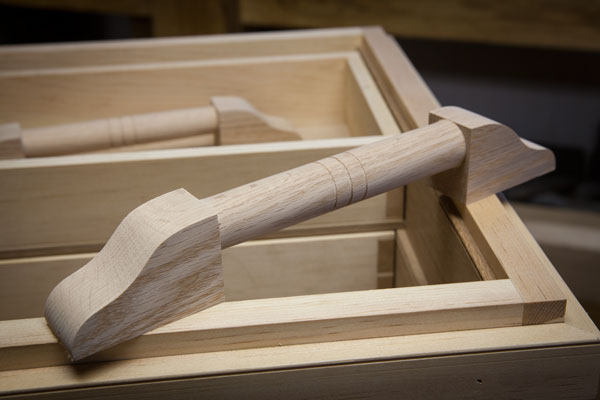
The end result is a handle that looks like it is made from three separate pieces but is actually one solid stick of oak that is quickly transformed into a handle. Here’s how I did it.

The layout is the most important part. The round handle is 6” long x 1” diameter. So to lay out the handle, you draw notches on the long edges of the blank that are 3/4” x 6” and then saw out the notches. The result is the dog bone shape.
Find the centers on the ends of each blank and then chuck a handle into your lathe. Start turning with a slow speed until you get used to sneaking your tools into the corners of the handle and have turned the handle to a round shape.
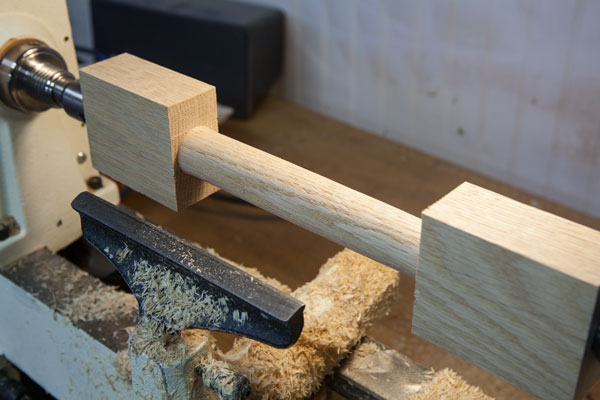
Then increase the speed of the lathe to finish the handle. For decoration, I added three incised rings on 1/2” centers.
Remove the handle from the lathe and lay out the shape of the end blocks. Anything goes here. I used an ogee shape that terminated in a quarter-round. Saw these to shape and finish them up with rasps and sandpaper.
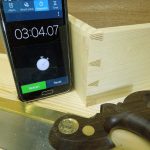
That’s where I stopped this evening. Tomorrow I’ll drill clearance holes and countersinks for the screws that will attach the handles to the carcase and rasp a chamfer on the 90° edges of the handles.
Each handle took about 10 minutes of turning and shaping – it took considerably longer to take the photos and describe the process.
— Christopher Schwarz
Note: If you are a fan of Roy like I am, you can order virtually every season of “The Woodwright’s Shop” here at ShopWoodworking.com.
Here are some supplies and tools we find essential in our everyday work around the shop. We may receive a commission from sales referred by our links; however, we have carefully selected these products for their usefulness and quality.


I’ve just finished building your anarchists’ toolchest (external portions, interiors to come) and made 2 of these handles out of Ash on the lathe earlier this week – and they are a really nice addition to the chest! I’m very curious to hear how you anchored them to the sides of the chest? Do they need to be screwed and doweled? I assume these need to be installed before the interior work proceeds…
How did you attach these to the chest and how far from the bottom and with what?
Thanks
Just tried my hand at one of these with some offset turning, ie laying out the handle on the “top” side, cutting out most of the waste & then turning with the center set for the handle. It left more finger clearance but didn’t require as wide a starting piece. The offset makes the turning a bit more exciting, but who needs knuckles, anyway?
Doug
“alcohol-powered lathe” ROFL
The ‘dog bone lifts’ are very much like the handles on my Great-Grandfather’s tool chest.
He was a timber frame carpenter in the late 1800’s and early 1900’s. Family lore is that he made it from peanut crate wood.
Sounds good! Will save this to hard drive.
But: after you’ve made the vertical “reference” cuts, is there really an advantage to removing the waste? I mean, you’ll be putting it on a lathe next…
Wouldn’t it save a substantial step to just make the four reference cuts (to ensure vertical edges to the “end pieces” — and then turn your cylindrical handle?
Just a thought.
–GG