


We may receive a commission when you use our affiliate links. However, this does not impact our recommendations.
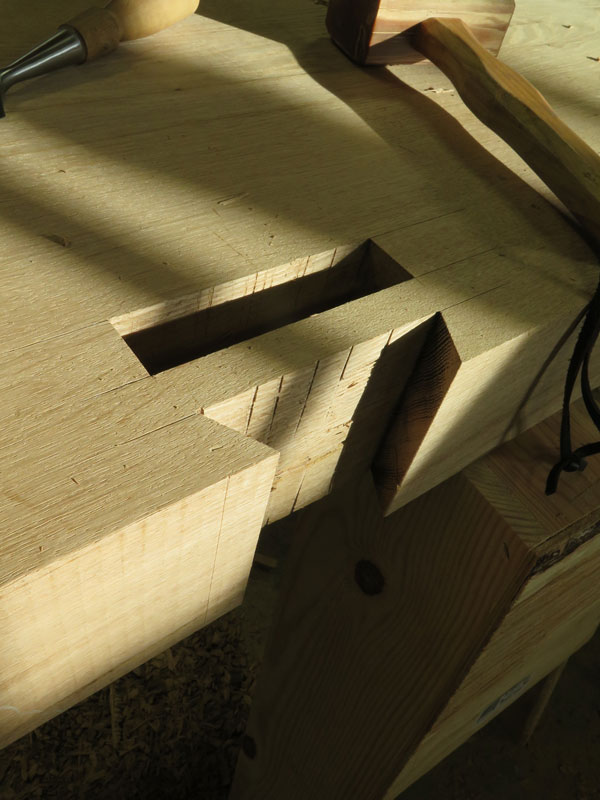
One of the defining characteristics of the heavy French bench is its joinery – the top and legs are joined with a joint that is one-half through-tenon and one-half sliding dovetail.
The sliding dovetail is the easy bit. Saw the walls. Knock the waste out with a chisel. Clean the floor with a router plane.
The through-mortises are trickier. It is more than 5” deep, 6” long and usually 1-1/4” wide. Typical furniture-making tools are slow and ineffectual. Here’s how I get around the problem.
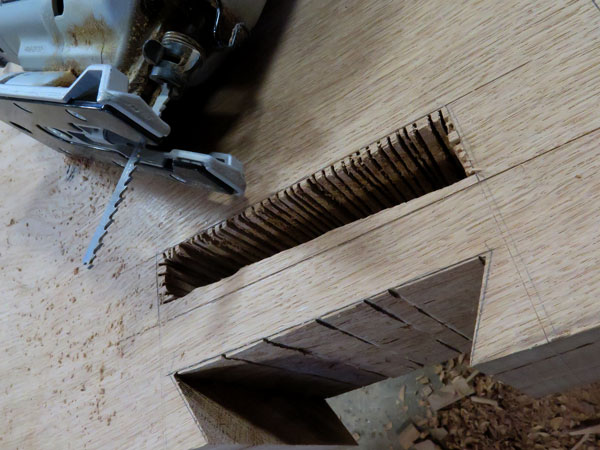
- I bore out the majority of the waste with a corded drill driving a WoodOwl auger bit (usually a 1”-diameter bit). I bore halfway through the top, then flip the top over and bore halfway through again.
- Then I take my jigsaw and mount a Bosch Progressor blade in the chuck and kerf the waste right up to the knife lines that define my mortises. I do this on the face of the benchtop, then flip the benchtop over and repeat.
- Then I take chisels and pop out the kerfed waste hanging to the walls of the mortise. When the kerfs disappear, the walls of the mortise are pretty much square.

This process makes mortises that are square and fairly quick. It took about four hours to do the the four mortises in this massive workbench – start to finish. I’m sure a chain mortiser would make even quicker work of the job, but most of us don’t own one of those machines.
Tomorrow is the final day of the French Oak Roubo Project put on by Benchcrafted. Te workbenches we’re building here look amazing – I’ll post some photos of the completed benches tomorrow.
— Christopher Schwarz
Here are some supplies and tools we find essential in our everyday work around the shop. We may receive a commission from sales referred by our links; however, we have carefully selected these products for their usefulness and quality.


Nice work, Chris and Co!
My questions relates to the double tenons connecting the legs to the top of these monster benches:
1. What’s the advantage of having through tenons? Why not just stop them and preserve the integrity of the bench top?
2. What’s the benefit of having a sliding dovetail tenon?
Thanks!
When I built a bench in 2014 using the plans in your book (the “old” edition) I used a router for the mortices. A plywwod pattern and a pattern bit (top bearing) did the leg mortices (not thru mortices). After defining the sides of the mortice with a 1″ long bit, I removed the pattern and went a bit deeper using the top portion of the mortice to support the bearing. For the planing stop (a through mortice), I did this as deeply as the bit would reach, then from the other side of the bench I used a bottom bearing pattern bit to clean up the bottom end the mortice. Of course, all the router work was preceded by drilling clearance holes for the router bit.
Interesting application of a jig saw to this problem.
While I know it not the way Andre’ would have done it, or did it, laminating three 1.75 thick pieces, with the center one as much longer as the top is thick, and leaving a corresponding gap in the lamination of the top, then draw boring the leg into the top, works well for us mere mortals.
Mortise or tenon first?
Nice tip. I was curious as to how you were going to cut those. Thanks.
Completed benches, as in plural? Wow, the FORP II crew ate their Wheaties!
Sounds like tomorrow is shaping up to be an epic day in modern woodworking history. If several assembled benches are lined up it will be the closest thing to Plate 11 since……Plate 11!