


We may receive a commission when you use our affiliate links. However, this does not impact our recommendations.

Here’s a common and frustrating finishing problem: You apply finish to your piece, and one of the parts – say a rail or a stile – ends up a slightly different color or shade. The off-color piece makes the project look like a jumble of parts instead of a cohesive whole.
There are several ways to fix this problem. And while a full explanation of color-matching would require a book (not a blog), here’s a quick introduction to the concepts and ideas and a simple example.
I received a crash course in toners, glazes and colored wax at age 19 when I spent a summer working for a factory that made high-end entryway doors. We glazed and toned every door before sending it to the spray line for its final coat of finish. During those three months I developed an eye for color that has stuck with me to this day. To develop your eye, I recommend experimenting with color by using crayons (or colored pencils) on scrap pieces of wood.
First, here are some definitions so we are all speaking the same language. A “glaze” is any pigment that goes between layers of a film finish. A glaze can be anything – a stain, a thin paint, even dirt. The point is that it is not applied to the raw wood. This is helpful because a glaze will color something consistently.
Here’s an example: If you use dye on a carving, its end grain will soak up more color than the face grain. The result can look odd. By sealing the carving with a film finish – say shellac – and then adding a glaze over that, the color can be much more consistent. The downside to a glaze is it tends to obscure the wood’s figure instead of highlighting it.
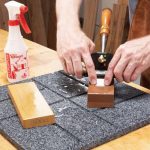
A “toner” is a film finish that has color suspended in it. Most toners – whether store-bought or homemade – are nitrocellulose lacquers with dye in them. I usually make my own toner using lacquer (or shellac) and a solvent-based dye (such as those made by W.D. Lockwood or TransTint). Making a toner is easy: Put some lacquer in a cup, add a drop or two of color and add some lacquer thinner so you reduce the solids content of the finish.
Toners are fantastic because you can sneak up on the final result. Every coat of toner adds another shade of color. And you can adjust the toner with every coat.
The trick is knowing which color to add. Some basic knowledge of the color wheel helps, though you can get away with being fairly color-dumb. (I am color dumb when it comes to clothing. My wife says I dress like an exchange student.)
Because North American woods are of a fairly limited hue, I make my toners using a couple of brown dyes (a dark and a light), a yellow dye and a red.
“Waxes” are wax with pigment added. I use these on top of the finish to help unify the appearance of the piece. Typically I use colored wax only on woods that have open grain. The pigment gets into the pores and can make two different-colored boards look more alike because they both have the same color in their pores.
There are limits to what you can do with waxes, but it’s a good trick for subtle adjustments. you can make your own pigmented wax (melt beeswax and add dye) or you can buy it off the shelf. I keep black wax and several shades of brown on hand.
So here’s how I used these tools to finish the aumbry I’m working on for an upcoming issue of Popular Woodworking Magazine. Most medieval oak furniture was finished with linseed oil – so that’s where I began (see details here). After four coats of boiled linseed oil, it was obvious that the right stile and the narrow rails of the face frame were a different hue. (Before finishing, they didn’t look much different.)

My first thought was to use a glaze. First seal the piece with shellac, then use a glaze above that to make the entire face frame the same color. Glazes work best when the pieces are close in color. In this case, I decided the color difference was too much for a glaze.
So my next thought was a toner. I have a couple of the Behlen toners on hand – the kind in the rattle can you can buy at woodworking supply stores. The Behlen “walnut” toner has a good deal of yellow in it. The “dark walnut” is mostly brown. Oak is generally brown and yellow, so I thought these would do the trick.
I masked off the areas I didn’t want to tone using painter’s tape and moving blankets. And, after a couple of test boards, I applied a coat of dark walnut toner. I let that dry for 30 minutes and then re-evaluated the piece in both fluorescent and natural light. I added another coat of dark walnut and returned 30 minutes later.
At that point the parts I had toned had the same density as the rest of the piece, but they looked a little gray or cold. To warm them up I added a coat of regular walnut toner. The yellow in that quickly brought the errant stile and rails in line.

The final step was to add a coat of pigmented wax – in this case I used “medium oak” from Liberon. Typically I would use a black wax, but the black was too contrasty with the lighter surfaces of the oak to my eye.
If all this seems like a lot of trouble, I assure you it’s not. It takes more time to explain than it does to do. If you wish to explore these ideas in full, I recommend Bob Flexner’s “Understanding Wood Finishing” – the single-most important book on finishing furniture I’ve ever encountered.
— Christopher Schwarz
Here are some supplies and tools we find essential in our everyday work around the shop. We may receive a commission from sales referred by our links; however, we have carefully selected these products for their usefulness and quality.


Chris,
Would you give more thought to the shellac you use for sealing the grain initially?, by that I mean blonde (clear) shellac so then more control on your intended final appearance as well as choices for glazing and toning through to a wax finish.
The Aumbry is from a distinctive period and the first I have seen, to me the finishes used by the artisan’s
from that era may have not been so extensive as ours today and perhaps the gradual colour changes that timber eventually goes through were how the finish of the piece was understood.
I now enjoy more perspective on the finishing of my work in the future.
Cheers M8!!
This is an interesting and timely article for me Chris. I’ve been trying to figure out how to match 100 years of age on varnished yellow pine trim work in my house, and this gives me some ideas. I’m completely ignorant when it comes to wood finishing, but I know that I don’t want to use stain first, since it soaks in to the wood and reverses the light and dark grain, and looks terrible. I bought some garnet shellac, which is expensive, but it still doesn’t give the darkness I am after with a reasonable amount of coats. With the help of your last articles, I’m thinking about trying Danish oil to darken the wood before applying shellac or varnish, or trying a glaze after the first seal coat.
The aumbry looks great, I especially like the carvings!