


We may receive a commission when you use our affiliate links. However, this does not impact our recommendations.
Woodworkers are shy people – especially at the beginning of their journey. They make parts or assemblies oversized and then plane, sand or rasp them to fit.
On one hand, this makes sense. It’s easier to take wood off than to put it back on. However, the other hand is already done with the job and drinking a beer. So I tell my students constantly: If you don’t go for a perfect cut on the line, you will never make a perfect cut on the line.
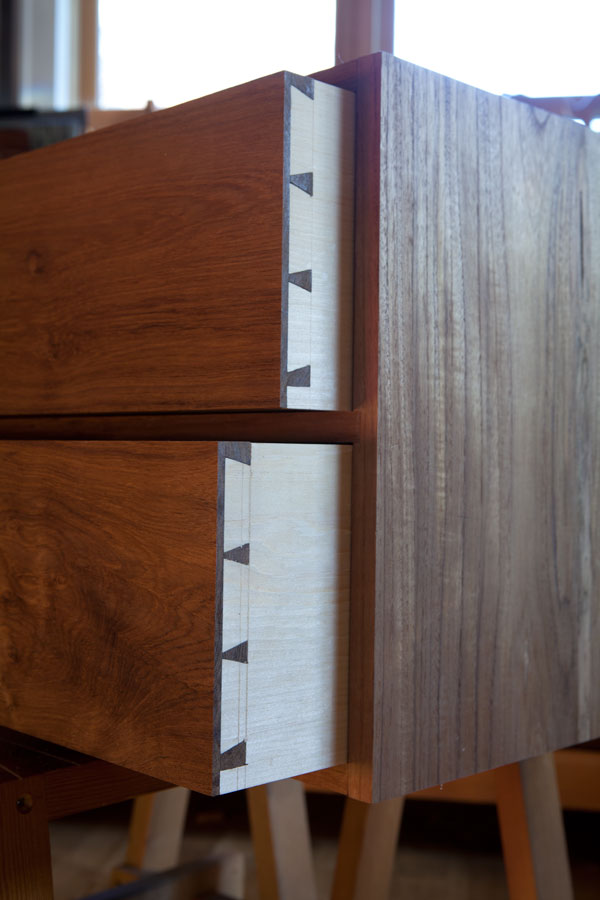
This is especially true with drawers. When I assemble a drawer, I expect that it will fit into its opening like the drawers shown in the photo above. Those two drawers need only a few shavings removed from the drawer fronts so their reveals (the gap around the drawer front) match. So I have about five minutes of work to do on each drawer – instead an agonizing day of pushing, planing and testing.
Building accurate casework is probably a book in and of itself, but here are some of the things I do that make fitting my drawers quick and painless.
Fit the Loose Parts to the Opening
Every drawer opening is a little different, so don’t just rip all your drawer parts to some number on your cutlist. Fitting your drawers begins with ripping and crosscutting the parts so they fit each opening.
Drawer sides should slide in and out of the carcase just as you want the drawer to slide. The drawer front should fit inside the opening with a slight reveal (about 1/32” is what I like). The drawer back is cut to the same size as the drawer front.
Details of the Drawer Back
I think the drawer back is one of the most important parts of the drawer. If its joints are misaligned, the drawer will rack. The same could be said of all the joints in the drawer, but the back is a special case because it’s easy to get its joints cockeyed. Why? Because many woodworkers cut the back narrower in width to allow the drawer bottom to slide in from the backside and to reduce friction at the top of the back.
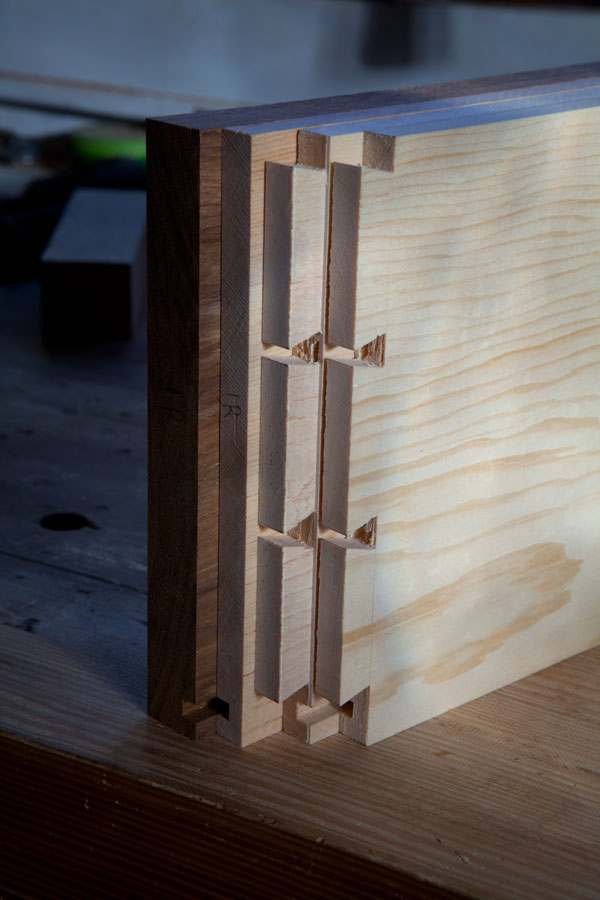
I do all these things, too. But I do them after all the joints are cut. So I first cut the back to the same size as the drawer front and plow a groove in it as if it were going to receive the drawer bottom.
Doing this prevents me from making mistakes when cutting the through-dovetails at the back. If the groove in the side doesn’t line up with the groove in the back, something is rotten.

After the joints are cut, I rip the back to final size to receive the bottom. And I rip 1/8” off the top edge of the drawer back. This reduces drag and makes the drawer move more easily.
Speaking of the Bottom
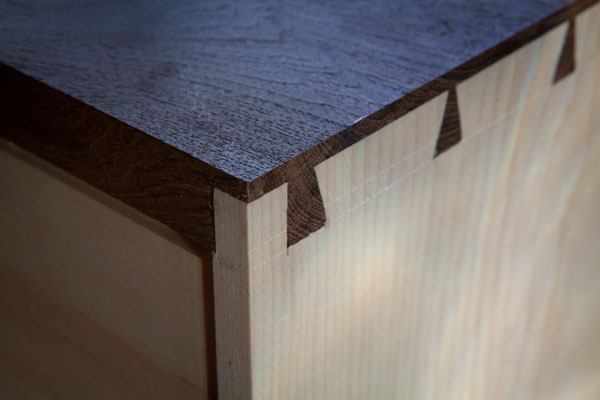
Lots of woodworkers struggle with how to hide the groove for the bottom in their dovetails. My favorite method is from antique English chests I began studying in 1993 with my father. A single straight tail at the bottom takes care of the layout problem nicely. And I like the way it looks.
Also, I plane the thickness of my drawer bottom so it doesn’t drag on the web frame or carcase below. Planing away 1/16” or so of the thickness will make the drawer move more sweetly.
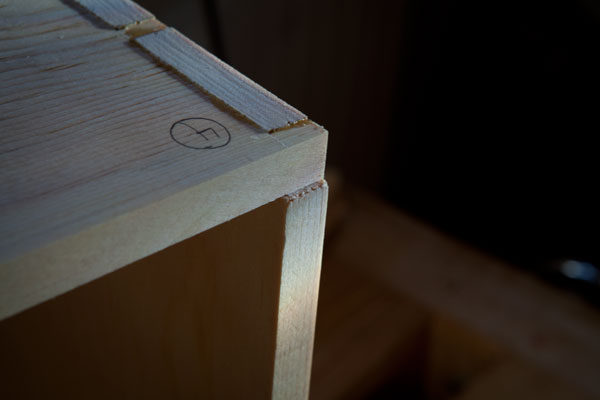
All these things help make drawers that fit. But all of this is for naught if your carcase isn’t square and your drawers aren’t square. An obsession with the interior squareness of your assemblies will pay off as you fit boxes inside of boxes inside of boxes.
— Christopher Schwarz
More on drawers and casework. Two good resources on this topic are “The Drawer Book” by Bill Hylton and “Illustrated Cabinetmaking,” also by Bill Hylton. “The Drawer Book” is an excellent compendium of methods for building drawers (many of them power-tool based). “Illustrated Cabinetmaking” is one of my all-time favorite books on casework. It shows how interior parts should go together for all forms of furniture.
Here are some supplies and tools we find essential in our everyday work around the shop. We may receive a commission from sales referred by our links; however, we have carefully selected these products for their usefulness and quality.


Great article, however my comment is not about that rather the “Schwarz effect”.
When I first read this article I looked on the internet for sources and found it at reasonable prices but was unable to order it then. I went back today to order and the prices have gone through the roof (at least where I looked previously).
So I will just wait for “the effect” to pass.
Chris, the reveal for the drawer front; is this done to just the front after sizing everything and getting a good fit on the drawer? I was thinking the entire drawer would be undersized, just so, to allow for things to move nicely, but I suppose in theory if there is a 1/32 gap around all sides of the drawer it would rest on the carcase or web frame and give you zero gap on bottom and ~1/16 on top? Just curious on how the drawer front when closed stays centered in the opening? Thanks.
” If you don’t go for a perfect cut on the line, you will never make a perfect cut on the line.”
The most important sentence of the article.
Paul
These are some great ideas. Thanks for going over your process. When I read “dry as a popcorn fart” I had to laugh but it gets the point across.
Jared@
http://www.durasand.com
Saving this one to my favorites. Thanks for the great tips. Now what do you do when you feel like your own carcase is out of whack?
Chris,
What wood are you using for the sides and bottom?
Curious,
Sean
Hi Chris,
In some of your dovetail discussions you’ve talked about your “rabbet trick” where you create a very shallow rabbet to facilitate aligning the joints when marking the pins. Do you still recommend/use that technique, and if so, don’t you need to take that into account when marking the depth of the pins (assuming a tails first approach)? It seems like if you don’t account for that somehow you could end up with a larger gap on the sides than what you intended. Thanks.
Jim
nice tips all ’round. I really like the little squared tail at the bottom.
I struggled my first few times at bat – perfectly servicable drawers in the end, but enough niggles to bug me. After a few I got my fitting down, and I’m pretty happy so far.
The one thing that made my workflow so much better was marking the baselines on my front and back just a hair under depth – I put a tiny piece of heavy paper under the head of my wheel-type marking gauge as I set it off the piece. I end up just enough proud that I can
1) clamp the sides in place (if need be) without making some sort of weird caul to go around the pins
2) only need to plane face grain if any clean up is needed
3) if I do need a little more planing than usual, don’t mess up the fit of the drawer front in the pocket (which I fit before cutting the joinery) too much
I usually only need a couple of swipes with the plane – but now I’m thinking I really need to sit down and try and get things closer to spot on to begin with. I know what I’ll be working on this weekend.
Unsightly tail arrangement? I like it. Dovetail slopes? feeler gauges, in wood that moves in large fractions, not thousandths? Seriously? And I thought Chris was a bit picky.
Great explanation of how you make drawers. I pretty much follow the same practices, although I move the bottom up a bit so it’s within the bottom (full) tail and clears the casework.
I’m curious why you plane the bottom after it’s fit. Why not start with it at the final thickness?
I think you’ll find that one set of rules for drawers does not exist in the historical record. Only in one author’s mind or one shop’s set of practices.
In my experience, dovetail slopes are fashion more than mechanical. I’ve surveyed slopes from the 15th c to the present, and I’ve seen 7° to 20° — all surviving quite well.
The drawer back — I’ve seen then shot narrower in old pieces. And I’ve seen the drawer sides rounded over.
Slips are in the minority of casework pieces I’ve seen from the 18th can 19th c.
Your points are all good ones for one way of doing it. But this way works and conforms to pieces I’ve seen in the archaeological record. I have Joyce’s book, and have read it. His perspective is of a 20th-century maker. Nothing wrong with that perspective, but it is not universally applicable to older styles of casework.
Thanks for the comment.
Chris, I have to leave a comment here. It looks like the sides are in softwood and in the best work, sides should be around 7-8mm in quarter sawn hardwood, oak, maple or something equally as nasty. Dovetail slopes can then be 1:8, not 1:5 or 6 as you appear to show them.
The drawer back should be shot in to the same width as the front, not narrower. However, the back of the casework should be fractionally wider, 0.5mm will do the trick. This ensures an even fit as the drawer slides in. The high spots (and there will be some) can be felt a lot more easily if a set of mechanic’s feeler gauges is used in the process.
Drawer bottoms should be located in ‘slips’ glued to the inside edge of the sides. This means that there’s no need for the unsightly tail arrangement as shown and tails can be spaced evenly across the side.
Although it may not be available in the US, the finest book without doubt ever published on techniques is the ‘Techniques of Furniture Making’ by Earnest Joyce, second edition edited by Alan Peters some years ago…probably still available through Amazon.