


We may receive a commission when you use our affiliate links. However, this does not impact our recommendations.
Learn the tricks to making sturdy furniture that folds flat.
For those with mechanical minds, building furniture that folds into small spaces is great fun. Not only does the piece have to look good and serve its ultimate function as a bookcase, chair, or bed, it also has to collapse into the tiniest form possible.
During the 19th century, the British became masters at making collapsible furniture when two things happened: First, so-called “patent furniture” became all the rage. These are household goods that transform into something else – the classic form is a chair that unfolds into library steps. Second, the British Empire conquered a huge part of the world during the reign of Queen Victoria and needed to send its citizens all over the world to manage its colonies.
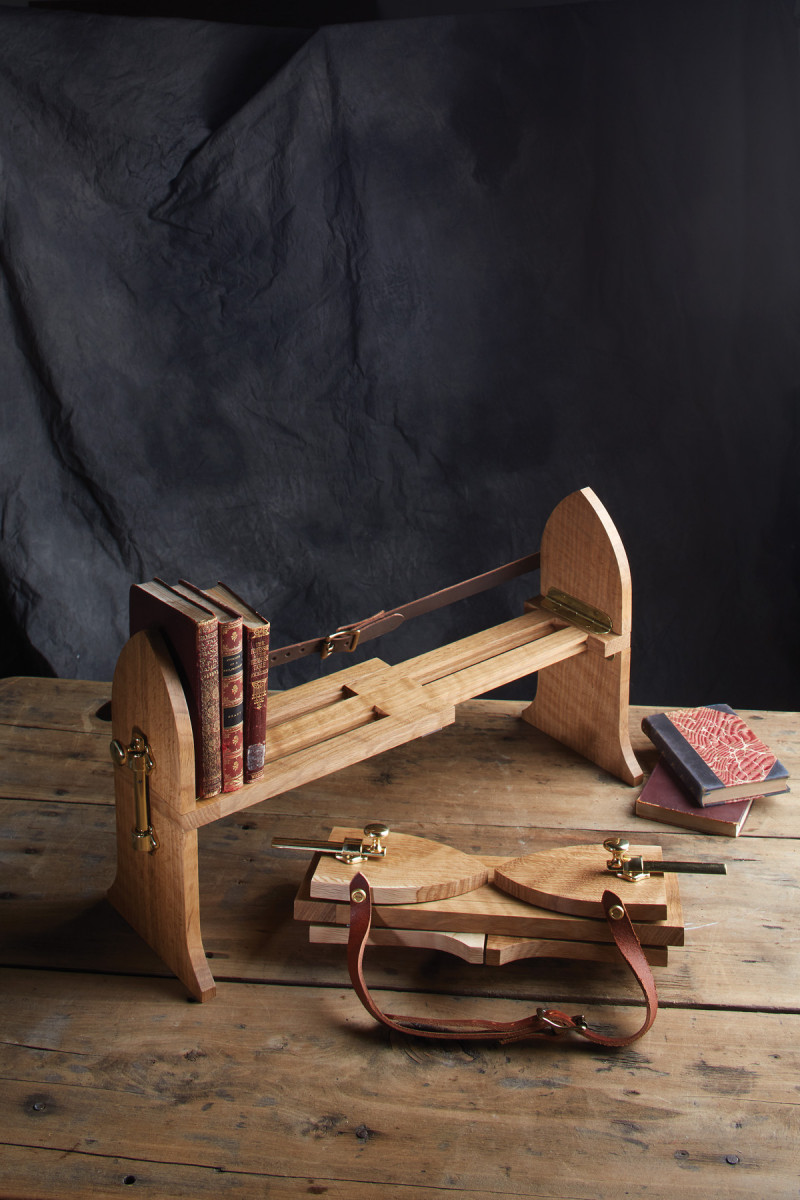
As a result, folding or knock-down bookshelves were a common sight in the 19th century, and this example from E. Mascart & Cie of London is notable because it combines hinges that fold the ends flat, with a bottom that expands its shelf to twice its collapsed length.
Even if you don’t build this particular bookshelf, the lessons embedded in it can help you develop your own pieces of folding campaign furniture.
How the Bookshelf Works
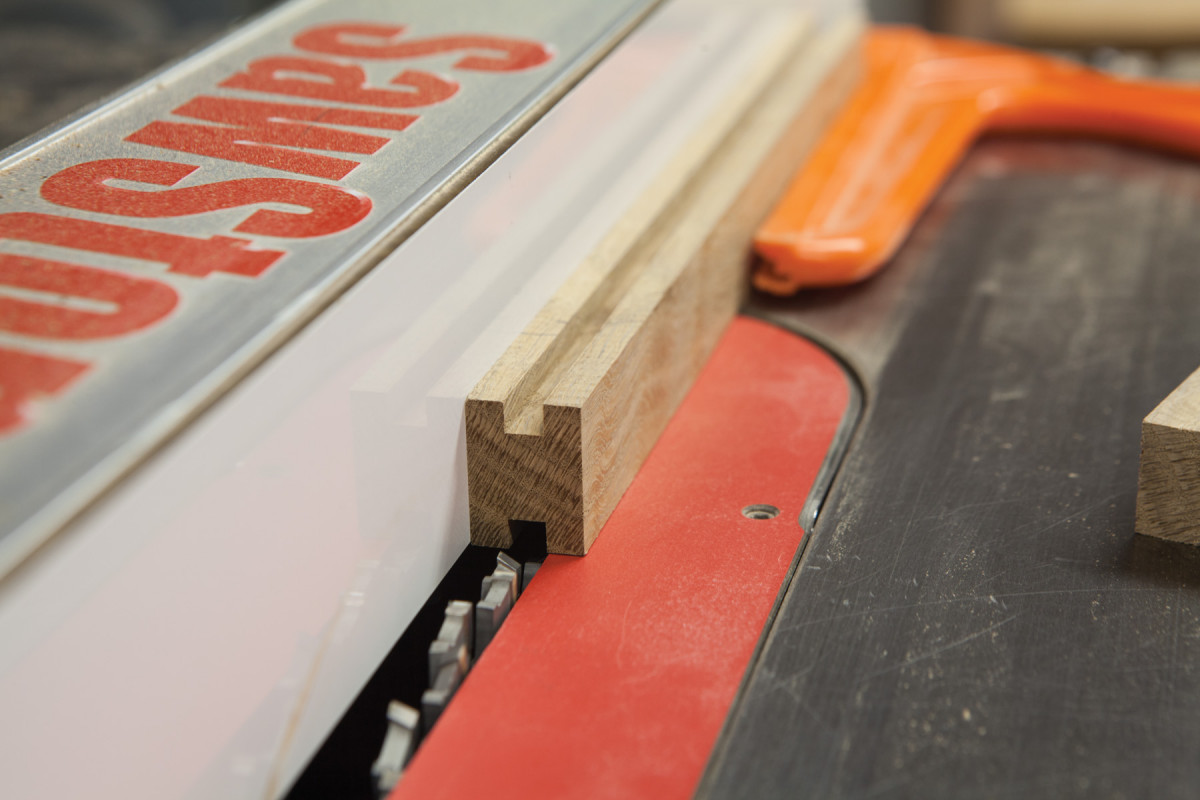
Tongues & grooves. I used a dado stack to cut these joints. When you cut the grooves on the fingers, run the finger through the blades twice – once with one face against the fence and a second time with the other face against the fence.
The heart of the Mascart bookshelf is its telescoping bottom. The frame comprises two assemblies – think of each assembly as one of your hands. Each has “fingers” that are tenoned into each “palm.” The fingers interlock and slide thanks to tongue-and-groove joints.

This ensures the groove will be centered. Then cut the tongue to fit that groove.
The ends of the bookshelf are hinged to the telescoping bottom. When the bookshelf is opened, you lock the ends using a brass door latch on each end – sometimes called a sliding Dutch lock. To keep the bookcase from falling to pieces, a leather belt is screwed to the back. It also makes the bookshelf adjustable.
The original was made using quartersawn white oak. No matter what wood you choose, I recommend it be quartersawn and dry. You don’t want the components for the bottom to warp or move much with the seasons.
Begin With the Bottom
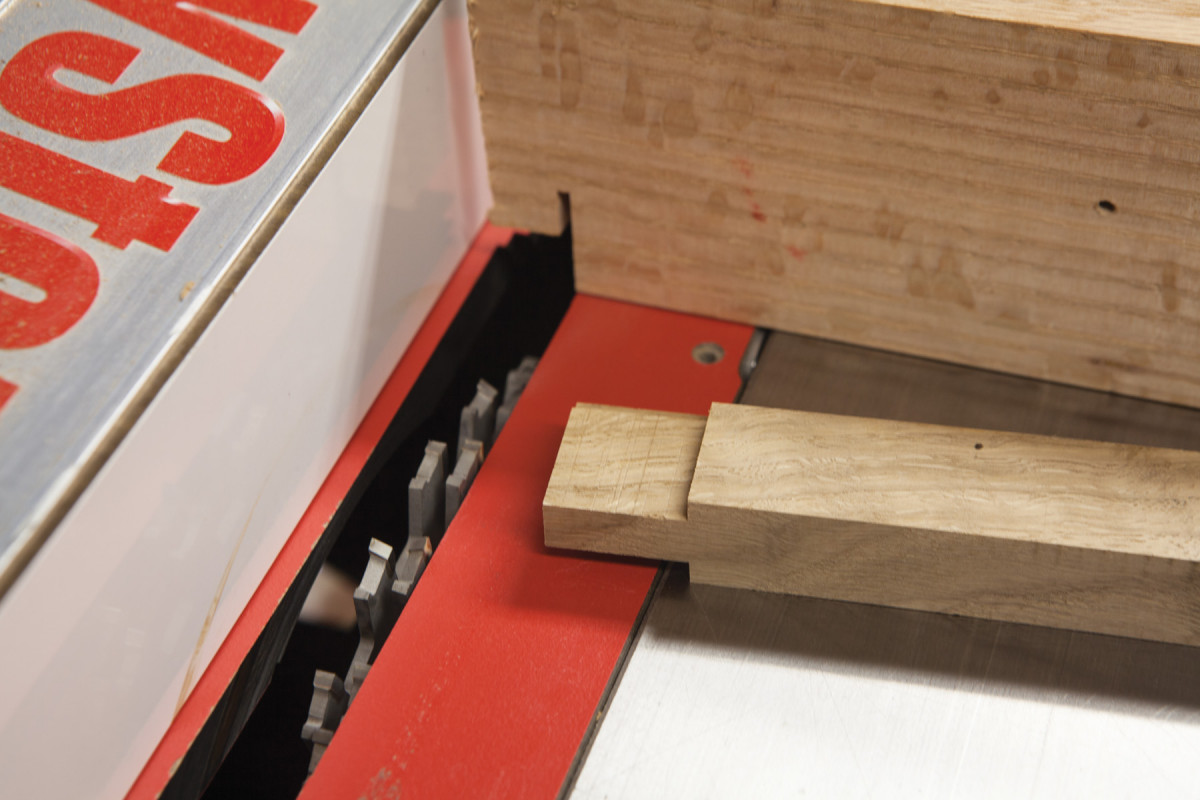
Table saw tenons. Again, the dado stack makes quick and accurate work of these tenons. After cutting the face cheeks, adjust the height of your dado stack and cut the edge cheeks.
After cutting the fingers to size, cut tongues and grooves on their long edges so the fingers interlock and slide. The photos show this better than words – some pieces need grooves, some need one tongue and one finger, the center one, needs two tongues.
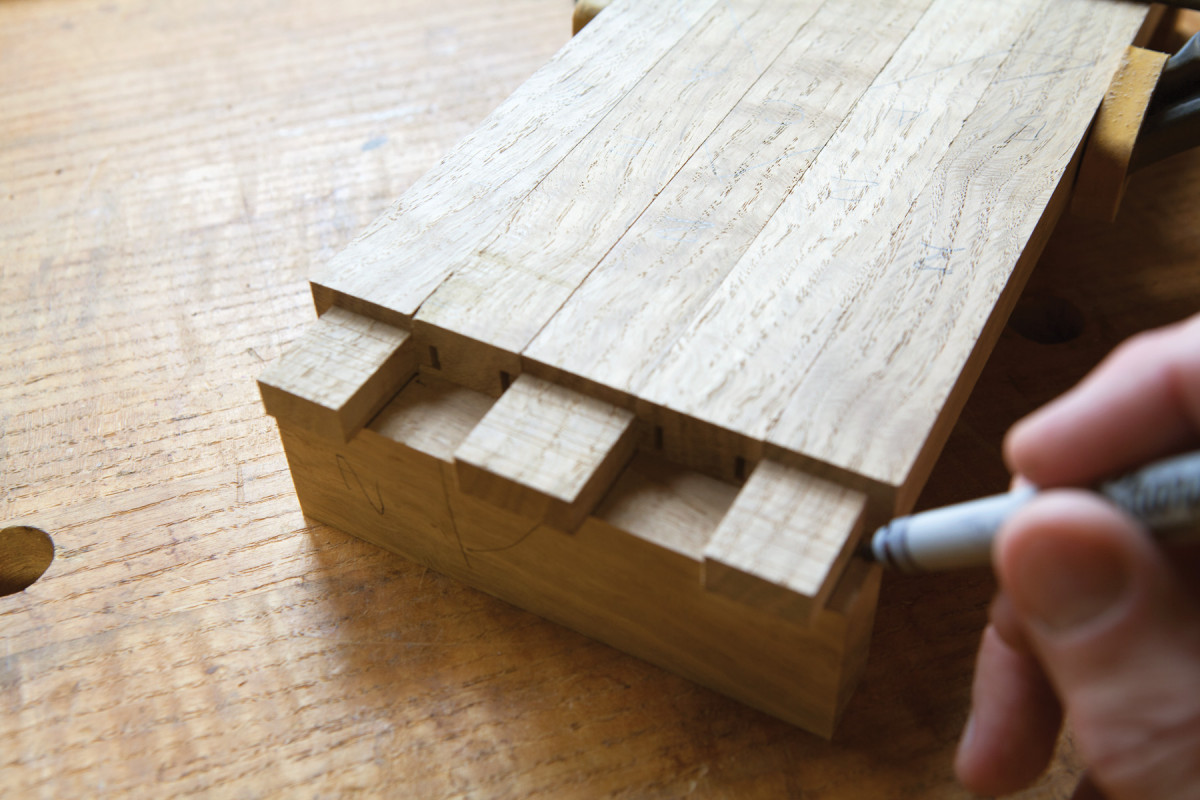
Completed fingers. With the tenons cut, clamp the fingers together and show the assembly to the ends of the frame. Mark the locations of the mortises.
When you cut the 1⁄4“-wide grooves, make them a shade deeper than 1⁄8“ to ensure the 1⁄4” x 1⁄8” tongues don’t bottom out in the grooves. When the fingers are complete, they should slide smoothly without the tongues rattling around in their grooves.
I find it best to cut the tenons first, then use them to lay out the mortise locations on the ends of the frame (the palm, so to speak). The thickness of your tenons can be anywhere from 1⁄4” to 3⁄8” (1⁄4” is traditional).
The width of each tenon needs to vary a bit depending on where it is in the assembly, anywhere from 3⁄4” to 1″ wide. For example, the tenons at the outside of the bottom should be a little narrower so you don’t destroy the frame ends during assembly.
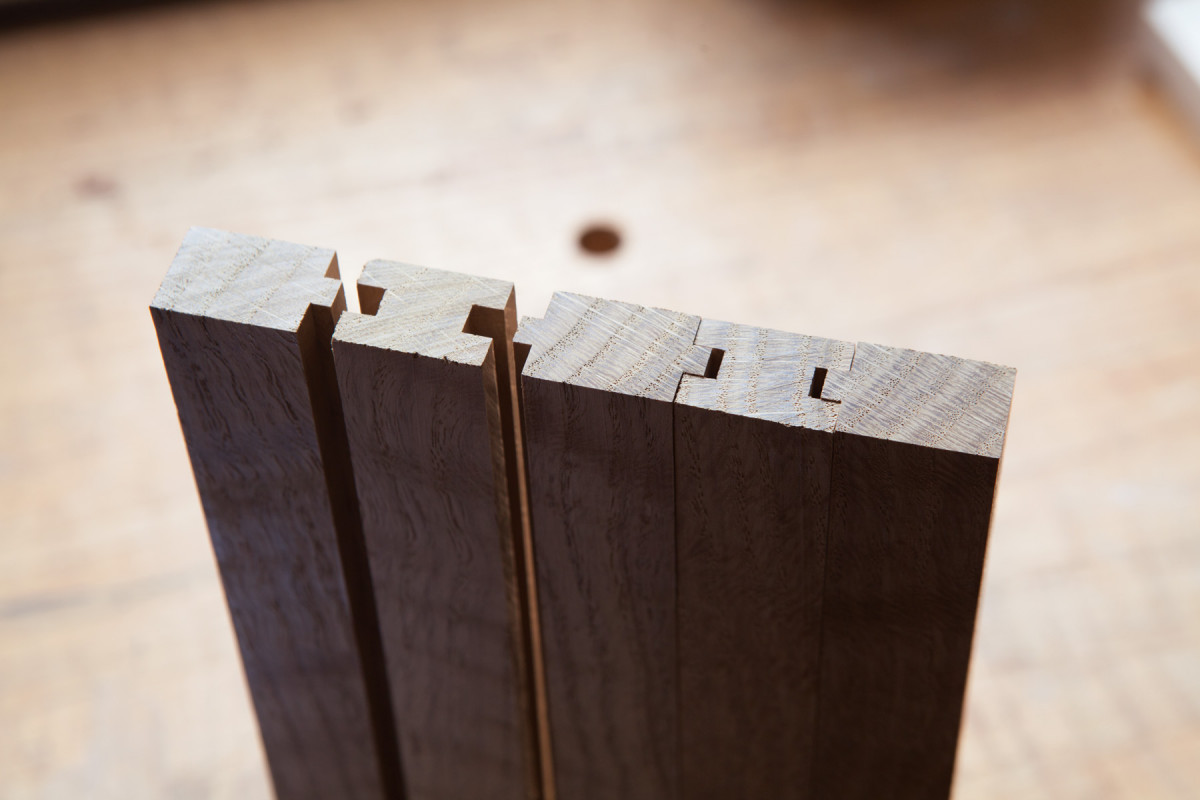
Sliding fingers. Here you can see which fingers are tongued, which are grooved and how they nest together.
With the tenons cut, put the fingers together and clamp the fingers across their width to keep them in a bundle. Then use that bundle to lay out the location of the mortises on the ends of the frame. This reduces measuring and errors.
Now cut the mortises. To reduce fussing and fitting, the mortises need to be dead centered on the thickness of the ends of the frame. The best way to do this is to mortise them twice – once with one face against the fence of your mortiser and a second time with the opposite face against the fence of the mortiser. (Just like you did when centering the grooves on the fingers.)
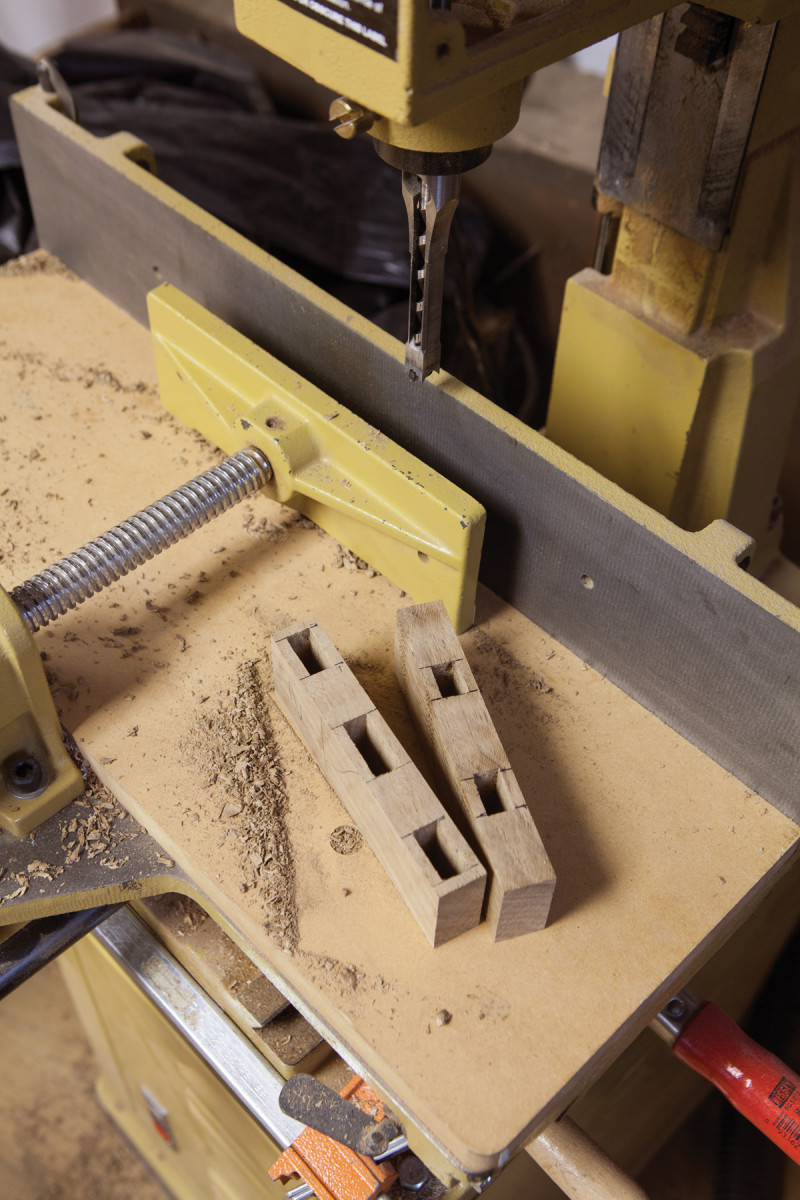
Twice mortised, once fit. To center the mortises, put one face against the fence and cut the joint, then turn the piece 180° with the other face against the fence.
Adjust the fit of all the joinery so the fingers fit firmly into the ends of the frame, yet slide easily open and shut. This is a good time to level the joints and remove any machine marks.
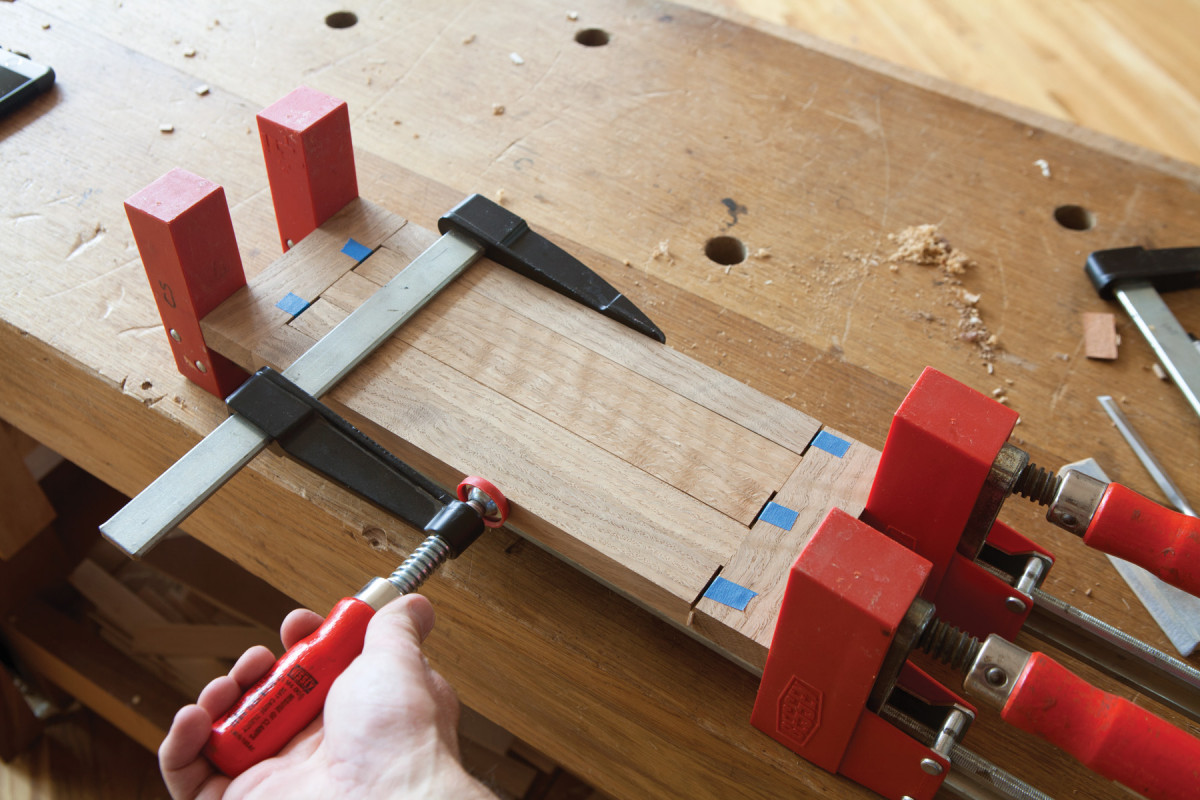
Gluing up the bottom is not difficult if you know the trick. You’ll want to clamp the bottom across its width to hold the fingers in position. And you’ll want to clamp across the length of the bottom to glue the tenons in their mortises.
Folding Campaign Bookshelf Cut List
No.ItemDimensions (inches)MaterialComments
t w l
❏ 2 Top ends 1⁄2 x 5 x 6 1⁄4 White oak
❏ 2 Bottom ends 1⁄2 x 7 x 6 1⁄4White oak
❏ 2 Frame ends 3⁄4 x 1 1⁄2 x 5 White oak
❏ 2 Inner fingers 3⁄4 x 1 x 11 1⁄2 White oak 1″ TOE*; 1⁄4” x 1⁄8” GBS**
❏ 2 Outer fingers 3⁄4 x 1 1⁄8 x 11 1⁄2 White oak 1″ TOE; 1⁄4” x 1⁄8” TOS†
❏ 1 Center finger 3⁄4 x 1 1⁄4 x 11 1⁄2 White oak 1″ TOE; 1⁄4” x 1⁄8” TBS‡
*TOE=tenon one end; **GBS=groove both sides; †TOS=tongue one side;
‡TBS=tongue both sides
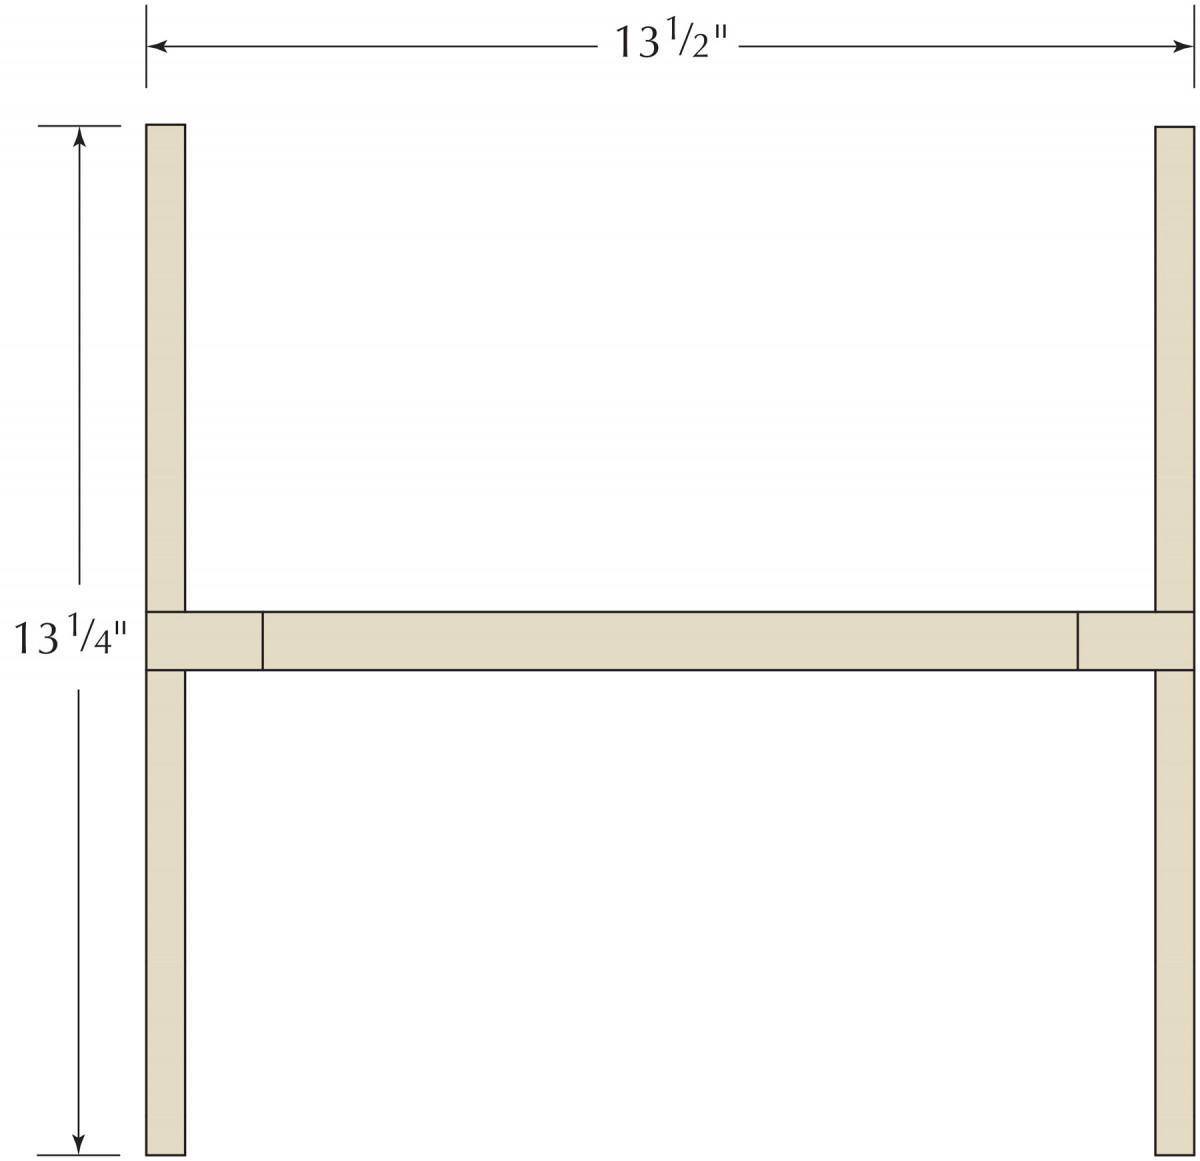
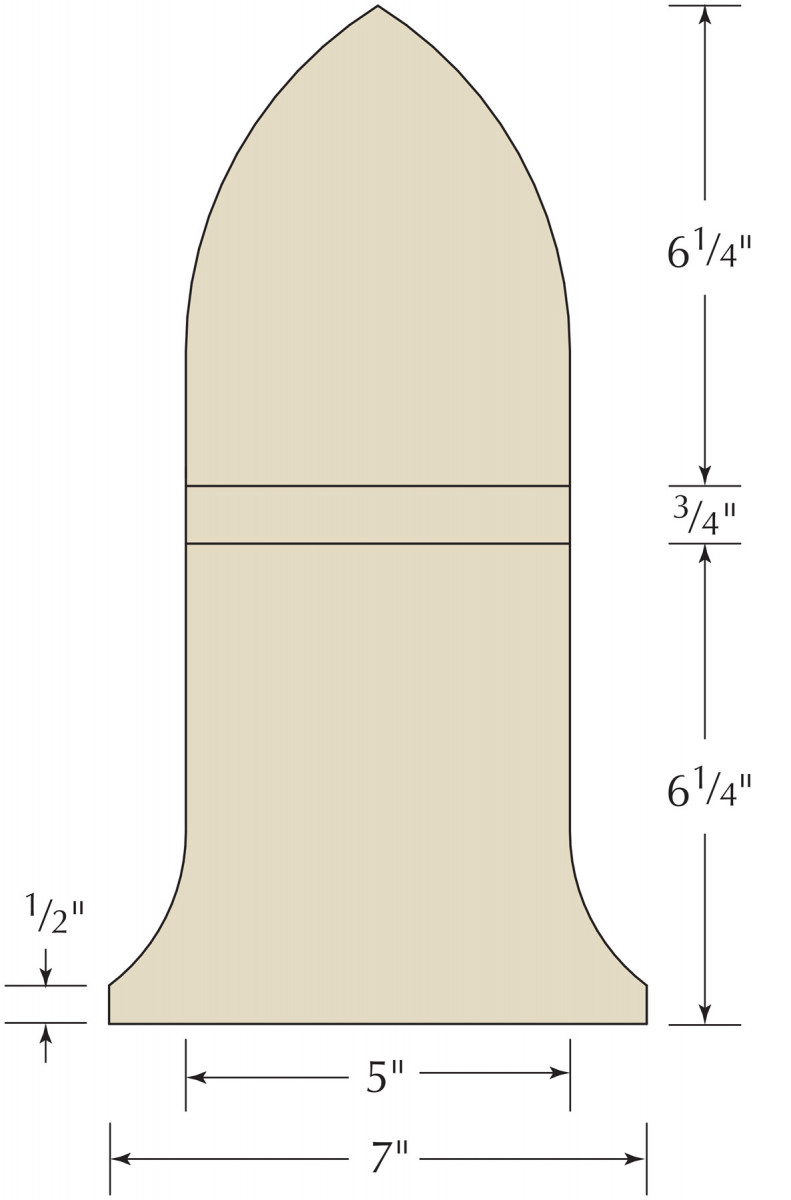
Elevation
Plan
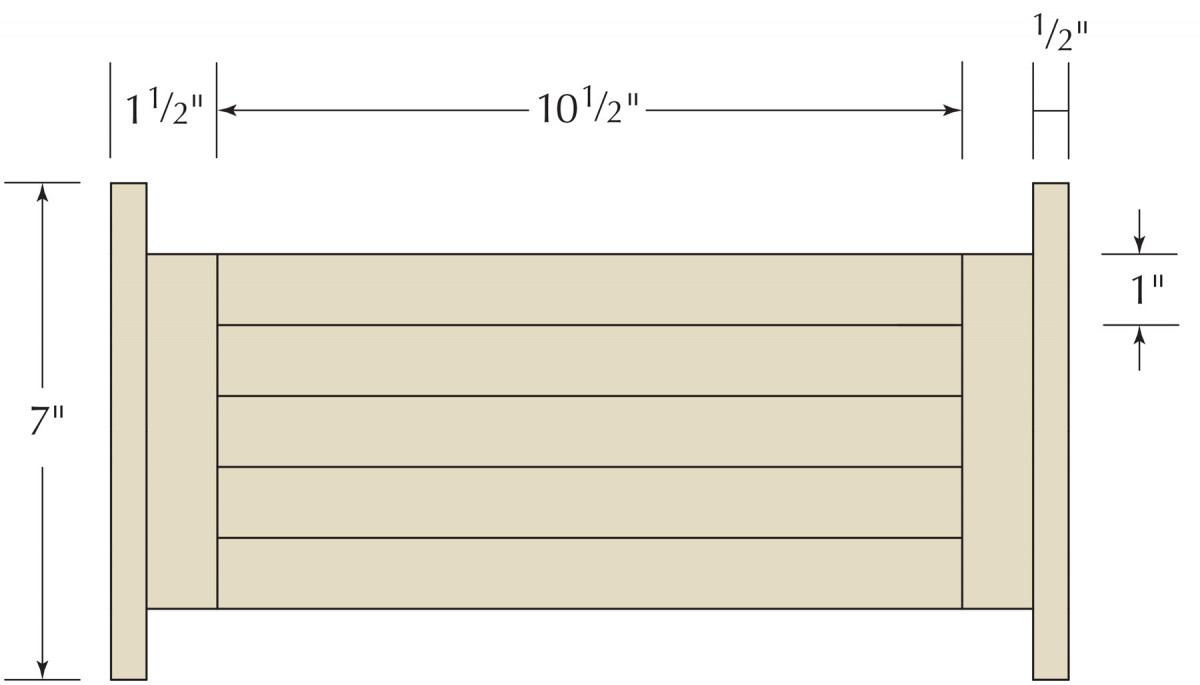
Profile
Add the Ends
Easy on the glue. I use liquid hide glue because it’s reversible and slow-setting. Paint the mortises and tenons with care so there is little or no squeeze-out. You don’t want to glue the fingers together.
The folding ends of the bookshelf can be any shape. The original had Gothic flair. I laid out this shape with a compass (see “Lancet arch,” below left). Use the drawings as a guide to replicate this shape. Cut the ends to shape and clean up the edges.
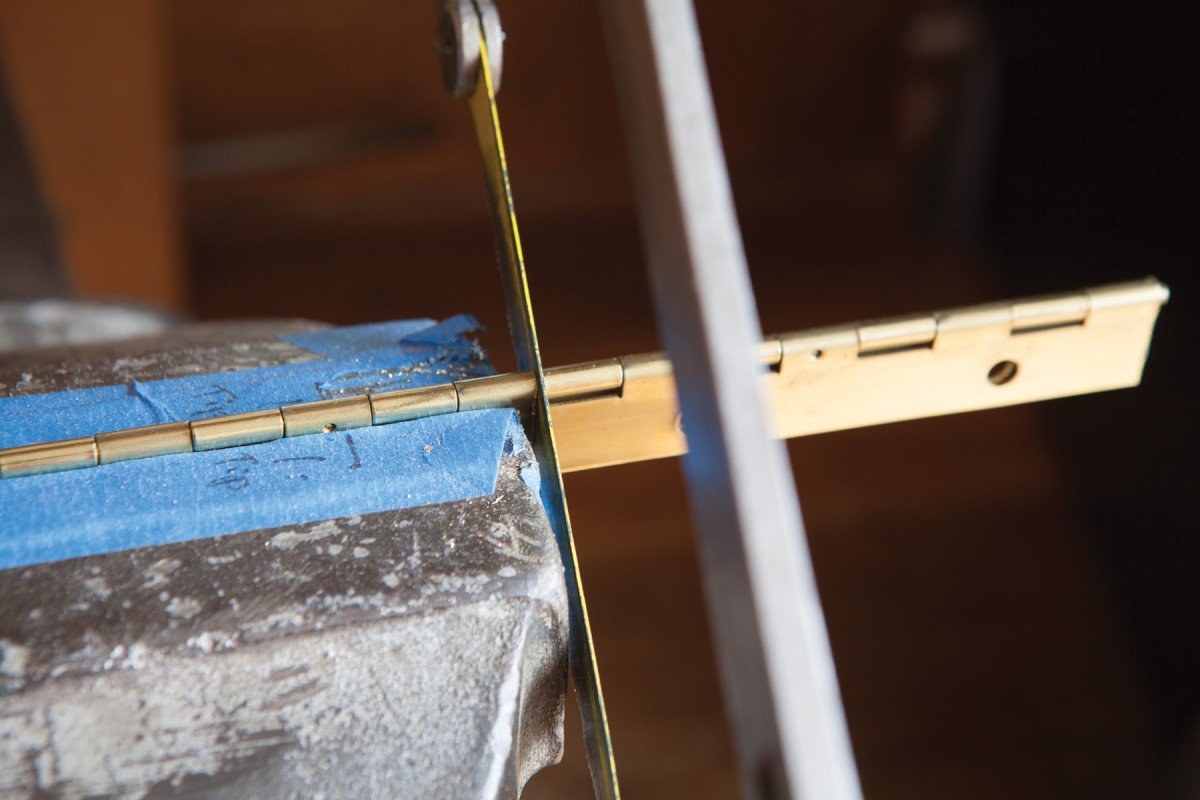
Attach the ends to the bottom using hinges. I used a solid brass piano hinge that I cut into 4″ lengths then filed to shape.
Attach the hinges with steel screws first then replace them with brass.
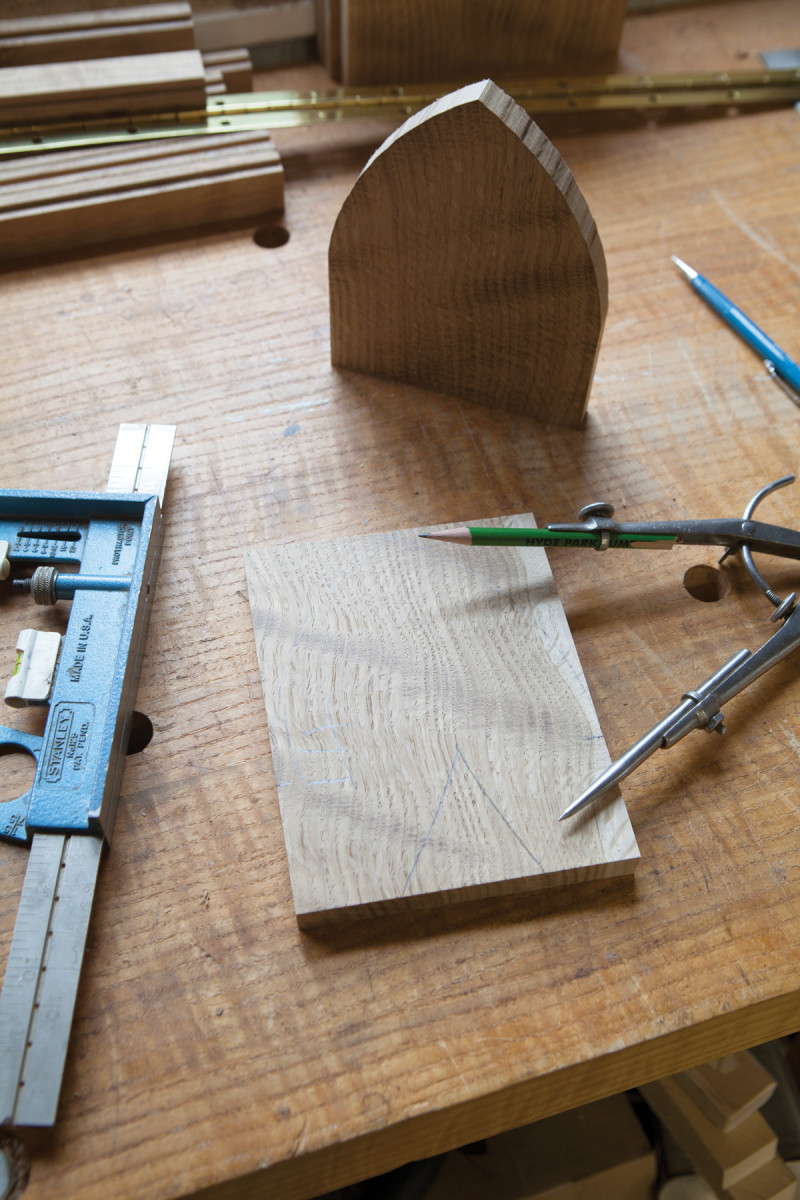
Lancet arch. Set the compass to the width of your piece (5″ in this case). Put the point of your compass 13⁄4″ up from the bottom edge. Swing an arc. Do the same on the other edge – you’ve made a Gothic arch.
On the underside of the bottom, screw a 5″-long mending plate (available at any hardware store) to the outside two fingers of the bottom. This will prevent the fingers from spreading apart under heavy loads.
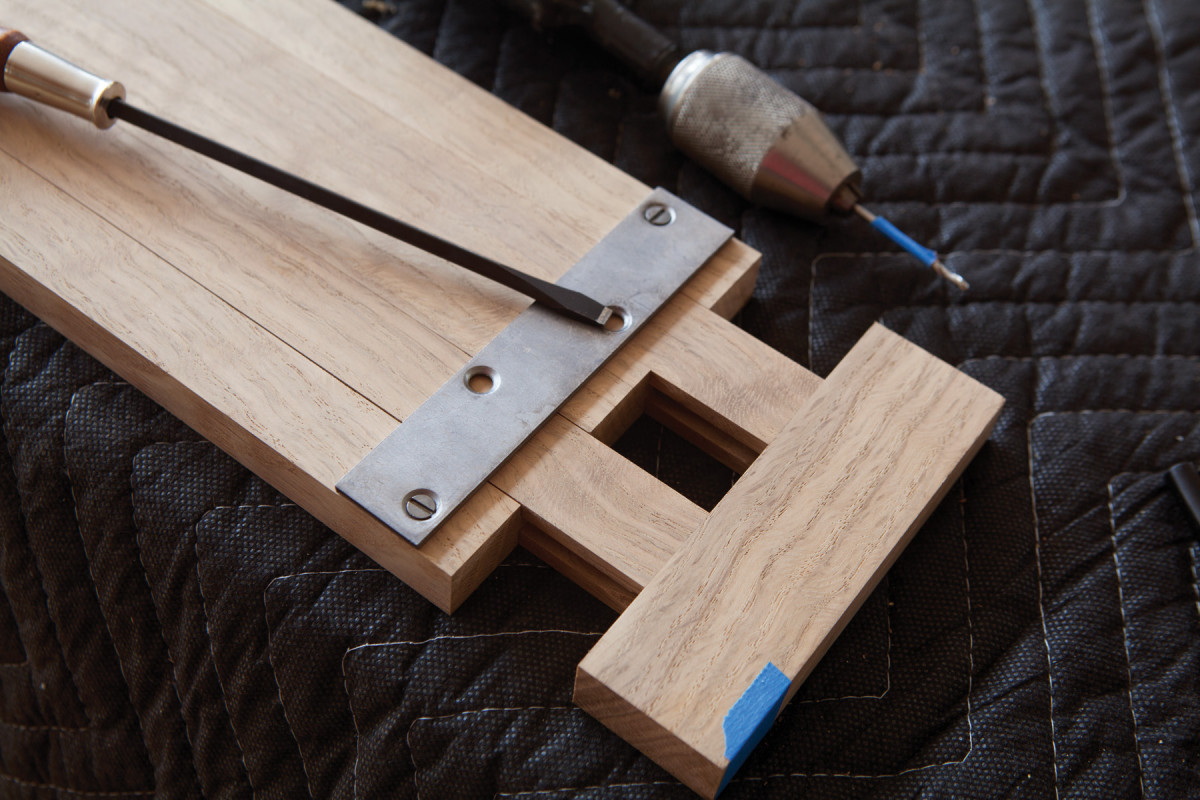
Unseen reinforcement. This common mending plate from the hardware store keeps your fingers in line through years of service and heavy loads.
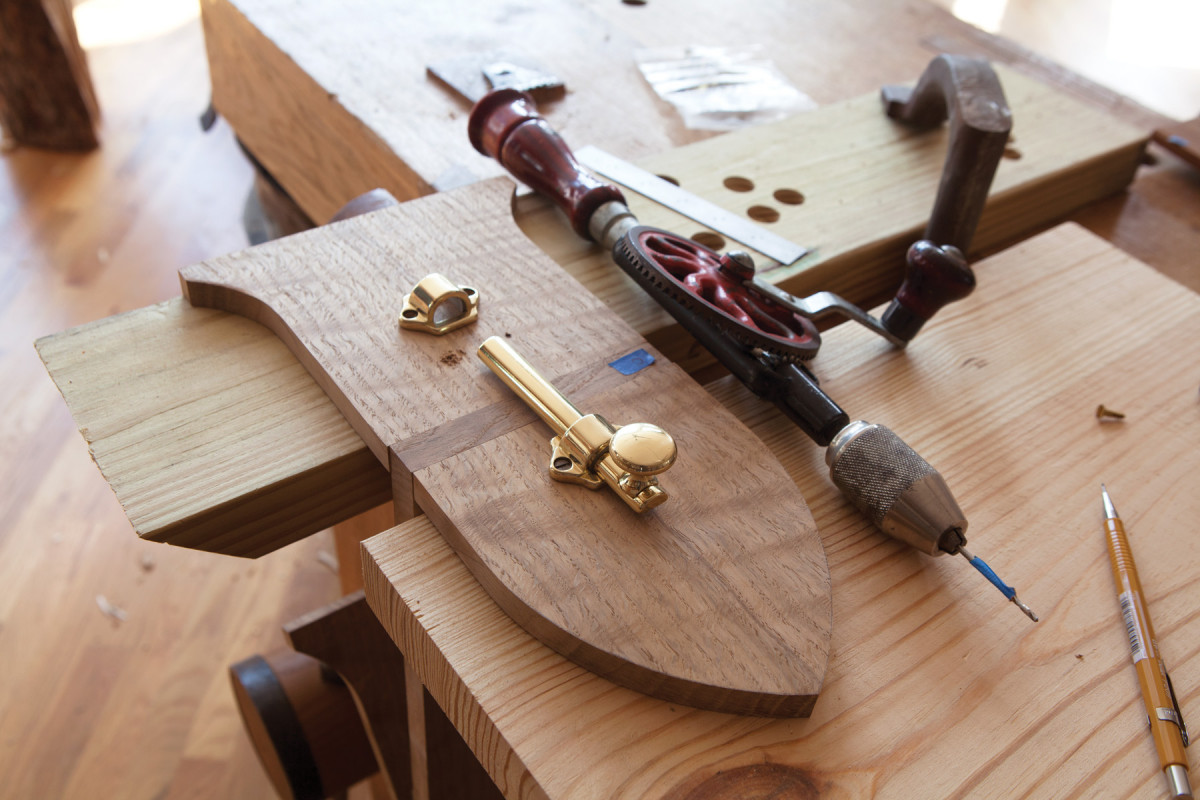
The last task on the ends is to install the sliding door latch that locks the bookshelf open. This should be centered on the ends. Again, install the bolts first with steel screws and replace them with brass screws.
Custom Hinges
Brass is a hard wood. Cutting and filing brass is easy compared to steel.
Cut the hinges to 4″ long with a hacksaw. The screw holes are on 2″ centers and the knuckle of the hinge is a great place to start the hacksaw. Lay out the shape of the ends of the leaves (I used a dime as a template). Then file the shape and blend it into the rest of the leaf.
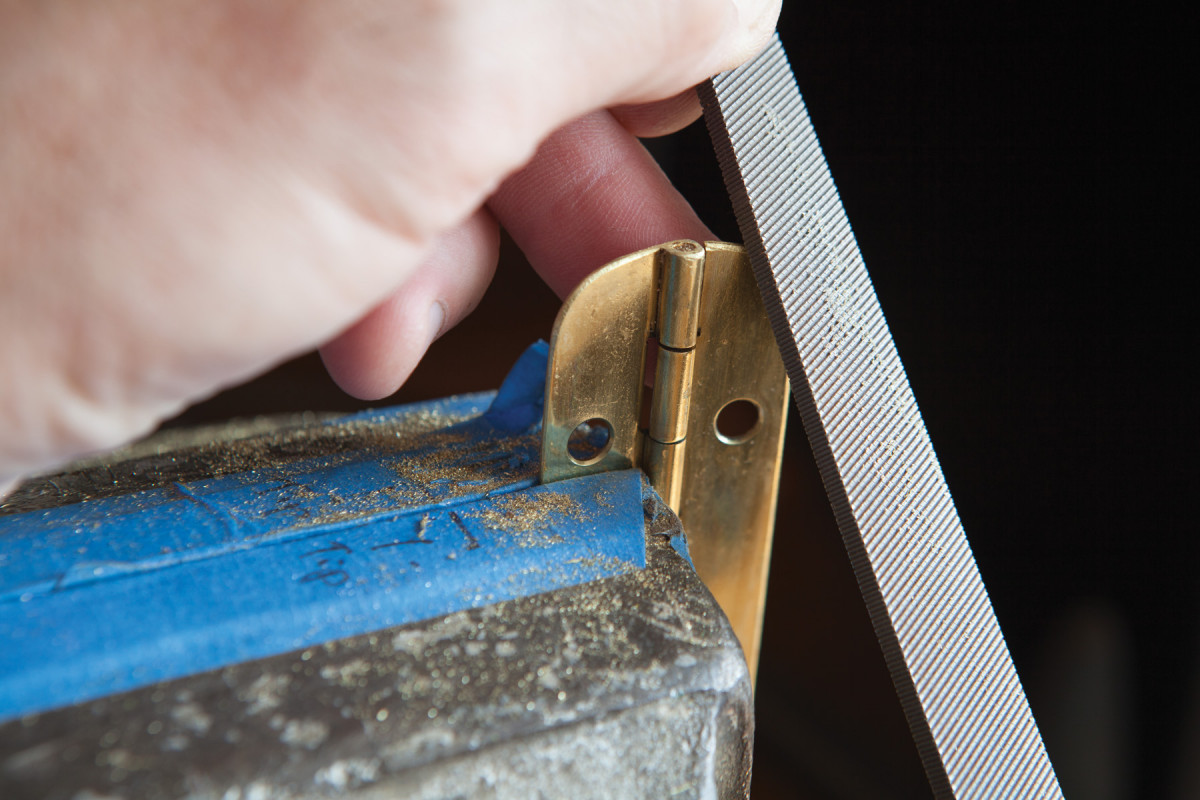
A few minutes of work with a hacksaw and a file, and you can make some hinges that look appropriate instead of awkward.
I polished the ends of my hinges using a deburring wheel in my grinder. Finally, I removed the lacquer from the hinges so they would age faster – a torch makes quick work of that task.
— CMS
Finish & the Belt
Keep it flat. I rigged up this temporary platform to keep the ends open while I installed the door latch.
Remove all the hardware, clean up any machine marks then apply two coats of super blond shellac, sanding between coats with a fine sanding sponge. Knock off any errant nibs with a folded brown paper bag, then reassemble your bookshelf.
For the belt, feel free to use anything you like – even an old belt from your closet. Before screwing the belt to the back of the bookshelf, cut it to length so you cannot over-extend the fingers, causing your shelf to fall apart.
With these tricks, plus a little imagination and engineering, you can scale up this bookshelf or use the fingers and folding parts to create your own collapsible furniture.
Video: Watch a video of how the bookshelf folds up and see details of its hinges.
Here are some supplies and tools we find essential in our everyday work around the shop. We may receive a commission from sales referred by our links; however, we have carefully selected these products for their usefulness and quality.


