


We may receive a commission when you use our affiliate links. However, this does not impact our recommendations.
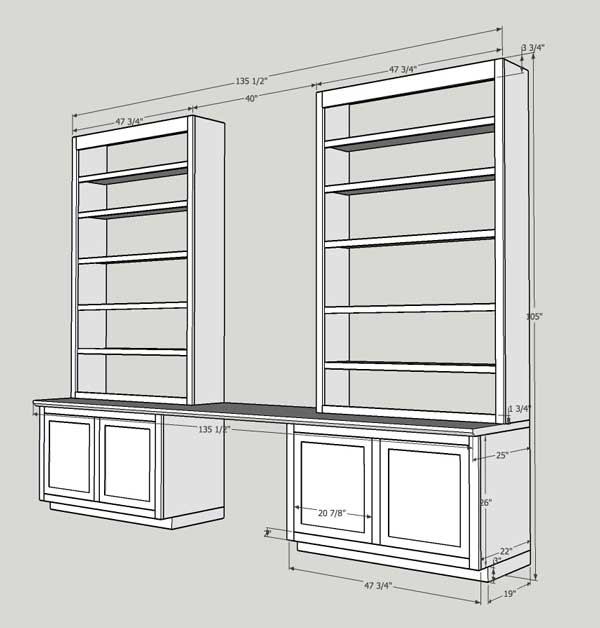
Here’s a screen grab of the working model for my study shelves (you’ll find a link to it in our SketchUp Warehouse at the end of this entry).
I’m working on a “built-in basics” article for an upcoming issue of the magazine. For perhaps obvious reasons, I’m not focusing that article on the specific components I designed for my study, because the odds of mine fitting perfectly into someone else’s space are slim indeed.
I’ve spent the last month or so digging into all the literature I could find about designing, building and installing built-ins, and there is but one topic I couldn’t find covered in the many books and articles I’ve read as research: How do you attach these things to a masonry wall? (I expect it’s covered somewhere; I just didn’t find it).
It’s not a difficult question; instead of attaching the units to studs (there aren’t any on the exterior walls of my house), use masonry screws. But no one in my research has written that, and for those just getting into woodworking (or whole-house rehab…which might lead to another kind of rehab) it might not be obvious.
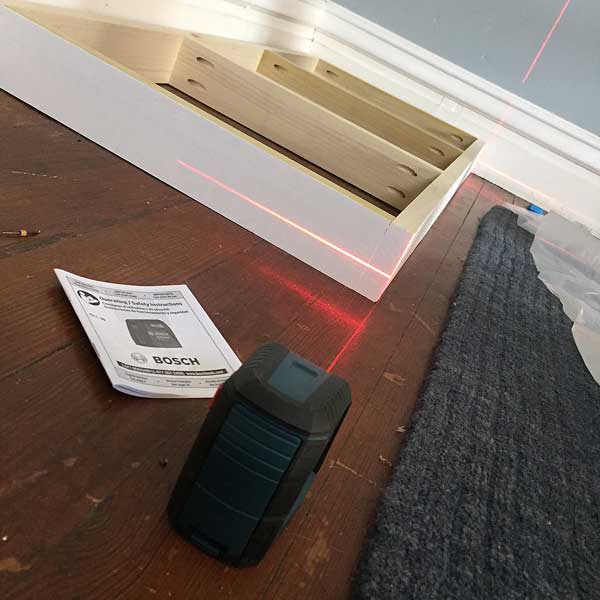
It’s possible this entire project was an excuse to buy this new laser cat toy, which also comes in handy for leveling and aligning cabinets.
So, the top sections on mine have half of a French cleat screwed to the case through the sides and top; the lower part of that cleat will be screwed through the plaster and into the brick with Tapcon screws (I’m just waiting for the paint to dry). There are other brands of masonry screws of course; the Tapcons are simply the ones a) With which I’m most familiar and b) Are carried by my local hardware store.
And because I wanted to leave the original mouldings in place and not put any (more) holes in them, after leveling the two bases (I got lucky; it took only two shims – one on the front right corner of each side), I screwed them to the floor at two corners each with L-brackets. That’s enough to keep them from moving.
Why wasn’t I worried about putting holes in the floor? It’s already in pretty bad shape and will take significant restoration before sanding and refinishing (and of course, that section won’t show anyway). You can see some lifting finish in the laser-leveling photo, but that’s insignificant compared to what’s under the rug.
I then screwed the base cabinets to the bases. (I could have gone into the wall with those, but I’d prefer to put as few holes as possible into the brick – but if I decide to do that, I’ll need a filler block behind the case to bridge the gap behind the cabinet and wall, and through which to screw.)
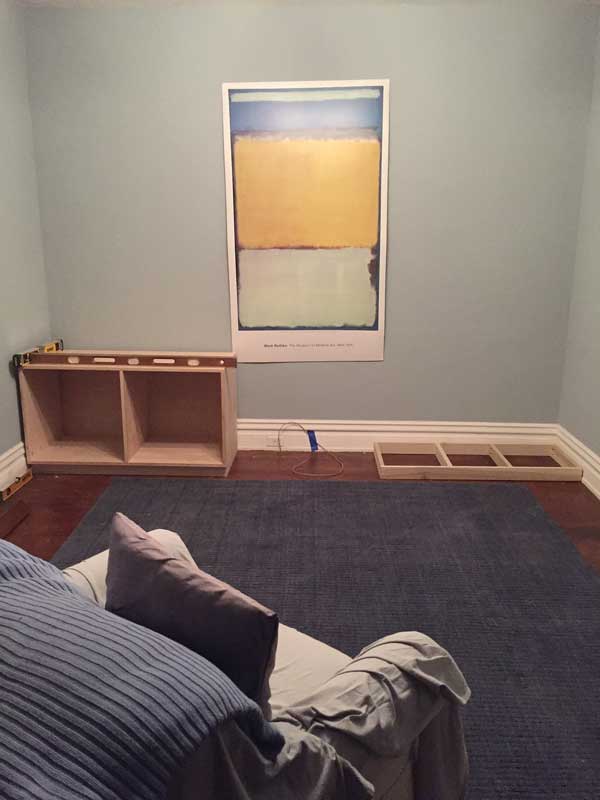
Here’s one cabinet in place on its base. Even though I knew it was level because I’d leveled the base and built a square case, it never hurts to confirm.
A lot of books and plans for base cabinets show the base and cabinet above as one unit. For an old house (or heck, for most new houses), I’ve found leveling is less trouble – especially if there are multiple units – if the base(s) and cabinet(s) are separate. While it wasn’t much of an issue here with only two base cabinets (and a darn-near level floor – quite a surprise, that!), in a kitchen I built in late 2014/early 2015, getting five cabinets in a row level on that undulating floor, well…it took a lot of both scribing and shims. That’s a lot easier for me to deal with when there’s less wood to shift about.
And once the bases are level, what comes above is easy: just place it on top of the base and attach.
The build itself is dirt simple (other than the size of the workpieces). I went through most of five 4′ x 8′ sheets of paint-grade birch plywood for the base cabinets, upper carcases and all the shelves, then added a 1″-thick poplar strip to the front of each shelf for rigidity (we ran a test on shelf materials and deflection in the Spring 2005 issue of Woodworking Magazine; the wide span exceeds the weight capacity of the material sans hardwood edge).
The lumberyard kindly agreed to rip the pieces at 23-5/8″ – the width of two of the upper cabinet pieces with the saw kerf accounted for, and just wider than the width of the base pieces. That rendered them narrow enough to get into the back of my Subaru – though it made shifting a bit of a challenge. I did, in fact, plan the component sizes based on what widths of plywood I could fit in my car in conjunction with how the thing would look when done.

Is this table saw abuse? To keep things square as I screwed together these relatively large boxes, I clamped half the screw-uo to the table saw table and used the rip fence to align the piece with the pocket holes.
The base and face frames are poplar, and the cases and bases are all pocket screwed. The fixed shelves just above center in the upper units are screwed into dados in the case sides, and the central dividers in the base cabinets are simply screwed in place through the top and bottom, with countersunk wood screws. The lower cabinets have 1/2″-thick plywood backs, screwed into a rabbet on the back edges of the case pieces, which I cut at the table saw equipped with a dado stack.
The only difficult thing was getting these large pieces home and up the stairs (Christopher Schwarz helped me out; he has a trailer and strong arms).
The countertop presented a different challenge (and I still need to attach a moulded strip to the front edge); I’ll write about that in a couple days.
Click here to access the model for this project in Popular Woodworking’s SketchUp Warehouse.
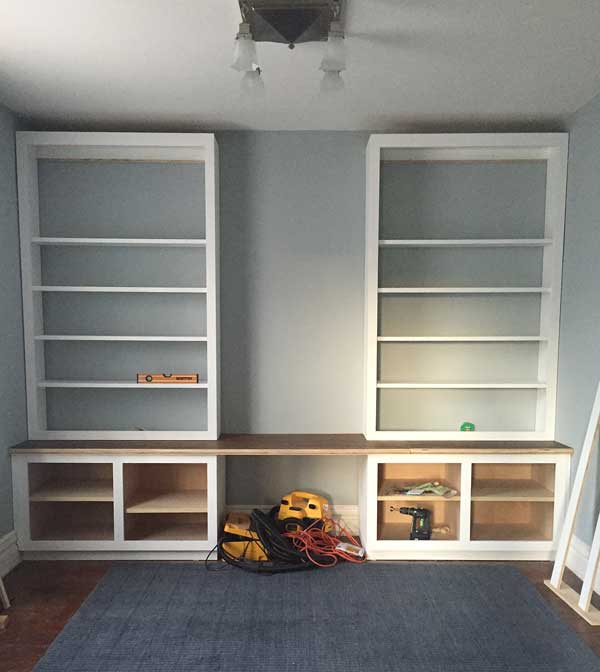
Still some work to do, but the finish isn’t too far off.
Here are some supplies and tools we find essential in our everyday work around the shop. We may receive a commission from sales referred by our links; however, we have carefully selected these products for their usefulness and quality.


I don’t know if I’ve been using the wrong screws, but it seems like when I use masonry screws, one in 5 of them get stick and won’t go further in or out. In one recent project I had to buy a carbide blade for my multitool so I could cut off a stuck masonry screw—because the screw was hardened I couldn’t cut it with normal tools.
I’ve had more consistent success using alligator anchors
” I did, in fact, plan the component sizes based on what widths of plywood I could fit in my car in conjunction with how the thing would look when done.”
For shame!
Someone recently commented (was it Jim Tolpin or Raney Nelson) that one should never let the tool dictate the design. To let one’s car dictate the design is far worse!!! Besides, Chris has a trailer.