We may receive a commission when you use our affiliate links. However, this does not impact our recommendations.
 Keeping project parts organized and in proper relation to one another while machining and assembling them can be a real challenge, especially if you’re organizing the pieces for attractive grain composition. So how do you mark the parts for quick return to their home position? Once again, we can turn to the old-timers for the trick: the triangle marking system.
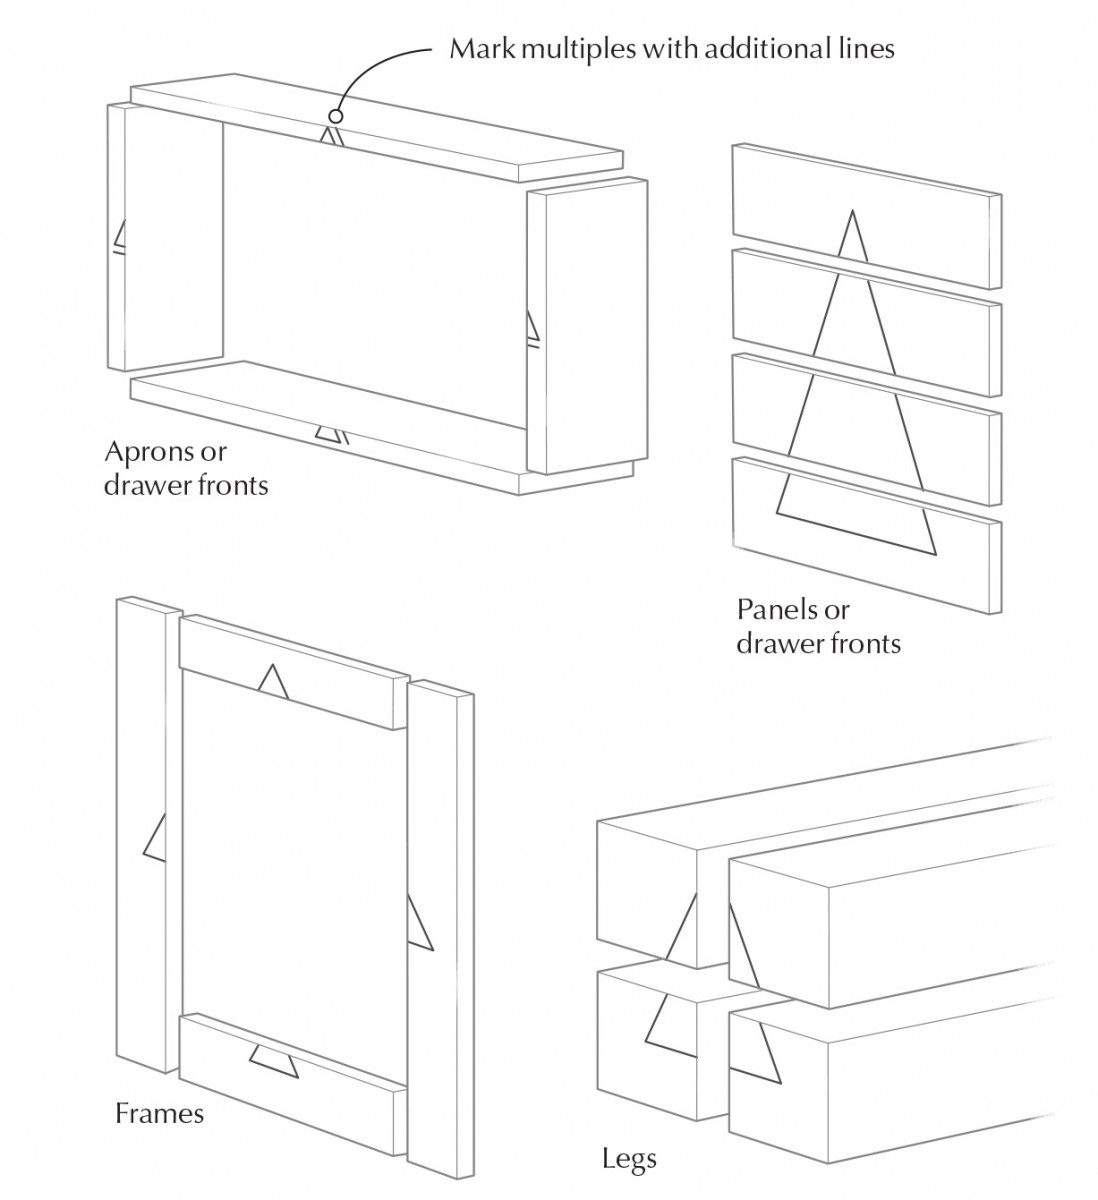
Once you have dressed your workpieces to thickness, width and length, orient them as desired and mark the faces with sections of triangles as shown. This quickly identifies the face, top, bottom, left and right sides of an assembly. Now when you grab a piece to cut a joint, for example, you know immediately which edge or face goes against the saw table or jig face. And during assembly, it’s a snap to place the pieces in their proper orientation. When cutting a series of identical parts, such as for multiple drawers, simply add additional lines that extend across all the pieces. — Art Mueller
Here are some supplies and tools we find essential in our everyday work around the shop. We may receive a commission from sales referred by our links; however, we have carefully selected these products for their usefulness and quality.