


We may receive a commission when you use our affiliate links. However, this does not impact our recommendations.
As woodworkers, we rely on electricity to alleviate some of the heavy lifting burdens of milling, sawing, and drilling. Many of us use these machines quite often and I believe we would benefit from being able to maintain them and solve some basic malfunctions.
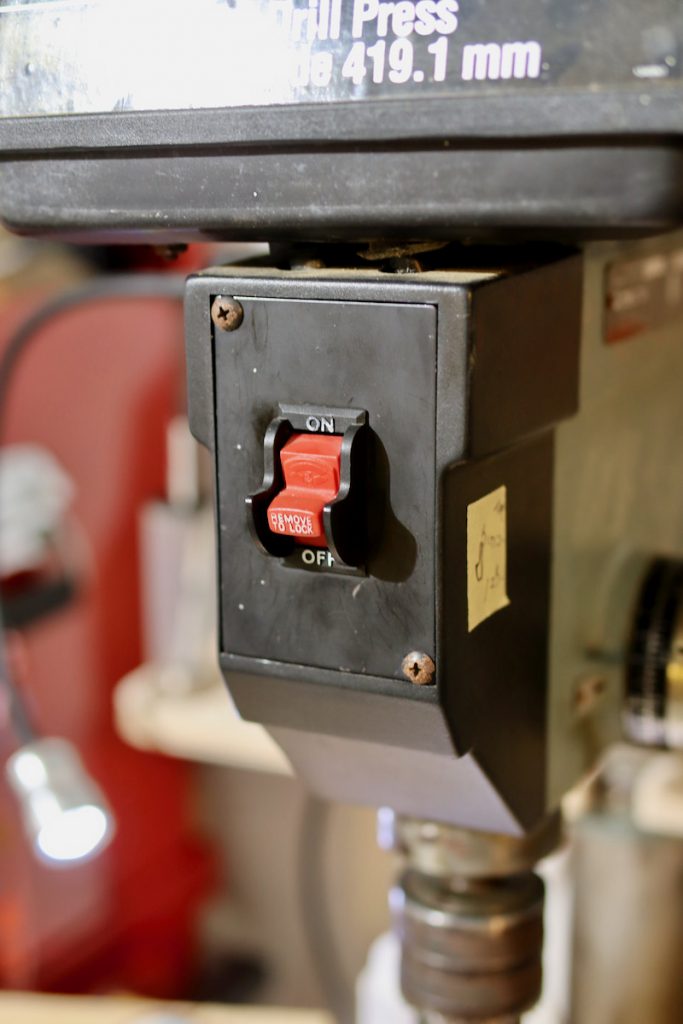
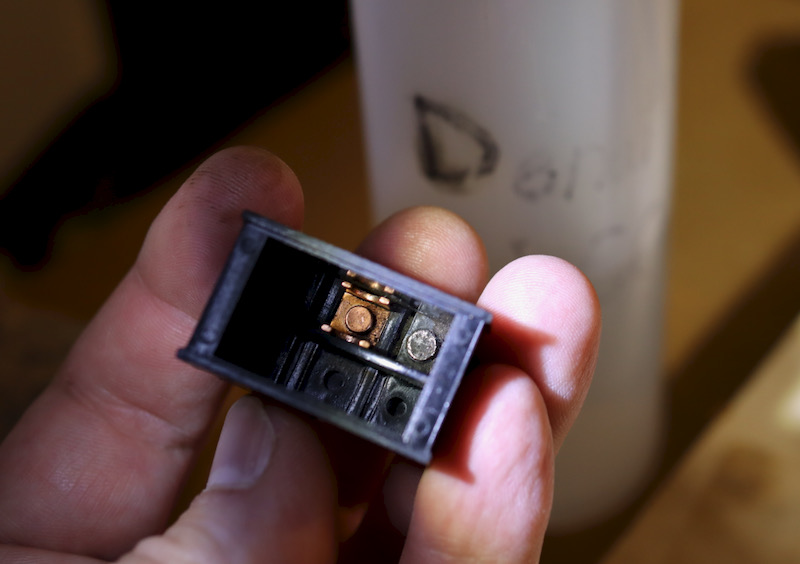
A few weeks ago I turned on my Delta drill press to drill a few dozen holes in a row. After finishing with the last hole I turned the On/Off switch down but to my surprise, the motor kept going and I had to unplug the machine to make it stop. I tried to lift and lower the switch’s actuator a few more times but could not feel the recognized engagement resistance when the switch was moved to the off possession.
At first, I thought of ordering a new switch and replacing it whole, but since I needed to use the drill press to finish a project I decided to attempt fixing the faulty switch by myself.
Fixing a switch is not that hard, doesn’t take much time, and doesn’t require specialized tools.
Why do switches fail?
Switches fail for mechanical issues such as material degradation, breakage, or the gradual dissipation of their inner lubricant. But switches can fail when their conductors lose conductivity – that is when the copper (or copper-plated) electrical contact points get covered by contaminants that prevent them from allowing electricity from flowing. This is known as arc suppression.
Because the inner parts of my switch were refusing to disengage I speculated that the problem was mainly mechanical in nature and not an arc suppression issue.
Repairing the switch
- Disconnect the machine from the power supply.
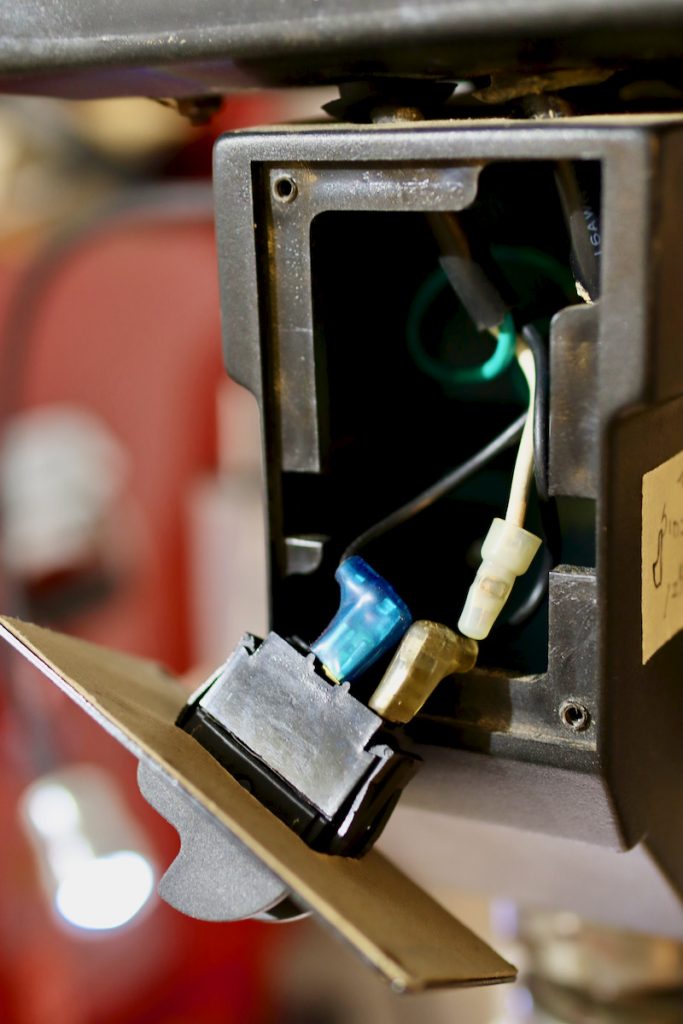
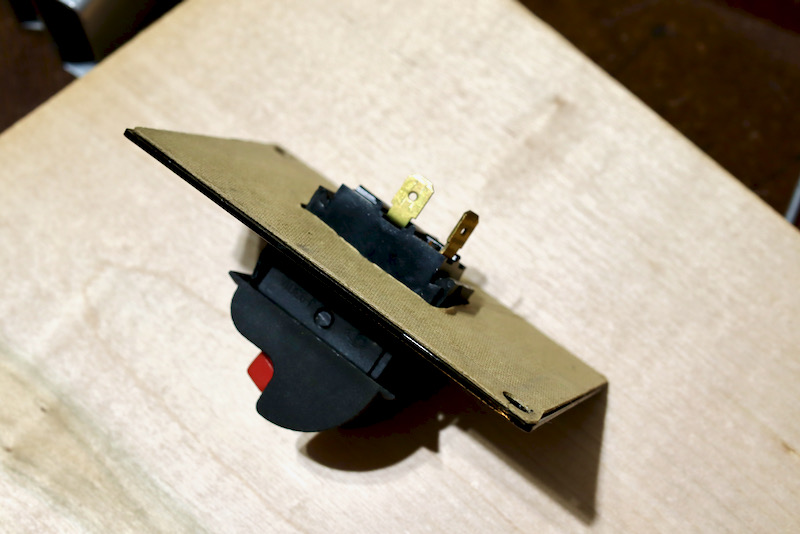
- Open the switch’s cover, etc, and carefully label each wire that is connected to it. Then disconnect the wires from the contact tabs.

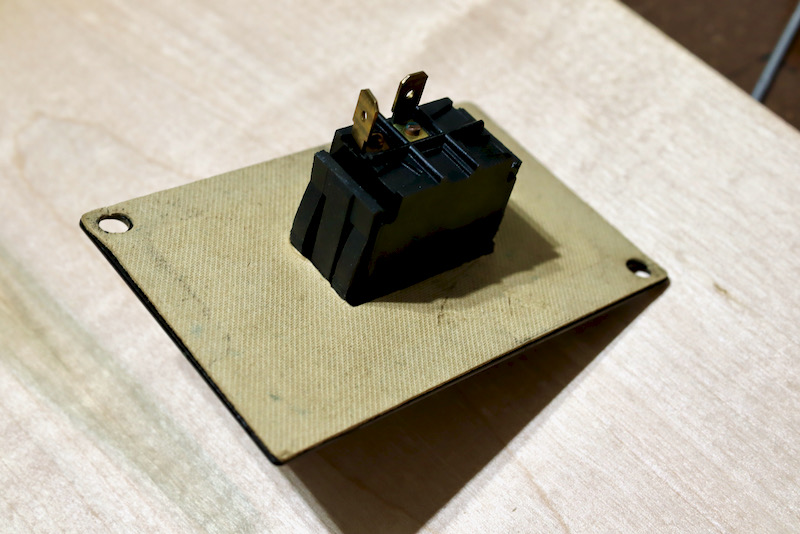
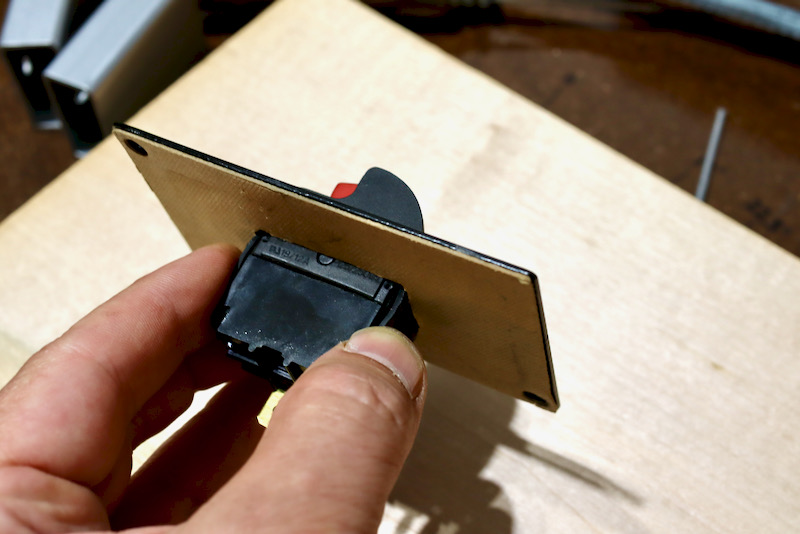
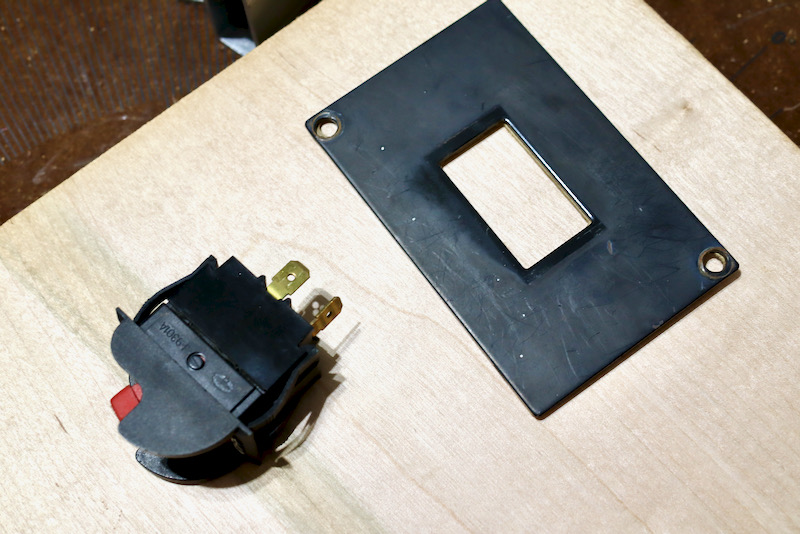
- Extract the switch from its plate or base. In this case I had to press the two hooked tables inward and release the switch from its plate.

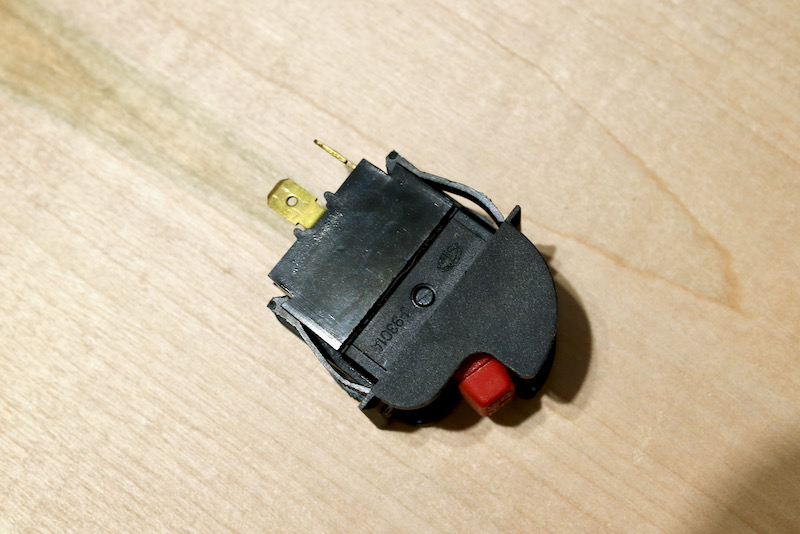
- Gently pry the plastic tabs out in order to open the switch’s shell.
The two plastic spring tabs hook over the shell. I had to push the hooks outward and then open the shell.
Some switches might have a rubber shroud to shield the contactor from dust. You’ll have to lift and remove it too.
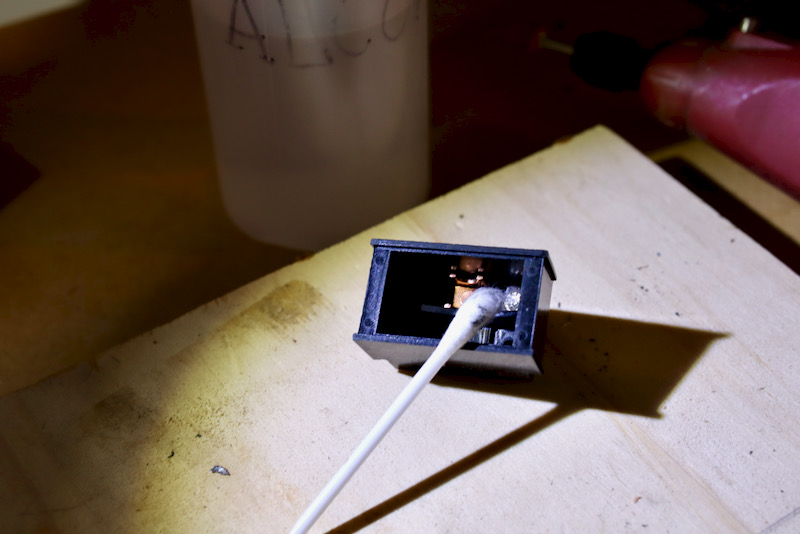
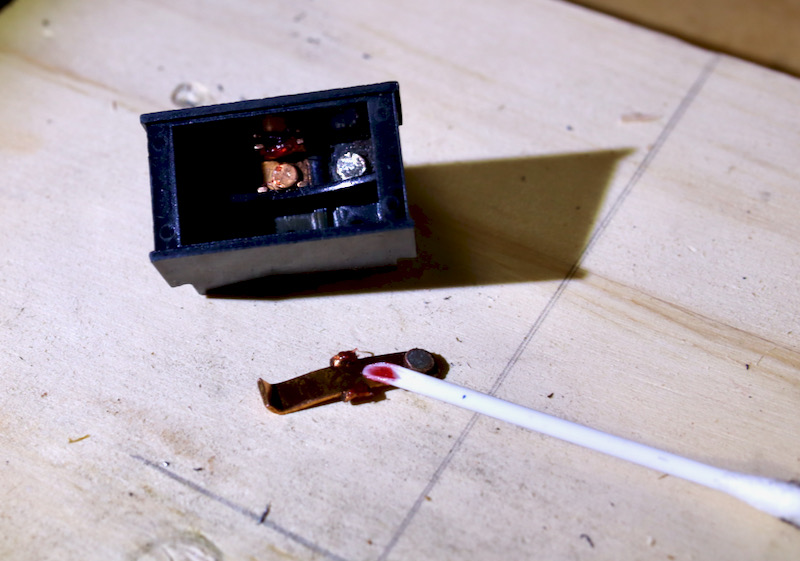
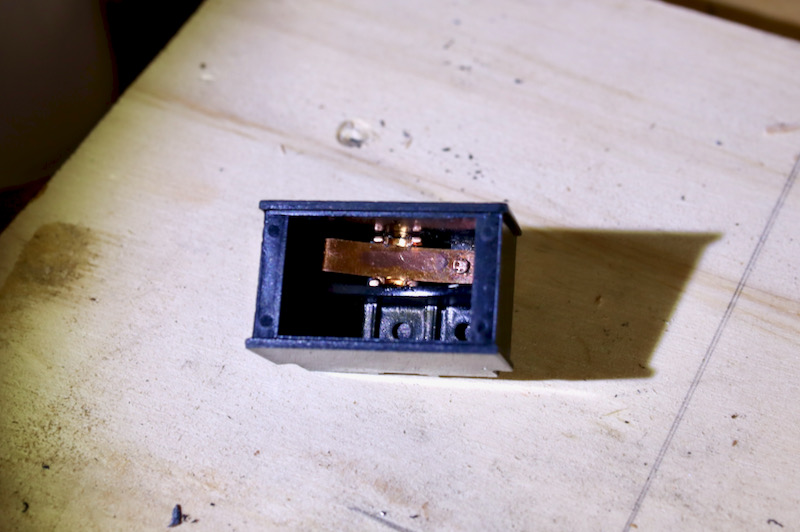
- Take out the inner “seesaw” contactor tab and any other moving parts or springs, and examine them. Clean any build-up or black charcoal-like powder with alcohol.
- Check the contactor’s contact points – these are elevated dots, small discs, or domes, and clean them too. They might be pitted as a result of arcing so use abrasive of some sort to smooth them out. I touched up the points using a rotary tool (very gently) but a better tool would be a Sandits™ “Q-tip” abrasive rod. Remember to clean and abrade (as needed) the stationary contact point at the bottom of the shell too.

- Place a dab of grease on the seesaw’s pivot point to help it move smoothly and close the shell.


- Reassemble everything back in reversed order.


It took me 10 min to do this and in the end, the switch was almost as good as new. I saved time, money, and saved a serviceable piece of electronics from ending in the landfill, and btw, learned a new skill that I am sure will be handy in the future. It is quite possible that down the road the entire switch will have to be replaced but until then I am quite proud of my little fix.
Here are some supplies and tools we find essential in our everyday work around the shop. We may receive a commission from sales referred by our links; however, we have carefully selected these products for their usefulness and quality.


![Woodworking Prime Day Deals 2024 [Updated for Day 2]](http://www.popularwoodworking.com/wp-content/uploads/bfi_thumb/dummy-transparent-olcy6s63it1p9yp7uhusjas7c8kahafrhg9su7q9i0.png)


I have repaired the switch on my Harbor Freight drill press twice. After the second failure (perhaps 50 cycles after the first), I ordered a much better replacement switch for $6.99 including shipping. It was an easy replacement even fitting into the existing mounting rectangular hole. I also find it much easier to turn on and off than the original style. Here’s a link to the switch I used:
https://www.amazon.com/gp/product/B07SGDX646
Thanks so much for sharing your experience and for including the link.
Best,
Yoav