


We may receive a commission when you use our affiliate links. However, this does not impact our recommendations.
I just don’t have room in my crowded shop for a permanent miter saw setup. Consequently, I designed this miter saw station to easily knock down when I’m not using it.
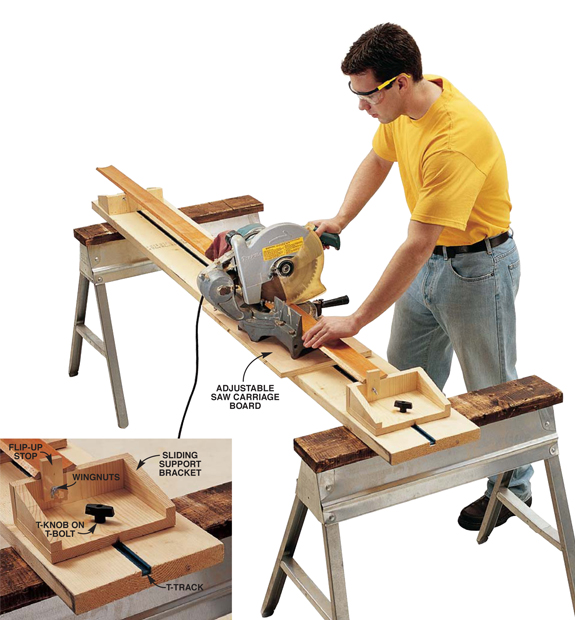
I started with an 8-ft. 2×12 that was flat and straight. (A couple of pieces of 3/4-in.-thick plywood glued together would also work.) I routed a groove down the middle of the 2×12 for the metal T-track.Then I screwed my miter saw to a plywood carriage board, which I fastened to the T-track with T-bolts and knobs. This allows me to slide my saw to either end when cutting long boards. I added two sliding support brackets which are also attached with T-bolts and knobs. The brackets support the ends of my boards when I’m sawing. I added a flip-up stop to each bracket so I can make multiple parts of the same length. When I’m not using my miter saw station, I simply remove the saw and stand the 2×12 on end, secured against a wall. The whole setup cost me about $50.
Here are some supplies and tools we find essential in our everyday work around the shop. We may receive a commission from sales referred by our links; however, we have carefully selected these products for their usefulness and quality.


Nice choice of miter saw station. You are right it is always necessary to maintain good safety and holding tool for a miter saw. I always buy my miter saw stand from reputed company that gives me extra confident while I do my job in the saw. Your setup looks pretty reasonable to me.