We may receive a commission when you use our affiliate links. However, this does not impact our recommendations.
An 18th-century chairmaker’s saw makes 21st-century work easier
The graveyard of obscure and forgotten tools is large, densely packed and many layers deep. Many of these tools richly deserve their pauper’s burial. But once in a while you come across a tool that does things that are quite remarkable, and you wonder why it ever disappeared in the first place.
I didn’t go rooting around for an old tool to dig up and bring back to life. I was simply trying to find a better way to cut tenon shoulders for some of my more complicated chairs. Cutting accurate, well-aligned shoulders, even on a straight tenon, is fairly difficult; cutting them on these chairs, where I had curved parts and angled shoulders, is especially so.
I devised a solution, then discovered that earlier chairmakers – of course – had long ago faced the same problem and had come up with a rather elegant solution. But elegant or not, it went the way of so many hand-tool techniques.
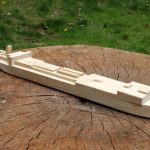
Simple solution. An easy-to-make tenoning frame and saw make short work of perfect shoulders on any workpiece.
The technique relies on a couple of tools that appear to have been in use mainly in France. The armchair maker’s saw (Scie Spéciale pour le Fauteuil) was used with a vise-like tenoning frame (or jack), and another layout tool, called a bilboquet, which I chose not to resurrect (in its stead, you will need to make a simple spacer block for setting up the work). With these easily made tools, it’s possible to cut straight (or angled), perfectly-aligned shoulders on even curved workpieces.
It’s worth noting that my adaptations are not attempts at a perfect reproduction. They were my attempt to make useful tools for my specific needs. But I have been surprised by how generally useful these tools are.
The Armchair Maker’s Saw
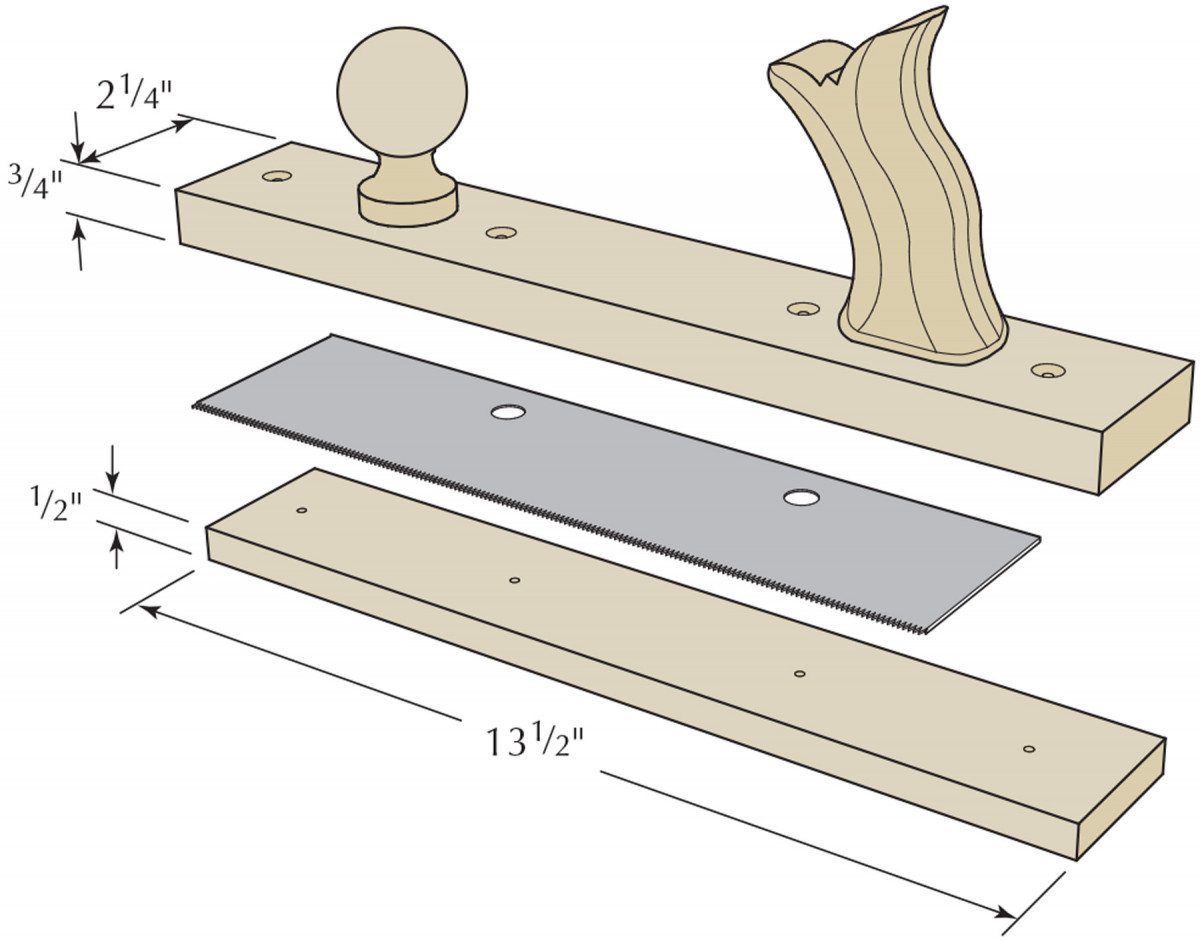
Armchair Maker’s Saw
Take a saw blade, mount it horizontally in a block of wood and add handles on top – that’s the essence of the armchair maker’s saw. But refinements make the tool, so I experimented a bit with saws and configurations to get it to work just right. A fine-tooth crosscut saw works the best, but you also want a blade thick enough to resist deflection when you’re cutting (ruling out some of the Japanese saw blades I tried at first). I wound up using a small crosscut saw blade from Lie-Nielsen Toolworks.
I drilled a couple of holes in the saw, then cleaned up the holes. A machinist, or Lie-Nielsen Toolworks, can punch these holes as well.

Parts. The saw consists of a blade, two blocks of wood, two handles and machine screws.
I decided to sandwich the saw between an upper block that has handles mounted to it, and a lower block, made out of a much harder wood for wear resistance.
For the upper block and handles, I used walnut; for the lower block, I chose ipe. Aligning the saw blade between the upper and lower blocks, I marked out the location of the holes in the saw blade, allowing for the saw to stick out from the side of the blocks about 5⁄8“. I then added marks for two more holes just beyond the ends of the blade. I clamped the two blocks together and drilled through them both at each marked location with a 3⁄16” drill bit, then used a 1⁄4“-20 machinist’s tap to cut threads in the lower block.
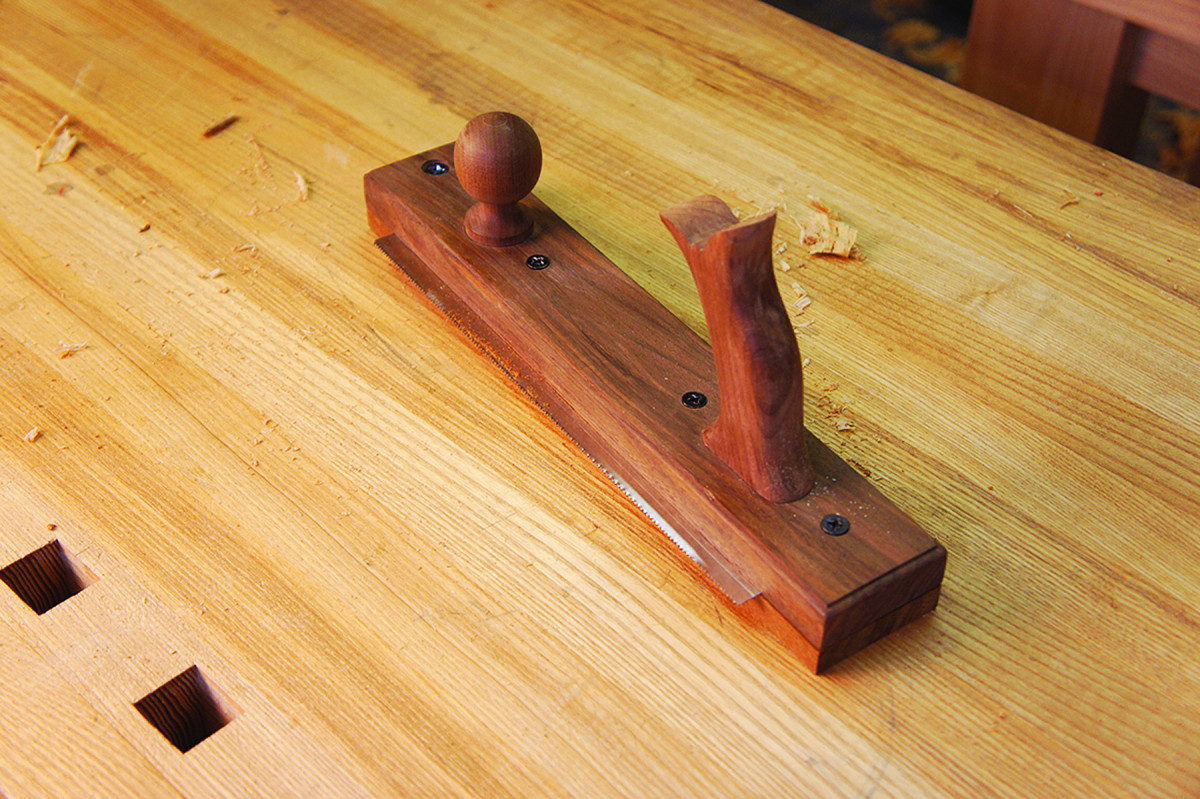
Ready to cut. The finished saw looks rather like a handplane.
The easiest way to do this is to chuck the tap in an electric drill then slowly and gently run the tap down into the hole. The pilot hole should keep you straight (you may want to practice this a couple of times). Then reverse the drill and let the tap unthread itself out of the hole. Now enlarge the holes in the upper block to 1⁄4” and countersink for 1⁄4“-20 flathead machine screws.
I turned the knob, cut out the tote on the band saw, rasped it to a comfortable shape then scraped and sanded it smooth. I decided to fit the handles into shallow mortises traced on the top of the upper block, then screw and glue them in place from the underside. Finally, I ran a (purely decorative) small ovolo around the edges.
The Tenoning Frame
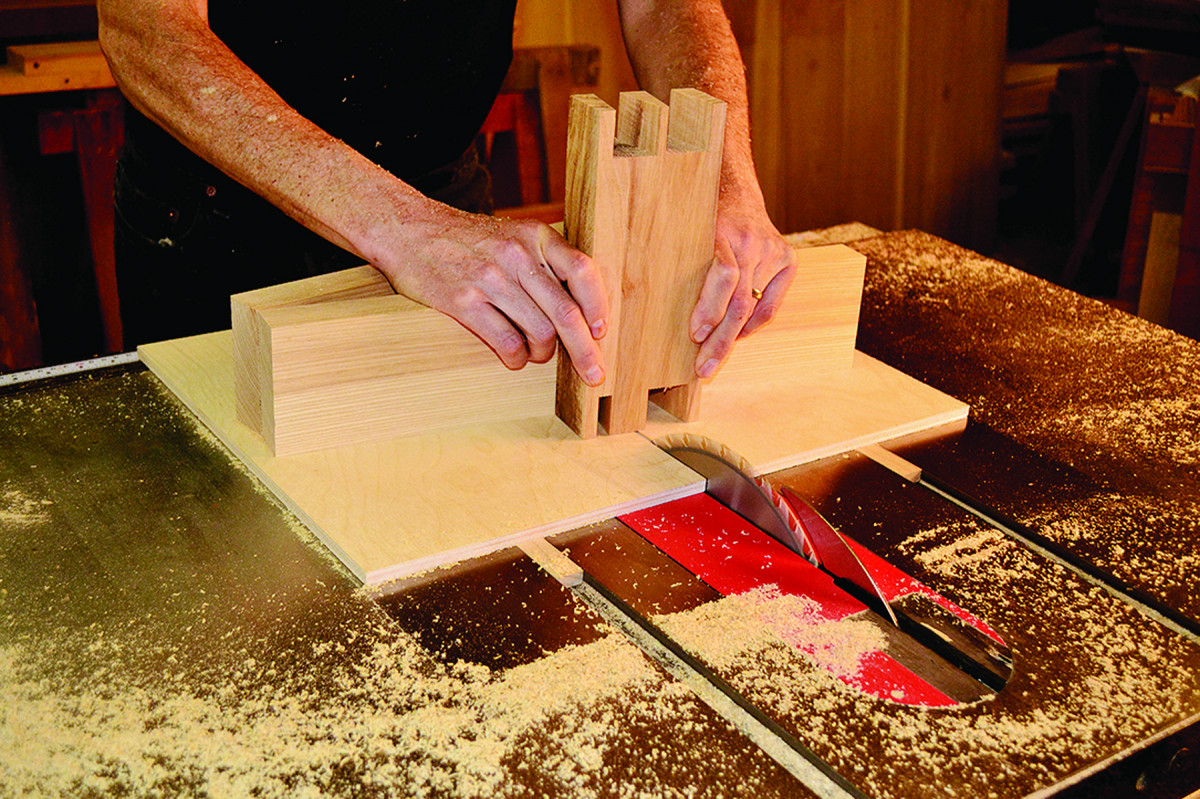
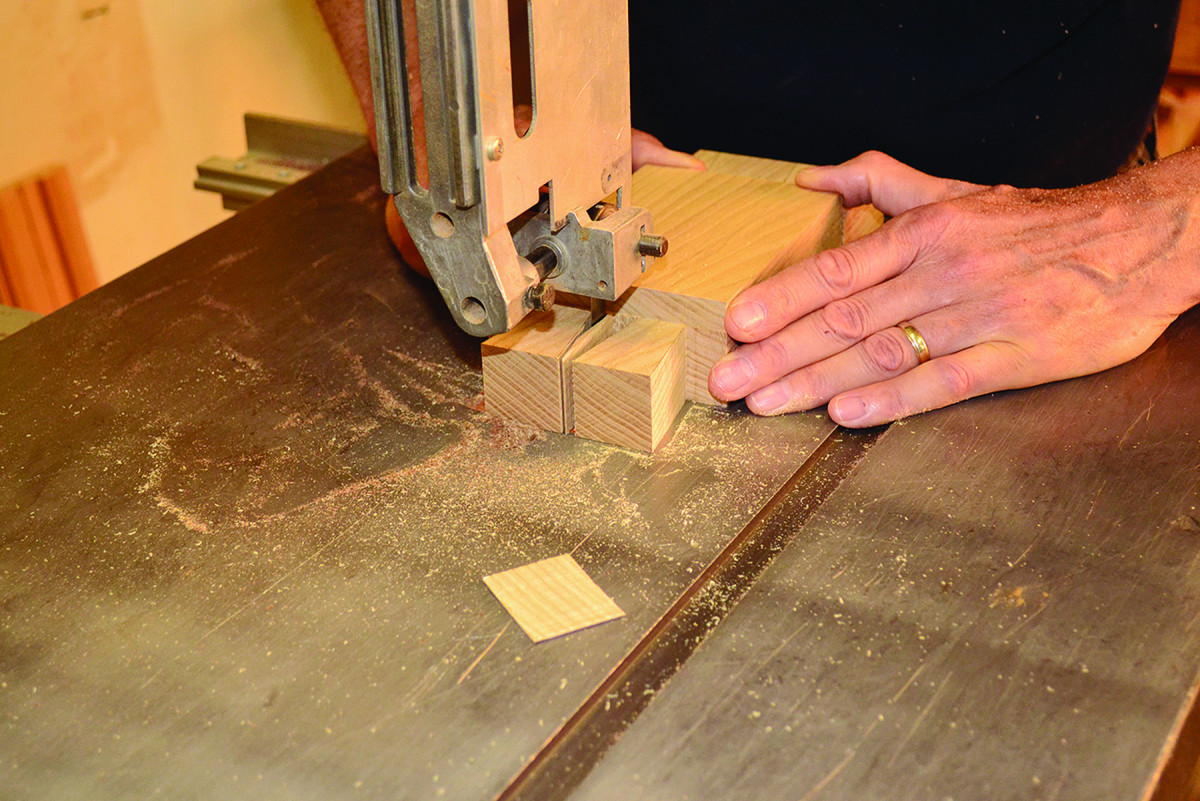
Machine-assist. For dovetails of this size, I cut my pins on the table saw and tails on the band saw, then clean up to the baseline with chisels.
 The tenoning frame holds the workpiece and allows you to saw around all four shoulders. The top surface needs to be as flat as possible, so the armchair maker’s saw registers in the same plane on all sides of the workpiece. Beyond that, it’s mostly a question of how involved you want to get. (In other words, feel free to simplify.)
Make the back piece of the dovetailed frame out of 21⁄4“- thick stock and the balance from 13⁄4“-thick stock. Rabbet the ends of the two side pieces 1⁄2” deep x the length of the tails (13⁄4” for the front, 21⁄4” for the back). These rabbets make the dovetails easier to mark out, mean a little less waste to remove when cutting the joints and allow you to cut the 1⁄2“-deep groove for the vise jaw without cutting into the tails.
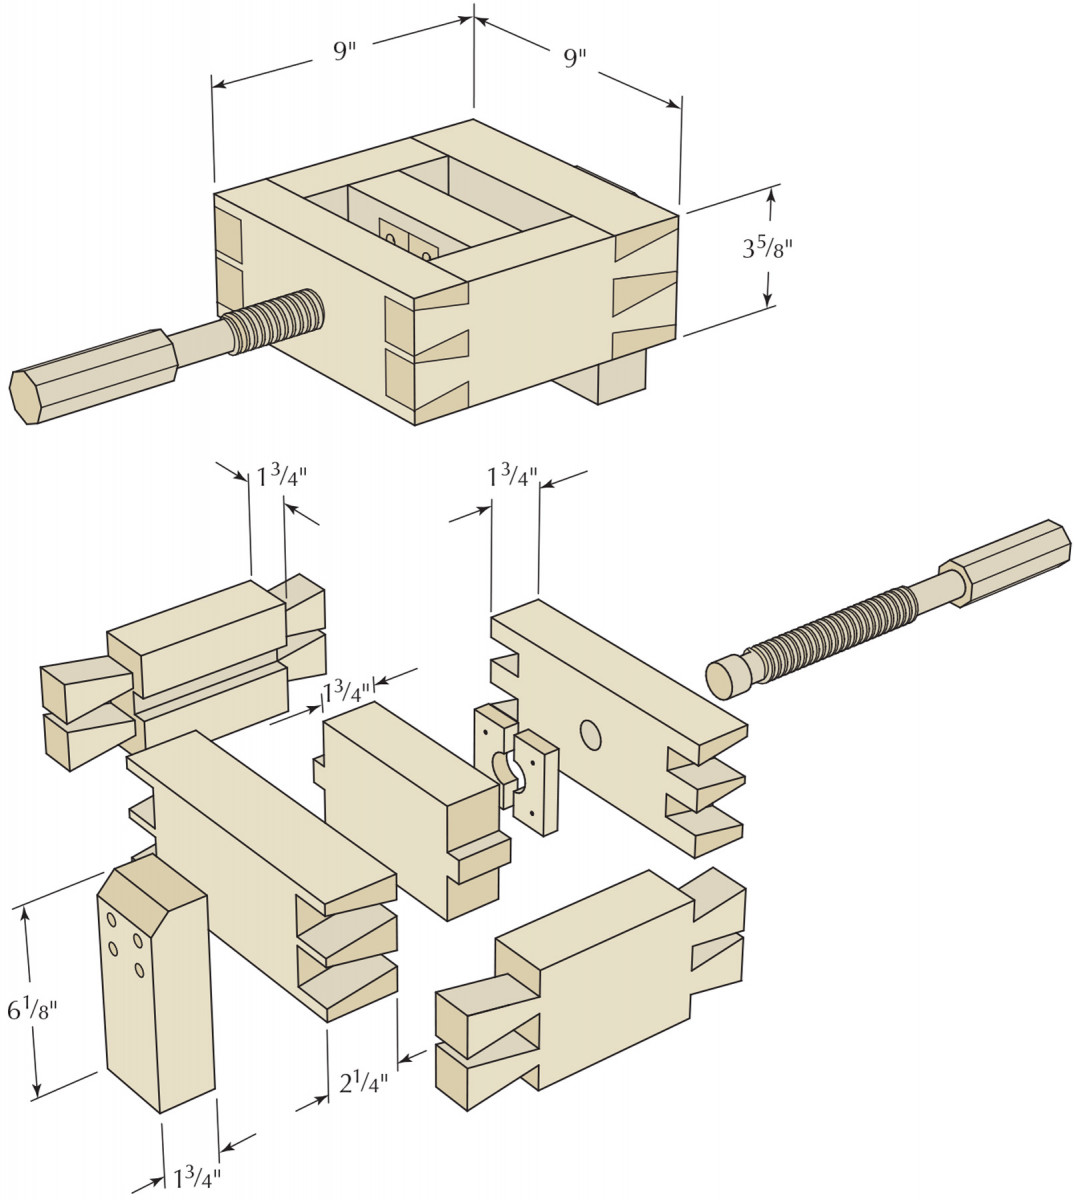
Tenoning Frame + Exploded View (bottom)
I cut the dovetails on the table saw (pins) and the band saw (tails), but for dovetails of this size, an adaptation of the Jameel Abraham’s “Condor Tails” approach from the August 2011 Popular Woodworking Magazine (issue #191) would also work well.
Fitting the dovetails and test-assembling the frame proved to be quite a challenge until I figured out that I could disassemble the frame by expanding a wooden handscrew to pull things apart. (It’s perfectly acceptable to cut large finger joints then peg the corners, but not nearly as much “fun.”)
Cut the frame’s vise jaw to size and carefully fit it in place. You’re looking for a close fit; you want the jaw to move easily (with a little wax applied), but with very little up-and-down slop.
Note: If you happen to have a wagon vise on your workbench, you may be able to use that as your tenoning frame. Just check to be sure that your workpiece is held perfectly square to the workbench top (and that the benchtop is flat) when clamped in the vise.
Wooden Vise Screw & Garter
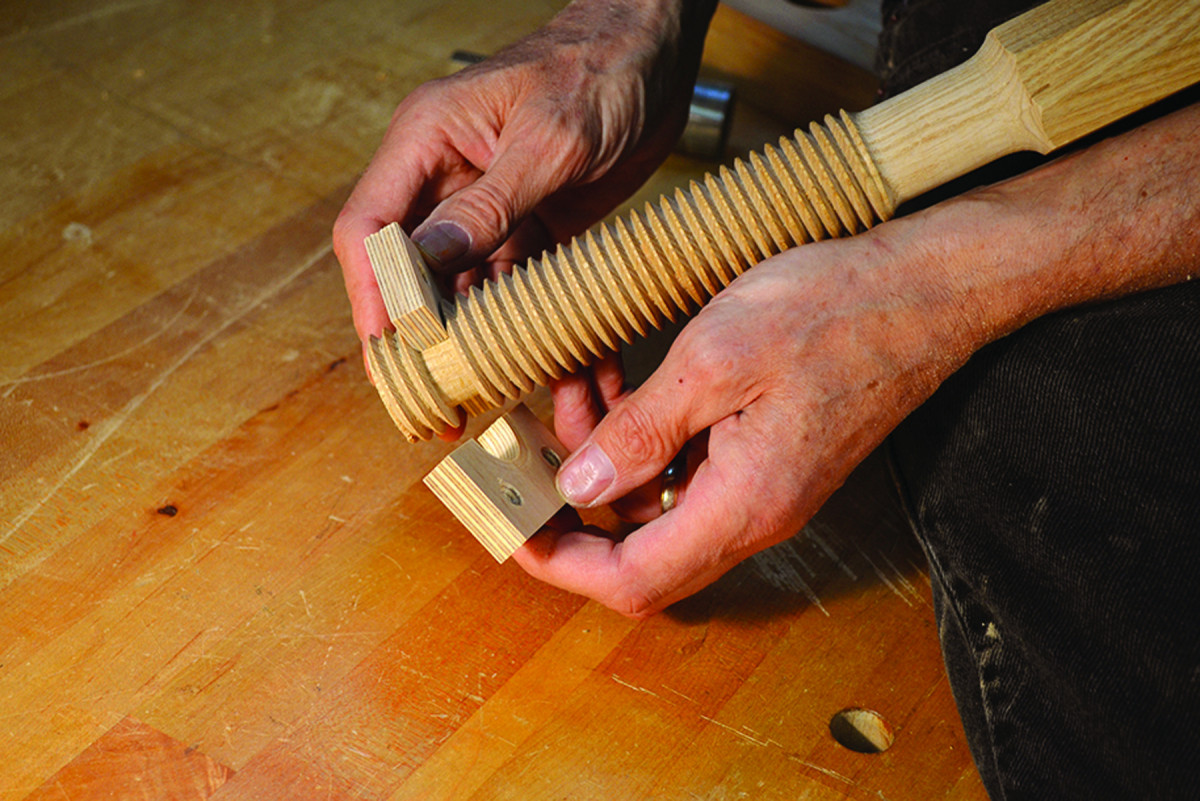
Handle it. After turning and threading the vise screw handle, fit the garter.
I opted to make the vise handle integral with the threaded portion, so I started with a 14″ long x 15⁄8“-square blank.
Mark out the centers on the ends of the blank, then lay out an octagon and saw or plane the four corners down to your layout lines. Mount the octagon on your lathe, and turn down the first 73⁄4” to an accurate 11⁄2” diameter for the threads. The next 2″, between the threaded portion and the octagonal handle, should be 11⁄4” in diameter. You should also turn the very end of the octagonal handle to round, leaving a 1⁄2” boss to be removed later. The octagonal handle winds up being about 41⁄4” long.
Fit to be screwed. Cut the recess for the garter in the vise jaw, then drill for and countersink for screws that will allow the entire assembly to move smoothly together.
I used a Beall 11⁄2” threader to cut the threads. This required a few practice runs on some extra blanks that I turned, but the results were excellent. Once you’ve cut the threads, return the handle to the lathe to turn down a 1⁄2” wide groove for the garter, 5⁄8” from the end. Use a piece of 1⁄2” Baltic birch plywood to size this groove for a fairly precise sliding fit. The finished diameter of this groove should be 1″.
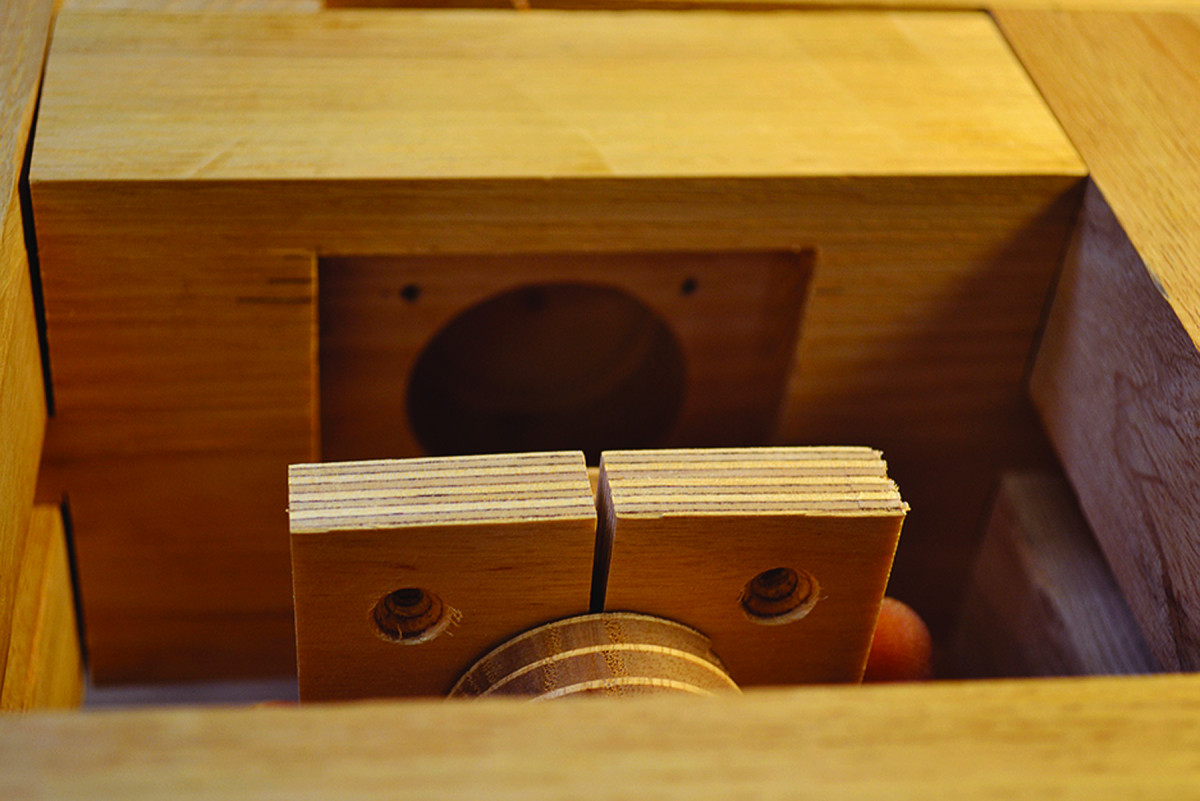
Make the garter by cutting two pieces of 1⁄2” Baltic birch plywood to 25⁄8” x 15⁄16“. Clamp the two together side-by-side, mark out the midpoint on the seam, then drill a 1” hole through the clamped garter blanks.
You’ll need to cut a stepped recess in the tenoning frame jaw for the end of the vise screw and the garter. Drill a 15⁄8“-diameter hole, 15⁄16” deep that is centered on the front face of the jaw. Around that, mark out a recess 25⁄8” square, then rout 1⁄2” deep and chisel the corners square so that the garter just fits. You should now be able to capture the end of the vise screw between the two halves of the garter, then slip this assembly into the jaw. Adjust the fit if necessary to allow the handle and screw to rotate without much effort or backlash, then drill four pilot holes for the #6 x 1″ screws that attach the garter (and captured threaded handle) to the vise jaw.
Drill a 13⁄8“-diameter through-hole centered in the 13⁄4“-thick end of the frame, then cut the threads with a tap.
Before you assemble the frame, you should glue a piece of suede leather to the face of the jaw and to the business face of the frame. This greatly improves the grip of the setup.
Glue up the frame with the sliding jaw in place. When the glue is dry, you can plane the outside surfaces flush and work on any cosmetic issues. Then, thread the screw through the frame end, slide the garter halves together in the notch and screw the garter in place. You may want to wax the surfaces that rub.
Tighten the vise jaw all the way closed, then plane the top surfaces of the frame and the jaw flat and even all the way around (or you can sand the whole frame upside down on a piece of sandpaper stuck to a flat surface). Take your time with this; it’s important that the saw has an even, flat plane off which to reference.
On the French version, a stub was usually added to the frame to make it easier to secure in a vise. This was usually just a board that stuck straight out the back. My workbench has a wagon vise, and it seemed simpler and sturdier to have the stub project down from the back of the frame; the frame sits on the benchtop, and the stub is secured in the vise. You should adapt the stub to suit your specific bench.
I also decided to add a removable stop that helps align boards for cutting square tenons. This is just a 1⁄4“-thick strip of wood roughly 11⁄2” wide that I screwed at the back corner of the frame against one of the sides. Check to ensure that the strip sits perfectly square with the surface and adjust it if necessary. This strip shifts your workpiece squarely into the center of the frame so the vise block pressure bears fully against the surface.
A Setup Guide
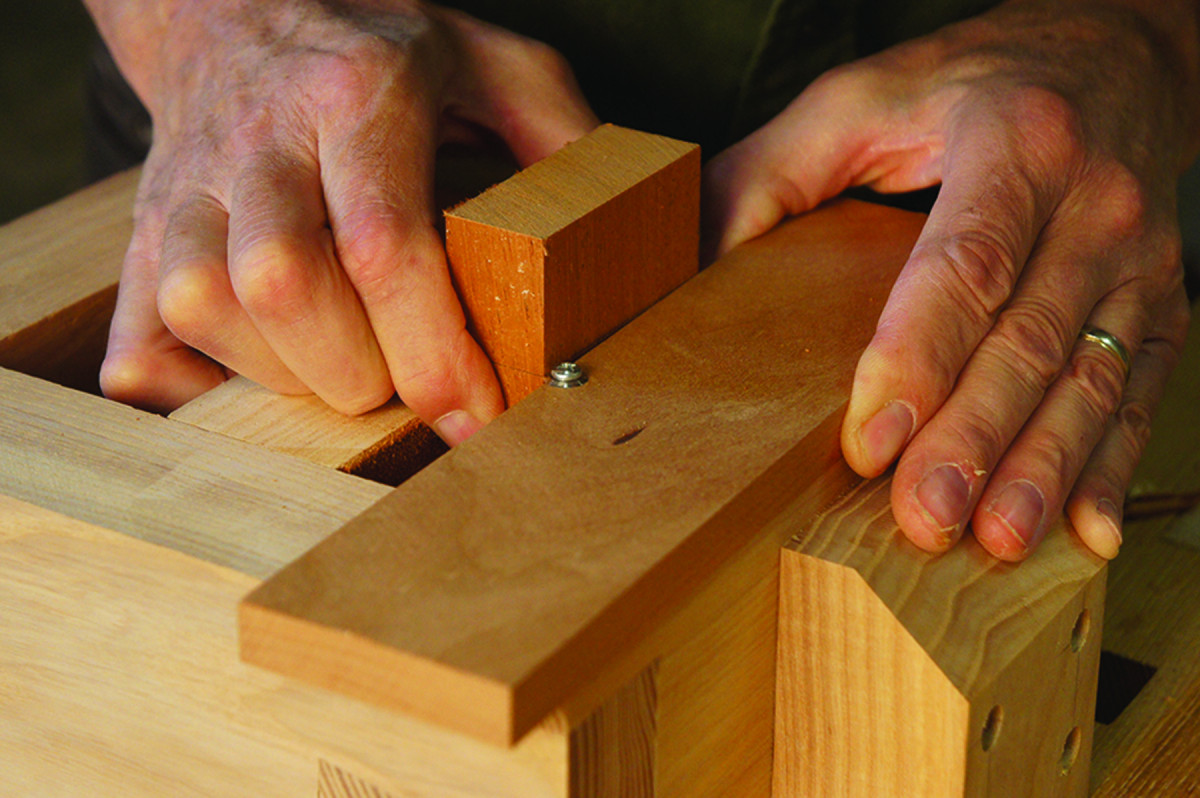
Perfect alignment. A disc (perhaps the round blade from a cutting gauge) screwed to a spacer block can help you to align your workpiece in the vise for dead-on sawing accuracy.
The saw and the frame were usually used with a bilboquet, a tool for laying out the tenon cheeks and locating the shoulders once the work was clamped in the frame. I did not make one of these; I prefer to lay out my tenons earlier and cut to the lines. But it is important to at least make up a spacer block that you can put on the tenoning frame to give you the exact location of the shoulders. You align your shoulder marks with this spacer block. It should be sized to exactly the distance from the top of the tenoning frame to the bottom of the kerf made by the saw.
To make it a little easier to align perfectly with a gauged shoulder line, you can also screw a scribing disk like those used in cutting gauges so that the edge of the disk is perfectly flush with the top of the spacer block. You’ll get just enough tactile feedback when you hit the mark perfectly.
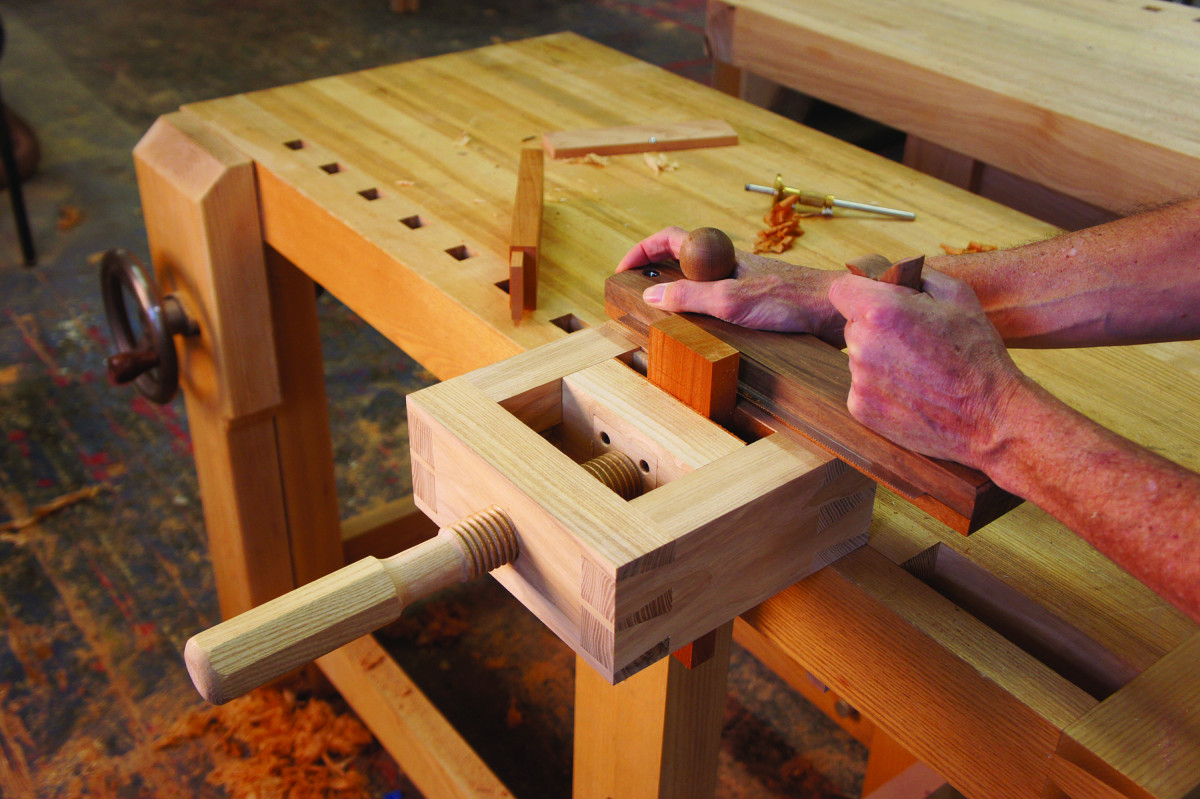
How to Use the Tools
Clamp the tenoning frame to your workbench and place your workpiece in the frame. Use your setup guide to align the shoulder marks at the proper height above the frame surface and clamp securely in the frame. Now saw around the four shoulders. Make sure to keep the base of the saw flat, and saw gently and evenly. It takes a little practice to get the feel of the saw. And don’t rely on the projection of the saw blade out the side of the saw as a depth stop; just cut by eye to the proper depth.
Peerless Results
The armchair maker’s saw and tenoning frame are fascinating tools to have around; they always provoke stares and comments when I take them out in public. And it’s not just the novelty of tools, or that they function so differently than what we’re used to seeing. It’s also that these tools provide what is a remarkably sensible solution to a fairly challenging task.
I find that the armchair maker’s saw and tenoning frame are one of the easiest ways to cut tenon shoulders I’ve come across. And for cutting angled shoulders, or shoulders on oddly shaped pieces, this method is without peer.
Here are some supplies and tools we find essential in our everyday work around the shop. We may receive a commission from sales referred by our links; however, we have carefully selected these products for their usefulness and quality.