


We may receive a commission when you use our affiliate links. However, this does not impact our recommendations.
 Mortise and tenon joints are the best way to go.
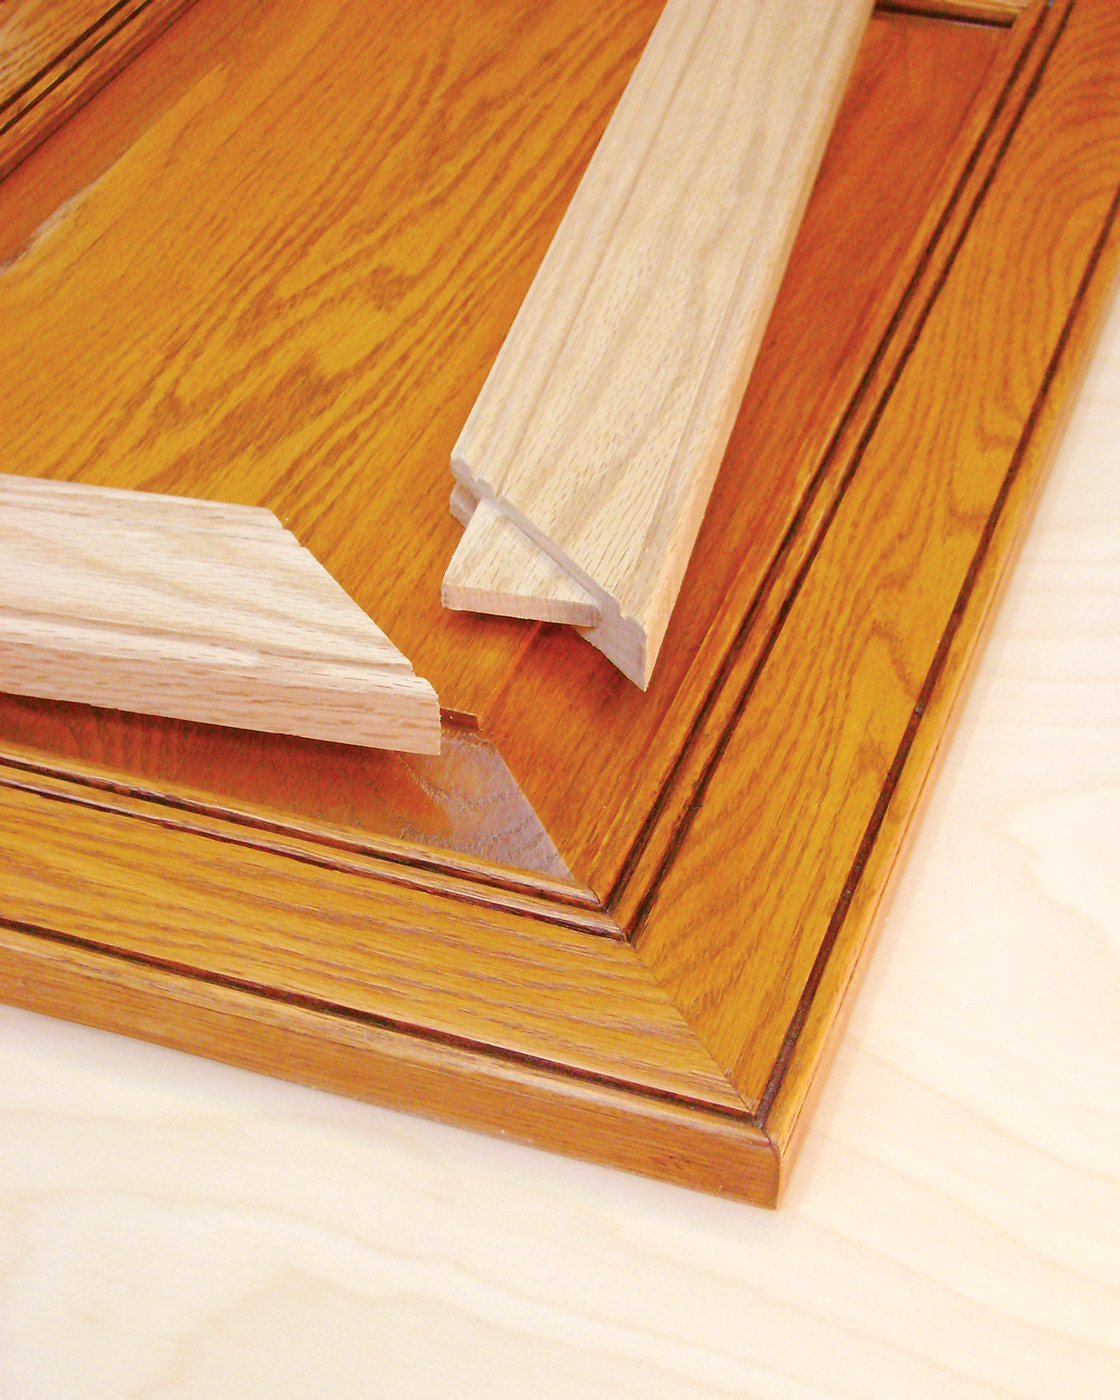
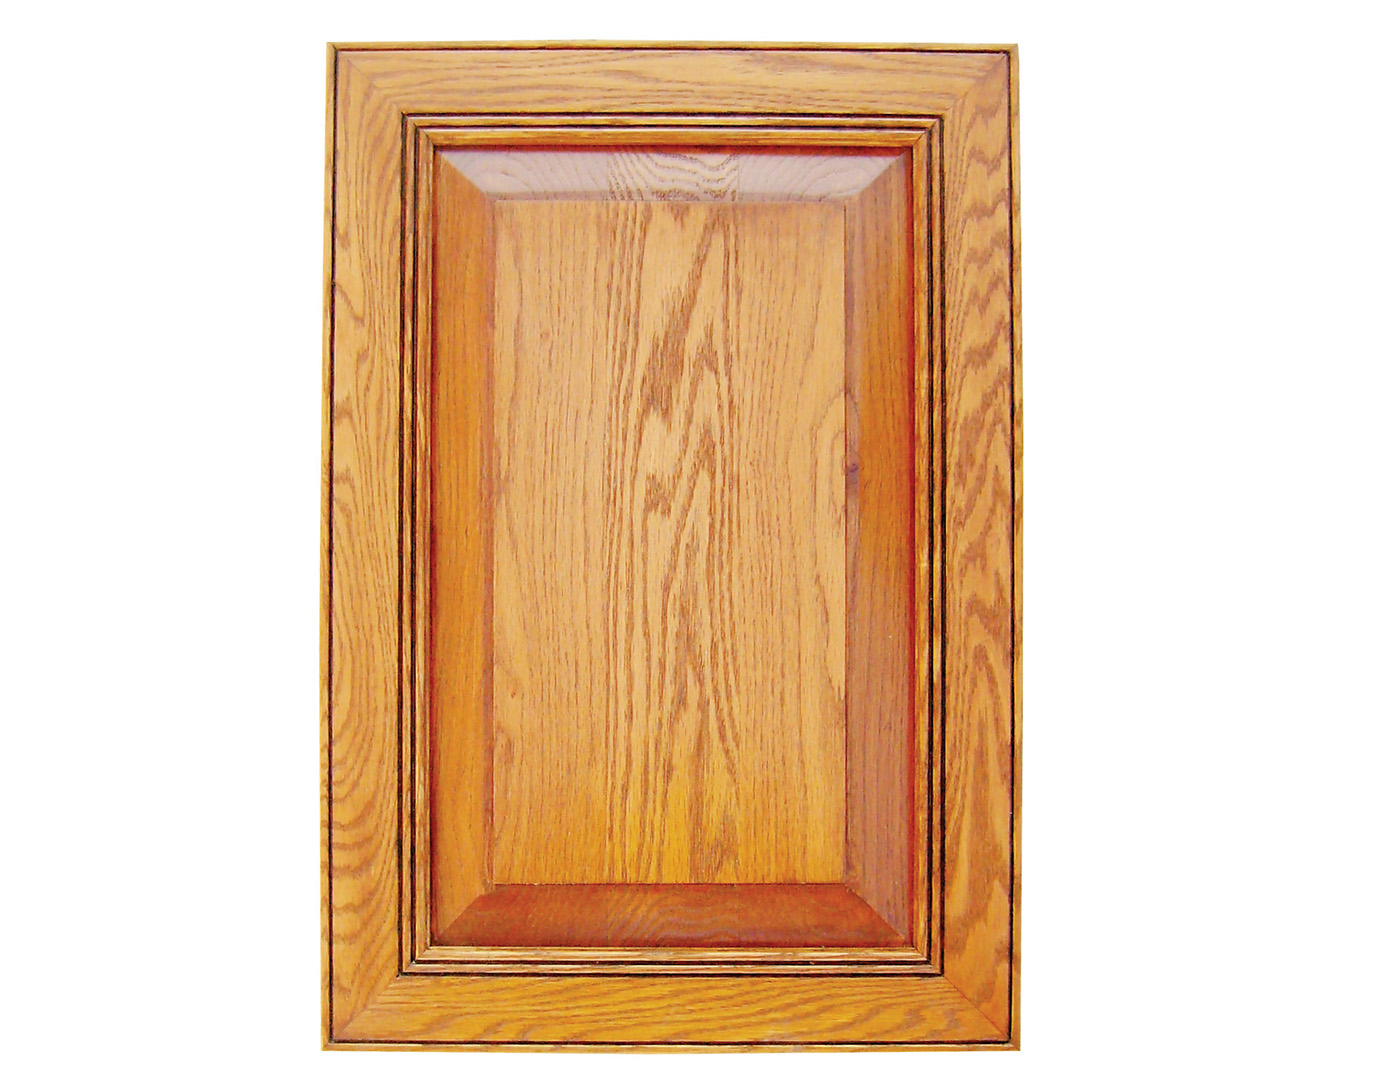
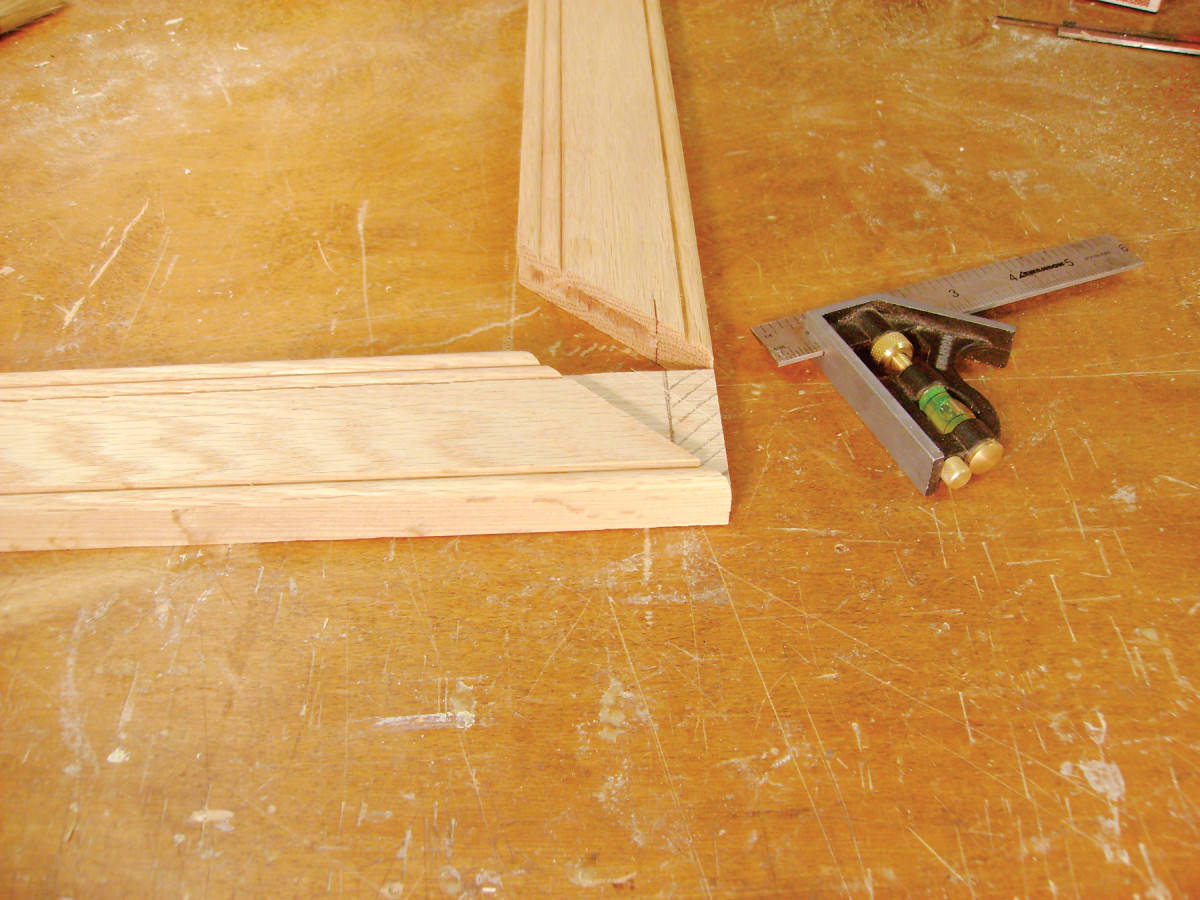
For a new look in cabinet doors, try mitering the corners. This simple design, as elegant as a picture frame, can dramatically change the appearance of a cabinet. There’s a practical benefit, too: You’re not tethered to stock cope-and-stick router bits any more. You can use any profile you wish. Routing the frame is just like making a molding. You can mix and match a wide variety of shapes.
 Mitered doors have to be strong to withstand the strain of being constantly opened and closed, so I build them with mortise and tenon joints. The procedure is technically challenging, but it’s also fun and rewarding.
Moldings and grooves
To begin, mill all your frame pieces to the same thickness and the same width. Make a few extra pieces, to test setups. Trim the actual pieces 1″ longer than their final length.
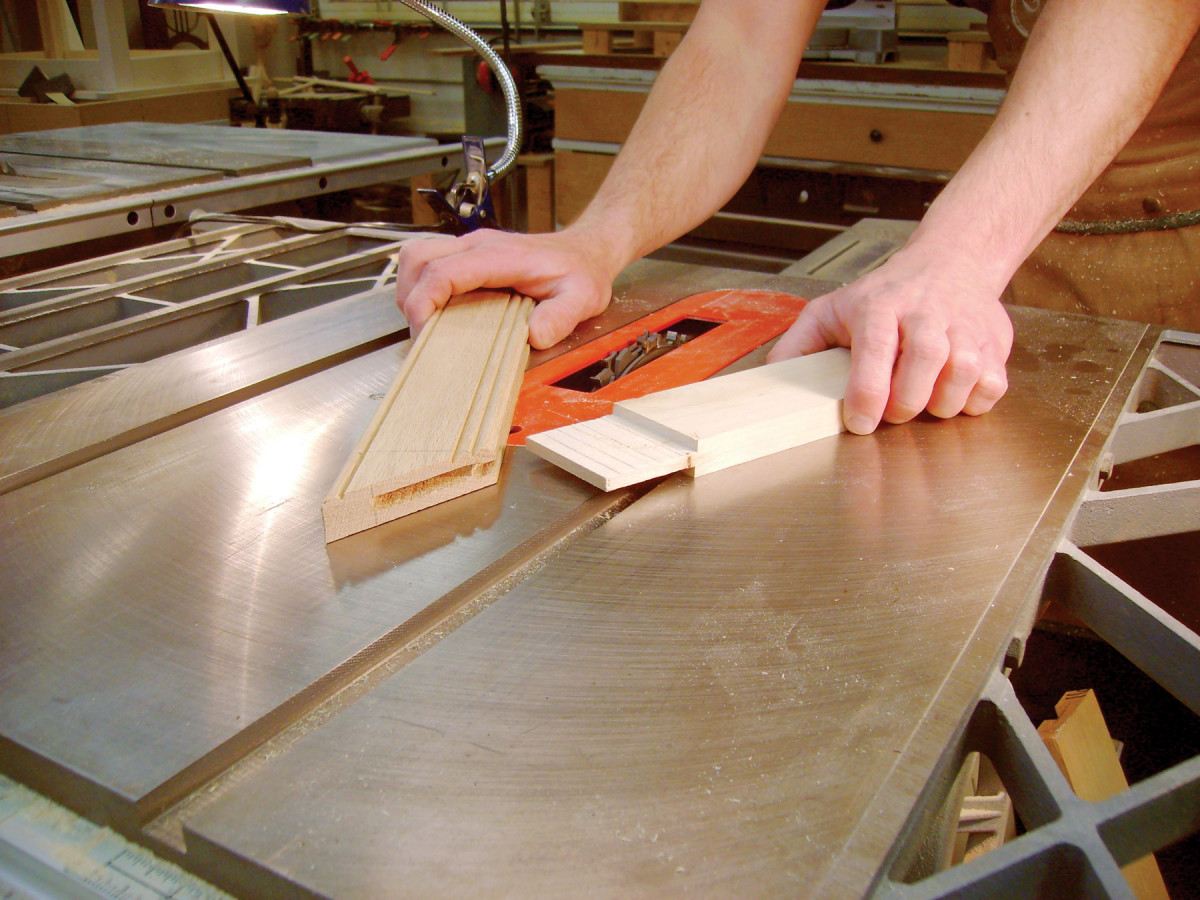
1. Start by routing moldings on the faces of the door’s stiles and rails. I’m using a beading bit, but you can use any profile bit you like.
1. Rout the molding on your stiles and rails (Photo 1). It can go on the inside or outside edges of the frame–whatever you like. Set up a featherboard on your router table to ensure that all the cuts are smooth and the same depth.
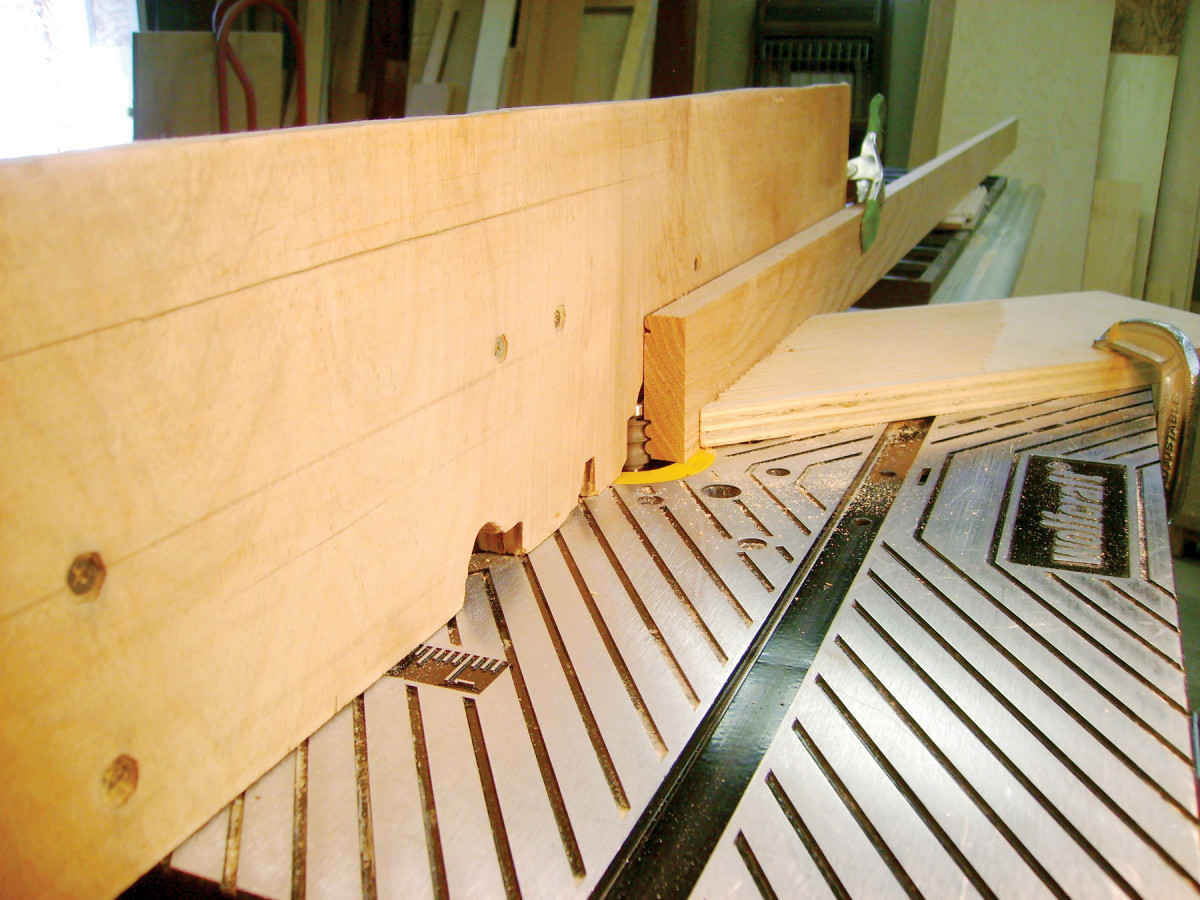
2. Saw grooves for the panel. Cut from both faces, so the groove is exactly centered. Cut all the pieces to final length–but without miters.
2. Cut grooves for the panel using a dado set (Photo 2). For 3/4″ thick doors, I make the grooves 1/4″ wide and 3/8″ deep. The grooves should be exactly centered. The best way to ensure this is to make one cut, flip the piece, and cut the groove a second time–once from each side. This may result in the groove being a tiny bit wider than 1/4″, but that’s OK. Centering the grooves isn’t required (you can cut the grooves off center, if you wish), but cutting the tenons later will be much easier if the grooves, mortises and tenons are centered.
3. Cut the stiles and rails to their final length, but don’t miter their ends yet.
Cut the mortises
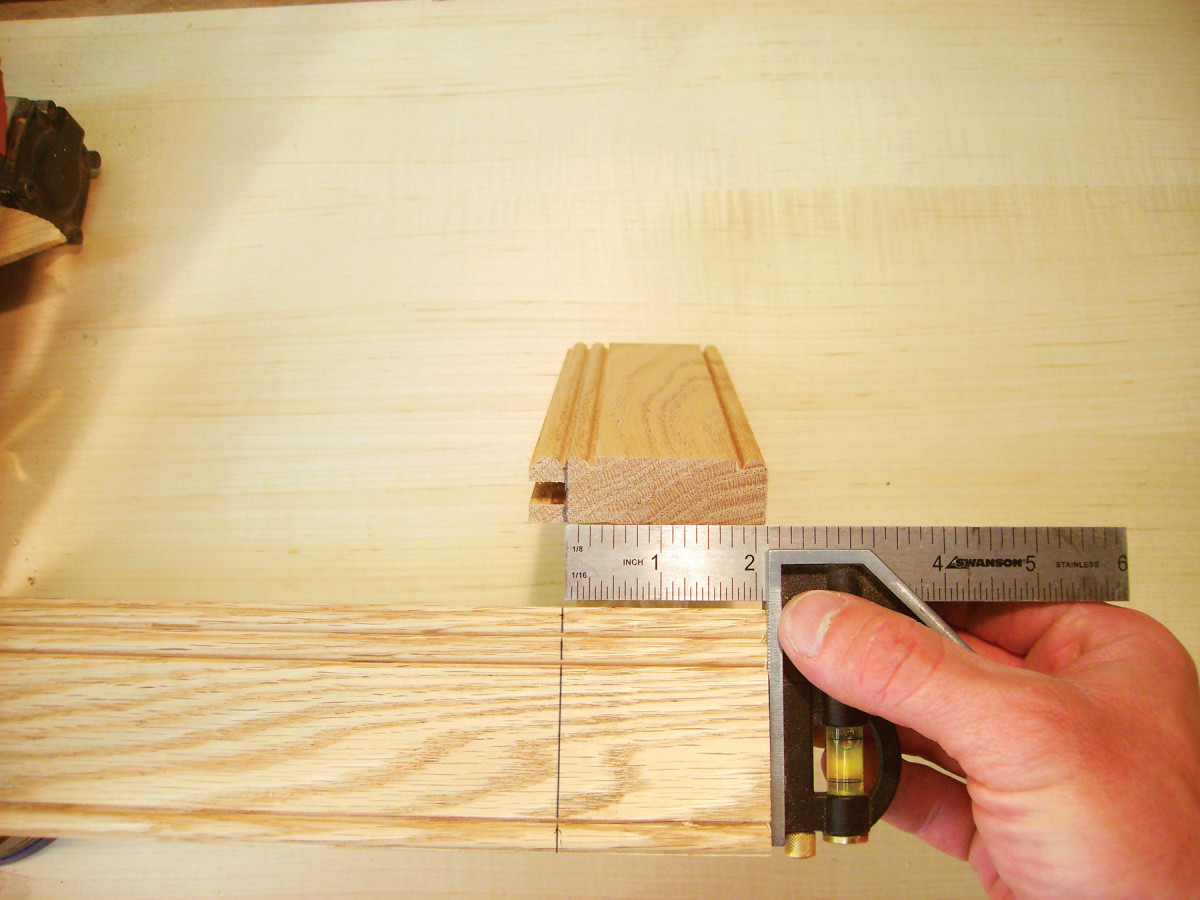
3. Mark the rails for mortising. Measure the distance from the outside edge of any piece to the bottom of the groove. Transfer this distance to the top edge and face of each rail.
4. The mortises will go in the rails, and the tenons will go in the stiles. They could go the other way around, too–it really doesn’t matter. The first step is to mark the inner end of the mortises on the rails (Photo 3). The depth of the groove determines the location of this mark. Using any piece, set a combination square to the distance from the outside edge to the bottom of the groove. Draw lines at this distance on the top edge and face of the rails.
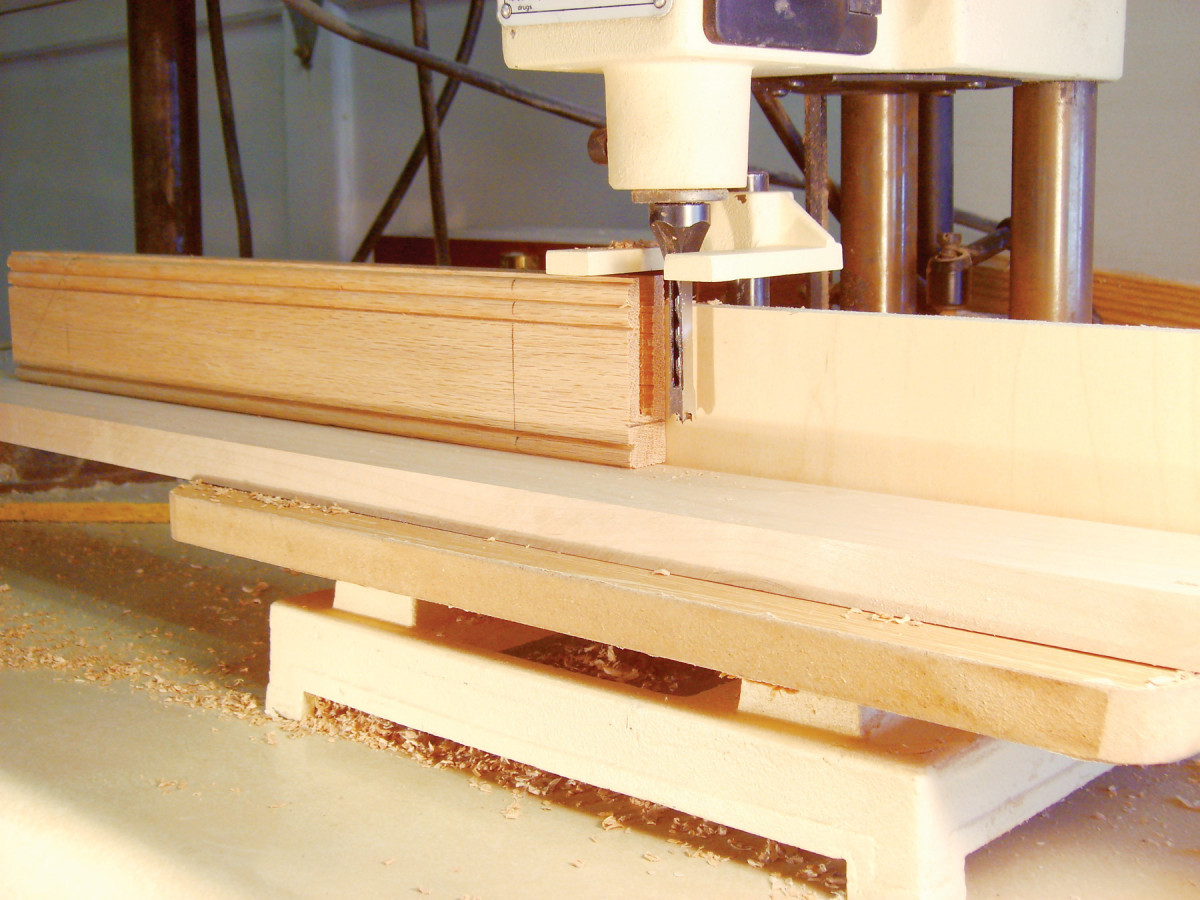
4. Mortise the rails. Start each mortise on the marked line, and continue it out the end of the rail. Cut the mortise a second time, from the opposite face, to center it.
5. Install a 1/4″ bit in your mortising machine. Adjust the depth-of-cut so that the bit stops 3/8″ above the table. Adjust the fence so the chisel rides against the back side of the groove. Cut the mortises, starting at the pencil line (Photo 4). Continue the mortise all the way to the end of the rail. To ensure that the mortise is centered and the same width as the groove, flip each piece around and cut each mortise a second time, as you did when cutting the grooves.
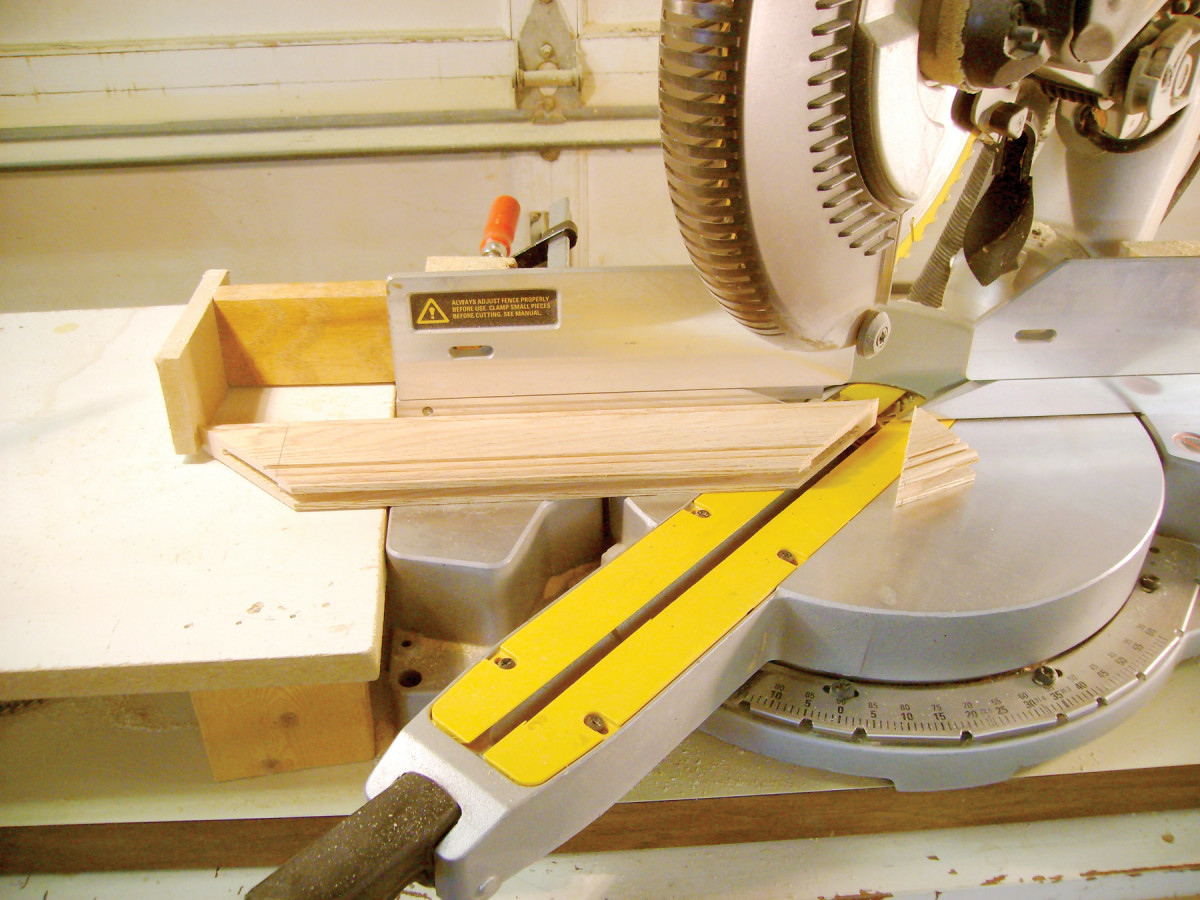
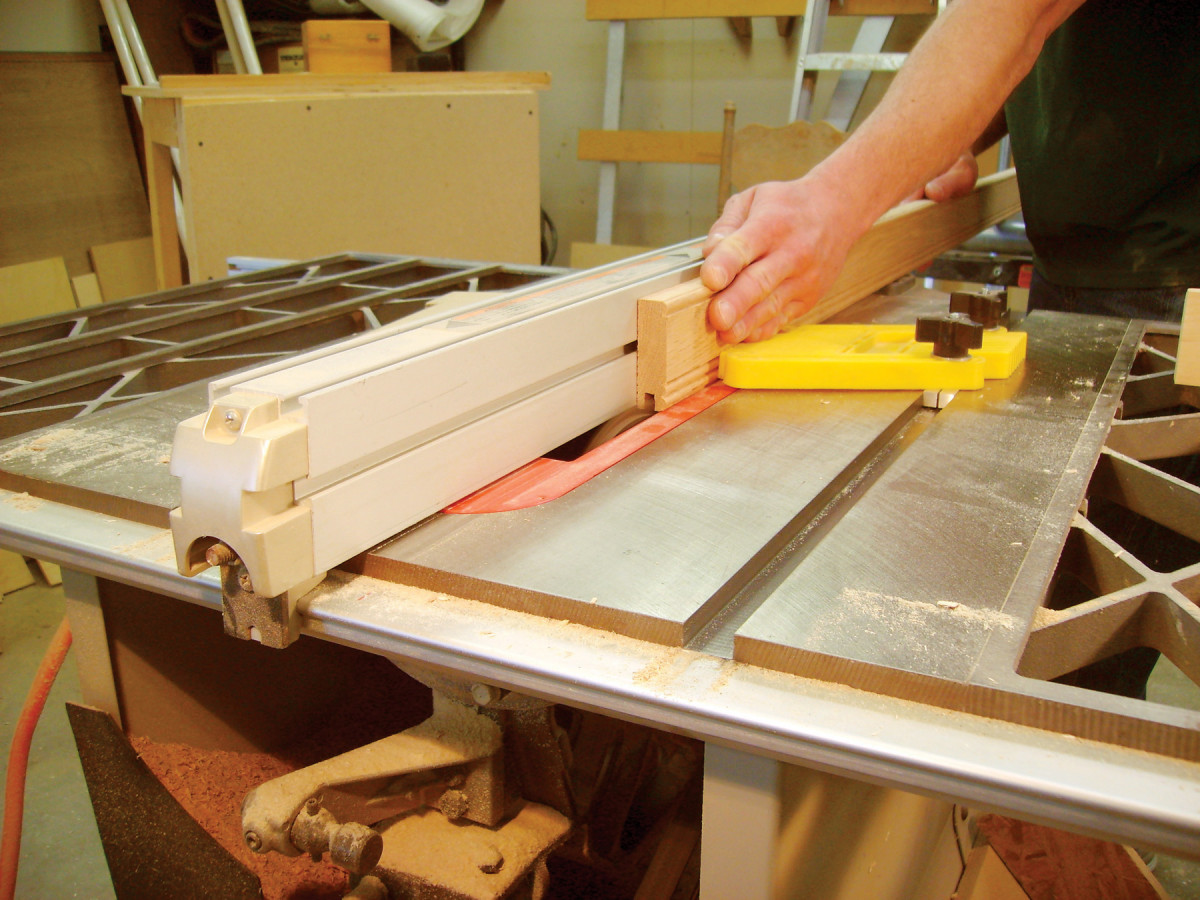
5. Miter the ends of the rails. Cut exactly to the tip, so the overall length of the rails stays the same.
6. Cut miters on the ends of the rails (Photo 5). This is a finicky cut, so it’s best to creep up on it by gradually readjusting the position of a stop block. The idea is to miter the corners of the rails without making the rails any shorter, tip to tip.
Make the tenons
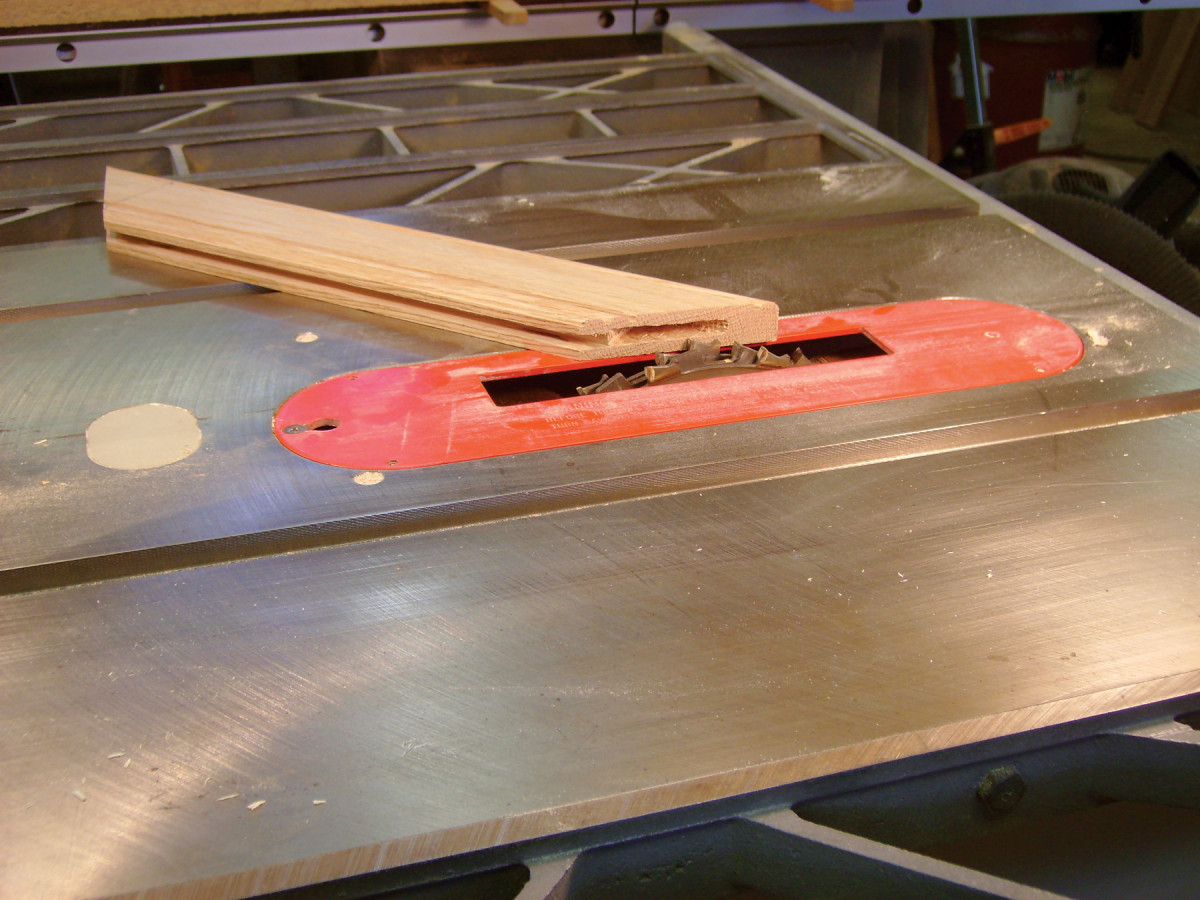
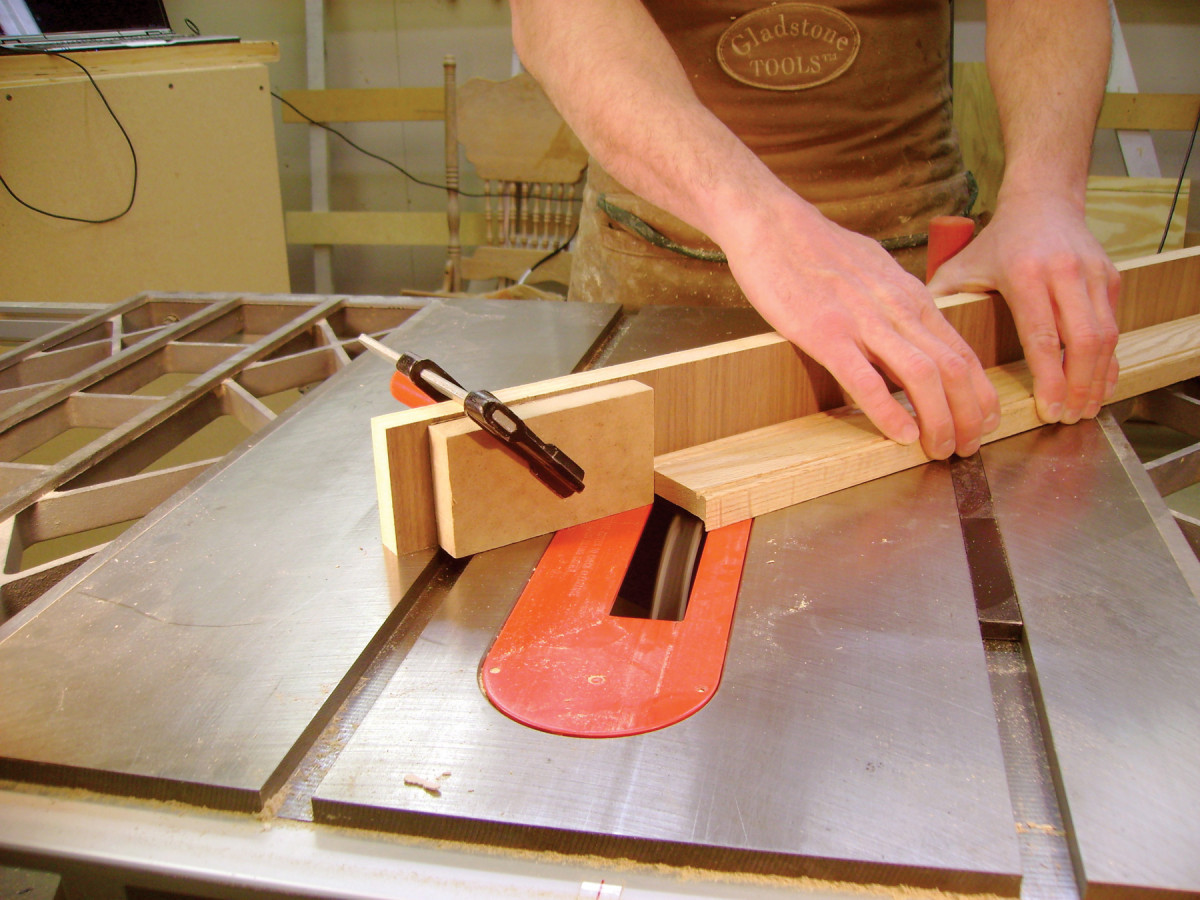
6. Set up a dado blade in the tablesaw for cutting tenons on the stiles. Raise the blade level with the bottom edge of the mortise in one of the rails.
7. Make the tenons on the tablesaw using a 1/2″ wide dado set. First, adjust the blade’s height. Place one of the rails next to the blade, then raise the blade until it’s even with the bottom of the mortise (Photo 6). Next, using a scrap piece that’s exactly the same thickness as your rails and stiles, set your miter gauge to 90° and make a test tenon by dadoing both sides of the piece (Photo 7). If it doesn’t fit–and chances are it won’t on the first try–cut off the tenon, raise or lower the blade, and dado a new tenon, again making the same cut from both sides.
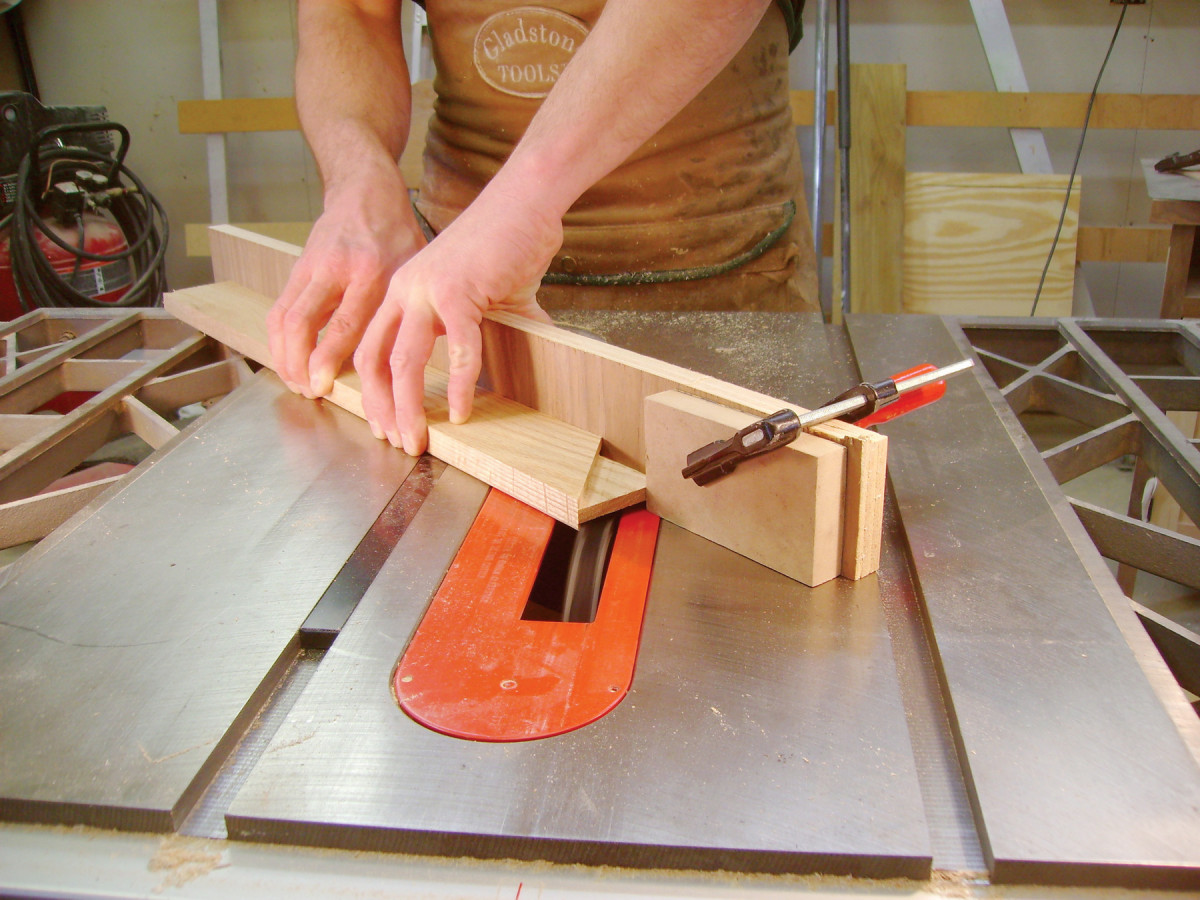
7. Dado both sides of a scrap piece to form a tenon. Adjust the blade’s height until the tenon slides nicely into the mortise.
8. Set the saw’s miter gauge to 45°, then make a series of dado cuts on the stiles to form one side of the tenon. Cut both ends of each stile, from opposite faces.
8. Set up your miter gauge to cut the actual tenons (Photo 8). Again, start with a test piece. Swivel the miter gauge to 45°, either way. Fasten a fence to the miter gauge and clamp a stop block to the end of the fence. The exact position of the block will require some fine-tuning. Use a test piece that’s the same width as your stiles and rails. Position the stop block so that your dado set cuts right to the tip of the test piece. Once the stop is positioned, cut the stiles. This requires more than one pass. Start with the stile pulled away from the stop, then make a series of overlapping cuts. Cut both ends of each stile this way.
9. Reset the miter gauge’s angle in the opposite direction. Cut each tenon’s opposing face.
10. Mark the tenon’s length. Measure the distance from the outside edge of a rail to the bottom of the mortise. Mark this distance on the end of the tenon.
9. Reset your miter gauge to cut 45° in the opposite direction (Photo 9). Again, make some test cuts to position the stop block. The shoulder this cut creates must be exactly in the same plane as the one you made in the last step. Once you’re all set, cut the opposite sides of all the tenons.
11. Make two cuts to trim the tenons.
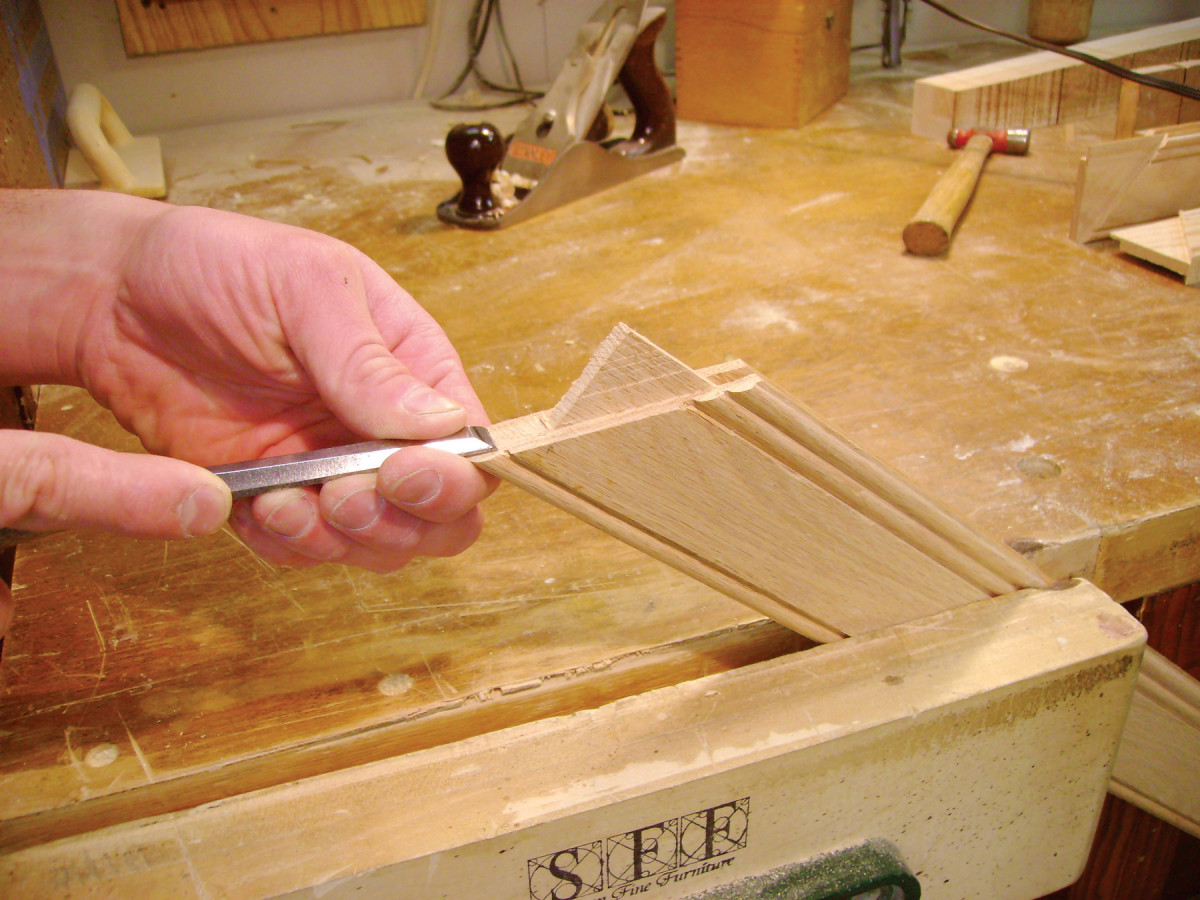
12. Pare the saw cut so it’s flush with the shoulders.
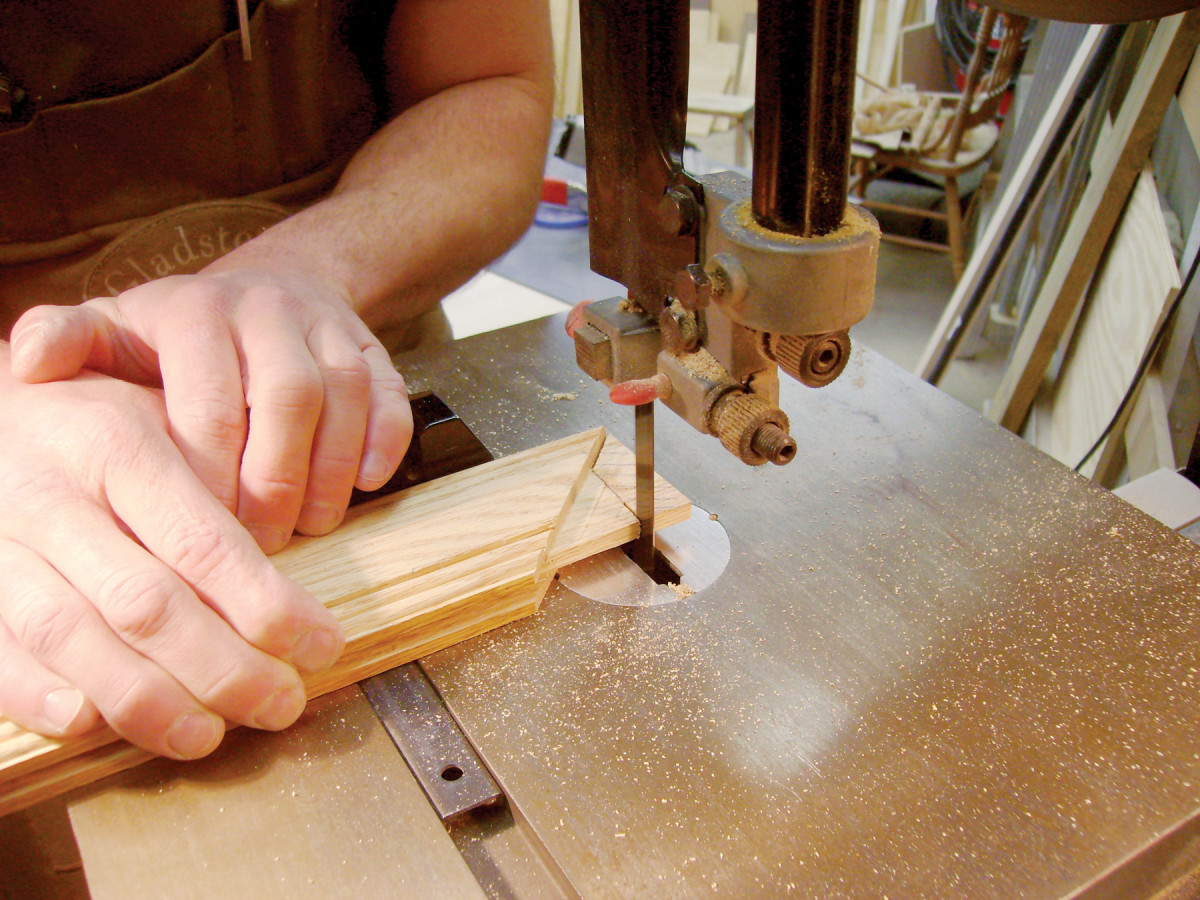
10. Cut the tenons to length. First, set a combination square to the distance from the edge of a stile to the bottom of a mortise (Photo 10). Extend the square’s blade another 1/32″ or so for clearance, then mark this distance on all the tenons. Saw the waste on a bandsaw or by using a handsaw (Photo 11). When sawing the mitered portion, stay 1/32″ or so away from the shoulders. Pare this cut with a chisel (Photo 12), and the joint is complete.


