We may receive a commission when you use our affiliate links. However, this does not impact our recommendations.
See how shop-made ply creates unique project possibilities.
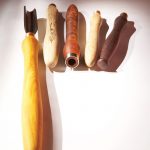
Shop-made ply can achieve shapes and forms solid wood just can’t handle.
The title of this article may sound silly, or perhaps us woodworkers have just run out of things to write about? Now that is silly. But why on earth would anyone want to make plywood? It’s almost as ridiculous as saying, “Honey, pick up a quart of aliphatic resins at the supermarket. I ran out of wood glue last night.” You don’t make plywood, you buy plywood, right? No one but a caveman would build anything out of BC plywood. Or would they?
The Why
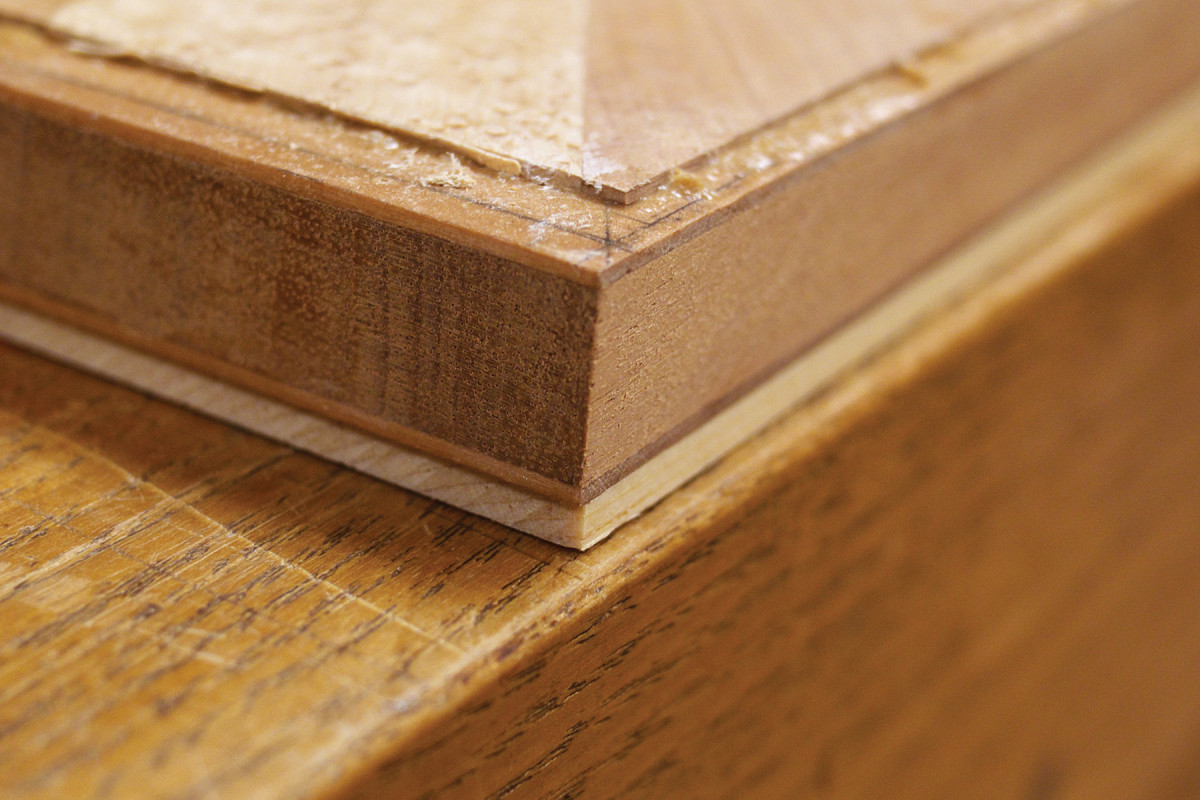
Enjoy your sandwich. Can you count the layers in the image above? From top to bottom: sunburst veneer of maple and beech, 1⁄16″ cherry, quartered mahogany core, 1⁄16″ cherry, 1⁄8″ white pine.
Plywood: What do you picture? A 4×8 piece of laminated who-knows-what filled with tan putty and football-shaped dutchmen that you would only use for cheap shop furniture or college bookshelves.
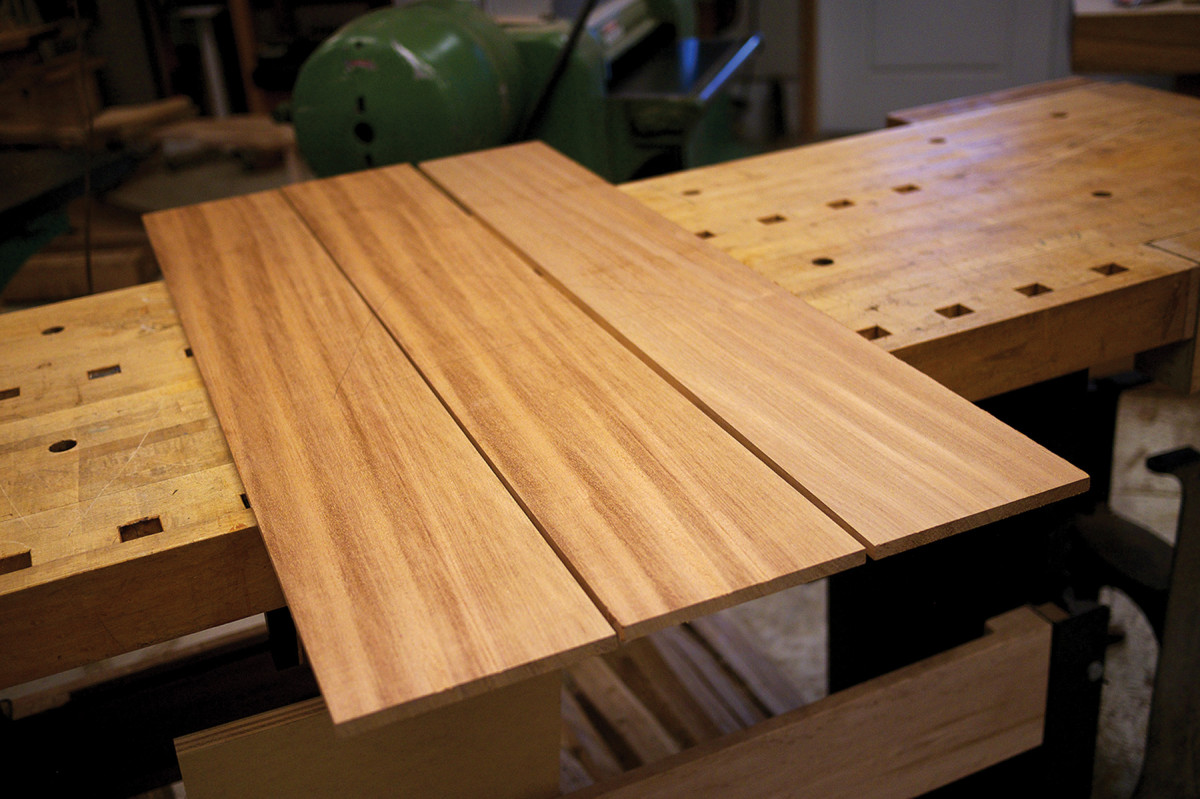
Stock prep. These quartered boards of mahogany are a perfect material for your core. If you can get all your boards from one plank of wood, all the better.
First off, forget about the 4×8 thing. You’re not mass producing this stuff – you’re making up pieces just slightly oversized. Say you need a cabinet door, 18″ x 24″. You make a piece of plywood that’s 19″x 25″. Done. You’re basically making what you need, when you need it.
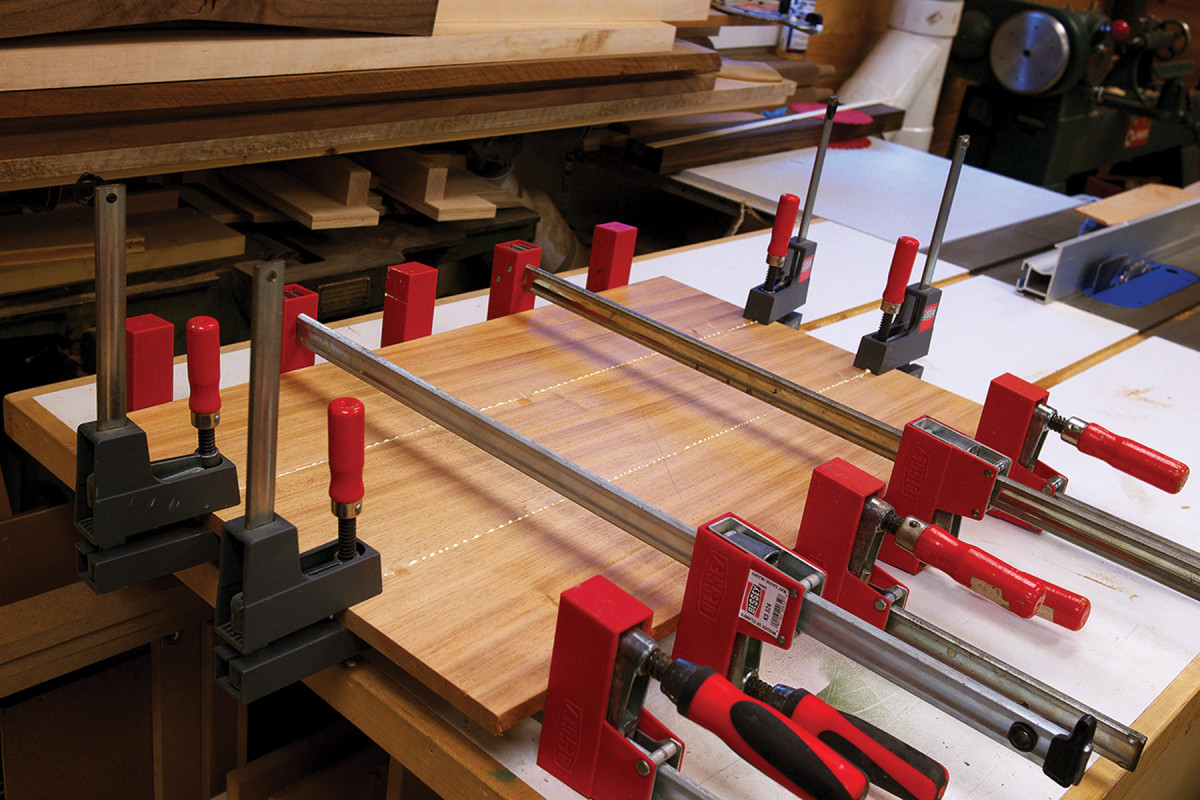
I want to squeeze. Basic panel glue-up here. No rocket science involved.
And here’s why you want to make your own plywood. Not for a quick set of cabinets, not for edge-banded bookshelves for the guest room. You’re making plywood for real, lasting furniture from wood that you select. That unique project that demands something special – and that special something is called veneer. Yes, you can veneer to solid wood, but don’t expect it to stay stuck for very long. Wood movement will wreak havoc with it. The trick, ironically, is to actually use veneer to immobilize the wood.
Lumber Core
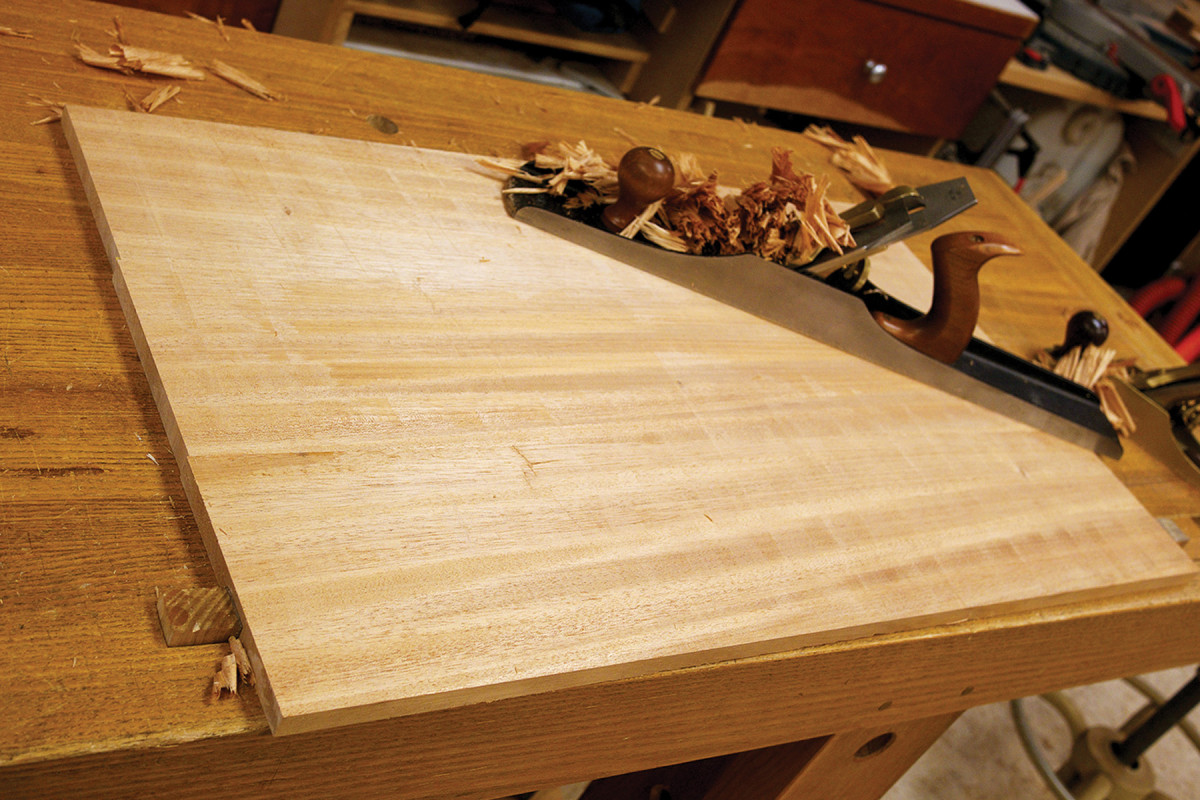
Core smoothing. A light pass with a jointer plane makes the core nice and flat after coming out of the clamps. Don’t get overeager here. You’re just getting rid of slight misalignments. The final pass should be a light traversing. This leaves a toothy surface your glue will love.
My favorite type of plywood is called “lumber core.” You’re probably picturing plywood as an odd number of equal-thickness layers of veneer. The vast majority of plywood falls into this category. But here’s why it’s not the greatest for most furniture making: When working with typical plywood, attaching hardware (especially to the edges of the panel) can be problematic. Because in typical plywood you have equal thicknesses of plys, you’re presented with narrow bands of long grain in between rows of end grain, making the screw-holding properties of the plywood iffy. With a lumber-core panel, you can treat the entire panel as solid wood, attaching hardware in the same manner as you would with solid wood.
A lumber-core panel, like any plywood, is made from an odd number of layers. This serves the purpose of balancing the layers. Balancing means that the grain in the two outermost layers of a panel are always running parallel with each other, but perpendicular with the layer they are glued to. This keeps the panel flat. It doesn’t matter if there are three layers or 301, each layer is glued at 90° to the layer beneath it, and opposing layers are always parallel. You can’t screw this up as long as you orient each layer at 90° to the previous.

Thick & rich. This is 1⁄16″-sliced veneer – awesome stuff for lumber-core panels. This happens to be cherry, but any wood will work.
To maximize the solid-wood effect of lumber core plywood, it’s important to make the central core thick. If your goal is a 3⁄4“-thick panel (and that number is arbitrary – you can make whatever thickness you like), then your central core should not be less than 7⁄16“. This leaves you some room for varying thicknesses of the outer layers.
The core material is important. You’ll want to select the best quality material you can find. I like to use mahogany, but any stable wood is acceptable. Mahogany has a fine texture, and it is stiff and light. These attributes make for a wonderfully lightweight but strong panel. Here’s the other important thing: This central core should be made from the most quartersawn wood you can find. Riftsawn is OK, but try your best to get those growth rings dead perpendicular to the faces. I usually have to select narrower boards to get the most quarter across the full width of the board, then glue these up until I get the width I need. This is typical edge-joining work. Easy stuff.
Once the core is glued up, you’ll need to surface the faces by hand (often the case due to the width) or run the panel lightly through either a surface planer or sander. You don’t want any raised ridges on the joint lines or plane tracks that might telegraph through your veneer.
Remember, you’re building this panel oversize, so don’t get too finicky on dimensions just yet. Just make sure it’s bigger than it needs to be.
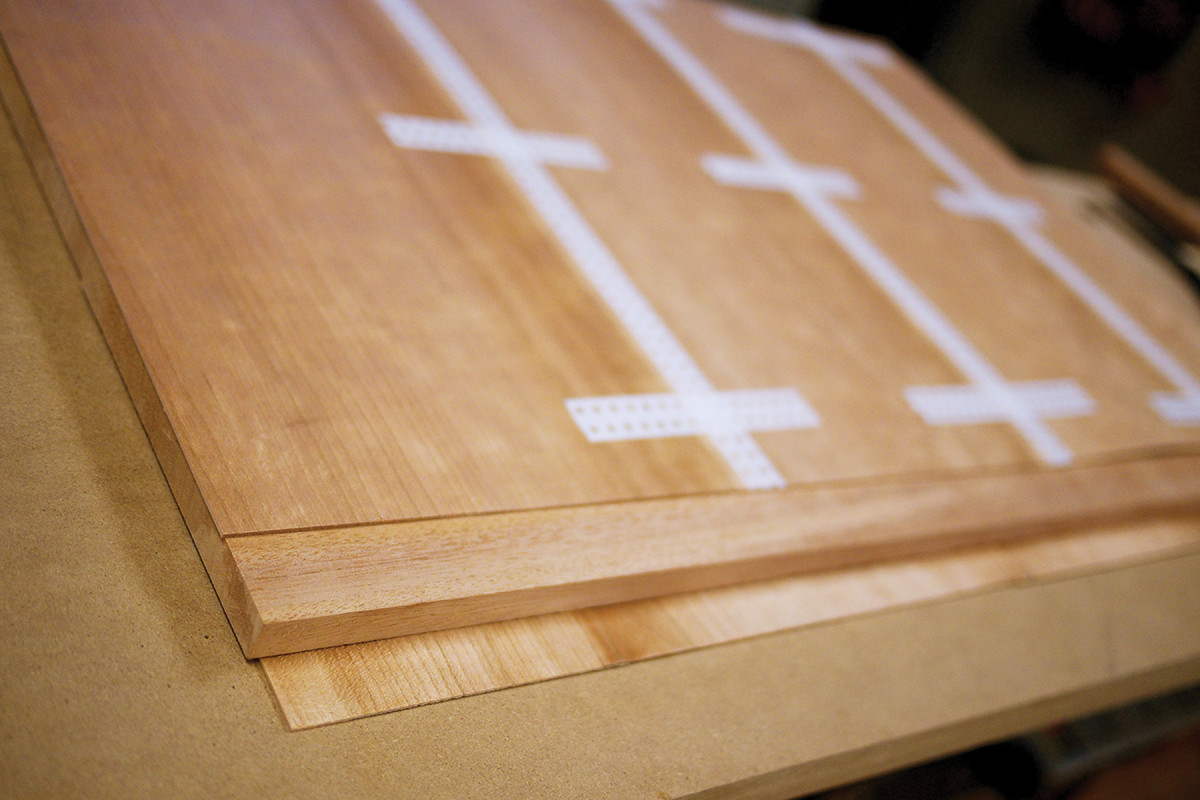
Layered up. Here I’ve joined the edges of the 1⁄16″ veneer with perforated veneer tape. Note that the grain direction in the core is perpendicular to the outer layers.
Once the core is ready, you can begin preparing your next two outer layers. Orient the grain perpendicular to the grain in the core. I like to use thick-sliced commercial veneer, and 1⁄16” veneer is readily available in many species (I tend to buy from Certainly Wood). The thicker dimension makes it a bit easier to work with. Jointing veneer might seem like a tricky proposition, but it’s actually quite easy. My favorite way is to use a couple offcuts of hardwood, about 3⁄4” thick, then place the veneer in between these boards, making sure the veneer is right at the edge of the board, then pass the whole sandwich over a jointer, or clamp the whole works in a face vise and have at it with a jointer plane. Because the thin veneer is held tightly between the sacrificial boards, it planes exactly like a thick piece of solid wood. You can get perfect edge joints in veneer with this method, and it’s quick and easy.
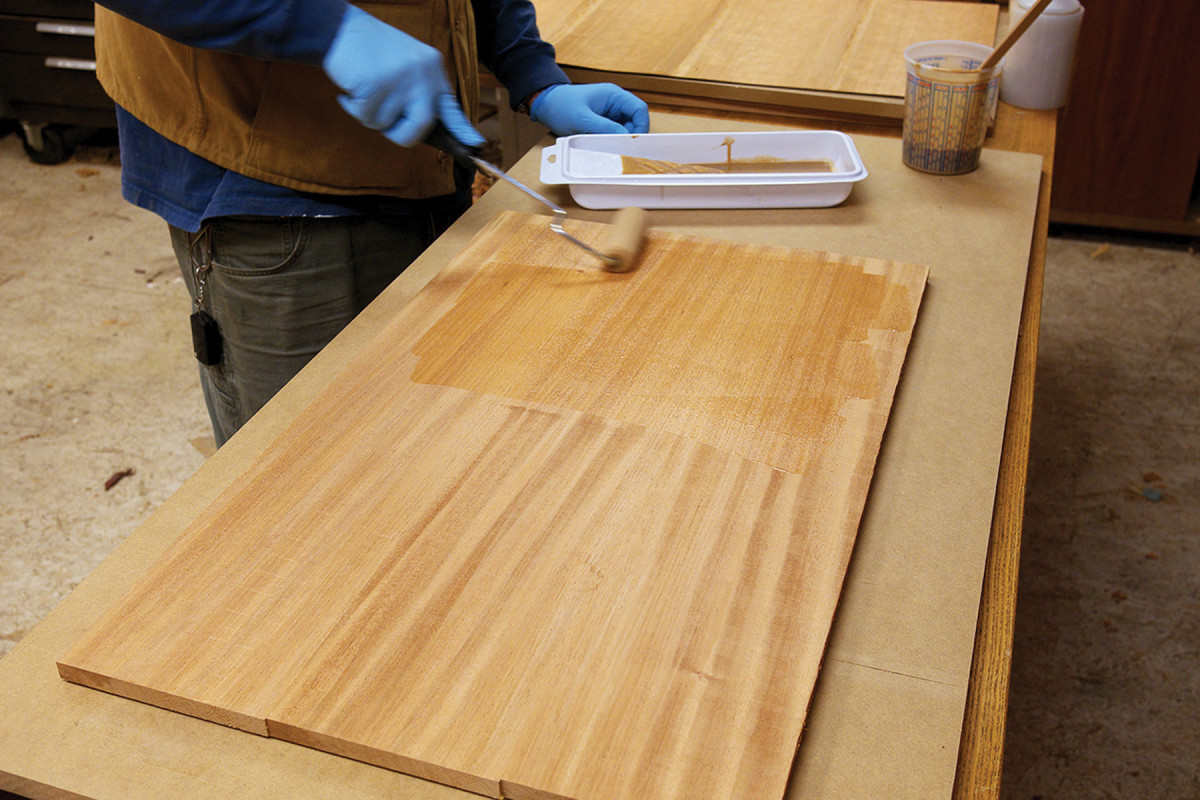
Apply the glue. I like to spread the Unibond with a disposable roller. Make sure it’s a nice, wet coat with no dry areas.
To join the veneer, first tape the pieces together on the backside with blue painter’s tape, pulling the tape tight across the joint (the tape will stretch slightly before breaking) every 3″ or so. Now flip the veneers over and repeat the process with water-activated veneer tape, adding a single strip of tape down the joint.
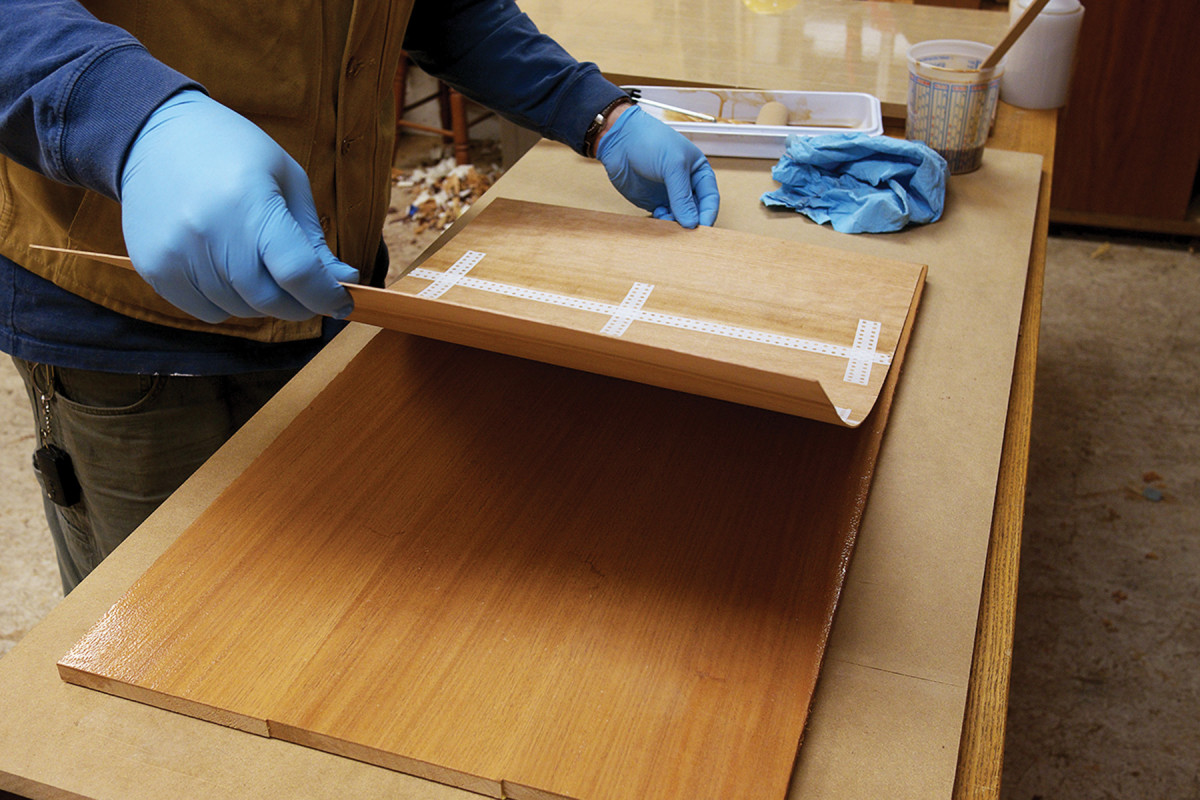
Make the sandwich. With the core ingredients prepared and the dressing applied, you can set the outer layers in place.
The water-activated veneer tape is important. It shrinks as it dries, drawing the joint tightly together. It also removes easily after coming out of the press with the wipe of a damp rag and a little scraping action. Blue tape is a real bear to remove after coming out of the press.
Once the veneer tape is on, flip the piece over and remove the blue tape. Make two pieces like this, one for each side of the core. These pieces should be just about the same size as the core, but never bigger. You don’t want thin, overhanging edges to get damaged in the press.
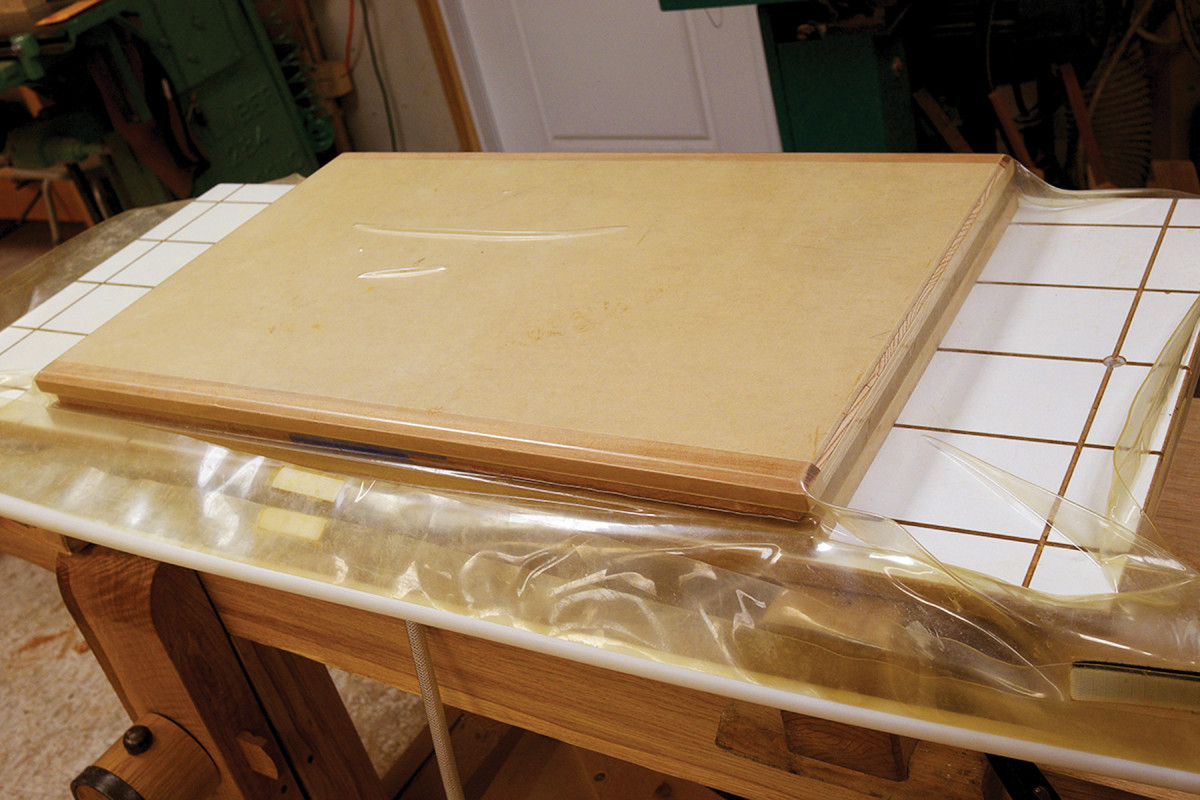
Press it real good. Into the bag the panel goes, along with two MDF cauls to even the pressure. I let it sit overnight. If you use Unibond, smear some inside a Ziploc bag, seal it up and use that to determine when it’s cured. It should crack like burnt cheese on the edge of pizza when it’s cured. Mmm, pizza.
The outer layers can now be glued to the core using your preferred method. I use a vacuum-bag system, but you can get excellent results with dirt-simple curved cauls and clamps. If you don’t mind tying up your bench for a few hours, you could use several go-bars and a big caul (3⁄4” MDF is great) to exert enormous pressure on the panel. But back to the vacuum-bag system. You don’t need a high-dollar electric pump system to get the benefits of squishing wood under atmospheric pressure. Do an internet search for “skateboard veneer press” and you’ll find a company called Roarockit that makes manual veneer presses. Here’s the thing with using a vacuum to make plywood: Atmospheric pressure exerts a fixed amount of force (unless you go to the top of a mountain where the air is thin). That plastic sack is pushing on your veneer the same whether you suck out the air with a fancy electric pump or an inexpensive plastic pump that you operate by hand. Your bike tire doesn’t know if it’s holding 50 pounds of air from the gas-station compressor or from the foot pump you’ve had in the garage since 1986.
Glues
This subject is open to some debate. The traditional choice is hide glue, and if you’re experienced with using hot hide in veneering applications, I don’t see a reason you can’t use it to make your own plywood. You don’t need any fancy tools, and we all know the holding capability of hot hide glue. My favorite, however, is Unibond 800. It cures hard and is very much like hot hide in its cured state. It is, however, chemical-based, and you may not feel comfortable using it. To each his own. Epoxy is also an option, but it is quite messy and will likely ruin your bag or press if you’re not careful about squeeze-out. The Unibond stays put and doesn’t squeeze out like epoxy. Yellow glue can also be used. I don’t recommend contact cement. It’s good for Formica, but not so useful for fine furniture.
After the Press
When your panel is cured and out of the press, you can treat it just like solid wood, except for planing the surface (more on that in a bit). If you wish to add more layers of veneer, it will add to the rigidity and stability of the panel. To keep things manageable, I don’t usually glue more than two layers on at a time.
Joining thick veneers. Here I’m using ye olde technique of candling to check my joint.
If I want my outer veneers to be made of thicker material, to allow some extra meat for dressing the stock after glue up, here’s what I do. On the chest lid shown on the first page, I wanted the show side to be made from the same material as the rest of the chest: white pine. This allowed me to treat the show surface just like the rest of the chest, meaning I could handplane the surface more aggressively, even to the point of inducing plane tracks if I so desired. This would be risky in thinner veneer and wouldn’t allow for much error or prevent tear-out. By using a full 1⁄8“-thick veneer layer, I can handplane the surface without worry and reap the benefits of the cross-grain construction of lumber-core plywood. The thicker stuff also finishes like solid wood. See, I told you this stuff was great!
Batten up. A 1⁄2″-thick batten raises up the pieces just enough to exert the perfect amount of pressure at the joint of these thin boards.
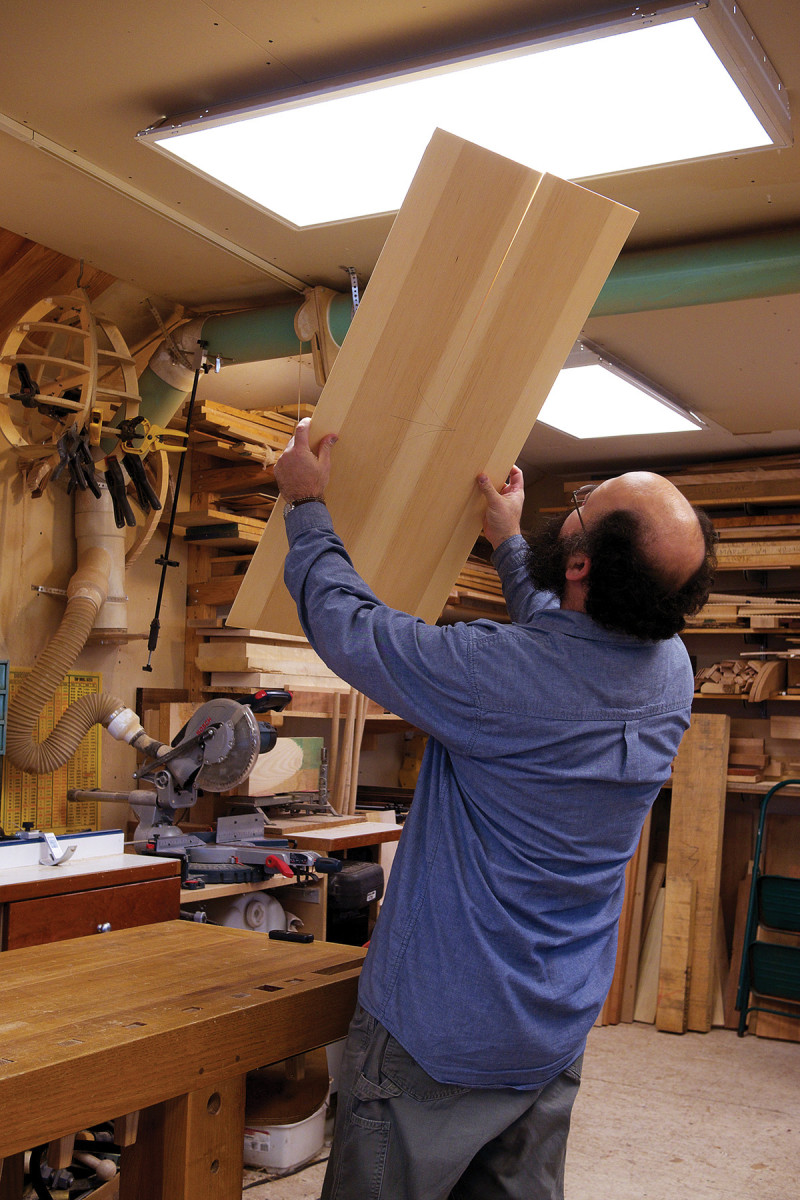
With the thicker veneers, I don’t use veneer tape to join the edges. Because the wood is thicker, the edges themselves also need to be glued. I use an old luthier’s technique to do this: I joint the edges on a shooting board, because the wood is so thin. I simply block up the veneers off my workbench surface so they are presented to the blade of my jointer plane, which I run on its side on the benchtop as I plane the edges of the veneers. To check the quality of the joint, I hold both pieces up to a strong light to check for leaks. This is called “candling.”
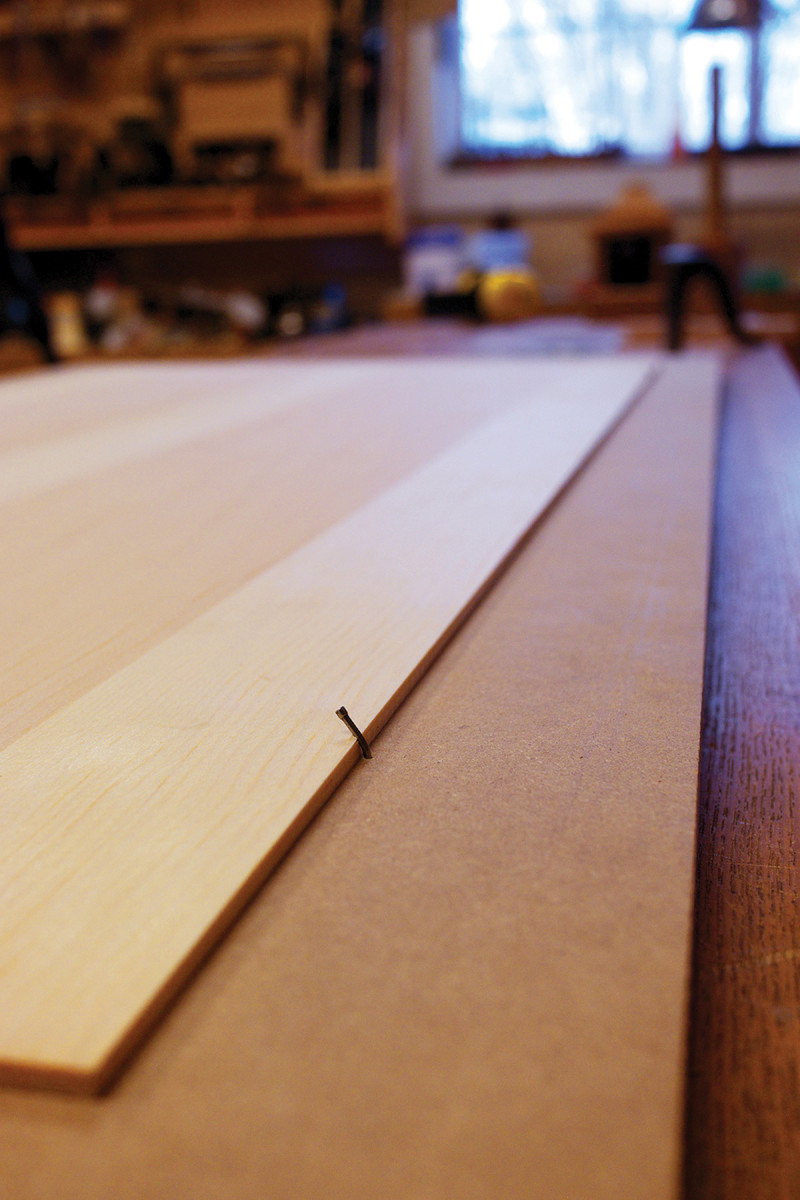
Nail clamps of yore. Another olde way of doing things. (Read the text for details – you didn’t think I’d reveal all in the captions now, did you?)
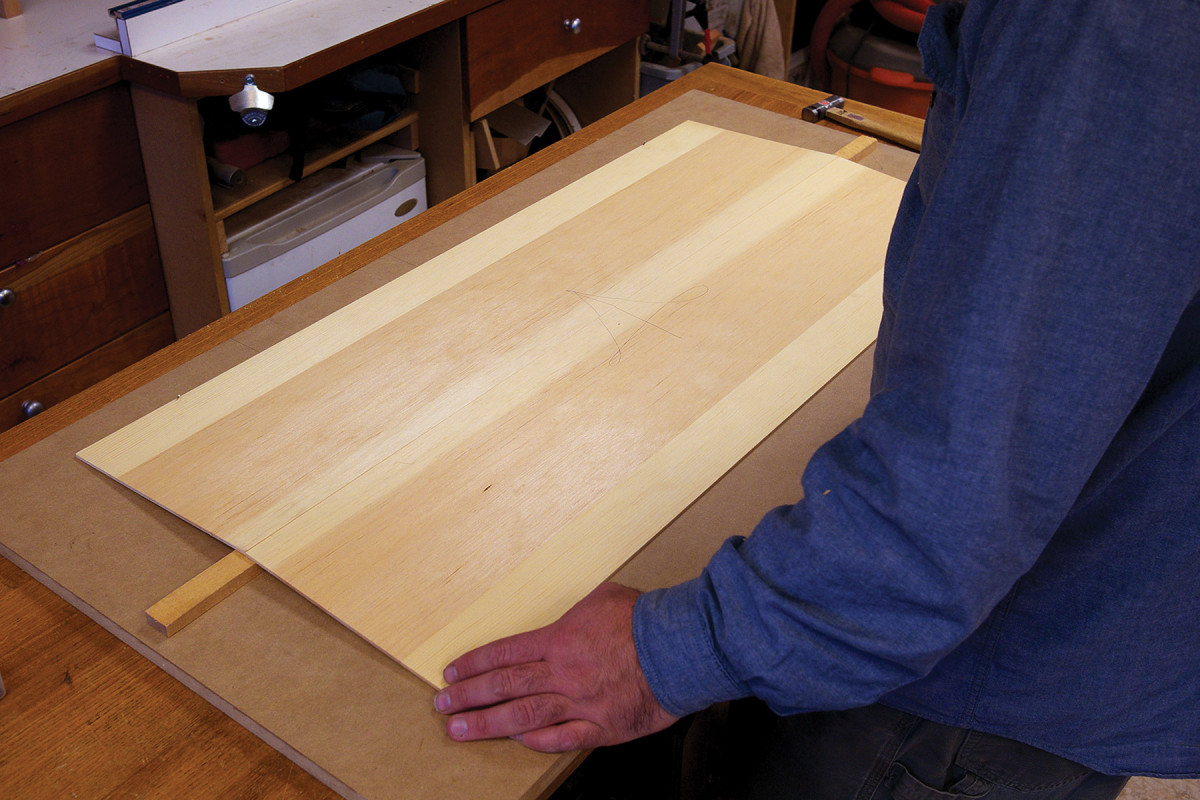
To clamp these thin veneers, I slip a 1⁄2“-thick batten under the joint, then drive small nails right into my workbench (or a scrap of MDF if you’re sensitive about your benchtop) at the edges of the veneers. Apply glue to the joint, remove the batten, then press the joint flat to the benchtop. A piece of wax paper under the joint keeps the assembly from getting glued to the bench. Press the joint flat and feel that the glue line is flush. Now place a heavy weight on the panel and let it cure. That’s it. The nails keep enough pressure on the joint while the glue cures, and the heavy weight keeps it from popping up under the tension of the nails.

Sit on it. A weight keeps it all from misbehaving while the glue cures.
When you think about it, making a plywood panel is really only one more step beyond a panel of edge-glued boards. And the result is a dead-flat and stable board that you can work just like solid wood. Once you add this technique to your woodworking arsenal, you’ll realize you can make shapes and forms that solid wood just can’t handle.
Here are some supplies and tools we find essential in our everyday work around the shop. We may receive a commission from sales referred by our links; however, we have carefully selected these products for their usefulness and quality.