We may receive a commission when you use our affiliate links. However, this does not impact our recommendations.
A Tool Tote designed to fit inside a Festool/Tanos #4 Systainer is perfect for organizing your hand tools.
Using digital tools, you can make this handy tool tote in less than an hour.
All woodworkers love tools. As your collection of tools grows, sooner or later you’re going to need something to put them in. The problem is, aside from the classic, wonderfully designed, heavy wooden tool boxes that some woodworkers build, you’re often left with few choices when it comes to making a small toolbox that organizes and carries your tools to say, a woodworking workshop or perhaps to a project outside your shop.
I’ve designed a handy, light-weight, customizable tool tote that organizes your tools and fits inside a Festool/Tanos Systainer box that you can make with a CNC in less than an hour.
Tool Organization
Tool organization is an ongoing challenge for every woodworker. In your shop, you may store your tools in drawers, tool boxes or a tool wall/cabinet. The problem with the first two solutions is your tools are out of sight and may require moving or sliding something out of the way to get at the tools you need at the time.
Toolboxes excel at transporting tools with dedicated compartments or dividers to protect different tools. But, if you need to carry a lot of tools they need to be stored in layers, bins or sections. Depending on the design, this may require a bit of digging to get to the tool you want. Large toolboxes can be quite heavy and unless it’s close to bench height, a lot of bending over is required.
The advantages of a tool wall or tool cabinet are everything is in sight, organized and accessible. If it’s set up right next to your bench, that also makes it easy to develop good habits of putting your tools away immediately rather than letting them pile up on your workbench.
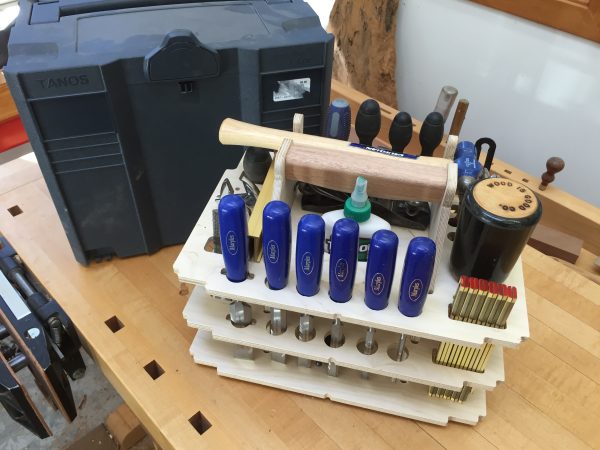
This tool tote provides the benefits of a tool wall and a portable toolbox in one package. It’s lightweight, open and fits into a protective case for transport. When you get to your destination or woodworking class, pull out your open toolbox, place it on your bench and you’re ready to go. Rather then tools being scattered all over your workbench, toolbox, and floor, like a tool wall or cabinet, all your tools are in sight and easily accessible.
With that in mind, I’ve created a Festool/Tanos hand tool insert designed to fit in a #4 Sys container. There are a handful of commercially available Systainer tool inserts including one from Festool and other German specialty companies. They look to be excellently designed but the downsides are they’re expensive and designed for very specific sets of often hard-to-find tools.
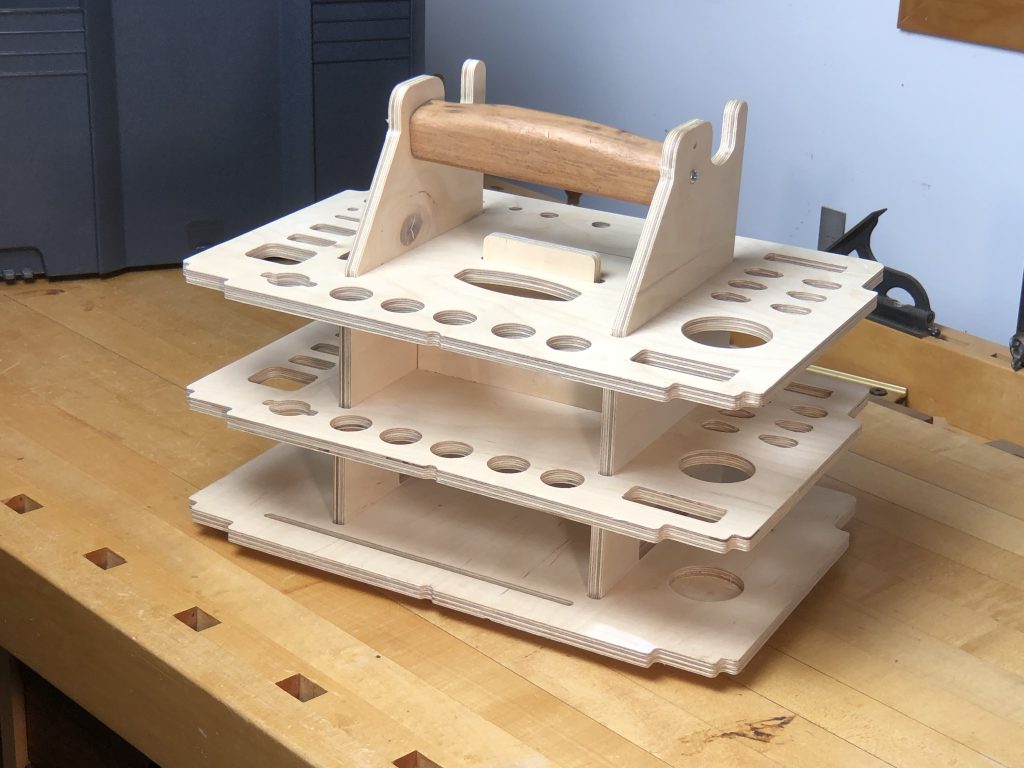
The two goals of my tote design are tool organization and flexibility. To the former, you can use the hand tool focused layout designs I’ve created or design your own layouts for different toolsets. Once your CNC is programmed, you can machine a new tool tote in about 20 minutes. To the later, this insert set easily breaks down into a short, 4-layer stack of 9mm-thick plywood. The ease of creation and storage encourages you to make dedicated tool totes for different situations or even for specific woodworking classes. You can store 6 or more stacked tool totes sets in a #4 Systainer box, out of the way when not needed. Pick the layout you need, add your tools and away you go.
Making a Tool Tote
This is a digital woodworking project that requires a CNC or someone to machine it for you. To make one, you’ll need about a 2’ x 4’ piece of 9mm Baltic Birch Plywood, a .250” spiral router bit (compression preferred) a small or large CNC, the project CAD files and the ability to program simple CNC routines with CAM software. If your CNC is small, you can use plywood pieces as small as 12” x 18” or so and machine each layer individually.
The files for this project are online and free to download, just go to my website: woodworking.digital and click on the free downloads page. The files are in Rhino3D format and the nearly universal DXF file format you can open or import into any CAD software to modify or create your own tool layouts. I’ve included a 1/10th scale PDF file in case you need another format.
Yes, it’s possible to make this without a CNC. Comparing the two woodworking methods, traditional vs. digital, provide a useful illustration of the benefits of using digital tools on a project like this. Figure 20 minutes on a CNC versus say, 4-8 hours using a hybrid toolset. Why? It’s a precision project — which favors CNC machining, with a lot of little detail cuts and other added challenges without at least a CNC-made or other precision patterns. The most notable detail to execute is the slots for the vertical supports. You’ll need to finesse the fit with lots of tests, a light touch, tight hold downs, and a precision fence system. The holes and other tool openings could be made with a drill press and jigsaw. For woodworkers that want a tote and don’t have a CNC, I’ll add an option soon for ordering one online from my digital.woodworking website.
Variables
Like most CNC plywood projects, the variable you’ll want to always keep in mind is the thickness of the plywood you’re using. Because plywood varies so much, you need to measure it precisely. Better yet, use the plywood thickness gauge I covered in a previous article. Once you have your measurement, you can modify the width of the vertical pass-through slots for the tool tote’s vertical supports. I show these as a separate layer in the CAD drawings. As an alternative, if your CAM software supports it, you can add or subtract a material offset for the slot cutting routine and leave the slot width constant. The idea is the slots need to be fairly tight when you push through the vertical parts of the tool tote. Too loose and the tool tote might wobble. A perfect fit is worth trying for.
The drawings are created in layers dedicated to verticals slots, tool layouts, pocketed areas for the bottom layer, guidelines and the outside profile cuts. I strongly recommend machining all the interior cuts first and adding a few tabs or bridges to the final outside profile runs. That way, the completed tool tote layer won’t wobble around and be damaged on the final pass.
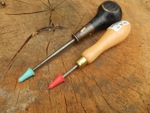
When I CNC machine projects out of thin plywood, I use one of MDF spoil board/registration systems underneath so that I can cut all the way through the bottom plywood layer without damaging my bed. For this project, I prefer a .250” compression bit which has both up-cut and down-cut cutters. For those pass-through slots to be accurate, it’s important to measure the width of the cutting diameter of the bit you’re using and put the information to your mill profile in your CAM program or other machine programming setups. For example, if your width is .243” then program that in, not the default .250”. This way your cuts are accurate.
To machine with a compression bit where the tip of the cutter is .25″ long, I make my first pass .27” deep and the final pass the remaining thickness of the plywood plus .001″ to get clean surfaces, top and bottom. Depending on your CNC and router or spindle, plan on cutting fairly slowly for a clean edge cut. Even on a large CNC, I usually machine projects like this at 50-60 IPM.
Tool Tote Layouts
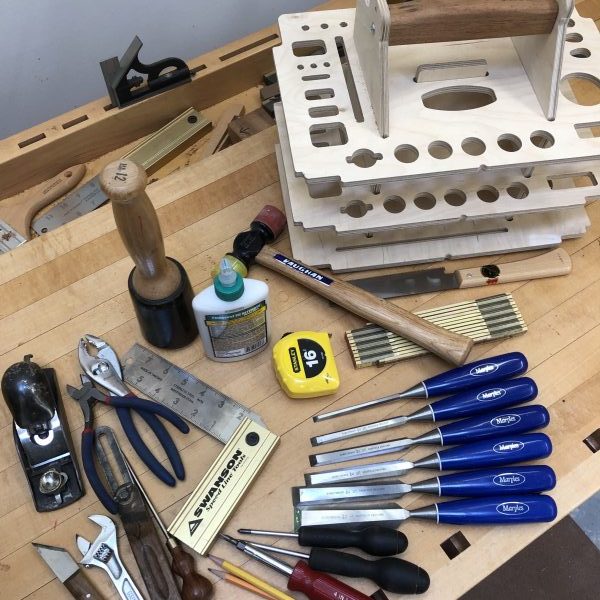
I’ve included a base tool layout for a collection of tools that would be typically needed in a hand tool-focused woodworking class. There’s room for a set of chisels, mallet, various pliers, squares, hammer, screwdrivers, block plane, and even a take-apart Japanese handsaw. On a second plan, I’ve included space for a digital caliper case. Soon, I’ll add another tool tote design for medium hand planes and other bulky tools. On the CAD drawings, I’ve included a starter set of tool openings you can select from and move around the top two layers to find your ideal layout. Remember, my tools aren’t your tools, so measure your own tools to create the openings you need.
If you come up with a great new tool layout of your own using these patterns that you’re willing to share, email me a photo and your DXF file and I’ll put it up on my woodworking.digital website for other woodworkers to use. Together, we could build a great library of tool tote tool layouts that fit in Systainers to share with other woodworkers.
More to Come
In the future, I’ll add several other smaller tool tote designs with a different focus and share them with Popular Woodworking’s readers. Tool carriers for homeowners, totes for techie uses, etc. These will be smaller totes, won’t need a Systainer and can be made with a CNC or a laser cutter out of 6mm plywood. There are even designs that make use of 3D printing for additional sections like new part organizers for household tool totes, more comfortable handles, specialty tool holding areas and more.
Additional Resources
- Tool Tote Files to Download
- Digital Woodworking on Instagram
- Digital Woodworking YouTube Channel
- Personal Work on Instagram
Here are some supplies and tools we find essential in our everyday work around the shop. We may receive a commission from sales referred by our links; however, we have carefully selected these products for their usefulness and quality.