


We may receive a commission when you use our affiliate links. However, this does not impact our recommendations.
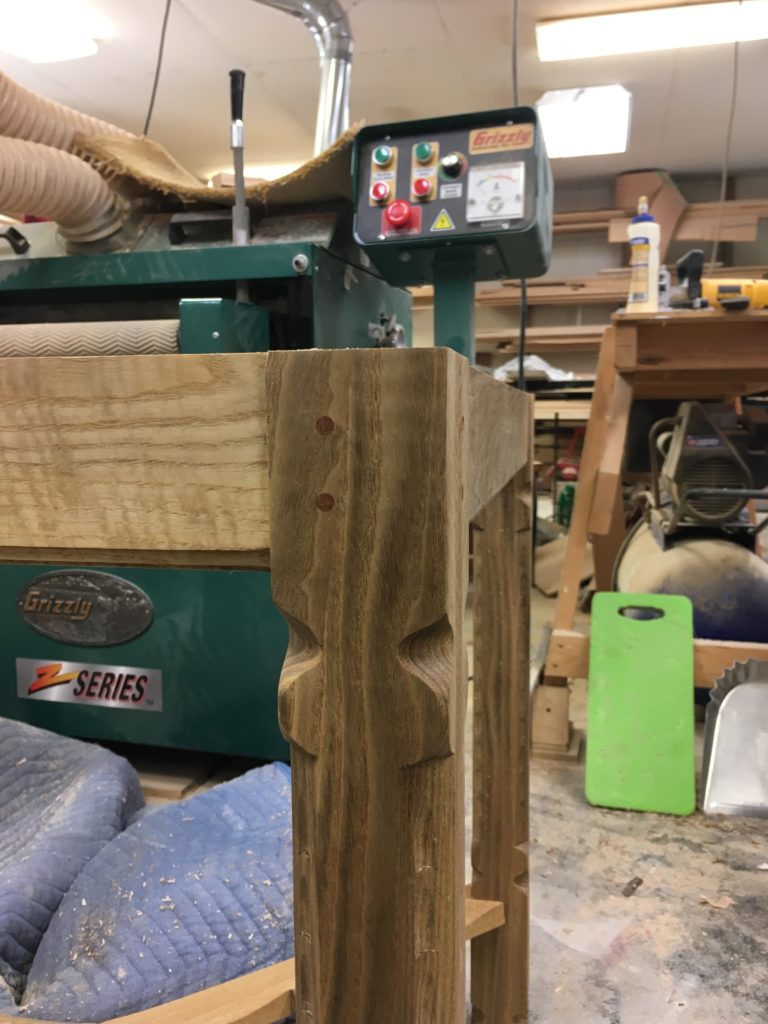
Every so often I do something dumb. A few weeks ago I was drilling 1/4″ holes to peg the tenons for a table’s apron. I started with a brad point bit but switched to a Forstner after finding that the first bit had torn the grain at the edge of the first two holes. I glued the pegs into those holes anyway, hoping to scrape out the tears when I trimmed the pegs flush.
The tears were too deep. So I drilled larger holes, thinking I could solve the problem by inserting 1/2″ plugs that would look like pegs and cover the tear-out. Bad decision.
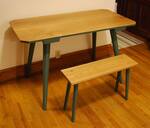
Oh, the shame. Taking one for the team here. Those plugs look like something from 1975. They definitely do not belong on this table, which is based on one of Ernest Gimson’s 1908 designs.
The larger “pegs” were completely out of scale with the rest of the table. My fix had just made the problem worse. I was going to need a patch.
Often called a “Dutchman” or “Dutchman’s patch,” this handy technique can save the day in a variety of disastrous situations to patch wood. The etymology of the term is disputed. Some see it as a slur based on the notion that Dutch craftsmanship is inferior, and so, needs patching. Others see just the opposite: A patch that’s good enough to be invisible requires some skill (or at least quite a bit of care), not to mention canniness. Still, others relate the patch to the story of the Dutch boy using his finger to plug the leaking dike.
I’ve long mused that the term might be related to the purported Dutch propensity for thriftiness – like “Scottish,” when used by the Scots’ southern neighbors. To go Dutch is to pay for your own dinner. Calling in a “Dutchman” in my own circumstances was certainly more economical than rebuilding the entire table.
Step 1: Lay out the patch
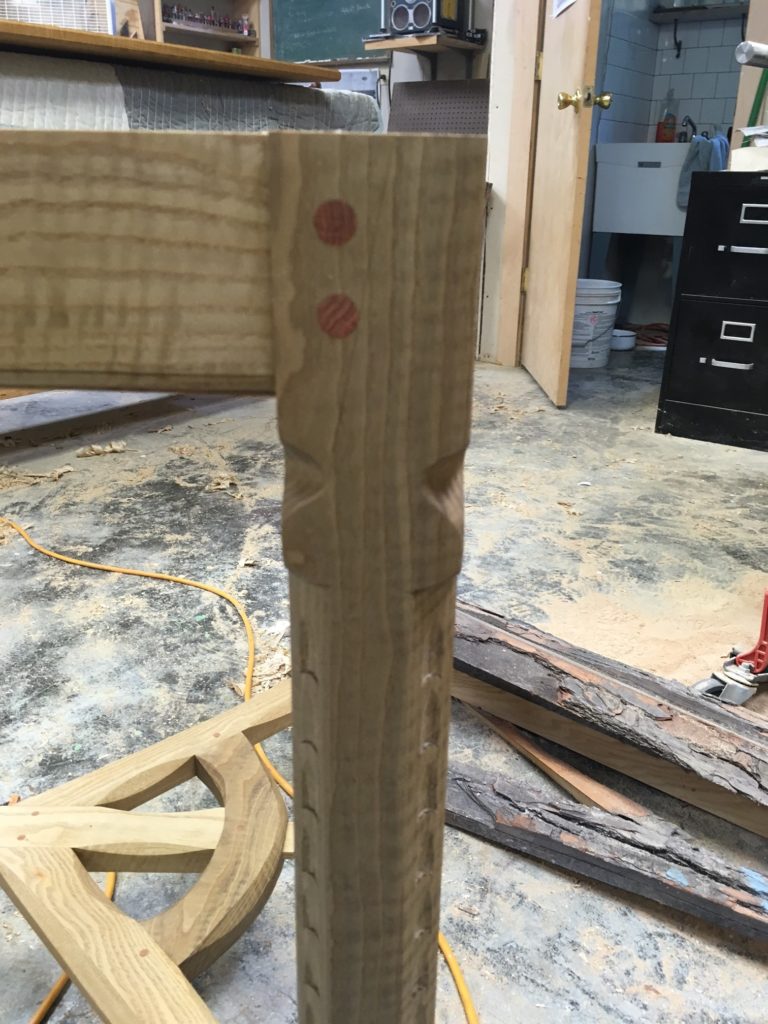
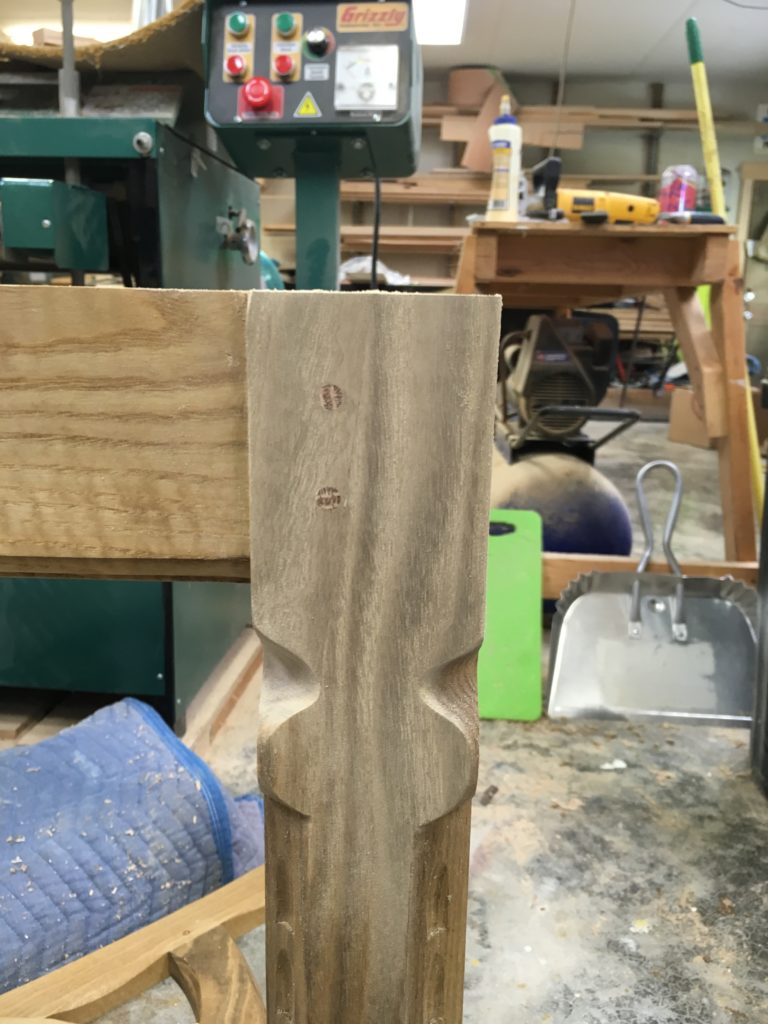
For my table, the patch would have to cover the area occupied by the plugs. Because long grain joints are much less visible than those involving end grain, I wanted to minimize end grain or avoid it altogether. In my case, the round carving near the top of the leg provided a good ending point at the patch’s bottom, and I decided to carry the patch all the way up through the leg’s top.

This image jumps ahead a few steps to illustrate some of the factors involved in determining the layout. The patch will be easiest to work with if you cut it close to finished size before you glue it in place. In this case, the patch needed to line up with the inside corner of the leg. I marked out the approximate outline of the carving that would come after glue-up.
Step 2: Cut the patch material
If your work is going to be painted, this part will be easier because you won’t have to think about matching the grain. With my table I had to take into account the grain, the figure, and the color of the curly sassafras I had used for the legs. I found an offcut from a leg and ripped a piece of similar looking material about 3/16″ thick. I cut the piece roughly to size. Don’t forget to take the grain orientation into account, too; the patch will be more obvious if the grain runs at a different angle from its surroundings.
Step 3: Lay out the ground
Lay the patch in place on your work piece. For this step I set my table on a blanket on the floor. Carefully trace the outline of the patch onto the ground, then use a marking knife to create a sharp edge. Set a router or laminate trimmer to the requisite depth — in my case, it was just over 1/8″ — and remove the waste, leaving just a little near the knife mark to clean up by hand. Next use a wide chisel to pare away this last bit of waste up to the line, undercutting a little.

Ugly. The ground is partially cut in this image. I left the top and the corner for last, knowing that I would need to hold the router perfectly flat and square to make a clean joint.
Step 4: Trim the patch to size
You can plane a slight bevel on the edge for a tighter fit. I tried the fit dry and kept trimming until the joint looked good. Then I cut the other edges roughly to size.
Step 5: Glue
Apply glue to the ground, being sure to apply some to the shoulder where the joint will come together. Clamp the patch in place, pulling it down as well as sideways, to get a tight joint.

Deja vu. Here is the patch clamped up.
Step 6: Trim
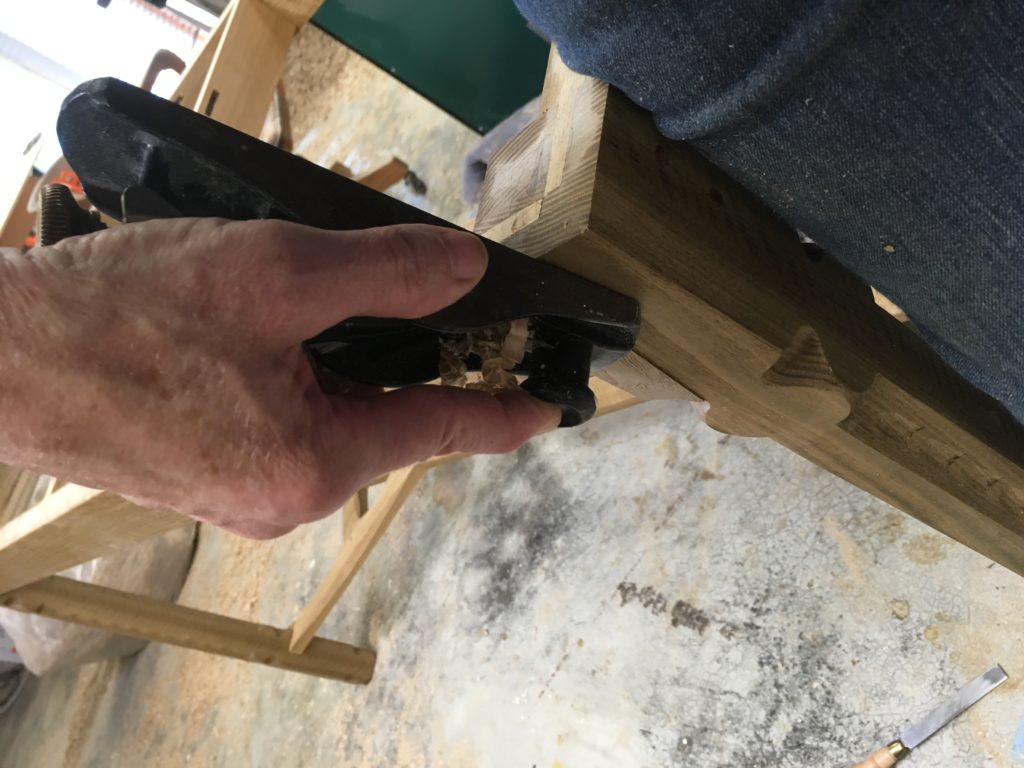
When the glue is dry, trim the patch flush with a block plane. In this shot, the table is standing upright on the floor.
Below is the patch after planing and a light sand. At this point I marked out the positions of the pegs (remember, the actual pegs, which are structural, are still underneath these subsequent layers), drilled shallow holes (about 1/4″ deep) to the correct size, and inserted plugs so that this leg would match the rest of the table.
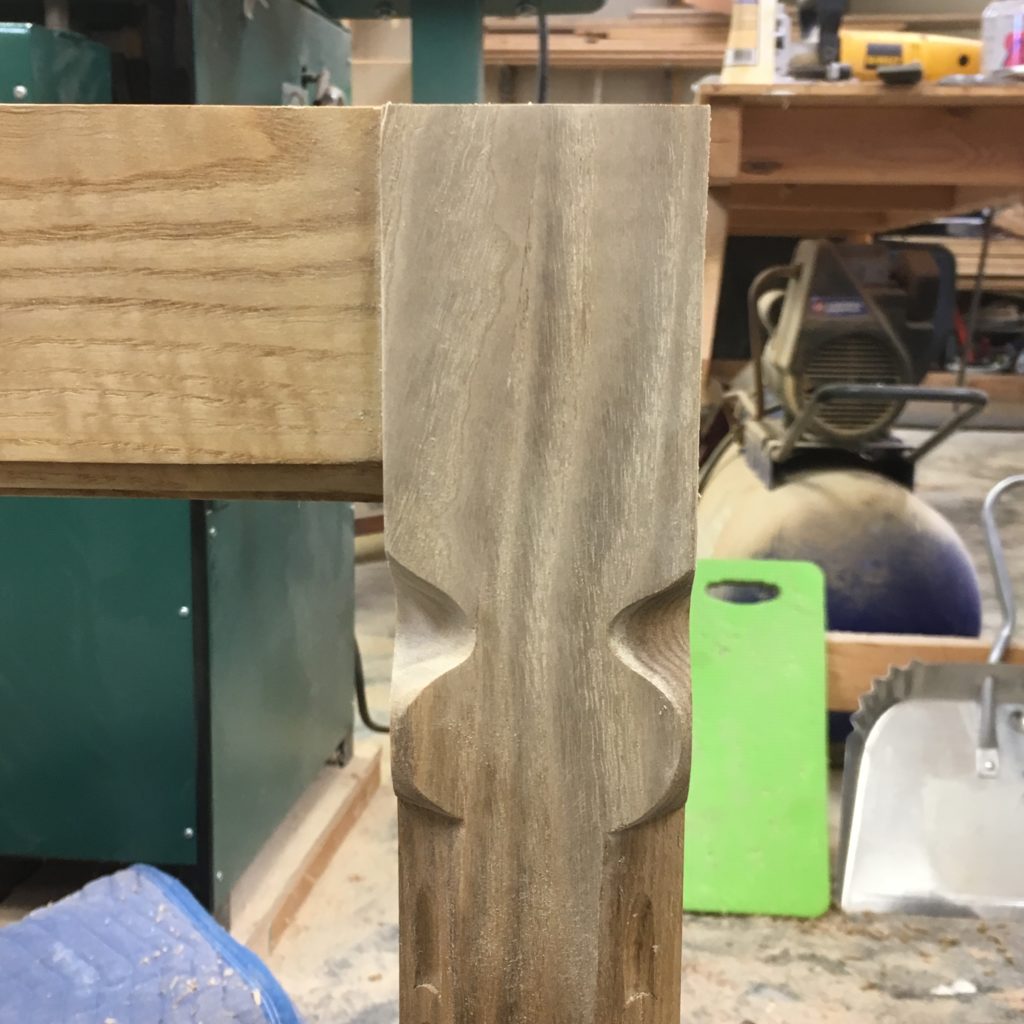
Not perfect, but close. Be honest. If you didn’t know there was a patch, would you see it?
Step 7: Scrape, sand, or both
Here are some supplies and tools we find essential in our everyday work around the shop. We may receive a commission from sales referred by our links; however, we have carefully selected these products for their usefulness and quality.


re: torn grain with bradpoint and Forstner bits — spin the bit backwards a few times so the spurs score the wood but the cutter doesn’t engage. Not a 100% foolproof solution but usually works.
Good lookin’ patch.
Great job. I didn’t know it was called a Dutchmans patch. I did something very similar a few years ago to repair a friends motor bay cover on his race boat. Still looks good.
Ed
I honestly don’t see it.
Beautiful!! Love the table too. I wouldn’t have seen the patch unless I’d seen the rest of the pictures.