We may receive a commission when you use our affiliate links. However, this does not impact our recommendations.
The right techniques and tools (plus a few tricks) will give you a good start on mastering this fine traditional joint.
Dovetails have long been recognized as the premier joint for casework and drawers – and for good reason. They’re the strongest way to join the corners of a box, and they look great.
However, dovetails also have a reputation as a difficult joint to master. But cutting dovetails by hand only looks difficult. It’s actually just a process of sawing and chiseling to a line. It’s that easy. (And with a bit of practice, everyone can saw and chisel to a line.) In fact, when I teach dovetailing, I start people out not by cutting dovetails, but just sawing to a line. Once you’ve mastered sawing to a line, you’re on your way to creating this time-honored joint.
No doubt you’ve seen the multitude of jigs available for routing dovetails. But there are several good reasons for skipping the jigs and learning to cut dovetails with hand tools. Undoubtedly the main reason is the pleasure that comes when crafting the joint with a saw, chisel and mallet. Cutting dovetails is fun. Another reason is the personal satisfaction of meeting the challenge head-on. And once you develop the skills, you’ll find that you can cut a variety of dovetail joints that can’t be produced with a jig. Keep reading, and I’ll show you step-by-step how to lay out and cut woodworking’s most beautiful joint.
A Few Terms
Before diving in, it’s helpful to understand some of the terms associated with dovetails. All dovetails have two mating parts: tails and pins. Tails are usually wider than pins and are tapered on the face. Pins are narrow and tapered on the ends. It’s the tapered, mechanical interlock, combined with the long-grain gluing surfaces, that give dovetail joints their tremendous strength.
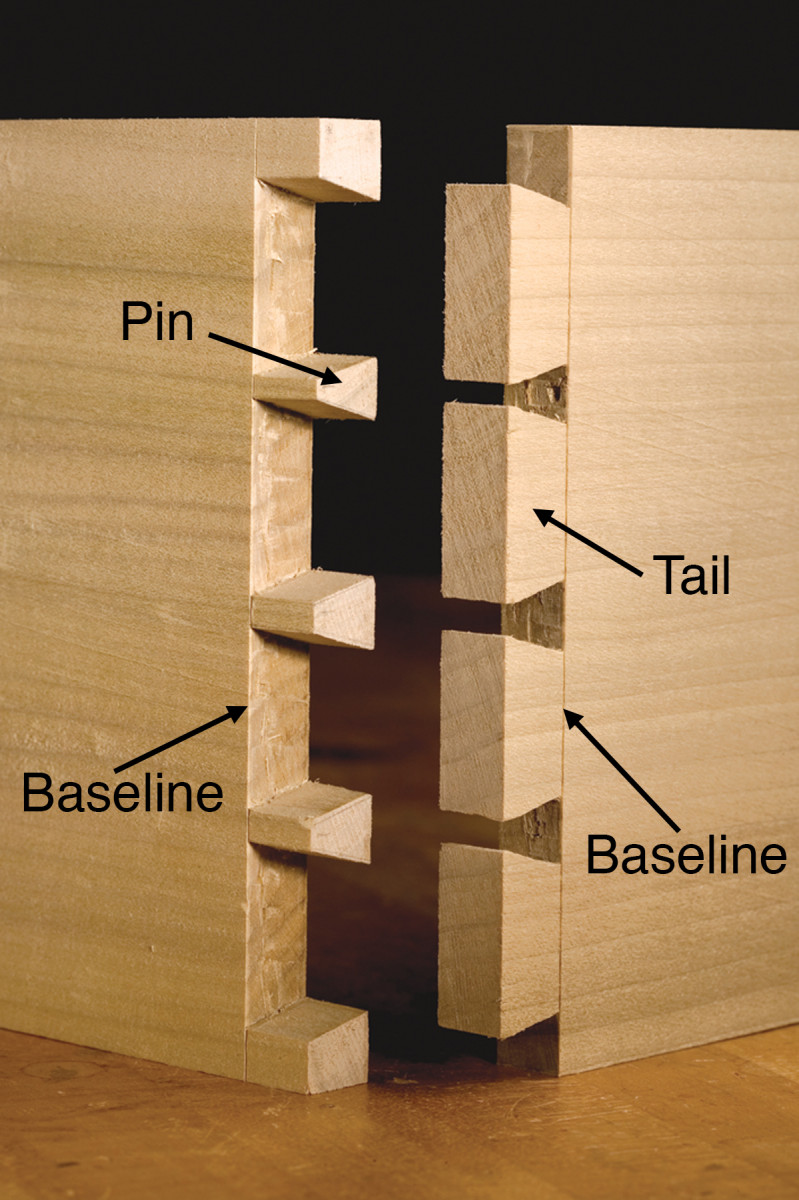
The essential parts of a through-dovetail joint.
Through dovetails are the most common type; the joint is aptly named because each member of the joint goes “through” the adjacent member. Consequently, through dovetails can be viewed from either face.
Half-blind dovetails can only be viewed from one face; on the adjacent face the joint is hidden. On a typical drawer, through dovetails are used to join the side pieces to the back and half-blind dovetails join the sides to the drawer front.
All dovetails have baselines; the baseline indicates the height of the tail or pin.
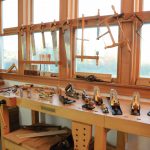
Tools
The tools for dovetailing are not expensive but it’s important to have the right ones. It’s also important to have them well-tuned.
Before cutting a dovetail you’ll need to do a bit of measuring and marking, commonly referred to as layout. Good layout is essential. Remember: Dovetailing is the simple act of sawing and chiseling to a line; if the line is inaccurate the joint won’t fit together.
One of the most important tasks is marking baselines. The baseline is created with a marking gauge – a simple tool that consists of a head, beam and cutter. The head slides along the beam and locks in place with a thumbscrew. Some gauges use a steel pin for the cutter while others use a tiny wheel. Either type of cutter will work so long as it’s sharp. A dull marking gauge will tear the fibers, making it difficult or impossible to craft a clean dovetail joint. In contrast, a sharp gauge will cleanly sever the tough end-grain fibers to create an incised layout line. As you chisel out the waste between the tails and pins, the edge of the chisel will drop precisely into the baseline to give you that great fit that you’re striving for.
Other layout tools you’ll need include a layout knife, a square and a dovetail marker. An X-acto knife works well; it’s razor sharp and the narrow point will easily scribe between the tails and pins. The type of square is unimportant as long as it is 90°; I prefer the Starrett combination squares for their precision and versatility. To mark the angle of the tails and pins, I use a Veritas dovetail marker. Its simple extruded aluminum design functions well, it’s inexpensive and I can rework the soft aluminum to an angle of my choosing, typically 14°. A 14° pitch provides the good looks and mechanical interlock that I’m always after.
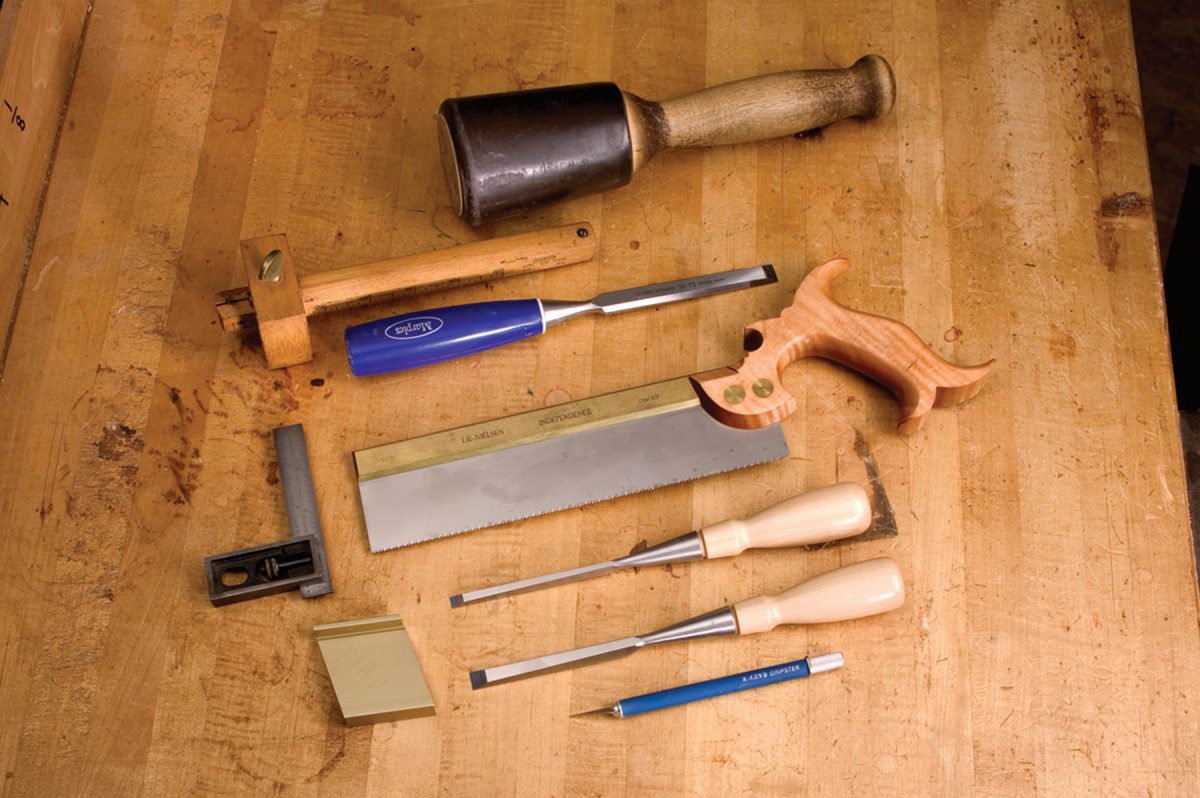
Lonnie Bird’s essential toolkit for dovetailing includes (from top): A mallet, a marking gauge, chisel (note the shortened handle), an adjustable square, a dovetail saw, a dovetail marker, more chisels and a knife.
Of course, you’ll also need a dovetail saw, a few chisels and a mallet. There are two types of dovetail saws available today: Western style and Japanese. Traditional Western-style dovetail saws cut on the push stroke and feature a thick back to stiffen the blade and prevent it from buckling. However, Japanese saws cut on the pull stroke, which places the blade in tension during the cut so it doesn’t have the tendency to buckle. Consequently, Japanese saws have a thinner blade and cut a finer kerf. Also, the unique tooth design of the Japanese saws cause them to cut more aggressively than Western saws. Which is best? When I teach dovetailing I encourage people to experiment with each. Although most choose the Japanese saws, others feel they get more control and a truer cut with the Western saw. Regardless of which style that you prefer, it’s important to use a high-quality dovetailing saw.
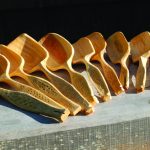
The best chisel for chopping waste from between the tail and pins is a short one. A short chisel provides the control you need when driving the chisel with a mallet; long chisels are designed for paring. For many years I’ve used the long-discontinued Stanley #750 socket chisels. The short 9″ length and perfect balance of these old tools are just what’s needed for dovetailing. Stanley #750s are still available from old tool dealers, and Lie-Nielsen Toolworks has just recently begun manufacturing its own improved version of these venerable chisels. Of course, if you already own a set of inexpensive chisels, you can also do what many of my students do – cut the excess length from the handle. Although it may sound odd, reducing the handle length greatly improves the balance of a long, top-heavy chisel. And the improvement will be reflected in the quality of your dovetails.
An important step to fine-tune chisels for dovetailing is to further bevel the sides of the blade up by the cutting edge. On most new chisels, the sides are too square, and the excess steel crushes the fibers of the tails and pins as you chisel the waste. Grinding the sides close to a knife-edge will eliminate the problem. Of course, you should also hone the chisels to razor sharpness.
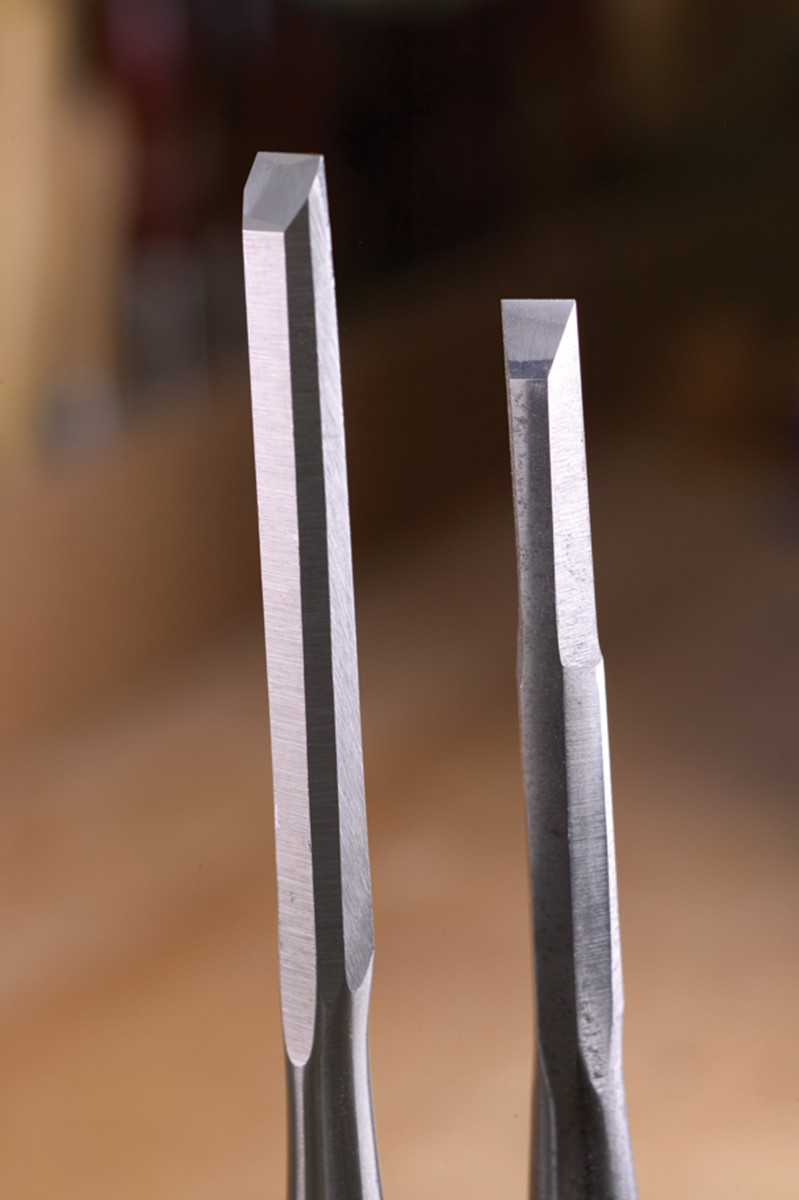
Many modern chisels have sides that are too square for getting into the triangular sockets between the joint’s tails (left). I recommend grinding the sides down almost to the back (right).
Having the right mallet is important, too. I’ve found that a round, 12-ounce mallet works best. Heavier mallets are tiring to use and the extra weight just isn’t needed. Also, the head of a square mallet must always be aligned to the chisel before striking. Not so with a round mallet.
Once you’ve gathered your tools and tuned them up, you’re ready to begin.
Layout
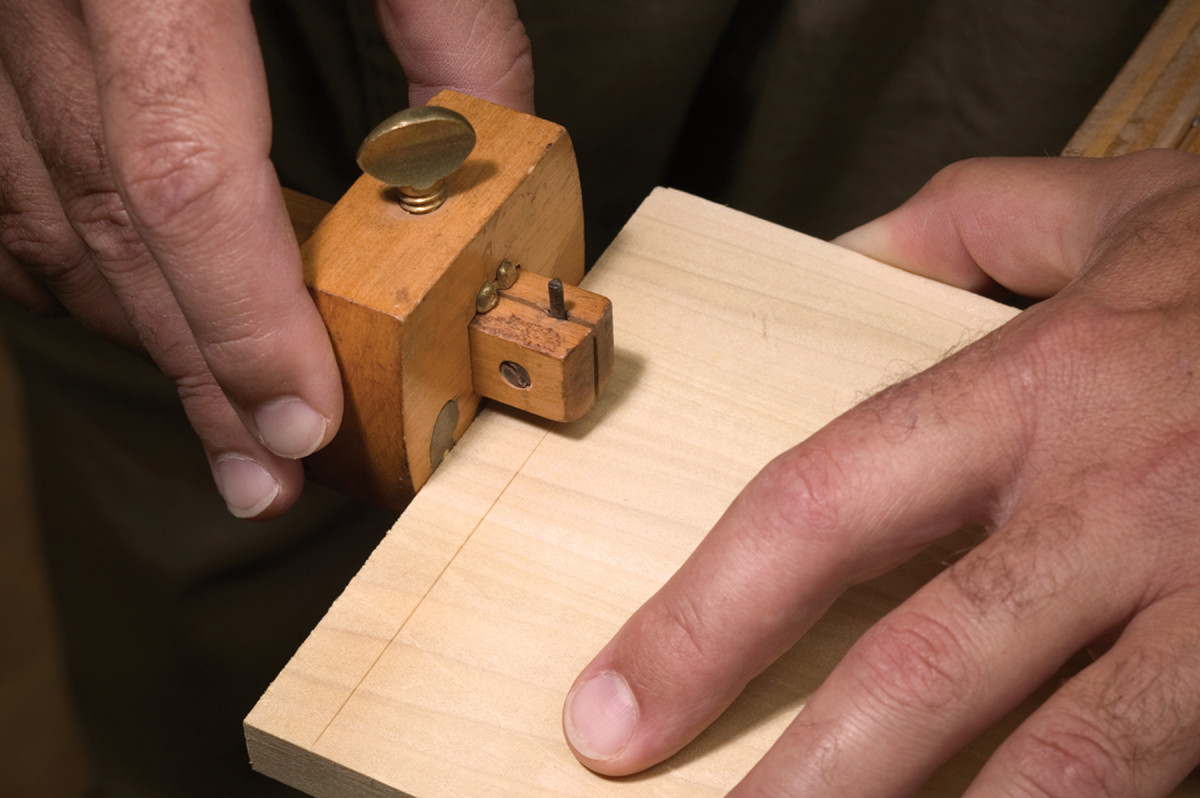
Mark the baseline on the faces of both the pin board and the tail board with a marking gauge. Also mark the baseline on the long edges of the tail board.
The first step in the layout process is to mark the baselines. Note that the baseline is marked on both faces of both halves of the joint. It’s also necessary to mark the baseline on the edges of the tail board. First, set the gauge to the thickness of the stock. As you mark the baseline, focus on keeping the head of the marking gauge firmly against the end of the stock. To avoid tearing the grain, make several light passes with the gauge as opposed to one heavy cut.
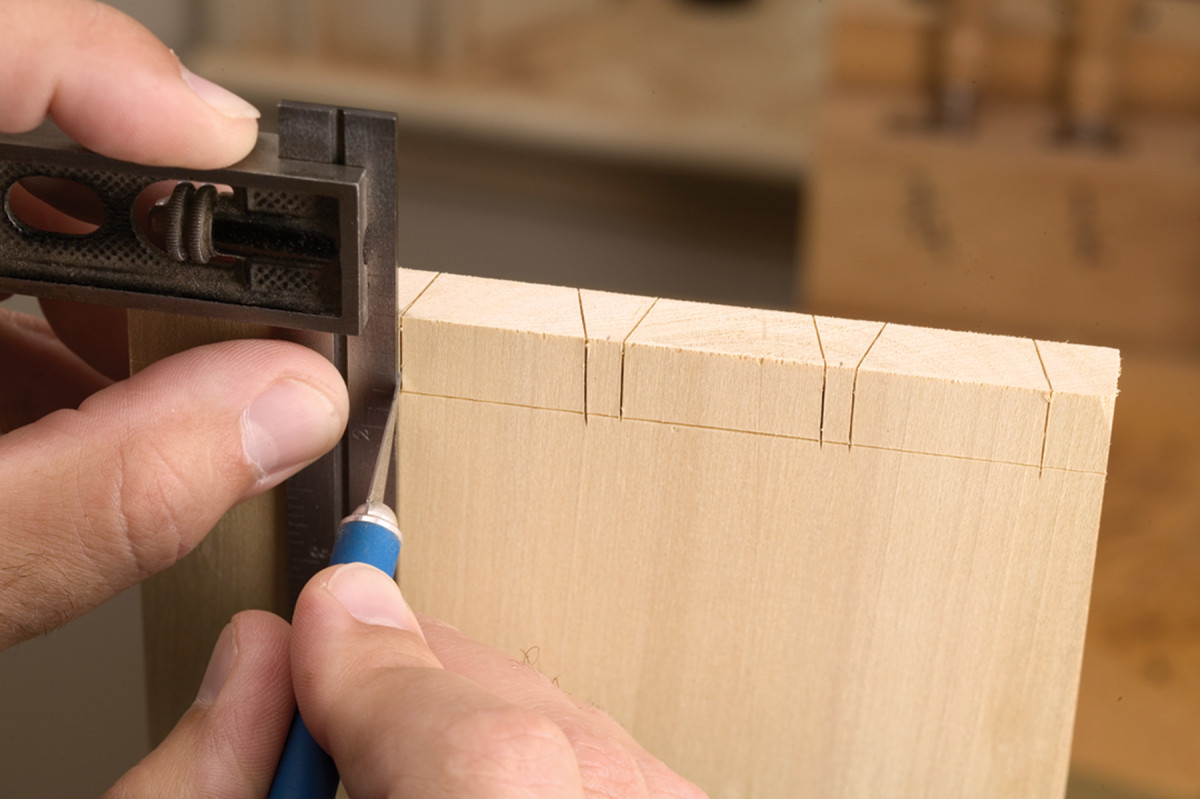
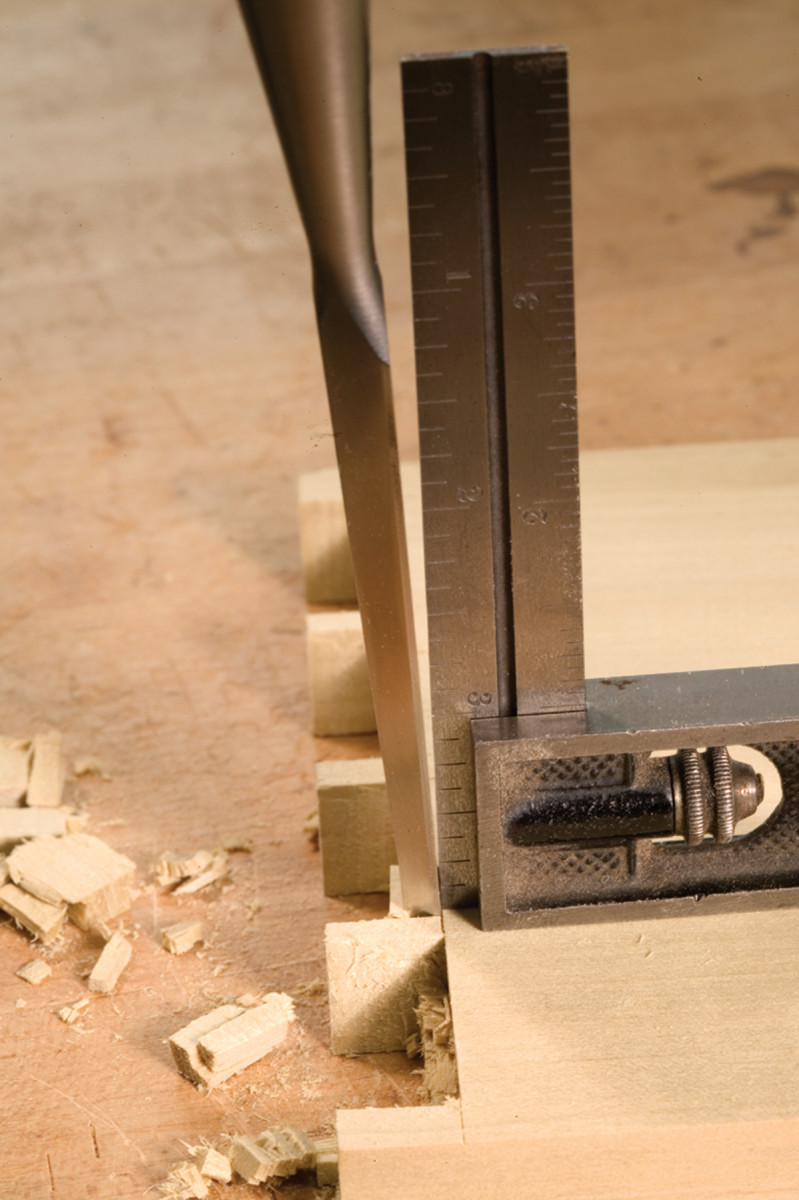
Use your dovetail square to mark the shape of the pins on the end grain. Then mark the face of the pins using your adjustable square.
Next mark the half pins on each corner of the pin board, and then divide the board into the number of desired tails. Each point of the divider becomes the center of a pin. After marking the slope of the pins on the end of the stock, mark the face with a square, as shown above.
Sawing
As I stated earlier, dovetailing is essentially sawing and chiseling to a line. Once you’ve mastered that technique you can cut great-looking dovetails.
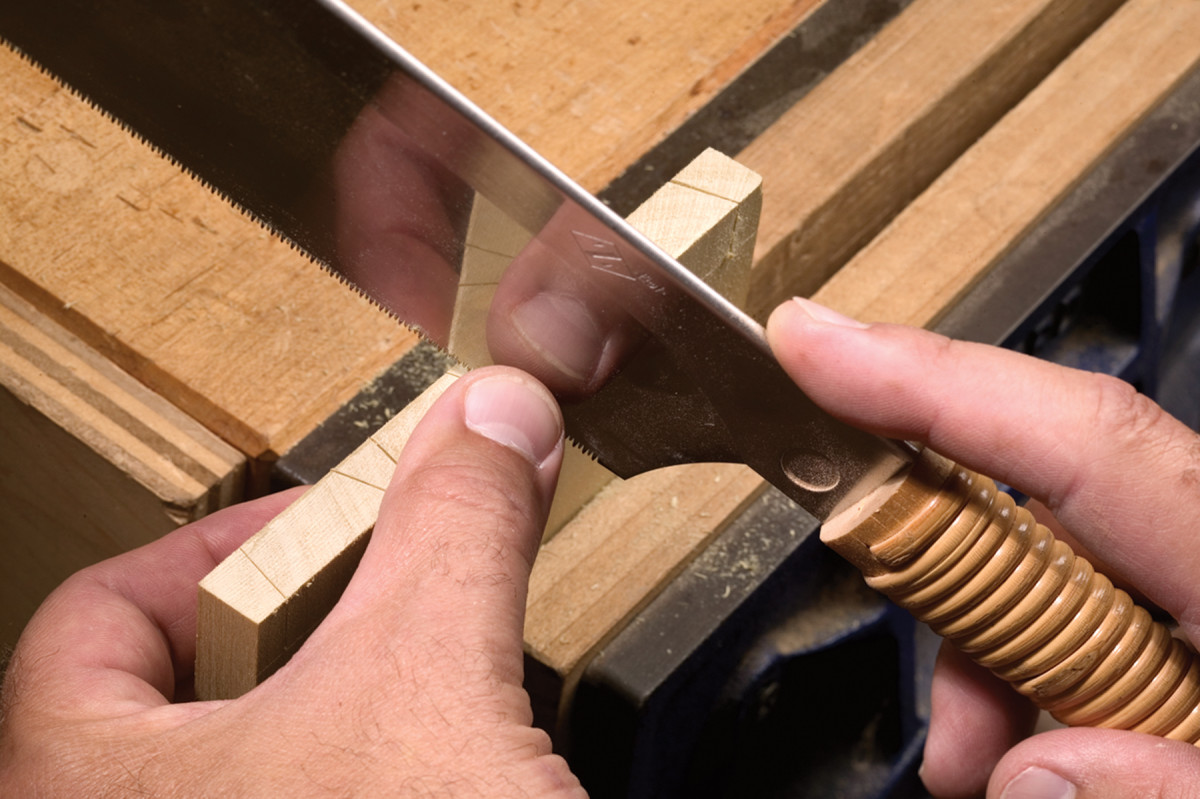
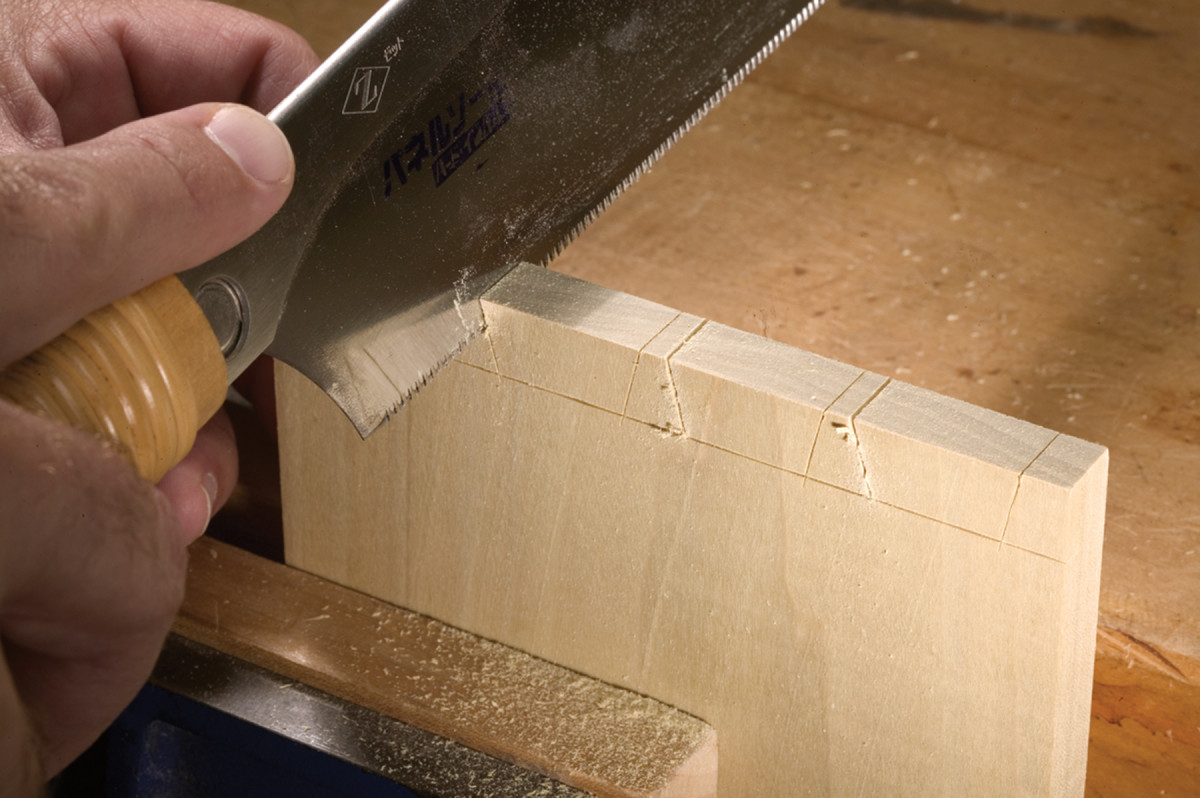
Use your thumb as a guide to start the kerf of your saw in the edge closest to you. After a couple strokes, begin to lower the angle of the blade.
Start by positioning the saw on the near corner of the stock and pull the saw to establish a small kerf. During this initial cut, it’s helpful to use your thumb to guide the saw. As you pull the saw toward you, lower the blade into the stock to establish the top line.
Now use long, smooth strokes to follow the line on the face of the stock. Stop when you’ve reached the baseline. Once you’ve sawn all the pins, make several extra saw-kerfs into the waste area between the pins. These cuts will make it a lot easier to chisel the waste between the pins.
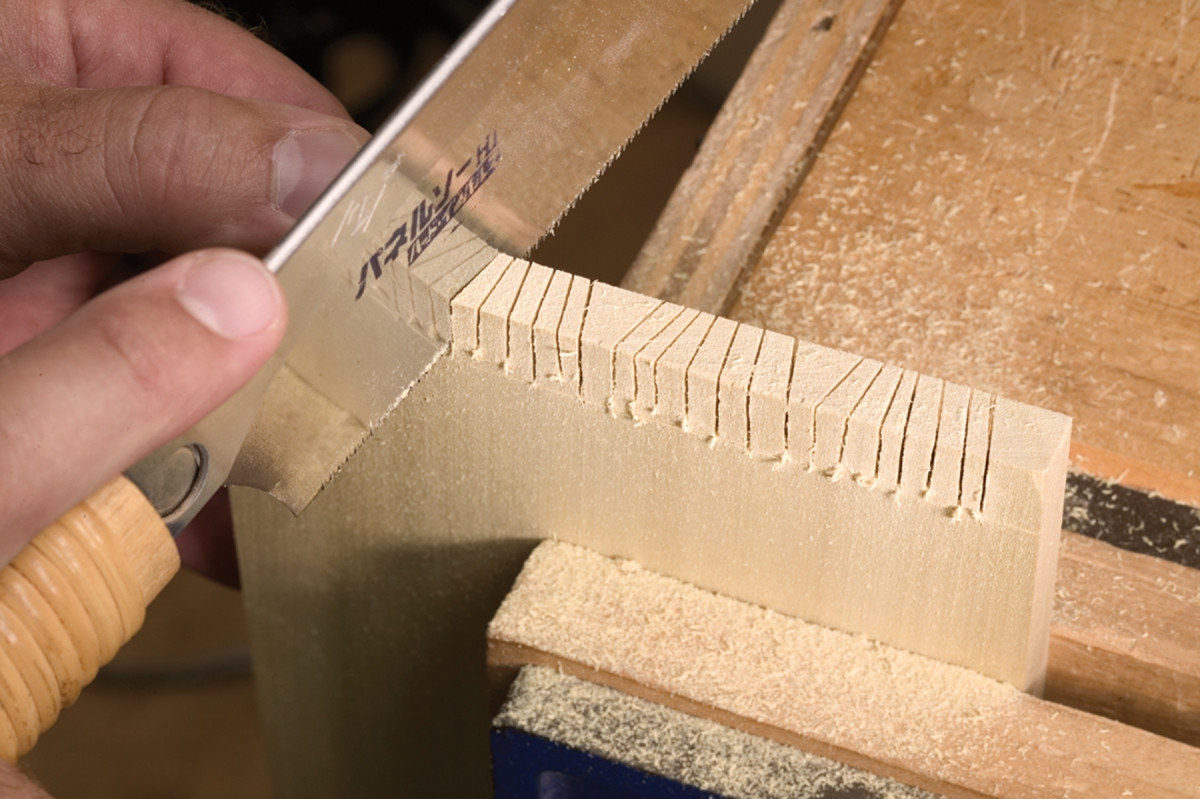
To make the waste between your pins easier to remove, cut several extra kerfs in the waste. Take care not to cross the baseline of the joint.
Next, select a narrow chisel, 3⁄8” or 1⁄2“, and make certain that it is razor sharp. A narrow chisel has less cutting resistance than a wider chisel and you’ll have better control of the tool.
To remove the waste between the pins, it’s best to cut halfway through the stock from each face. But remove the bulk of the wood first by positioning the chisel about 1⁄16” away from the baseline. Drive the chisel halfway through the stock, flip the stock over and repeat.
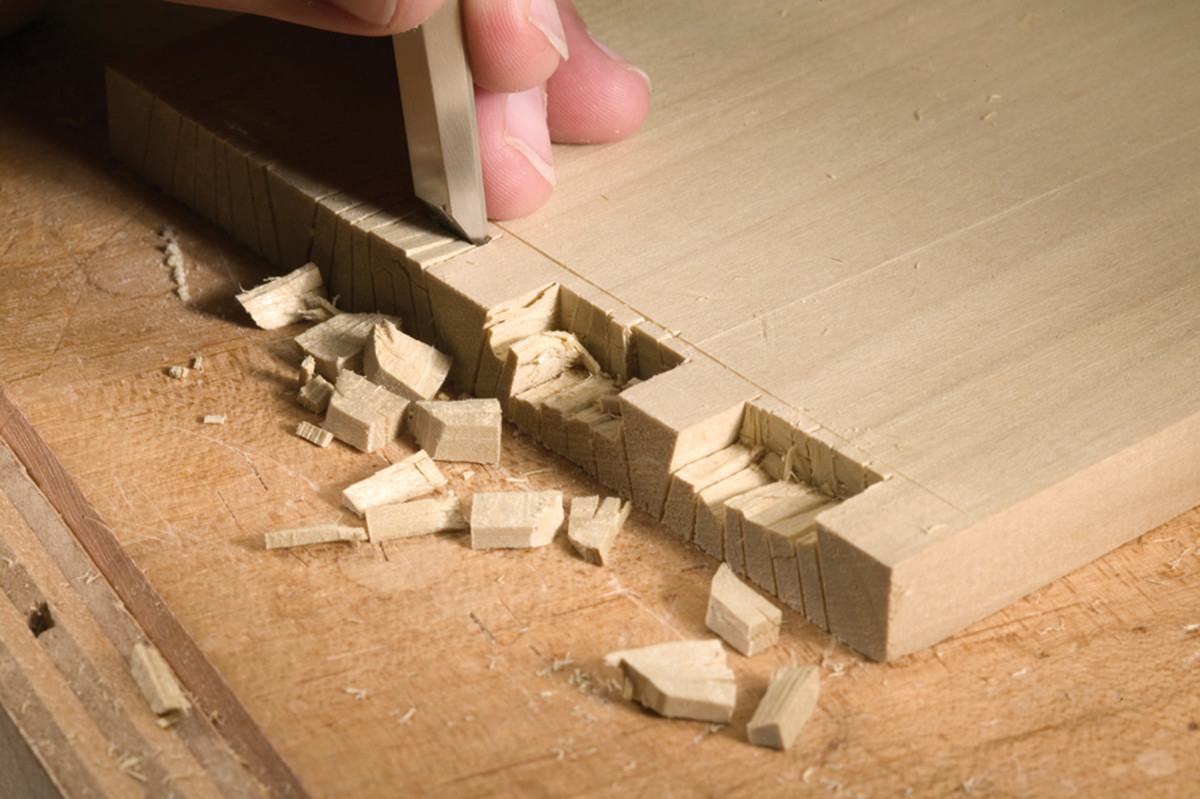
Here is how I remove the waste between the pins. First position the chisel 1⁄16″ from the baseline and cut halfway through the thickness of the board.
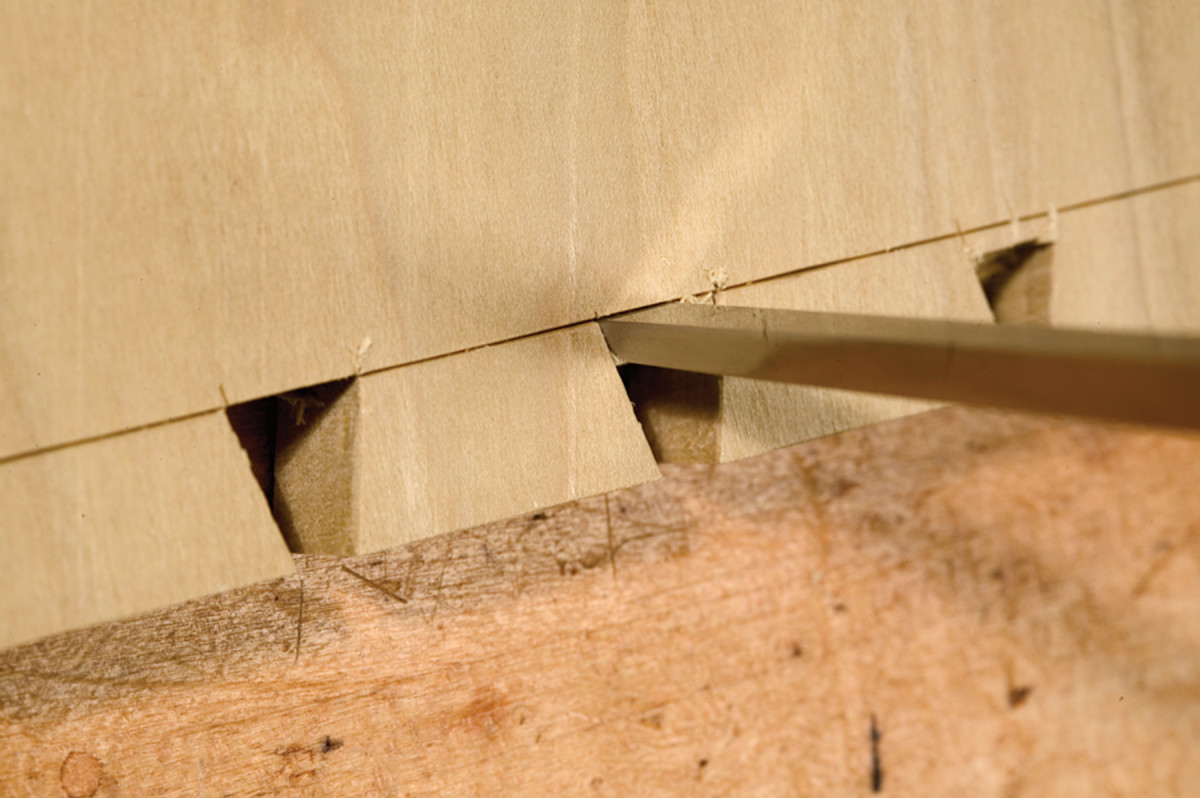
Now position the edge of the chisel in the baseline (note how easily it drops into the incised line) and repeat the process. It’s good practice to undercut the baseline very slightly. The undercut surface ensures a tight fit and doesn’t weaken the joint. (Remember that the strength comes from the interlocking tails and pins as well as the long-grain gluing surfaces.)
Then flip the board over and do the same on the opposite side.
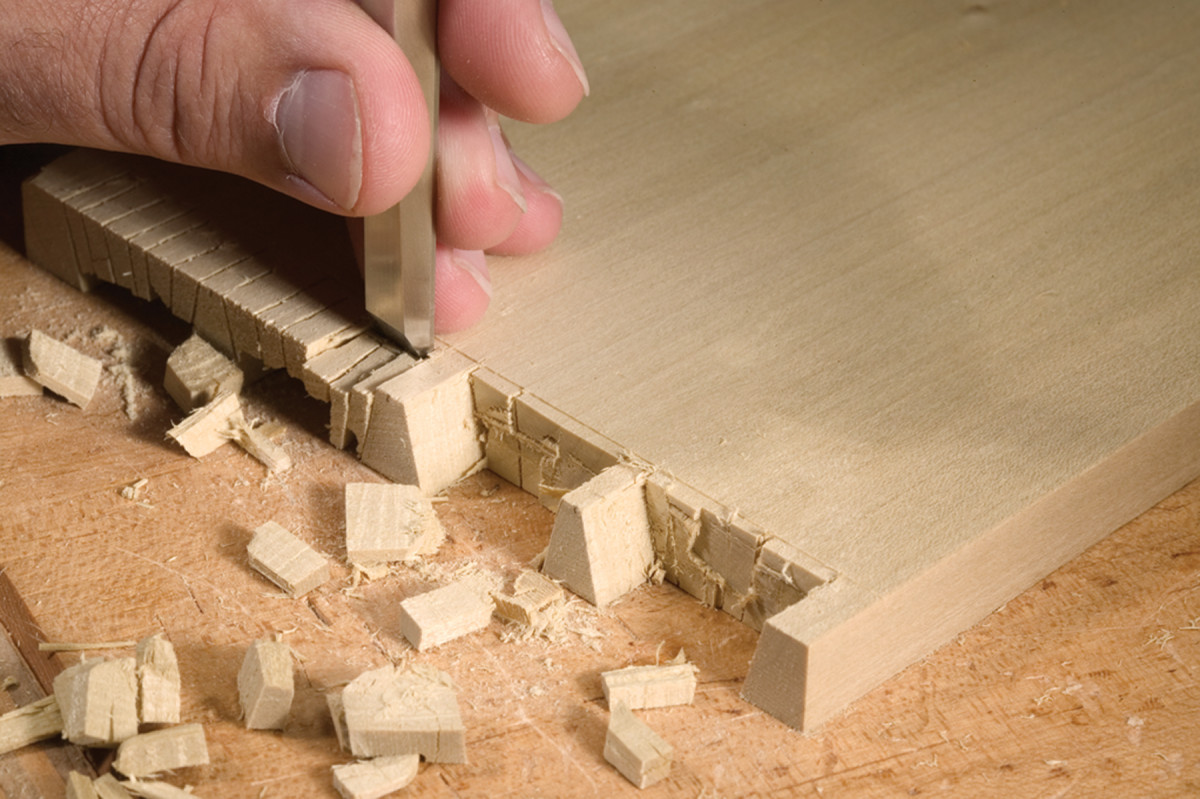
Third, to chisel out the rest of the waste, place your chisel into the baseline and undercut the joint just a bit by angling the chisel as shown.
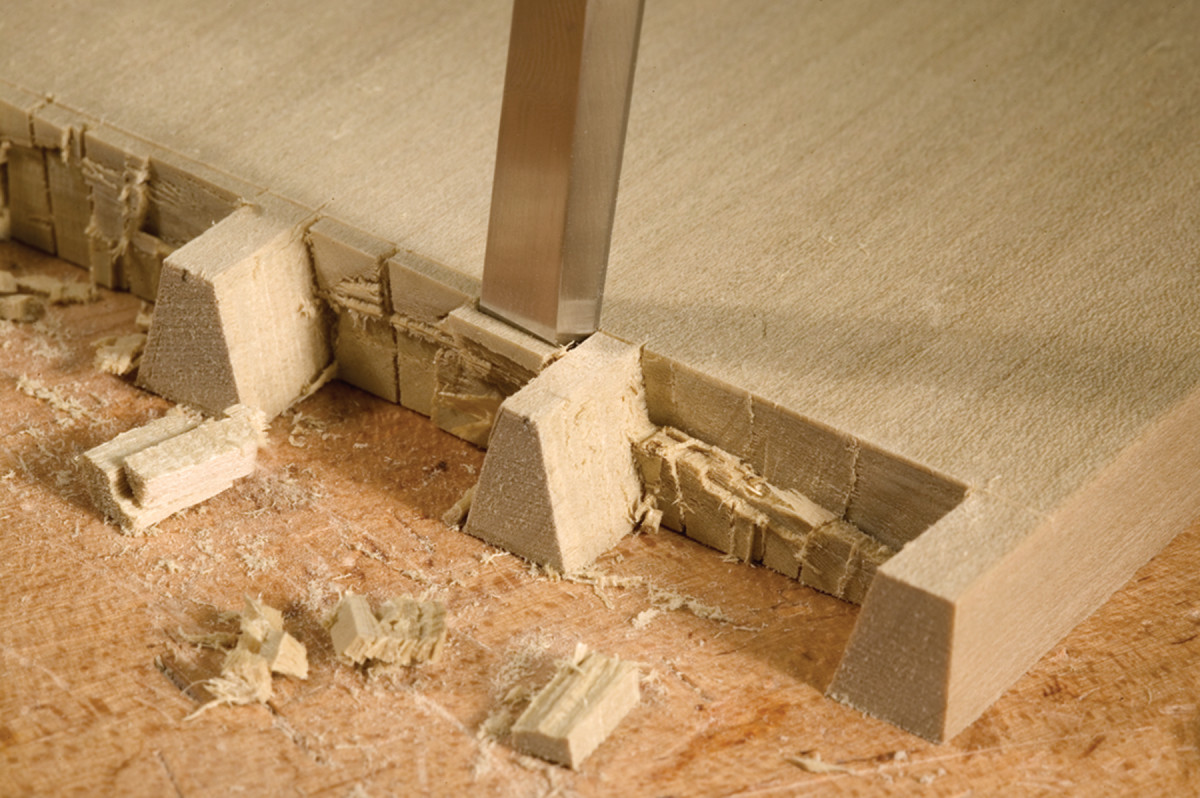
Cut halfway through the remaining waste on one side. Flip the board over and repeat.
Here you can see what’s left of the baseline after removing the waste. This fine line is the evidence that you’ve chiseled to the correct point.
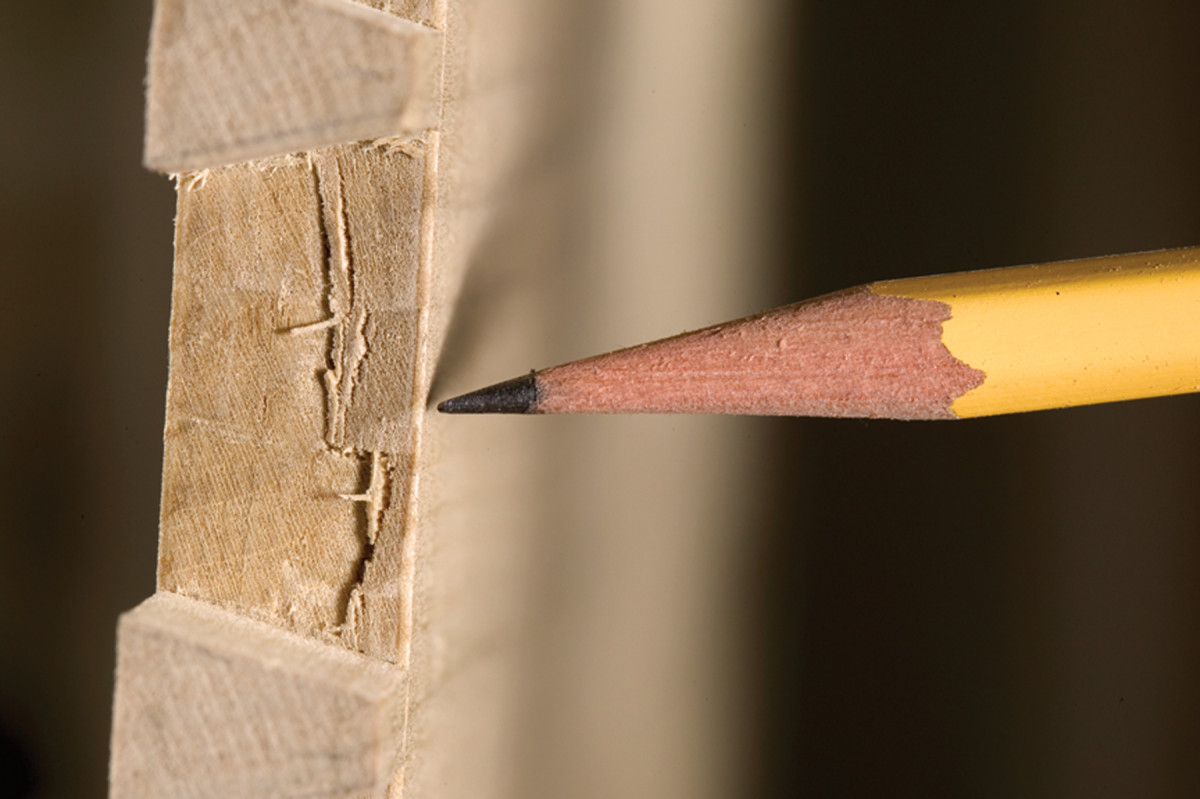
Now examine the end grain surface very closely. You should see a fine line along the edge of the stock that was created by the marking gauge. If you don’t see this line, you’ve chiseled too far – or not far enough.
Lay Out the Tails
The tail-board layout is created from the pin board. First position the tail board face down on the bench. Next, place the pin board over the tail board, align the face with the baseline of the tail board, and then clamp it in place. Remember, too, that the wide part of each pin should be facing the inside of the joint.
Clamp your pin board to the mating tail board and transfer the shape of the joint to the tail board using your marking knife.
Mark the tails with your layout knife. Position the blade of the knife against the pin and use the pin to guide the cut. To complete the layout, mark the end of each tail with a knife and square.
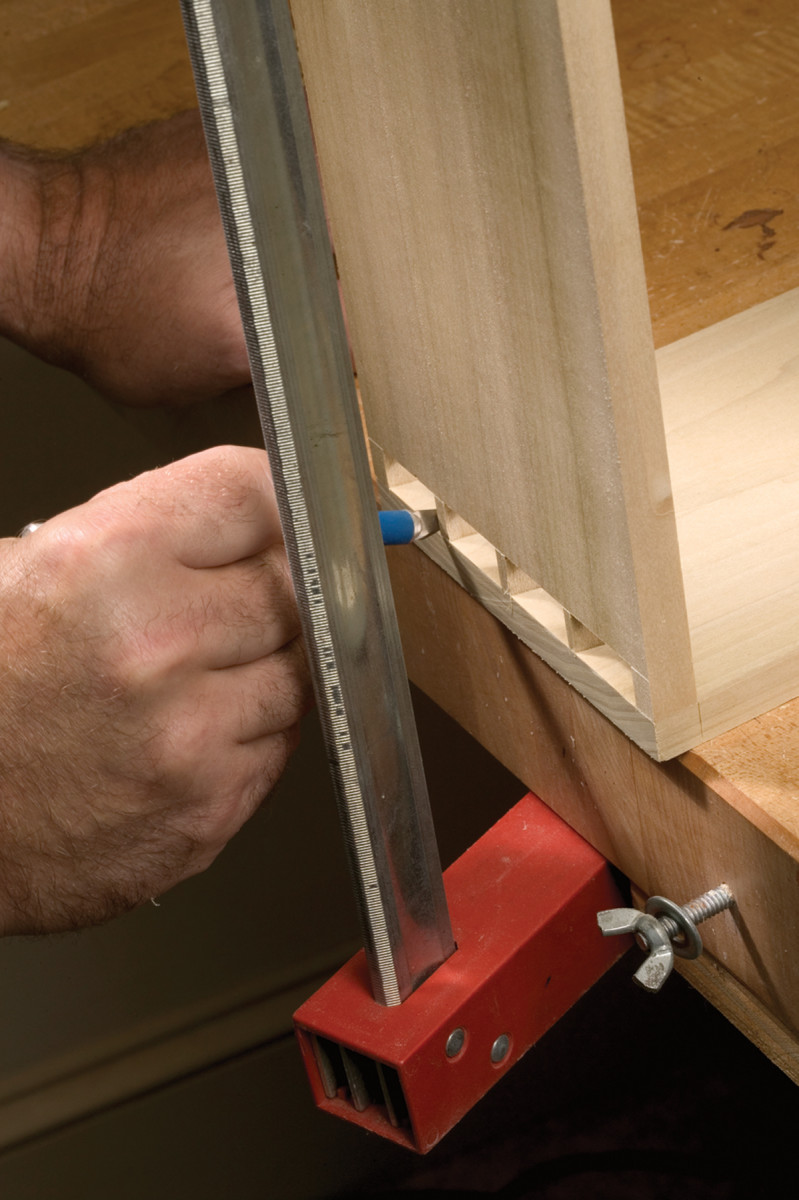
Sawing the tails is similar to sawing the pins except you’ll have to tilt the blade on the vertical axis. I think it’s bad practice to angle the tail board in the vise; it’s best to learn to angle the saw instead.
Otherwise, when sawing the tails of a wide board for large casework, one corner of the board will be positioned high up in the air which will make sawing difficult. Instead, clamp the tail board in the vise (make sure it’s level) and saw all the cuts one direction, as shown at right. Then saw all the cuts that are angled the opposite direction.
Clamp your tail board vertically in your vise and saw the shape of the tails. Make a few extra kerfs in the waste and chisel it out much like you did with the pins.
I use the same technique for chiseling the waste as I use on the pins; make a few extra saw kerfs and chisel half way from each face. Remember to undercut this end-grain surface slightly. However, be careful to not undercut the surfaces at each corner. Otherwise you’ll see a distracting void in the assembled joint.
When you remove the waste between the tails, slightly undercut the end grain between the tails – except on the ends, where it will show.
To assemble the joint, first position the pin board upright in the vise. Now gently press the tail board into the pin board using pressure from your thumbs. When assembling dovetails on wide casework, I’ll use gentle taps from a dead-blow mallet.
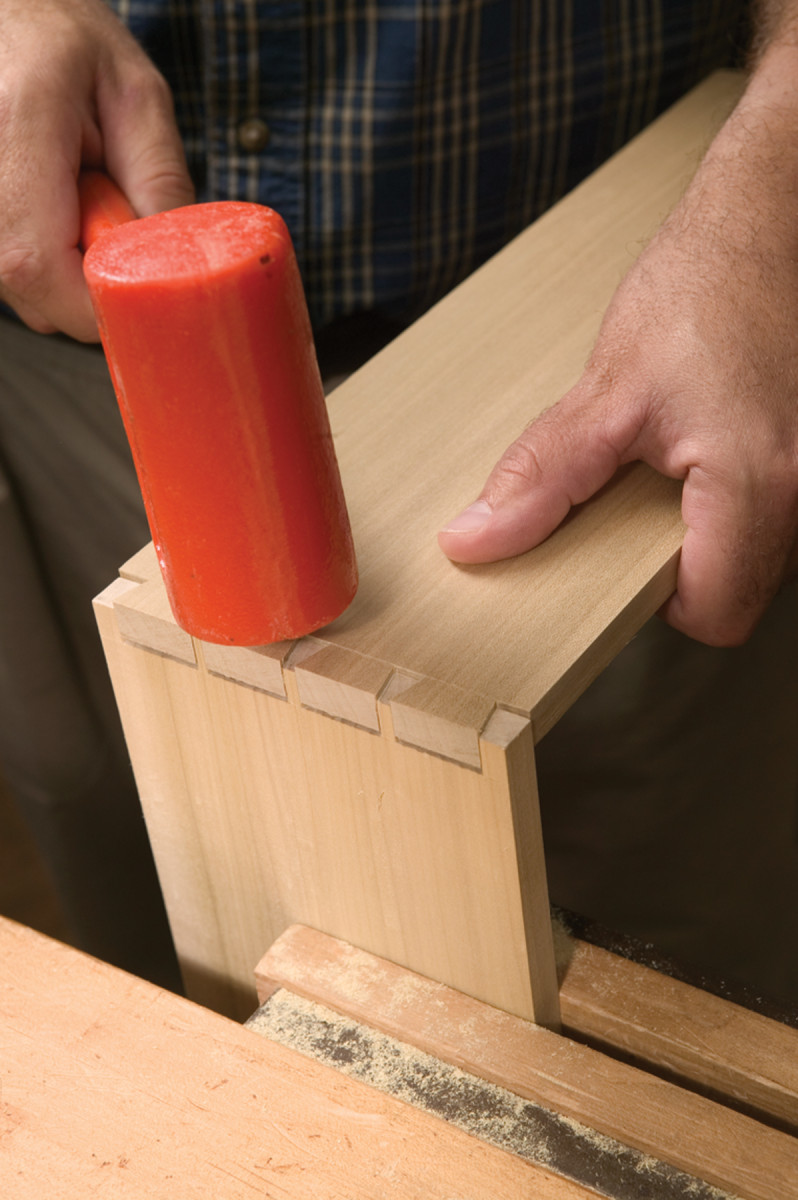
In wide casework especially, you may need a few taps of a dead-blow mallet.
You can hear and feel where a portion of the joint may be too tight. Simply pare a shaving from any such areas, slide the joint together, and step back and admire your work. With patience you’ll find that dovetailing is one of woodworking’s most pleasurable tasks.
Here are some supplies and tools we find essential in our everyday work around the shop. We may receive a commission from sales referred by our links; however, we have carefully selected these products for their usefulness and quality.