


We may receive a commission when you use our affiliate links. However, this does not impact our recommendations.
In previous entries, I explained how to lap short-bodied planes using diamond stones and sandpaper rolls (click to read parts 1 and 2.).
This entry is dedicated to lapping larger planes and explaining how to avoid inadvertent convexing of the sole while lapping it.
When dealing with longer and broader planes, we have to spend more time lapping (as more cast iron needs to be dispensed with), and in addition, we will have to replace the sandpaper media more often for that exact reason.
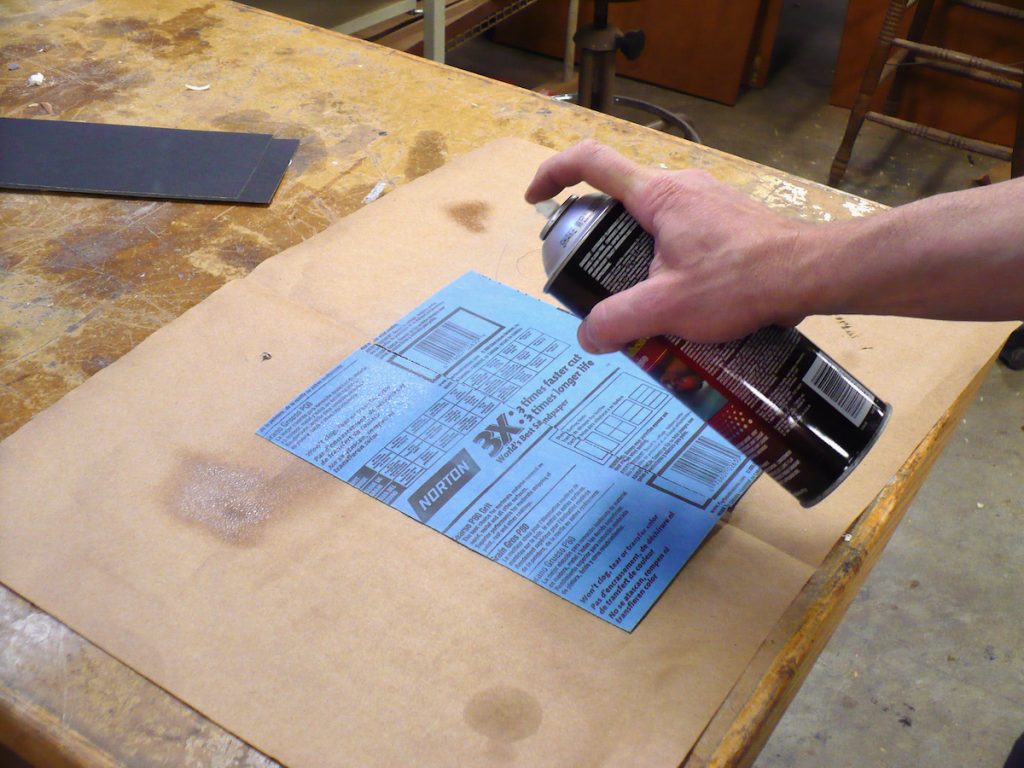
As an alternative to sandpaper adhesive rolls (in case you don’t have them at hand), we can use regular sandpaper sheets and affix them to our lapping surface using an adhesive. I like spray adhesive and prefer the low-tack one – which is easier to peel and remove from the substrate. An easy-to-remove liner to cover the lapping surfaces is also very beneficial, especially if the sandpaper adhesive is difficult to remove. Please check my recommendation for liners in my previous entry.
Grit disparity and the cambering of the sole
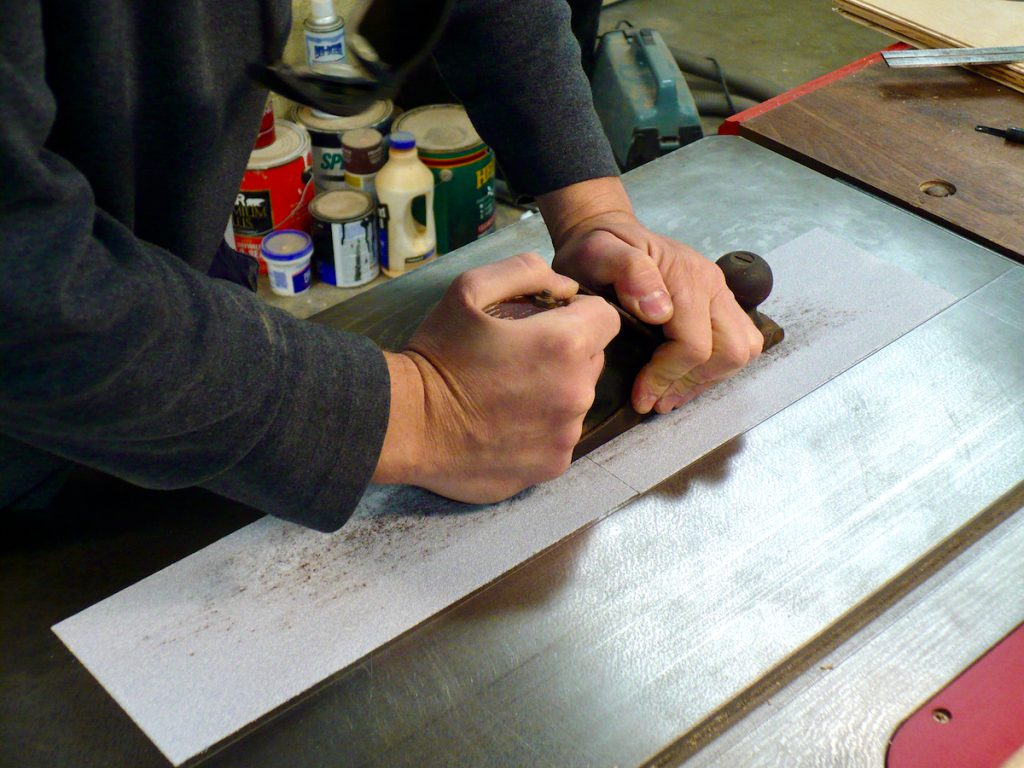
When I lap a plane’s sole, I use a knife-edge straight edge or a high-quality straight edge to check for the flatness and trueness of the sole. While lapping, I routinely probe the sole against a light source and try to eliminate any surface “pathologies” until I hardly see any light penetrating between the ruler’s edge and the sole.
One of the frustrating aspects associated with using sandpaper media (rolls or sheets) is the phenomenon I call “grit disparity,” a predicament that makes it difficult to reach optimal flatness using the traditional sandpaper technique on planes whose sole is initially convexed or planes that have angulated soles. In addition, during lapping, when your abrading media becomes inhomogeneous, you run the risk of unintentionally convexing or cambering the sole. This cambering condition frustrated me and forced me to evaluate and change how I lap over sandpaper media.
What is grit disparity?
After rubbing the plane’s sole on the sandpaper for some time, I often noticed that the middle dulls faster than the rims. I believe this is because the inner areas of the sandpaper see more contact with the sole than the edges. When the grit particle at the boundaries are sharper and taller, they will cause a camber effect by convexing the sole – at least, this is my hypothesis.

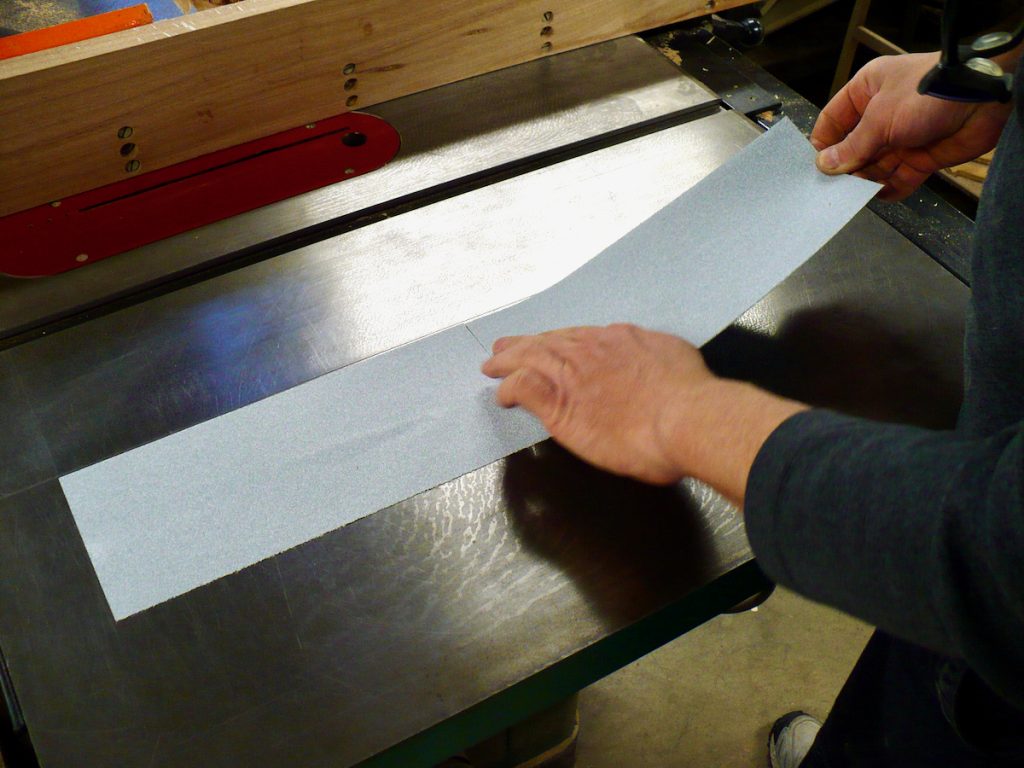
A fresh sheet of sandpaper has sharp particles distributed evenly on the entire surface.
Once the lapping process occurs, the sandpaper’s middle flat out faster than the surrounding surfaces. The dark reddish color of the sandpaper’s rims indicates taller and sharper particles.
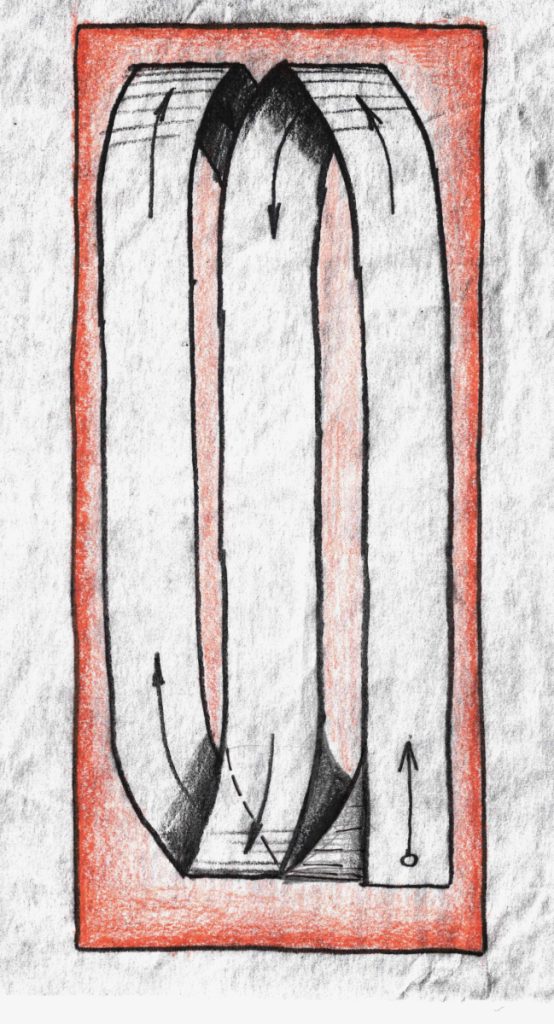
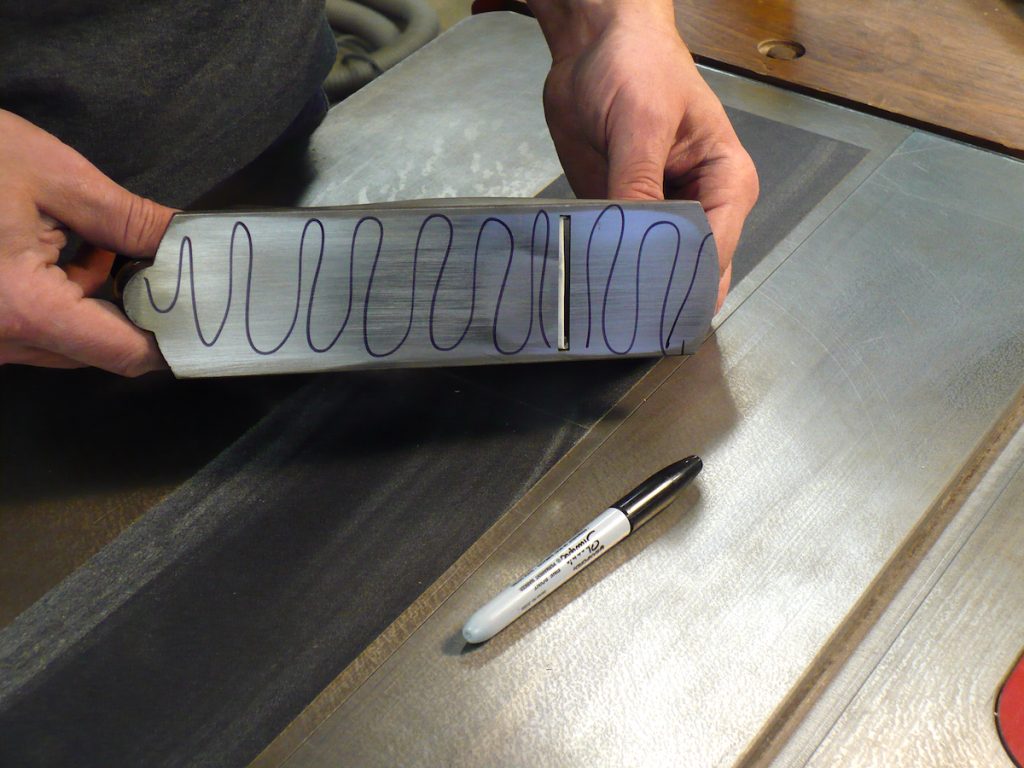
To avoid cambering, we need to abrade the sandpaper evenly; we should attempt to apply even pressure on the entire paper’s surface while guiding the plane over the sandpaper using a tight meandering pattern, as I show in my sketch below.
During the many hours I spent lapping over sandpaper, I noticed that no matter how good I tried to abrade the plane’s sole evenly on the entire sandpaper surface, the rims (or the frame of the sandpaper) always felt somewhat fresher than the middle. I believe that the more aggressive particles of the sanding media at the rims are responsible for the cambering effect.
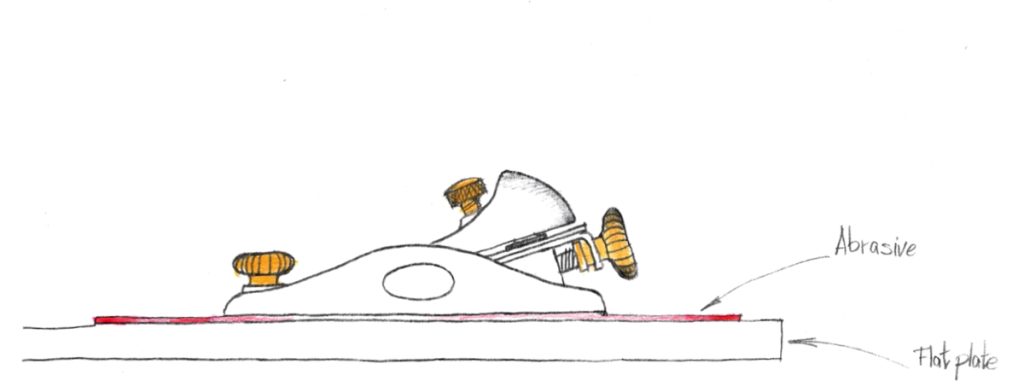
In addition, we should slightly project the plane’s sole beyond the boundaries of the sandpaper at the end of the forward (and the backward) motions while maintaining the same downward pressure as we did while traversing the inner parts of the sheet. But in reality, as we thrust the plane towards the end of the sanding field, we slow down before reversing course, and at the same time, we also let go of some of the down pressure. In my experience, rubbing the plane firmly over the abrading media while some parts of the sole have already breached out is not easy, and this is why the rims of the sheet are sharper and taller.
As we reach flatness, the lapped sole should become perfectly true.
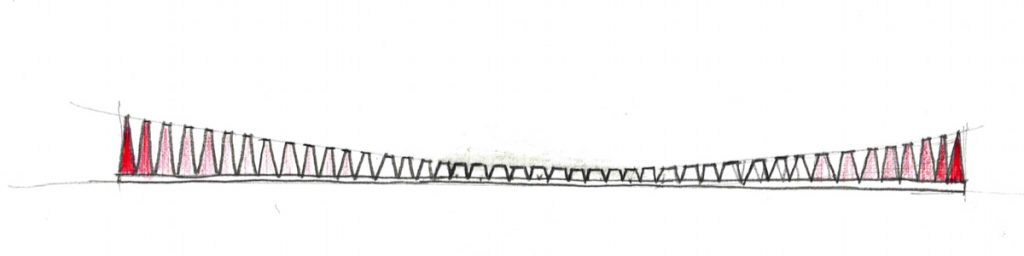
The sandpaper particles close to the rims of the sheet are sharper and taller, so if we keep lapping, we risk cambering the sole. This illustration is exaggerated for clarity.
A remedy for cambering
If passing the plane along the sandpaper can cause a cambering effect, what can we do about it?
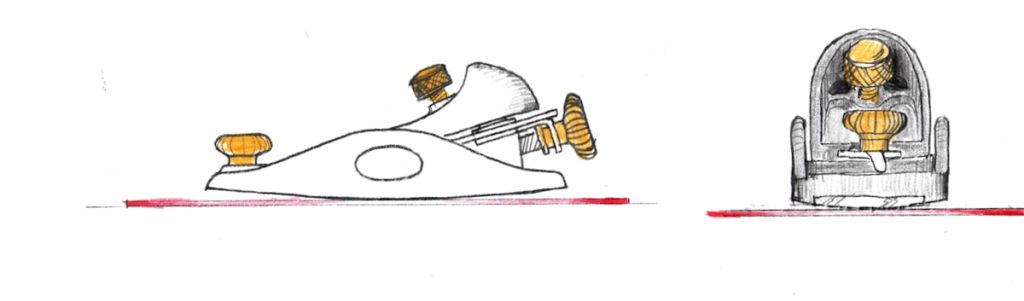
My solution is to turn the plane 90 degrees to the paper and abrade the convexed area across the narrow strip without engaging neither the front nor the rear of the sole with the sandpaper. After trying this technique for some years now, I can attest that it works pretty well. To ensure a successful outcome, you will have to check your progress and reduce the high areas (at the middle portion of the sole and elsewhere) as needed. As you continue lapping, you will have to evaluate how long and tall that raised portion of the sole remains and how to engage with it, but in the end, you’ll have a great flat sole that is ready for work. Check the video below to see it in action.
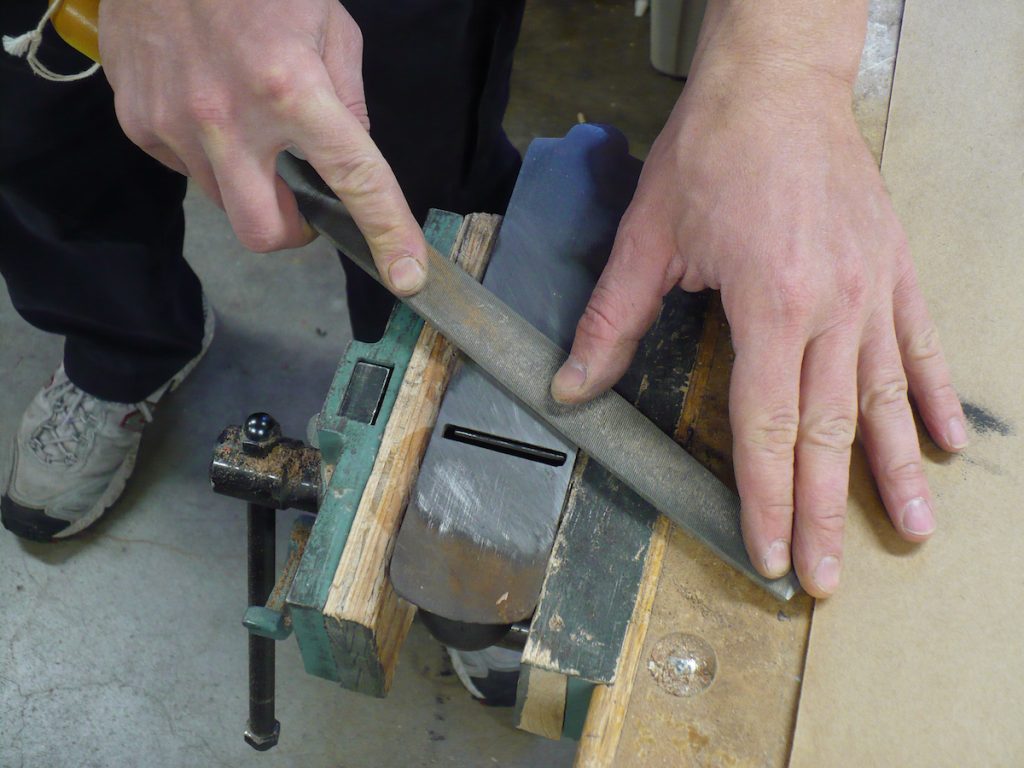
And in those extreme cases where your plane is ultra-convex don’t hesitate to use a mill-file to file away those cast-iron hills prior to lapping it on sandpaper.
Concave sole
If the pre-lapped condition of your sole is concave (you should celebrate this as it is the easiest to deal with), try to lap along the length of the sandpaper but stop immediately when you have reached flatness. If you continue lapping, you will be risking convexing the sole, as mentioned before.
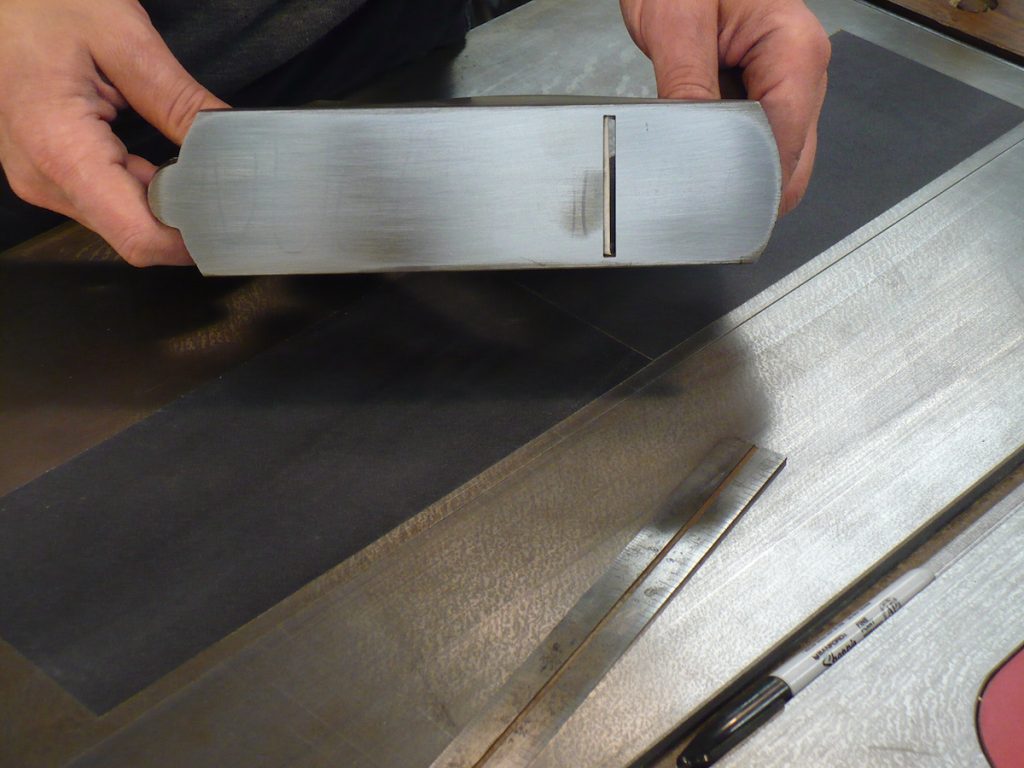
The sole of this plane was concave, so I lapped it along the length of the sandpaper sheet. Once the sole’s front and rear got abraded enough, I stopped lapping.

Trust, but verify! Don’t count on the vanishing felt tip pen lines as a sole indicator of flatness. As we have learned, the lines might have vanished partially because of the grit disparity effect, which might have left the sole slightly convexed. So use a good straight edge to verify the flatness.
Next time I will show how I deal with the longest cast-iron hand planes and the squares and straightedges I use.
Here are some supplies and tools we find essential in our everyday work around the shop. We may receive a commission from sales referred by our links; however, we have carefully selected these products for their usefulness and quality.


Yoav,
I thought I had read all there was to know about flattening plane soles, then you showed up! Wow, great article!
Grit disparity is a frightening topic. Can’t wait to see what you use to gauge flatness. Any rule that has a fine edge is likely to be too flexible and stiff rules are likely too thick. Setting up a surface gauge would be a real challenge. I did find a pressure indicating film that maps flatness if you have a truly flat reference surface: Fuji Prescale Film, but it is horribly expensive.
Thanks for the comment. In the next entry or the one after it, I will show the tools I use. But since you asked, I can tell you that I got my 12″ Knife-edge straight edge (SE) from grizzly. The company (regrettably) doesn’t carry it any longer. Using a high-quality combination square (ideally fresh and unused) is another option. Getting a Knife-edge SE from aliexpress> is probably the cheapest option but it will take some time to arrive. And then there is iGaging, I haven’t tried their straight edges but I like and respect their other products so this might be also a good choice too.