We may receive a commission when you use our affiliate links. However, this does not impact our recommendations.
Plane dealing. Use a table saw as if it were a plane to quickly shave down unstable legs to level a wobbly seat.
A simple table saw technique levels four legs in no time flat.
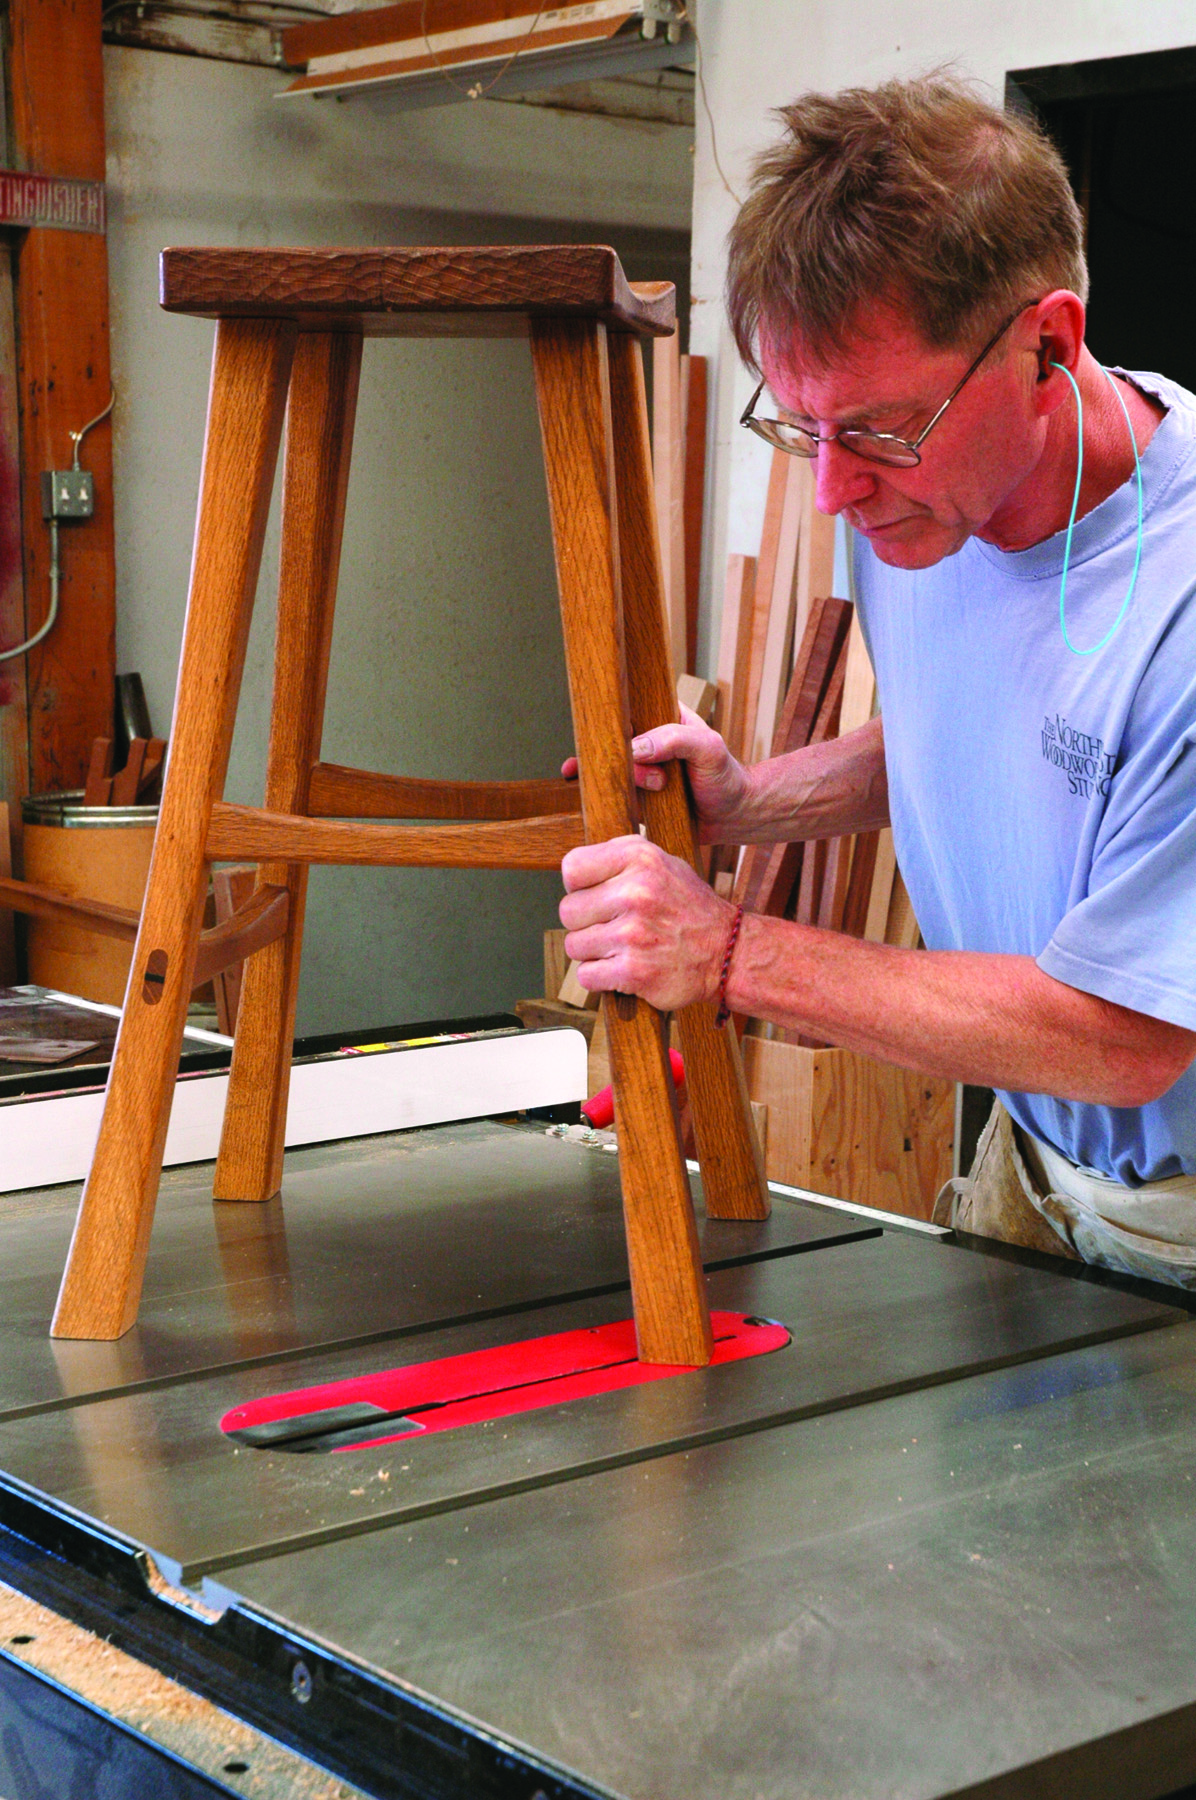
Rock-n-roll. That’s what four-legged pieces have a habit of doing – even with perfect joinery and a careful and unhurried assembly. Even with all the care and attention you paid to building it correctly, it doesn’t sit flat on your floor but moves back and forth rocking on two legs. What gives?
Don’t worry; it’s just life at the bench and Euclidean geometry raising its head again. If you build everything with three legs, you won’t have this problem. But because a lot of tables and chairs have four legs, you are constantly faced with this issue. Just a little pull from one of the joints and your chair or table doesn’t sit flat. The legs are still the same length but they’re pulled out of true or flat by your assembly.
The Problem
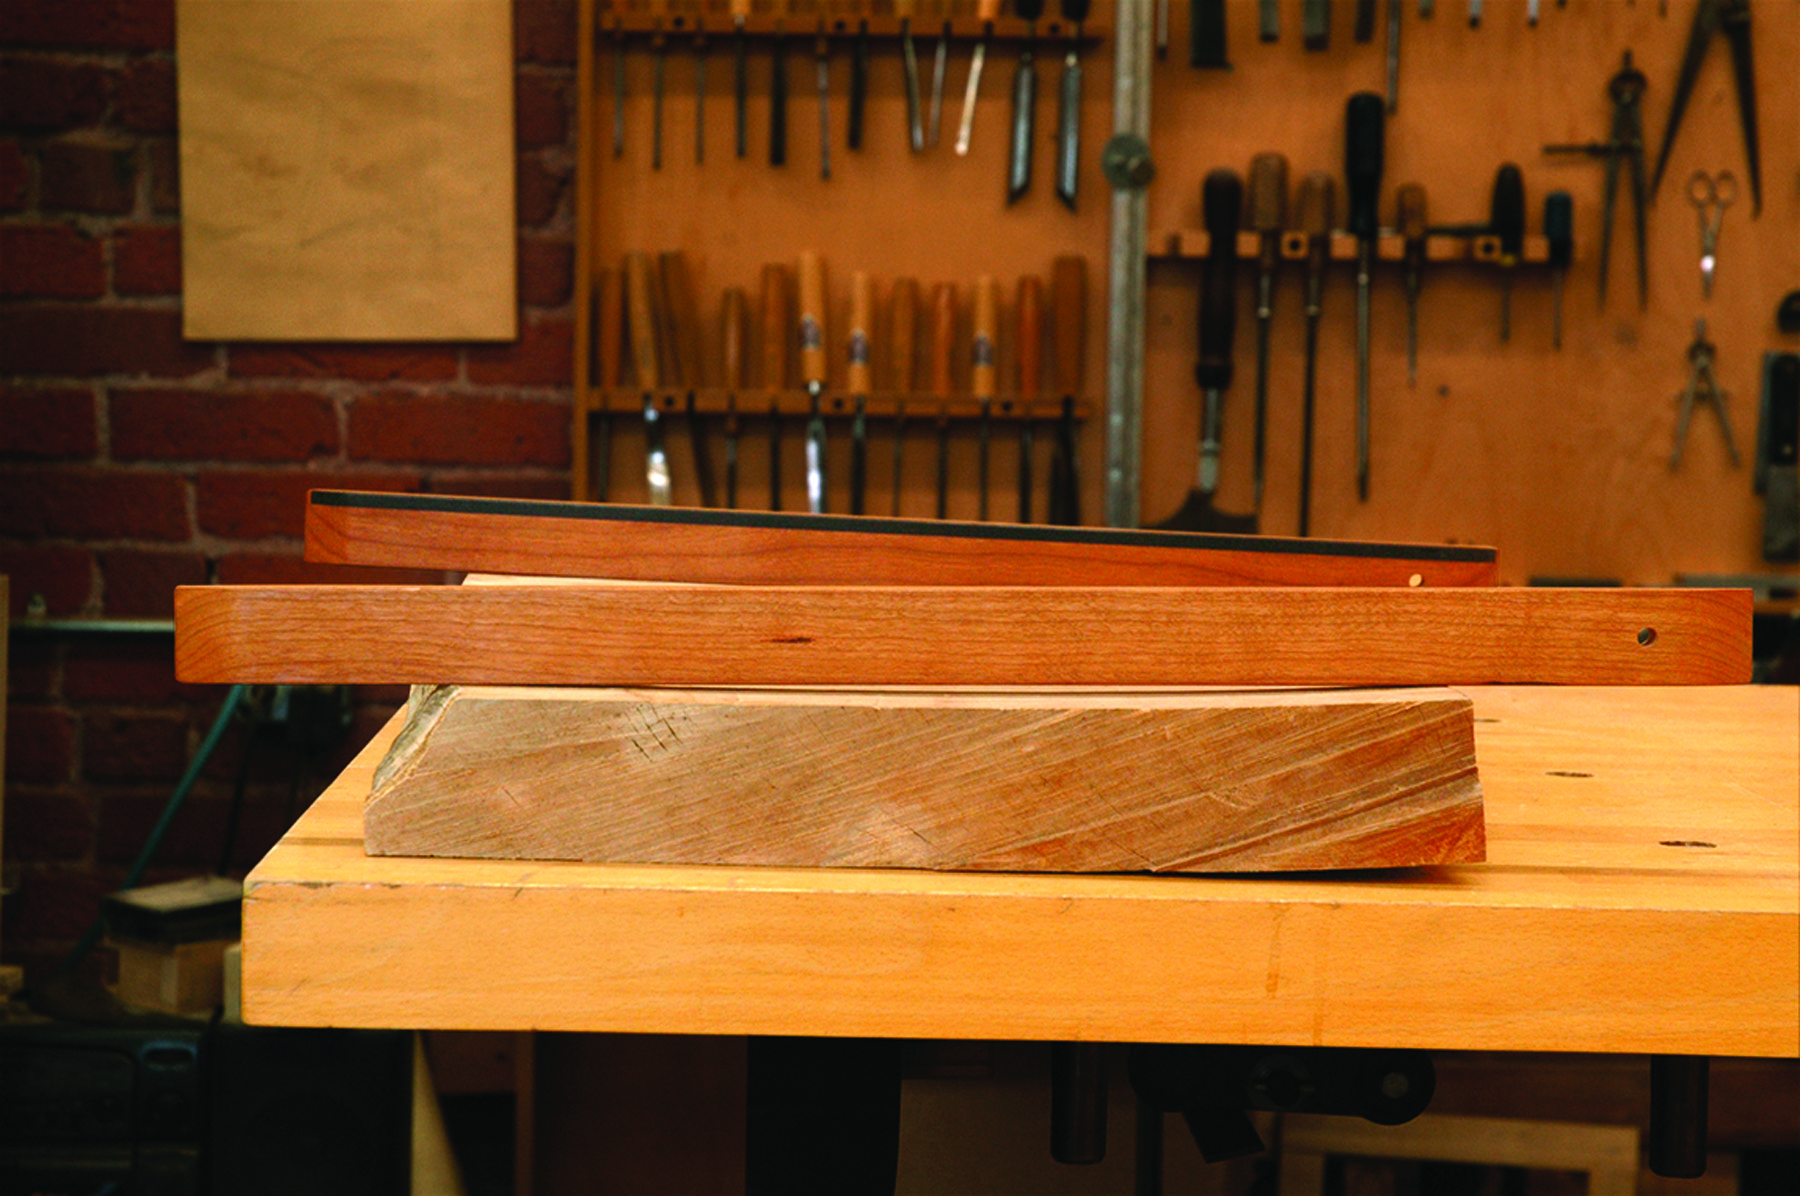
Twisted board, twisted legs. This twisted board illustrates just how a four-legged piece can also twist. There are two opposing high sides vs. two low ones. The winding sticks show what’s high and low.
Let’s say you need to remove a bit of length from one or two legs. As little as a 1⁄32” or 1⁄16” can be a lot to take off with a handplane, but too little to remove with a saw – even if you could line up your saw perfectly. So, how do you true the legs without either making your chair too short or making yourself frustrated in the process?
Let’s understand the problem first. A four-legged chair doesn’t sit flat for one of two reasons. It either sits on an uneven floor or the chair itself is twisted. How do you determine where the problem lies? As I tell my students and all my clients, my bench is the Center of the Universe. If it sits flat on my bench, then it’s flat. If it moves to the floor and rocks, it’s the floor. Of course you could move the piece around until it finds a spot where it’s not tipping then never move it, but that’s not a reasonable solution. So for all intents and purposes, my bench is my reference surface and sets the standard to which I work. If the piece sits flat on my bench, then it’s good to go out the door.
Four-legged pieces can twist for any number of reasons: too much clamping pressure on one side versus the other, mortises cut slightly off center from each other or tenons made at slightly different locations. Little things during construction can add up to small variations that result in a rock so bad in the piece that you think your wood is possessed. (Heck – the boards may actually be possessed and moved or warped as you cut them.) Clearly, this can affect your joinery. Any of these things can add up to a piece that seems to have two longer legs. Even if your legs are equal in length, your task is to trim the bottoms of the seemingly longer ones.
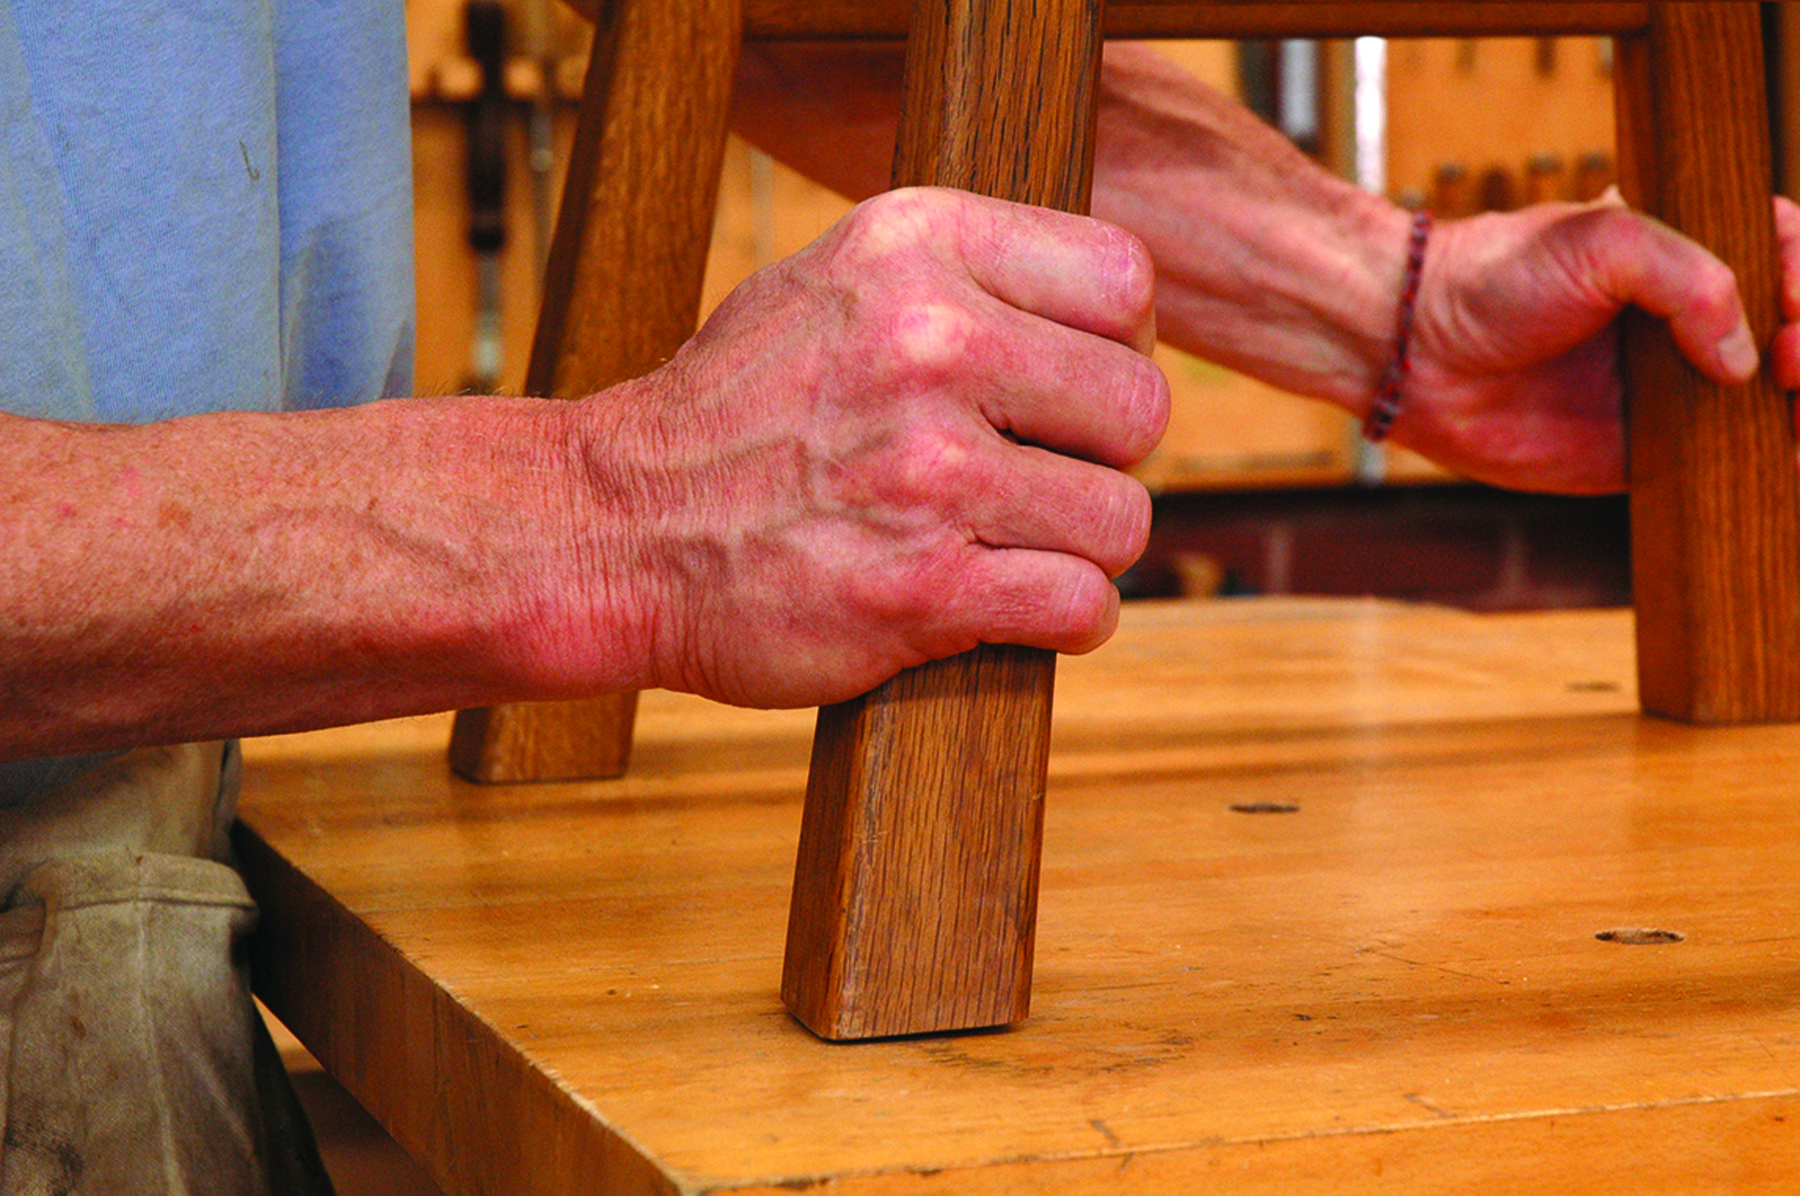
Find the culprits. Check for twist using the bench as a flat reference surface. Pushing on opposing corners will identify which legs are longer, mark those with chalk.
Now you have to make sure you know which leg or legs to trim. A piece rocks because it developed a twist and two legs are pulled up and seem shorter than the other two. It’s just like a board that’s twisted or a cabinet face that isn’t flat. Two opposing corners are high or longer, and two are low or shorter. When adjusting a four-legged piece that’s teetering, the first critical mistake you can make is to remove wood from the wrong legs. To determine which legs need adjustment, set the piece on your bench and push down on one pair of opposing legs and then the other. The piece will rock easily when the short legs are pressed. Pushing on the long legs yields no movement. These are the legs to cut. Get this straight in your head and mark the long legs with chalk before making any cuts.
The common solution to adjusting the leg length is to saw the legs off or handplane the bottoms of the legs to shorten them. Sawing, if not done exactly right the first time, can lead to a succession of cuts that can render your chair suitable only for the kiddie table.
There’s got to be a better way. Truing legs with a block plane requires time and ingenuity to make sure the piece stays stable and doesn’t tear out as you attempt to trim it to length.
A second solution is done at the bench using a handplane or rasp, but it’s difficult work because you’re removing end grain from the bottoms of the legs. If you don’t own or can’t sharpen a handplane, it will be slow going. A file or rasp has a tendency to round over the leg. You also have to figure out a way to hold the piece securely while you work on it. You could try belt sanding the long legs but the risks are too great. So what is the answer? Use your table saw instead, but use it as a plane.
The Solution
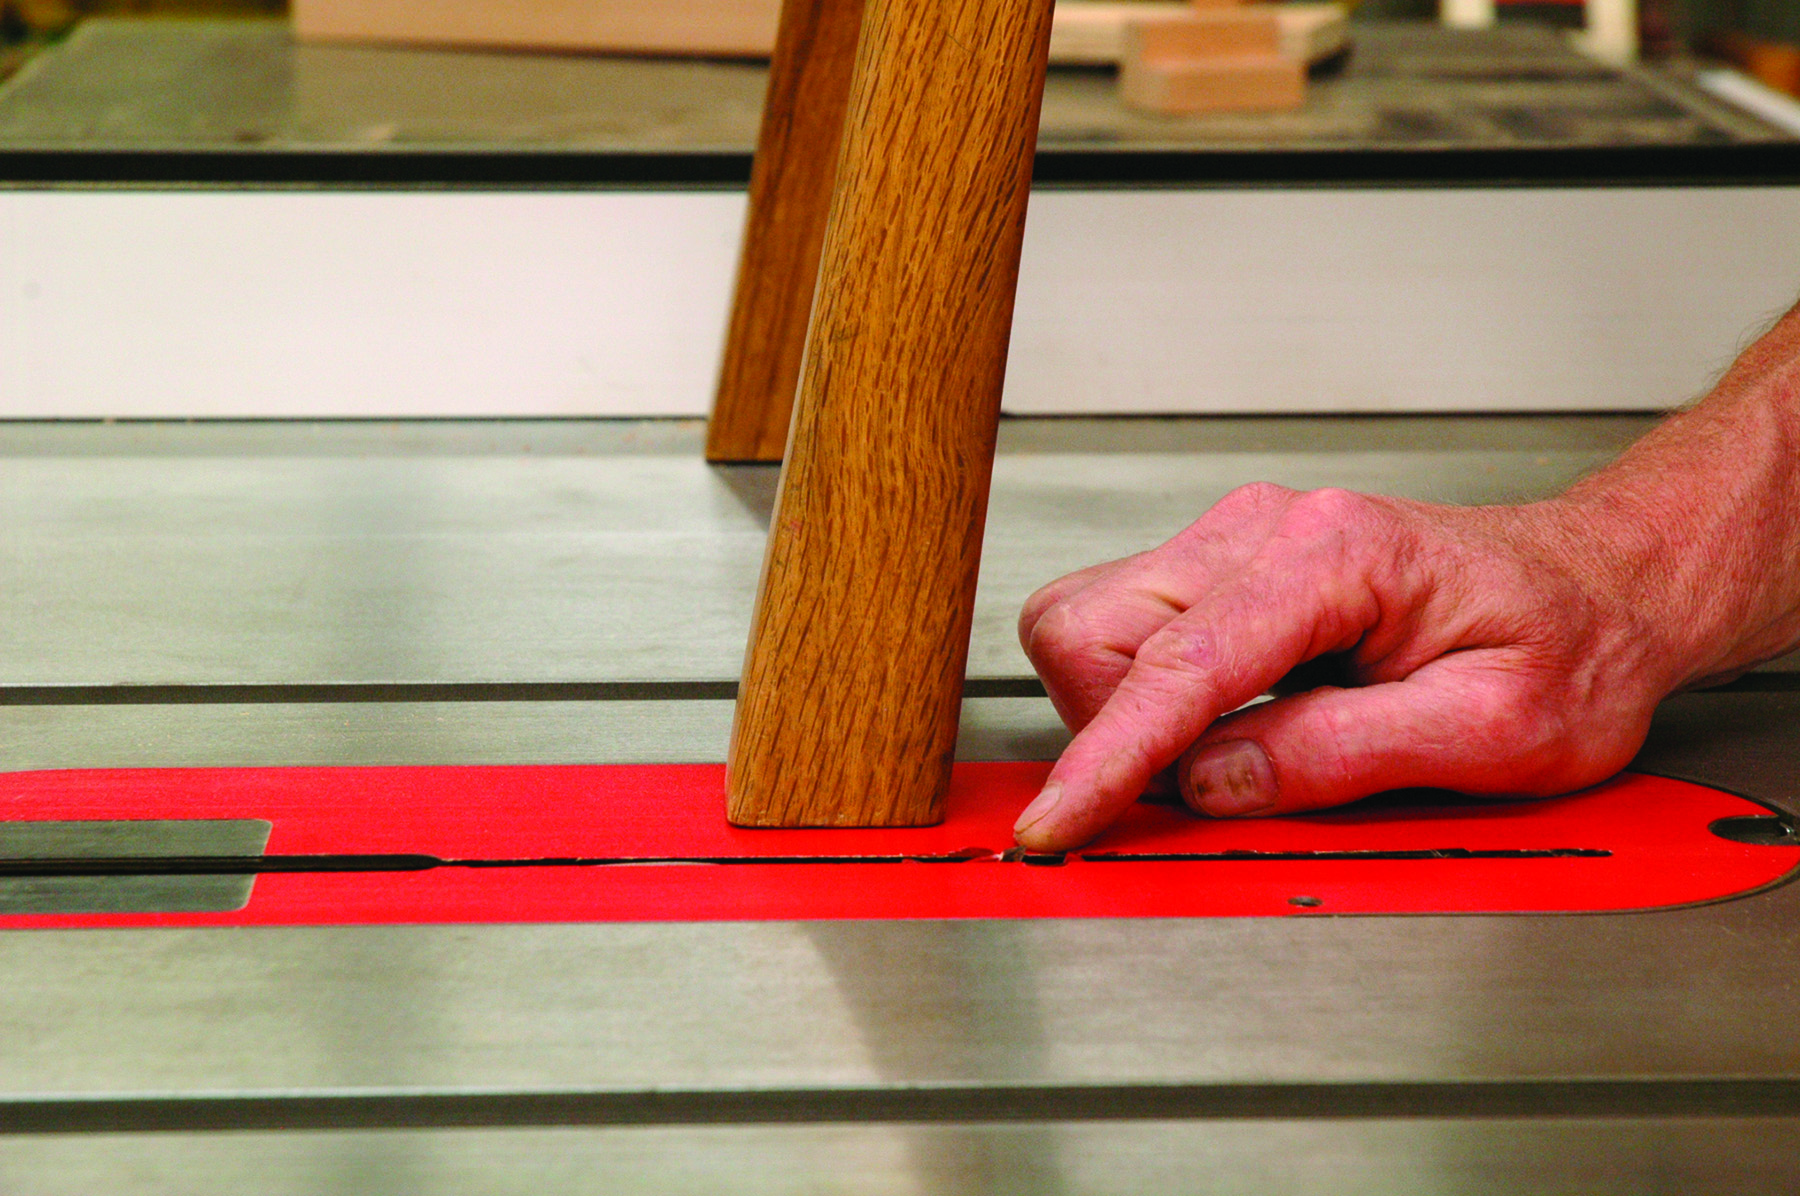
Barely there. Set the blade height for a mere 1⁄64″ to 1⁄32″. You should just feel the blade coming up out of the table throat plate insert. A saw blade with a flat-top grind works best.
Now stop gasping. This method works great if your saw table is flat, you set the blade height properly and you are reasonably sure handed. The table saw table acts as your reference surface with the blade shaving off a tiny amount from the bottom of the leg that’s too long. To get started, set the table or chair on the table saw table and see if it’s rocking the same way it did on your bench. If not, then one or maybe both of those surfaces aren’t true. But if you’re getting the same results, proceed with this surefire technique.

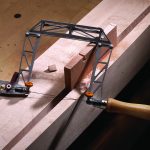
Quick shave. True a leg on the table saw the quick and easy way. Make sure the blade is set for a very small cut. Laterally move one of the longer legs slowly over the spinning blade.
If you have a blade with flat-top grind (usually a rip blade) for your saw, put that on because it tends to cut more quickly and create a slightly smoother cut with less tear-out than an alternate-top-bevel blade. Now the key is to set the blade height for about 1⁄64” – just enough to feel it coming out of the table. This will be enough to remove some wood but not so much that it creates problems.
Material is removed from the bottom of the leg by moving it laterally across the top of the saw blade. Because there’s so little exposed blade there’s no danger of kickback or having the saw pull the piece out of your hands. Grab the piece with two hands, switch on the saw and move one of the long legs slowly over the saw blade. Take your time with this and use the saw blade as a plane rather than a saw.
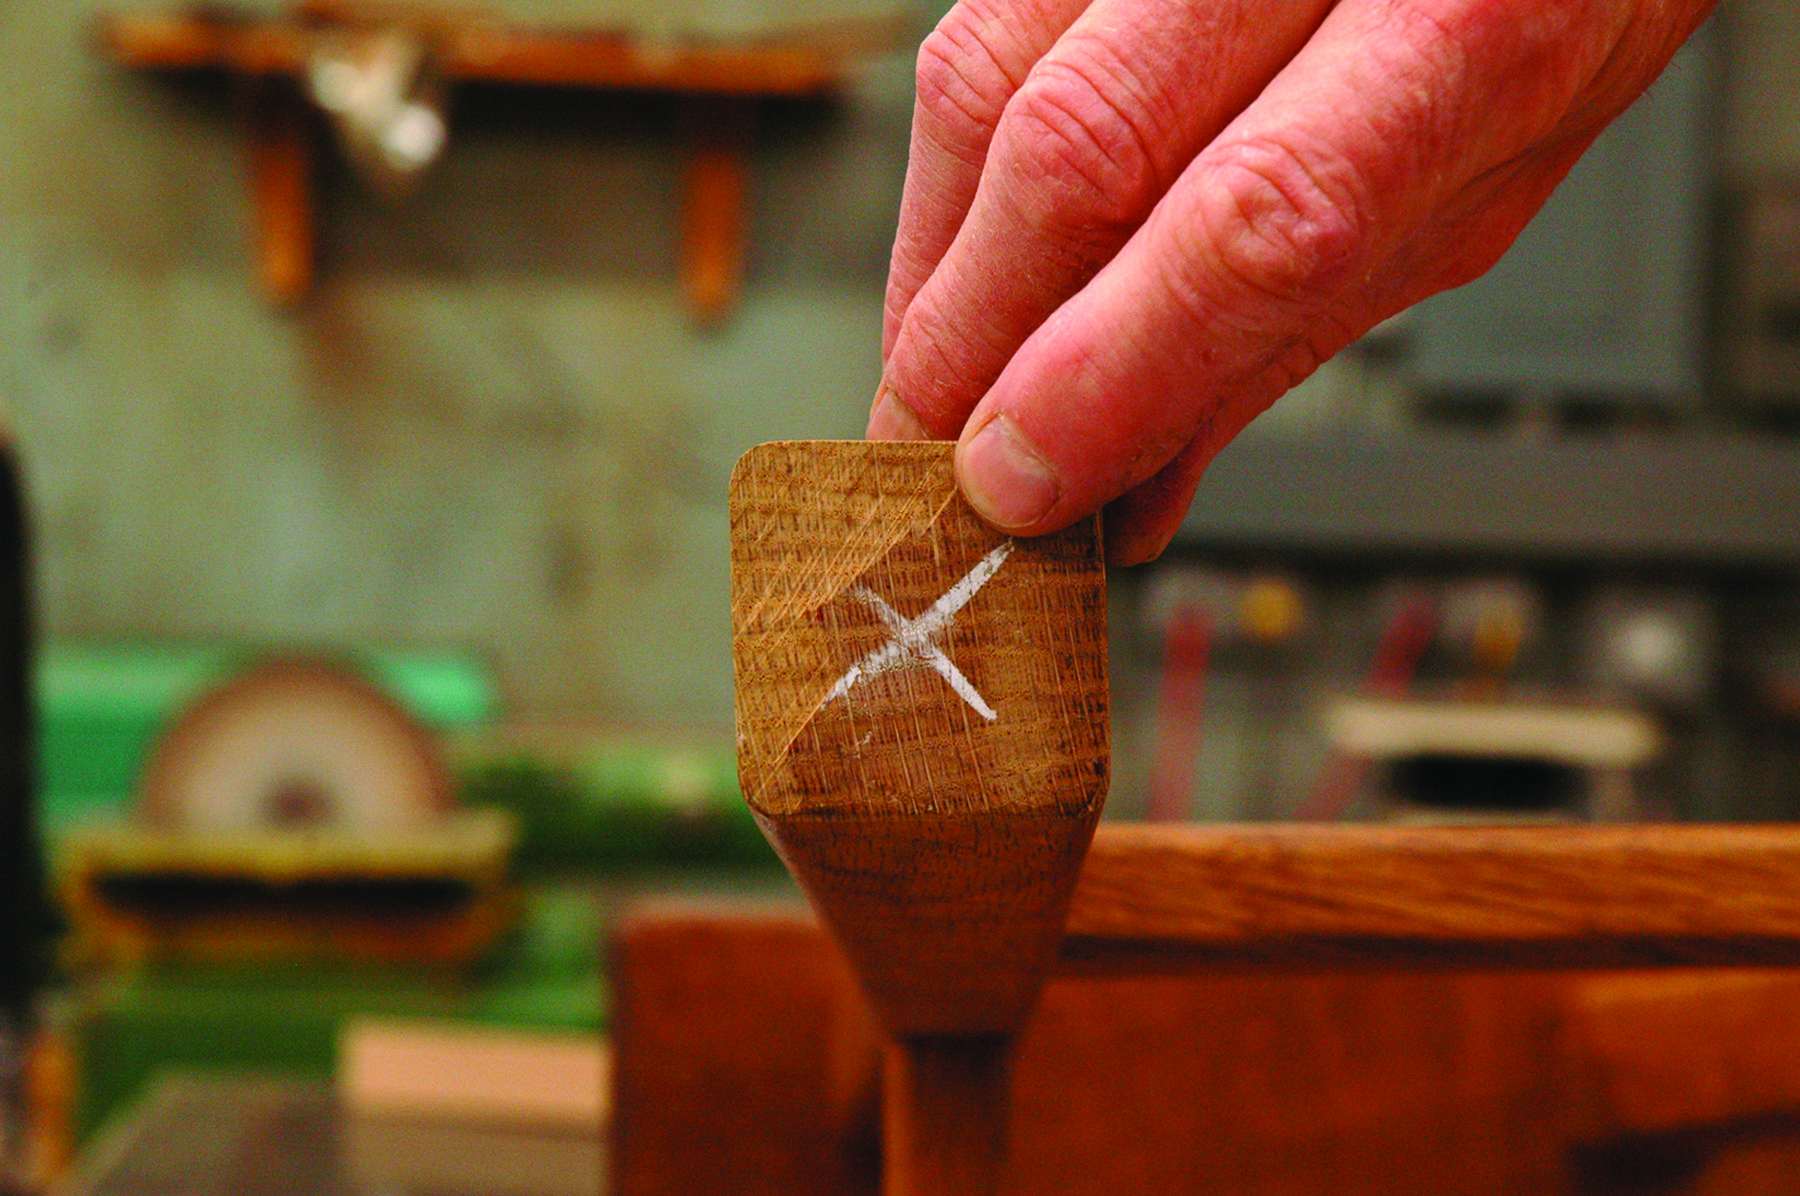
Bottoms up. Check to see if you cut all the way across the bottom of the leg. Sometimes you’ll miss the corner of a leg.
Perhaps a better way to think of this is taking little planing or shaving cuts off the bottom of the long leg.
As you begin to remove material, make sure you’re not taking too much off in one pass, because that can cause blowout on the edges of the legs. Move the leg off the blade and check to see how you did. As you proceed, check your legs on the flat surface of your table saw to measure your progress.
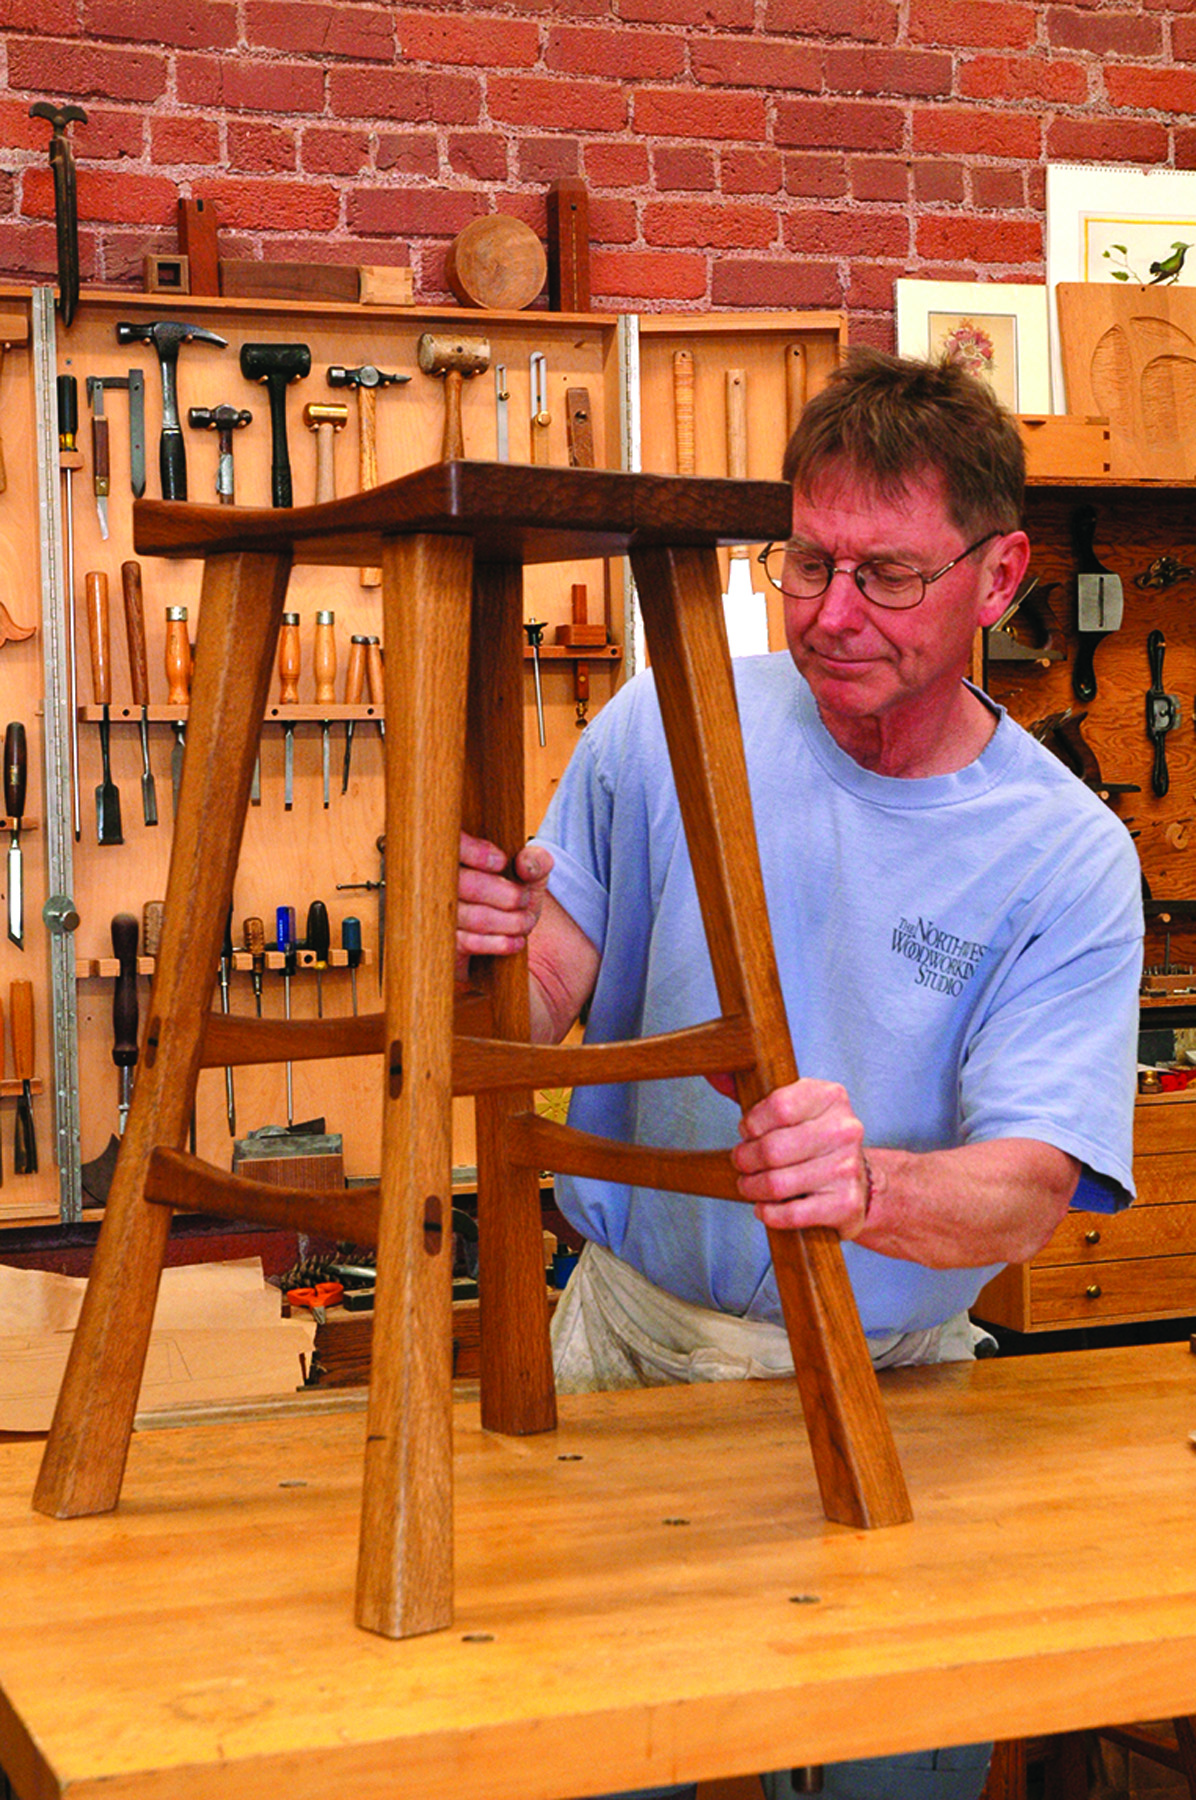
Bench flat is flat. When the stool no longer rocks on your bench, your work is done. Your four legs have been tried and trued.
With light pressure and very little blade exposed you can take off a surprising amount of material in a hurry. If you have more than 1⁄16” to remove, alternate between the two long legs so you keep them close to the same length. Continue removing material until the piece sits flat.
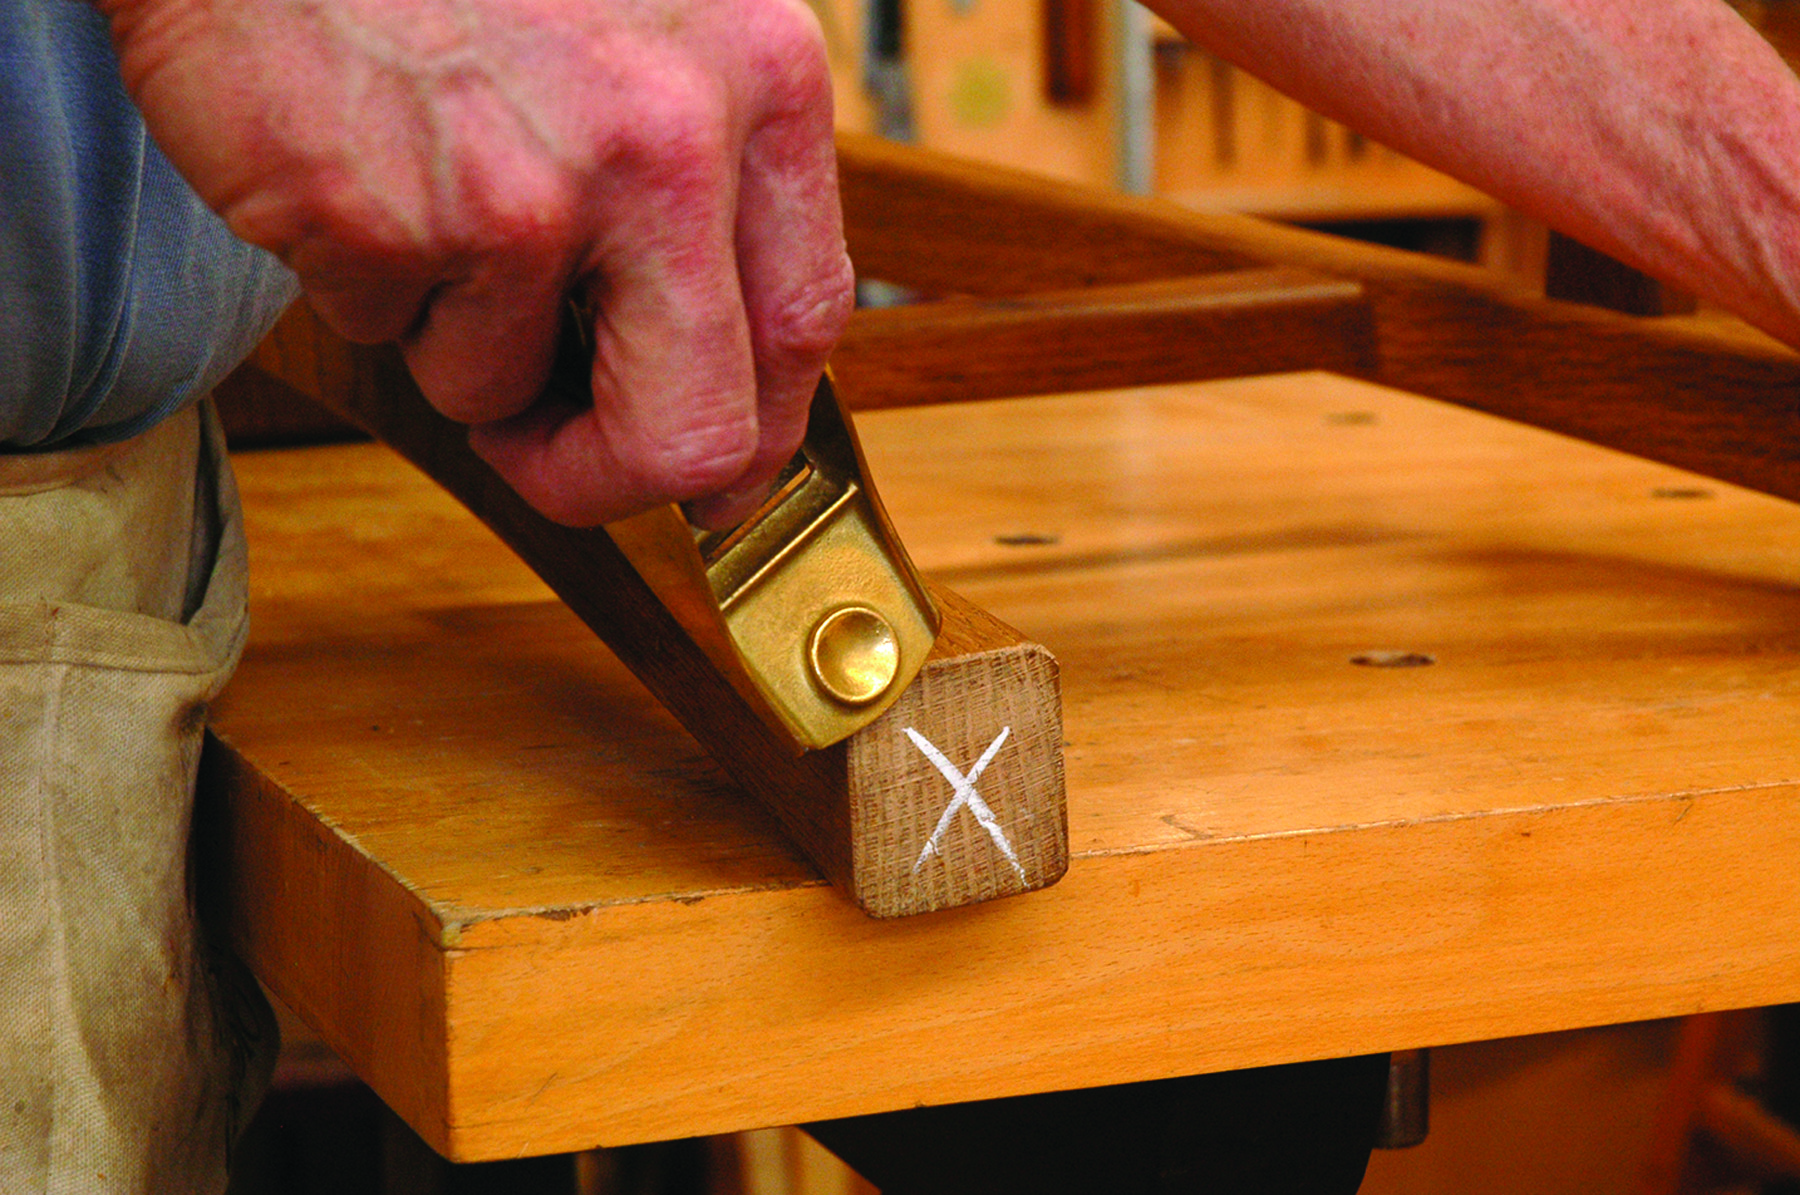
When the piece no longer rocks on the saw table, take it to your bench and clean up the leg bottoms with a few quick passes using either a block plane or file. Chamfer the leg’s bottom edges then set it on your bench to check again for flat in the center of your universe.
Editor’s note: This article originally appeared under the title Fast Fix For Teetering Legs in the February 2013 issue of Popular Woodworking.
Here are some supplies and tools we find essential in our everyday work around the shop. We may receive a commission from sales referred by our links; however, we have carefully selected these products for their usefulness and quality.