We may receive a commission when you use our affiliate links. However, this does not impact our recommendations.

When Egyptian King Tutankhamun was buried in haste, the linen cloth he was wrapped in was soaked with linseed oil. And, perhaps because Tut was buried in haste, the oil was not allowed to cure.
And so began one of the most common safety messages in relation to finishing: Spread out your oily rags to dry cure to avoid spontaneous combustion.
Yup. The oily rags that wrapped Tut’s body spontaneously combusted, charring the body that Howard Carter discovered in 1922. You can read all about that event here.
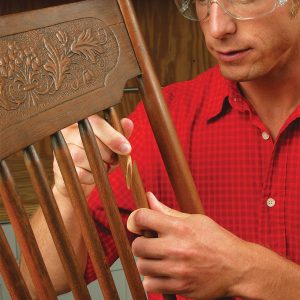
This week I’m adding multiple thin coats of linseed oil to the oak aumbry I’ve built for an upcoming issue of Popular Woodworking Magazine, and in between coats of finish I’ve been getting in touch with my inner Linum usitatissimum. The flax plant has a long history with humans and their woodworking. One of the earliest domesticated plants, flax has long been exploited for its fibrous stalk and seeds.

In some parts of Europe its oil is used as a hearty flavoring to bland foods. But here in the United States, we use flax far more as a cloth – it is linen – and as an important component in finishing. It is the basic ingredient in oil paints and many other finishing products, most notably boiled linseed oil.
Plain linseed oil is a drying oil, meaning it will stiffen and dry when exposed to oxygen. But it takes a long time for this to happen – it can be days, depending on the ambient temperature. And so historically linseed oil was heated – sometimes with lead – to significantly shorten its drying time. Today linseed oil is transformed into “boiled linseed oil” by adding metallic dryers.

Stephen A. Shepherd discusses how you can make your own boiled linseed oil at home (with some precautions) so you can avoid contact with metallic dryers. Details are in “Shellac, Linseed Oil, & Paint” (Full Chisel), which is available through his web site. The book is an interesting read.
I haven’t tried it, and so I use the off-the-rack “boiled linseed oil” from the home center and wear gloves when applying it.
As a stand-alone finish, linseed oil is an adequate finish, as long as you know its limitations.
Many beginning woodworkers use an oil-only finish because it is easy to apply and gives a nice low-lustre sheen. The main problem with linseed oil is that it doesn’t offer much protection against scratches or water. You can get around this problem by applying many, many thin coats of oil, like gunsmiths do, but this is time-consuming.
The other problem with a straight oil finish is that unless you apply many coats, the finish will lose its lustre in short order. So you have to wax the finish (and maintain that) or add more oil. I’ve seen many pieces of furniture from beginners that suffer from this problem – the wood looks dull, lifeless and like it is covered in a fine layer of dust.
Despite these limitations, I use boiled linseed oil a lot. It is a fantastic base coat for many projects because it will help accentuate the figure in the wood and will yellow over time (some people don’t like the yellowing; I do).
However, after applying the oil, I follow it up with something else that will add some protection.
If you don’t own special finishing equipment (such as a spray gun), I recommend you make your own topcoat finish from readily available sources. I use a finish that is equal parts spar varnish, boiled linseed oil and “odorless” mineral spirits.
Just mix them up in a jar and you have a near-perfect wipe-on finish. Apply thin coats (I usually use three coats) and this finish will add enough protection for typical furniture. It also will prevent the straight oil below from drying out. I wouldn’t use this finish on a kitchen table, for example, unless I added a lot of coats.

Of course, when you finish with your finishing, you need to dispose of your rags properly so you don’t burn your tomb down. I usually spread the rags out flat outside or temporarily on the edge of the garbage can until I can get them outside.
If you need the rag for the next coat of finish, you can seal it in a Ziploc bag with all the air removed. That will keep it moist.
I’ll be honest, I’ve never had a problem with the rags heating up, even when I intentionally tried to start a fire. Last year I soaked a bunch of rags and put them in a tin can outside to see how long it would take to start a fire. No joy.
Oh well.
— Christopher Schwarz
If you are beginning finisher, I can offer no higher recommendation than Bob Flexner’s “Wood Finishing 101.” It is short, easy to understand and 100 percent free of misinformation. This book is only $12.50, but it’s worth its weight in gold.