We may receive a commission when you use our affiliate links. However, this does not impact our recommendations.
 Cut precision joints on a large top.
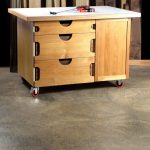
Breadboard ends are old devices for improving a solid-wood top. They act like cleats to hold the top flat, which is particularly important when there’s minimal understructure, such as on a trestle table. They also cover end grain, which can help prevent a top from cracking. They’re often used on boards for kneading dough or cutting bread (thus the name), but breadboard ends have also traditionally been used on dining tables, kitchen work tables, desks, library tables, and workbenches.
Cabinetmakers realized long ago that breadboard ends add visual interest, too. As your eye scans down the length of a top with breadboard ends, it stops at an end piece, turns, follows it, and returns down the top. The ends keep your eye moving, making a top look more dynamic.
Narrow breadboard ends, like those used on cutting boards, are usually held on with a simple tongue and groove joint. Breadboard ends that are over 1-1/2-in. wide or so benefit from a stronger joint (see below). Making this joint on a big tabletop can be a bit of a problem, though. Here’s a method using portable electric tools and hand tools that will work with a top of any size.
INSIDE A BREADBOARD JOINT
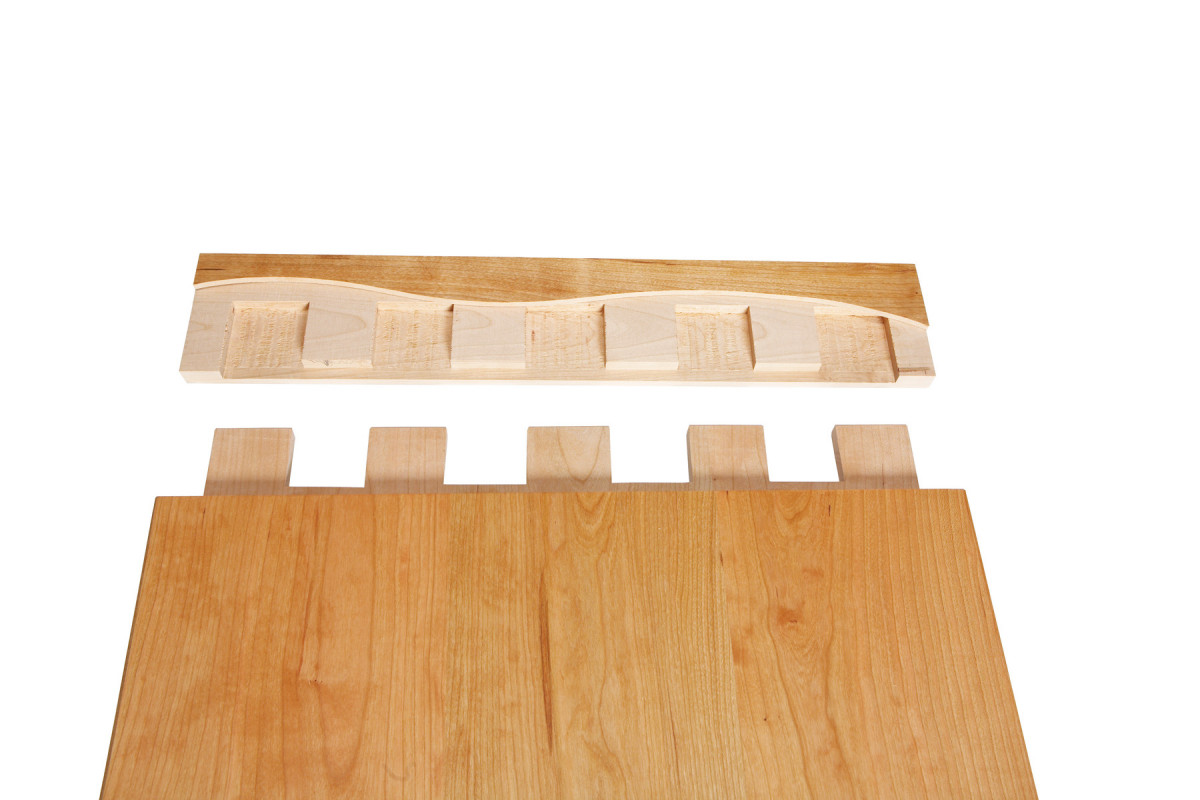 A wide breadboard end needs plenty of support, so it won’t break off if somebody leans on it. That support is provided by a series of long tenons, which fit into deep mortises.
The trick in designing this joint is to accommodate wood movement. As humidity changes with the seasons, a tabletop expands and contracts across the grain. The breadboard end won’t get shorter and longer, though: its length stays the same. To allow the top to move inside the breadboad end, most of the tenons are 1/16-in. to 1/8-in. narrower than their mortises. The center tenon is the same width as its mortise. This equalizes the amount that both sides of the top will move.
PREPARE THE TOP
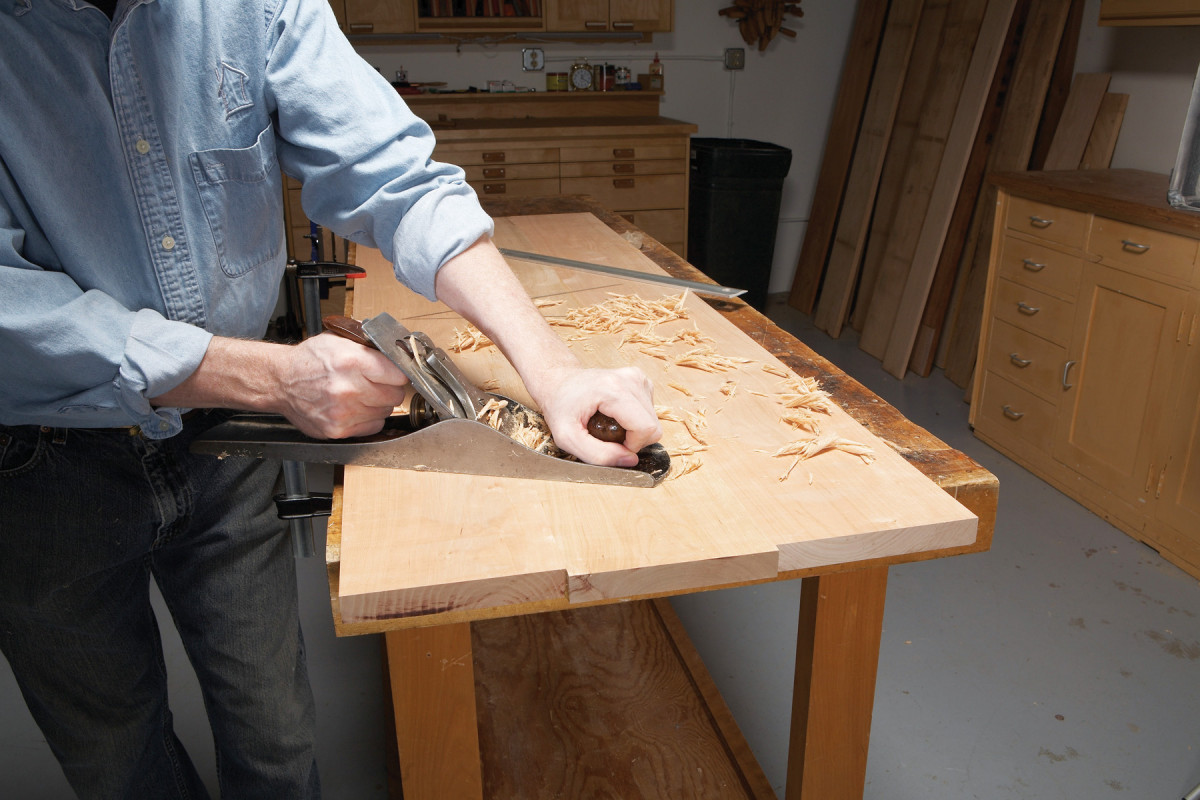
1. Your top must be flat before cutting breadboard-end joints. If it’s cupped, plane across the grain to remove the high spots. This advanced technique requires skill and practice.
Breadboard-end joints are very difficult to make if your top is slightly cupped. It pays to do whatever you can to ensure that the top is flat when you glue it up, such as clamping heavy battens across the ends. If your top is still cupped, despite your best efforts, you can clamp it flat to a workbench while you make the joints. You’ll be flipping the top over now and then, though, which will be awkward.
You may also use a belt sander or a large plane, such as a No. 6 or a No. 7, to flatten a cupped top (Photo 1). This requires skill and practice, whichever tool you use. It’s important to flatten both sides, because they will be reference surfaces for making the tenons. Measure the thickness of your top at both ends when you’re done. It should be the same all the way across, to make the joints easier to fit. It also helps if both ends are the same thickness.
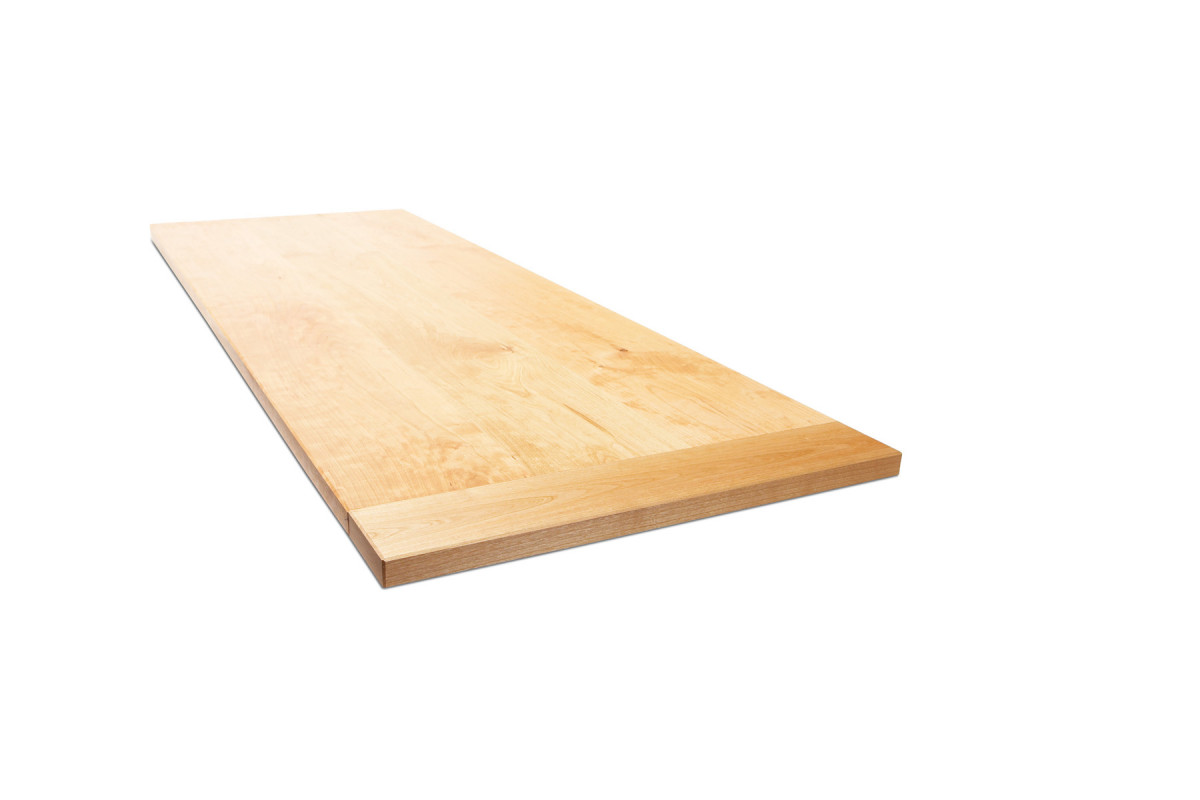
2. Rout a square, straight end on the tabletop using a guide board and a top-bearing flush trim bit
Next, make the ends straight and square. The easiest way to do this is to use a router, a wide guide board, and a top-bearing flush trim bit (Photo 2). Make the guide board from 1/4- or 1/2-in.- thick hardboard or MDF, about 12 in. wide and 3 to 4 in. longer than the width of your top. Clamp a sacrificial piece to the right side of the guide board to prevent tearout on the top’s edge.
MORTISE THE ENDS
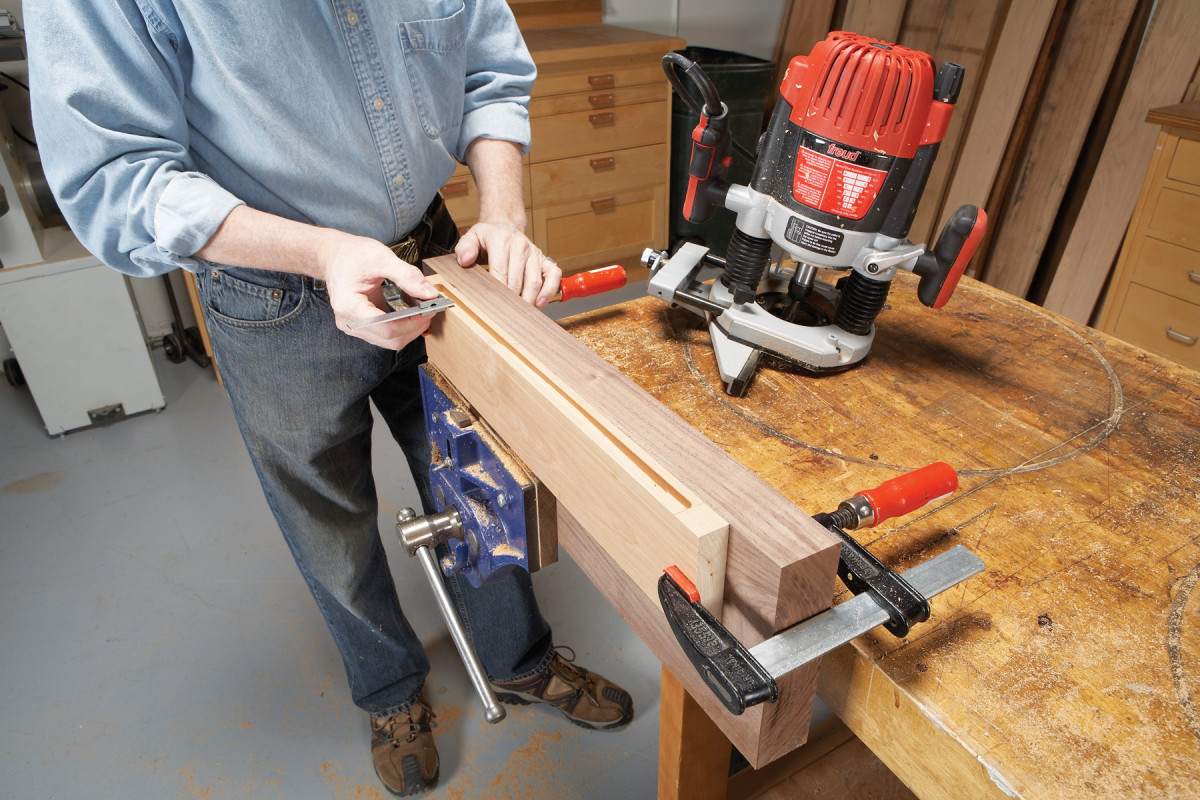
3. Make the end pieces next. Use a plunge router to cut a shallow, stopped groove down the length of each piece. Make sure the groove is centered side-to-side.
Mill the breadboard ends the same thickness as the top. Make an extra piece to test your setups along the way. Their width is up to you; on a long or wide top, such as a dining table, ends that are 2-1/2 in. to 4 in. wide look about right; the ends shown here are 3- 1/2 in. wide.
Cut a stopped groove down the length of both end pieces using a plunge router and edge guide (Photo 3). Use a bit that’s about one-third the thickness of your top (a 1/4-in. dia. bit for a 3/4 in. top, for example). Make the groove about 3/8 in. deep. Center the groove as precisely as you can. Stop the groove about 1-in. shy of both ends. You could run the groove the full length of the pieces, but the ends of the finished joint won’t look as neat.
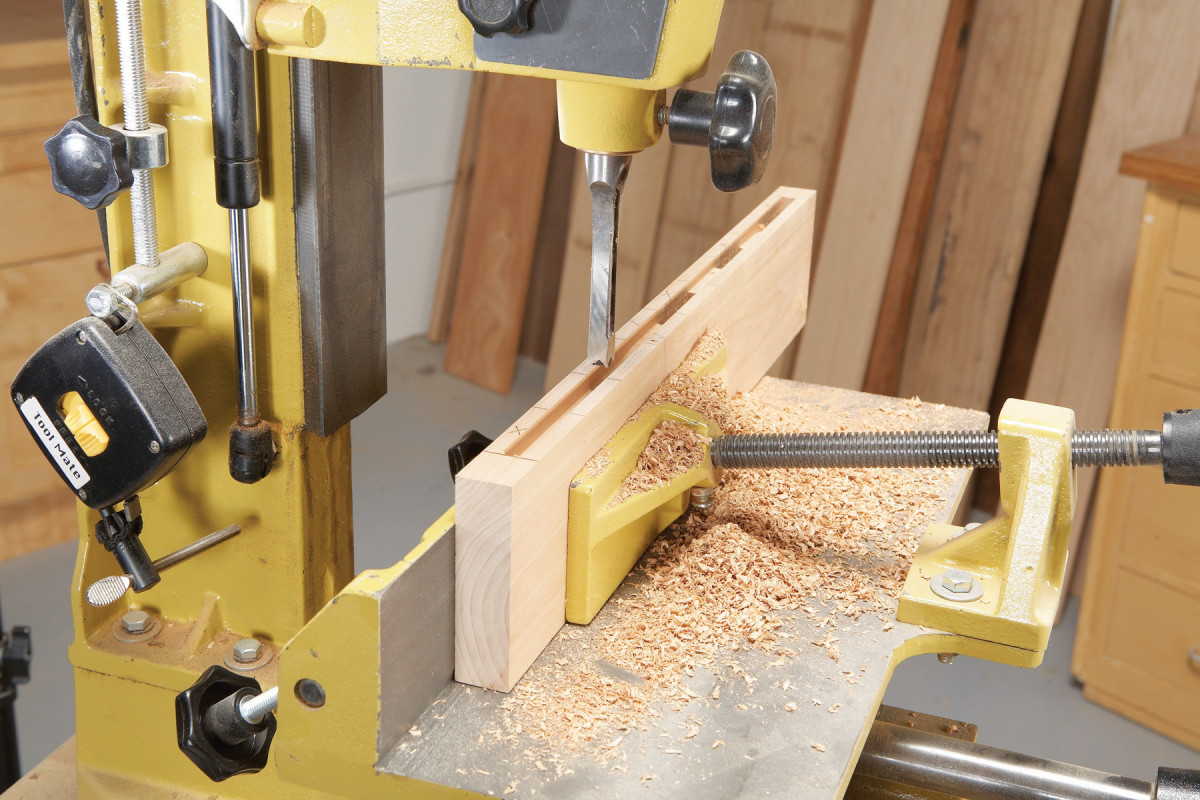
4. Cut a series of deep mortises in the end pieces using a mortising machine. The mortising bit is the same width as the groove.
Lay out and cut mortises in the end pieces (Photo 4). Their width and spacing is your call; just be sure to leave plenty of room between them, so as not to unduly weaken the end pieces. Make the mortises 1-1/2 in. to 2 in. deep (the ones shown here are 2 in. deep).
CUT THE TENONS

5. Mill a test piece that’s the same thickness as your top. Use a router and edge guide to form a tongue on the test piece. Make the tongue the same width as the groove.
Chuck a 1/2 in. or 3/4 in.-dia. bit in your router. Set the depth of cut equal to the distance between the face of the end piece and the groove. Place the router on the top of the test piece (not on its edge), and rout a tongue (Photo 5). Check the tongue’s thickness– it should be equal to the width of the groove and mortises. If you readjust the router’s depth of cut, be sure to rout from both faces of the test piece.
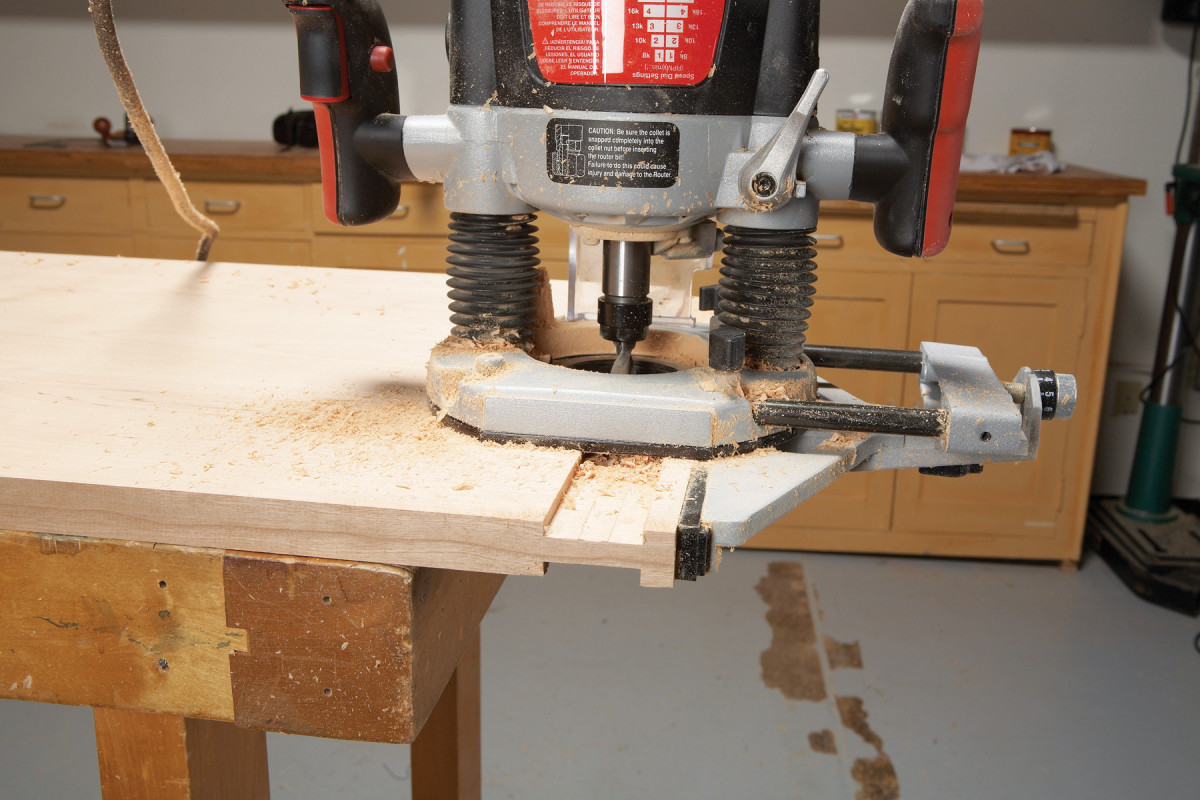
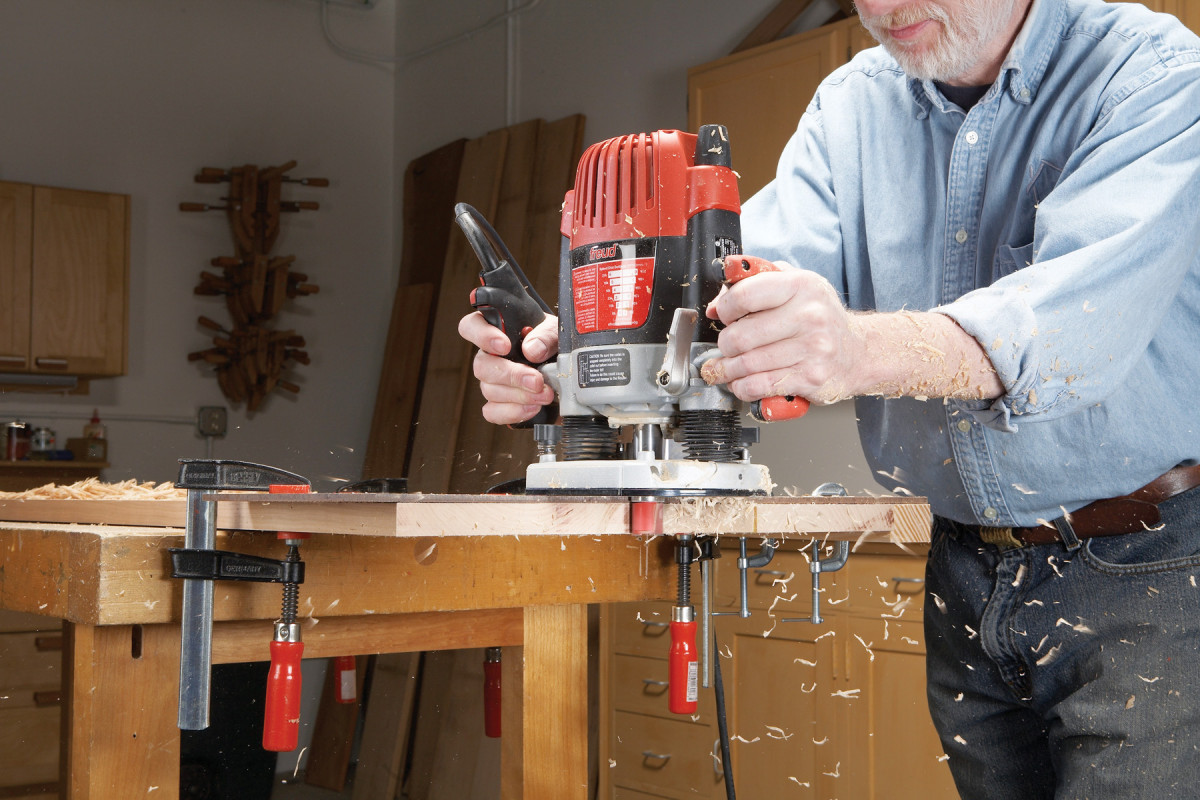
6. Rout wide dados across both sides of the top to start forming the tenons. Leave a strip of wood uncut to support the router.
Rout the ends of the table top (Photo 6). This requires a series of overlapping cuts, on both sides of the top. Start with the outermost cuts, then reset the edge guide and work your way in.
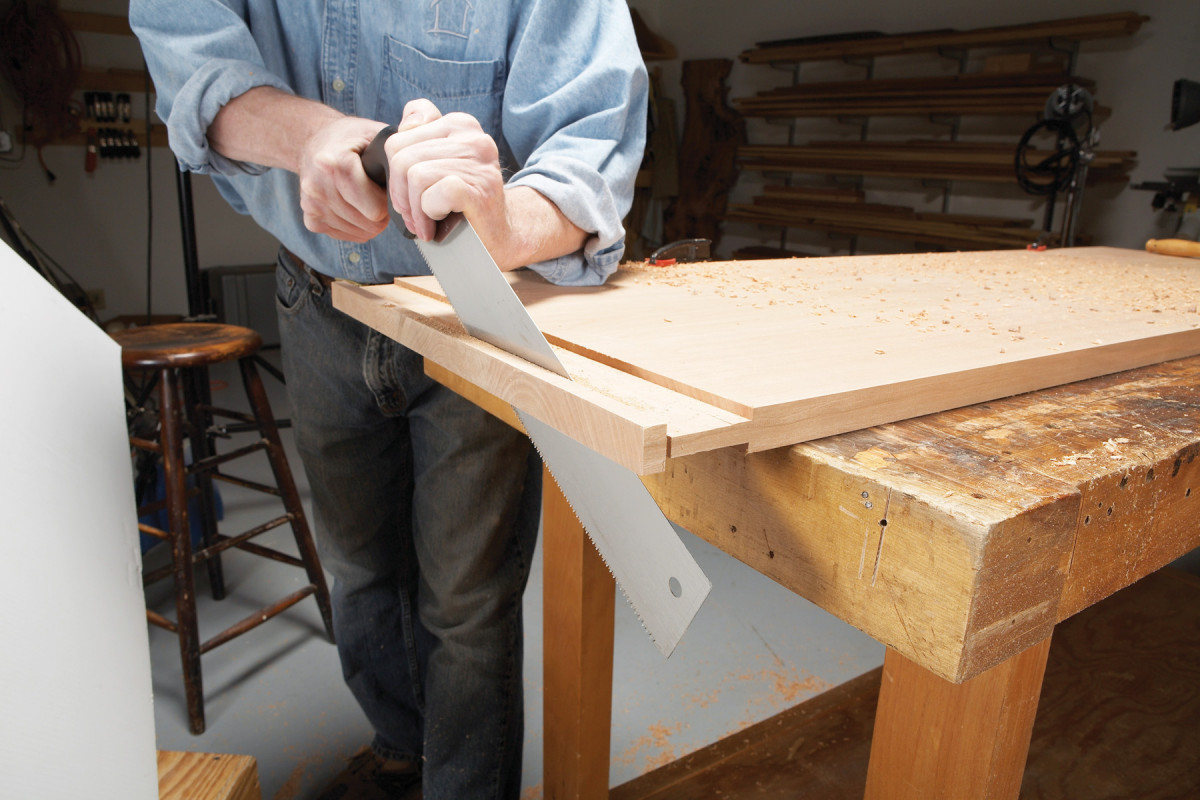
7. Saw off the support piece by hand or use a jigsaw. It doesn’t matter if the sawn edge is a bit uneven or out of square.
Flip the top to repeat the same cut on the opposite side. The last cut, which creates the tenons’ shoulders, must be absolutely straight. Shift the router’s edge guide only 1/16 in. or so to make this cut–that should do the trick. Saw off the support piece (Photo 7). The resulting tenon should be 1/16 in. shorter than the depth of the mortises.
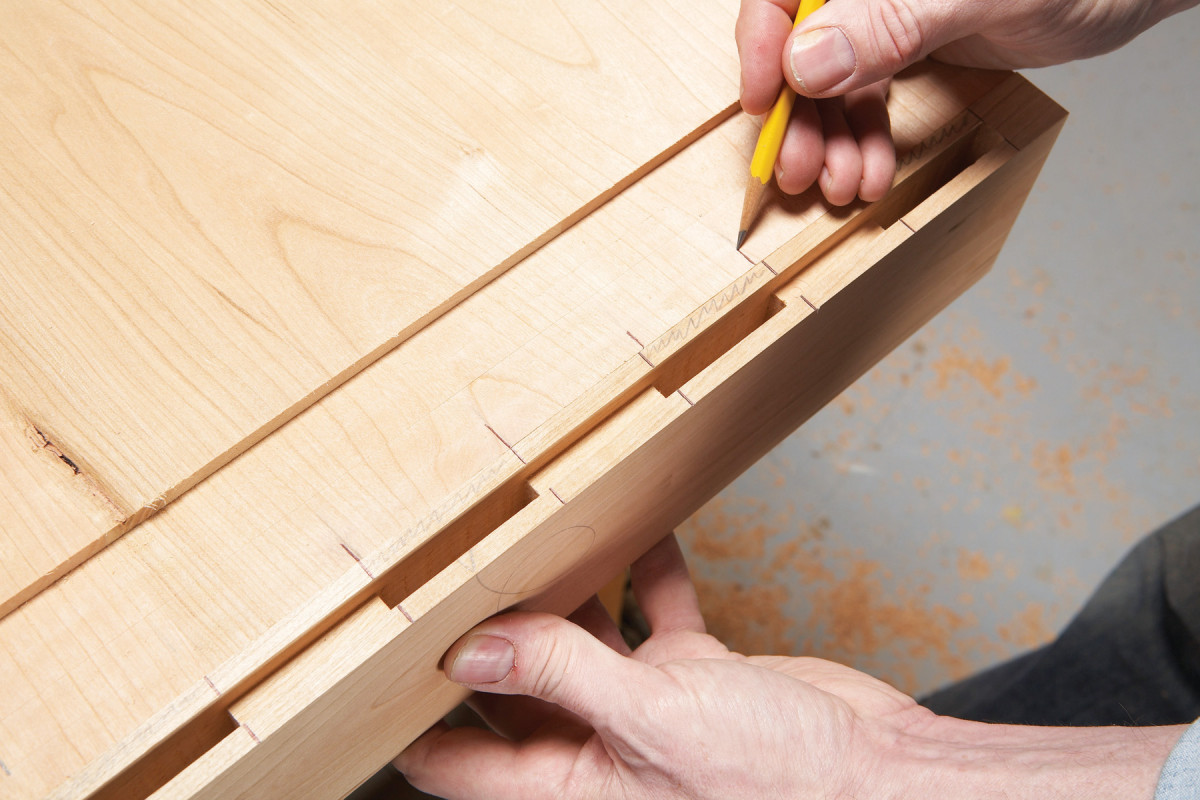
8. Place an end piece next to the top. Mark the center tenon exactly in line with its mortise. Mark the other tenons narrower than their mortises.
Lay out the individual tenons (Photo 8). Mark the center tenon the exact width of its corresponding mortise. Mark the next tenons about 1/16-in. narrower, on both sides, than their mortises. This offset should get larger as you go, depending on how wide your top is, how much your species of wood moves, the season in which you’re building, etc. As a general rule, an 1/8-in. offset on both sides of the tenon should be sufficient for most tops.
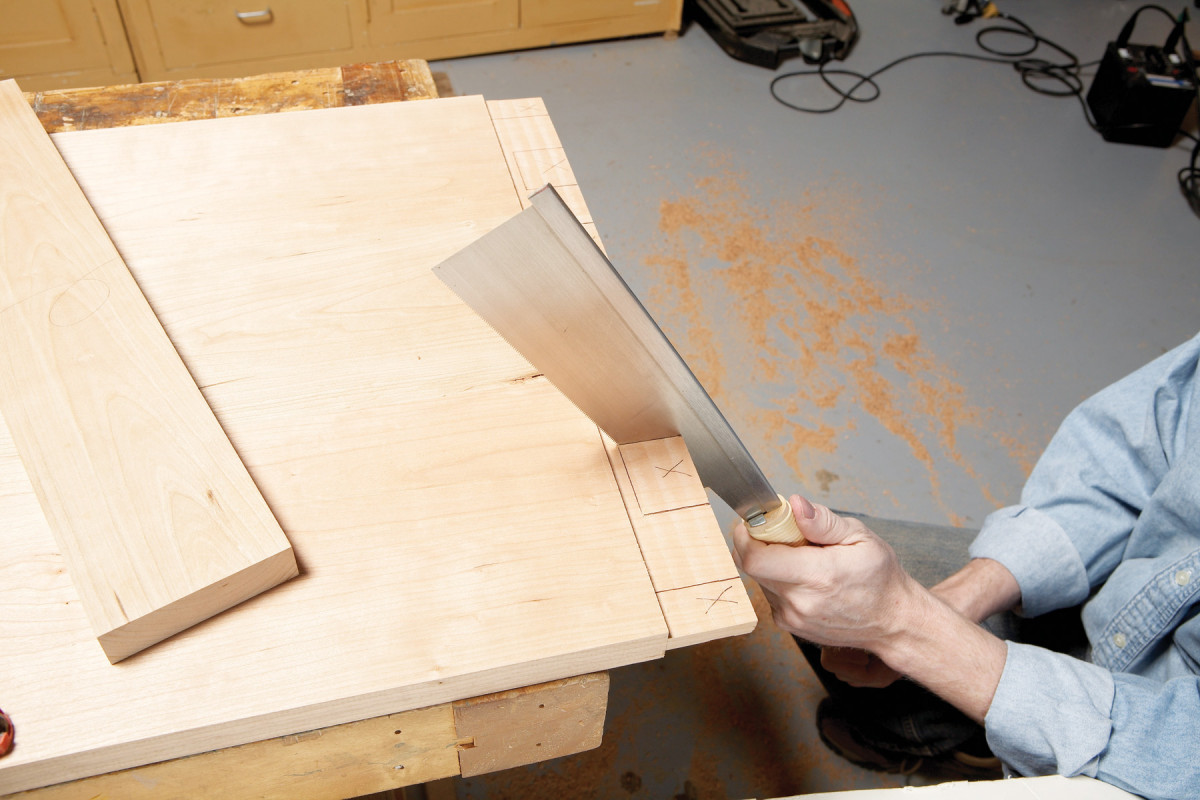
9. Cut the tenons. Stop most of the cuts at the haunch line. At the outer ends, saw full depth, then saw near the shoulder to remove the end waste piece.
Draw a line across the top to lay out the haunches (the short segments between the tenons). Make the haunches 1/16-in. shorter than the depth of the grooves in the end pieces to ensure that the joint’s shoulders fit tight.
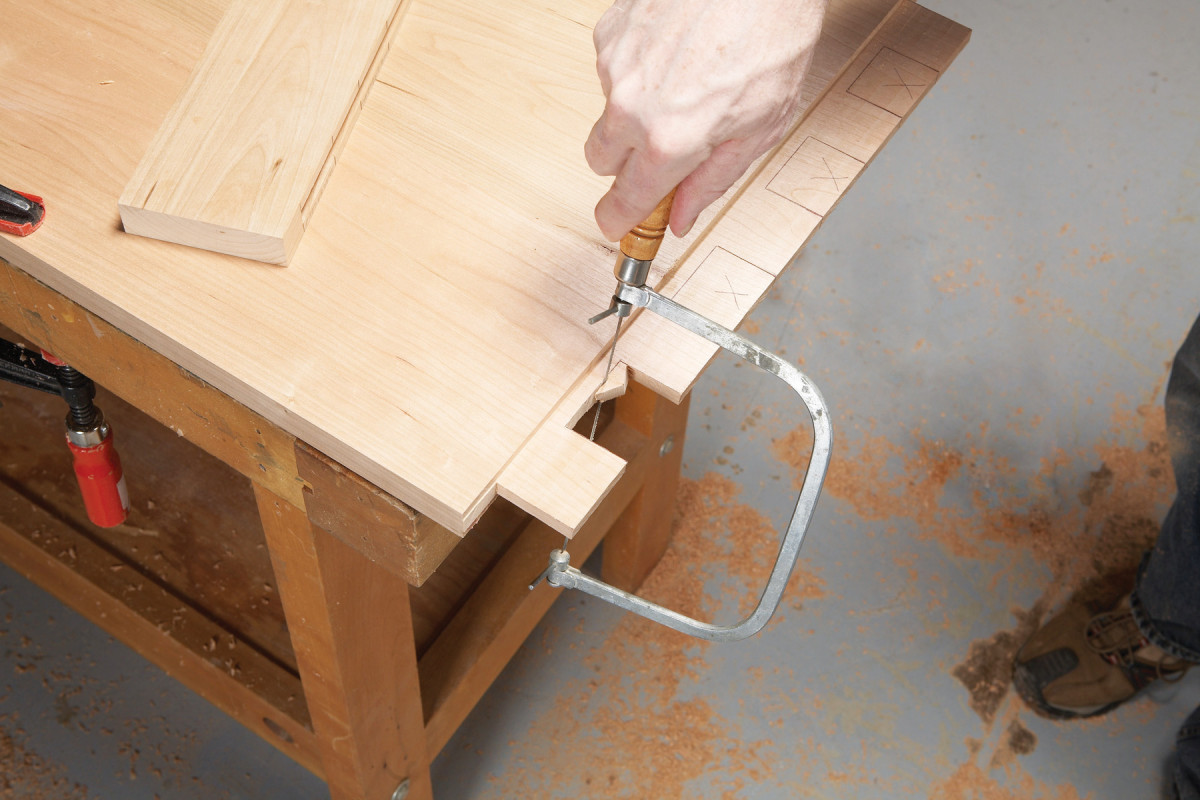
10. Cut the waste between the tenons using a coping saw. Twist the blade so it’s at a right angle to the saw’s frame.
Saw the tenons (Photos 9 and 10). After removing the end waste pieces, pare the shoulders even using a chisel or a trim router and a flush-trim bit.
FIT THE JOINT
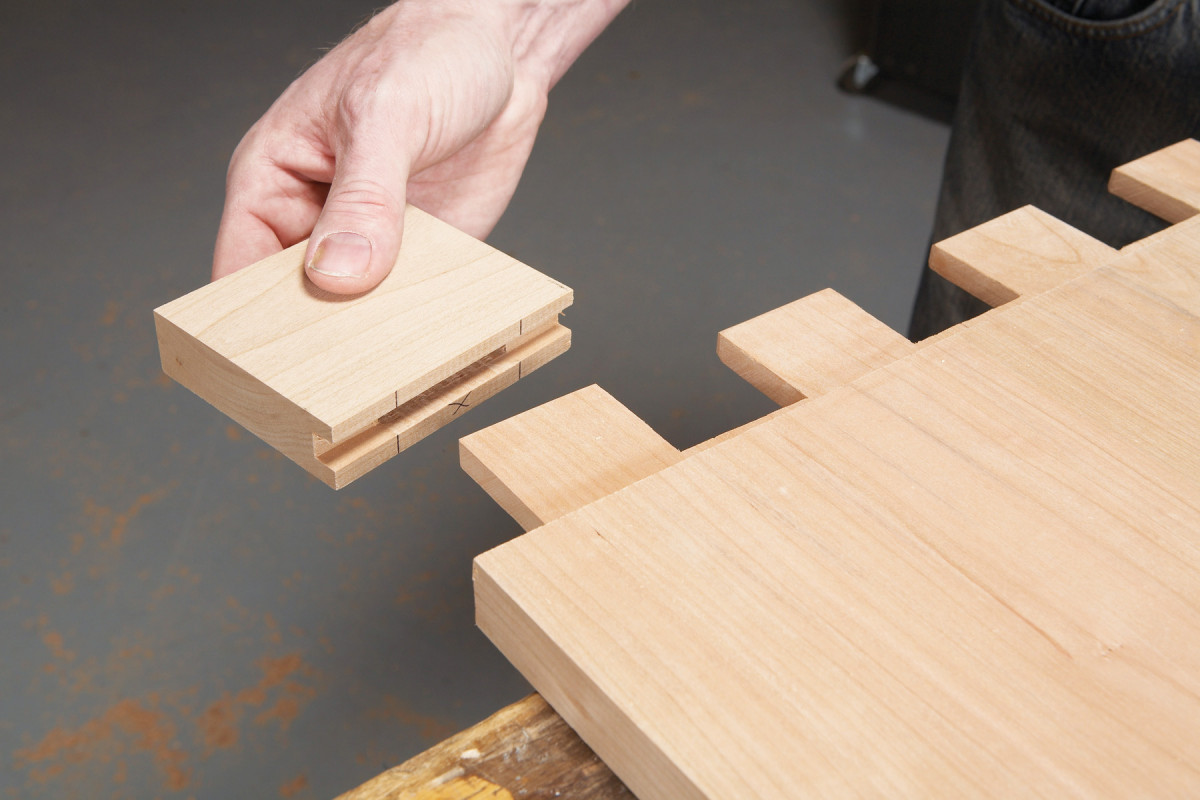
11. Test each tenon’s fit using a short piece of wood that has the same groove and mortise as the end pieces. Ideally, this test piece should slip over the tenon with very little effort.
Try fitting each breadboard end onto the table top. Chances are that it won’t go without force, and that’s fine. It’s better that the fit be a bit too tight than too loose at this point. (If it’s too loose, you can shim the tenons with glued-on veneer.) Don’t strike the end piece with a hammer; if the fit is that tight, you’ll have a very hard time getting the piece off. Typically, the tenons must be shaved a bit thinner. The best way to figure out how much to take off, and where, is by using a short test piece (Photo 11).
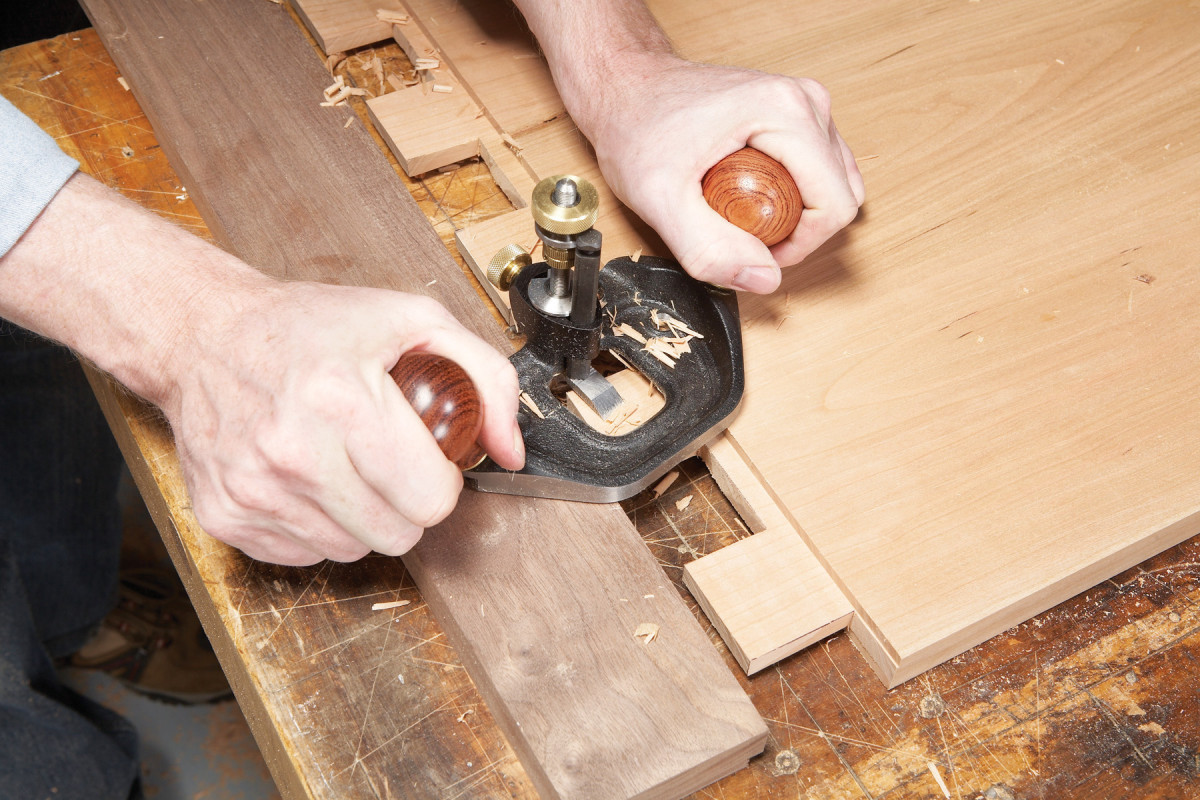
12. Use a router plane or rabbet plane to pare the tenons thinner, if necessary. Support the router plane with the test piece you made that’s the same thickness as the top.
Pare the tenons as needed (Photo 12). You can use an electric router, a router plane, or a rabbet plane. An electric router is fast, but you must be very careful not to cut into the joint’s shoulders. A rabbet plane won’t harm the shoulders, but you may create another problem: inadvertently leaning a rabbet plane from side to side will cut a taper on the tenons. A router plane works best–and is a fun tool to use! You can’t cut into the shoulders, and the tenons will always be parallel to the top. Shoot for a somewhat loose fit for the breadboard ends. You should be able to push them home with hand pressure alone.
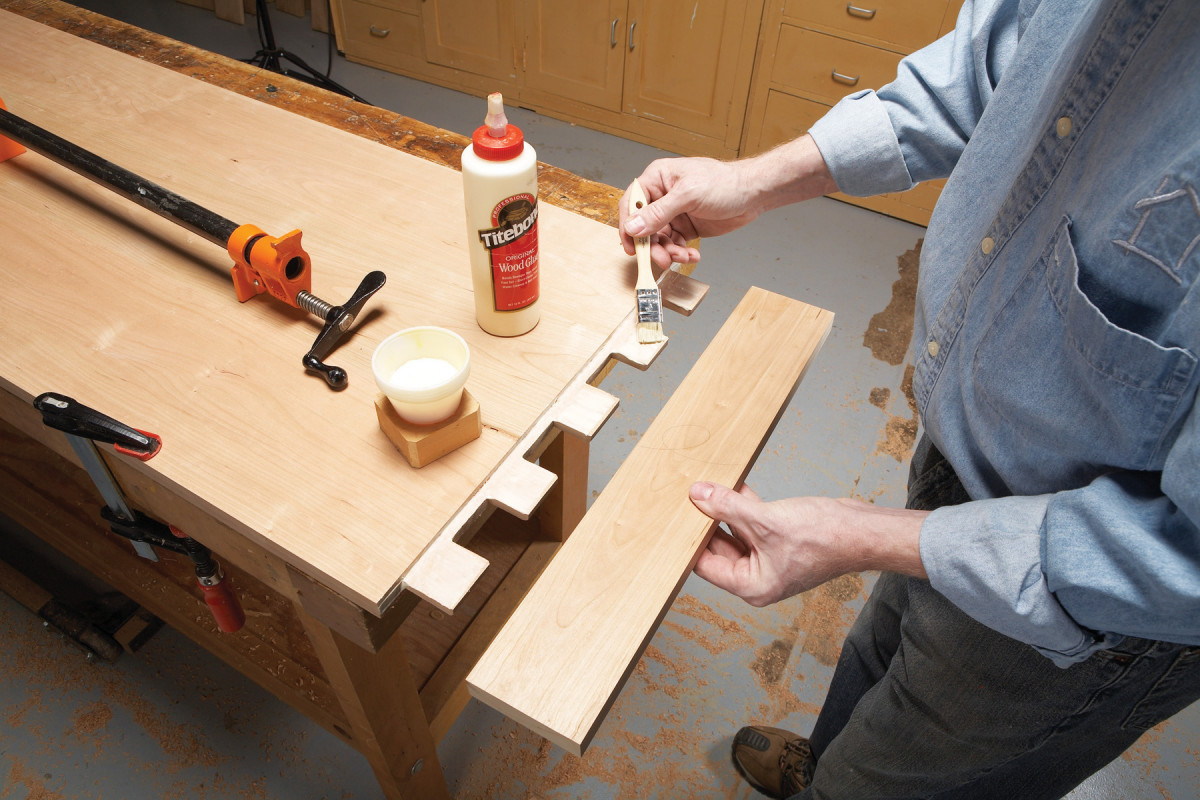
13. Apply yellow glue across the entire joint. When dry, this glue has enough give to allow the top to slowly expand and contract with the seasons.
Use yellow (PVA) glue to secure the breadboard ends to the top (Photo 13). In the Titebond series of glues, use Titebond 1. When dry, it is more elastic than Titebond II or III. If you expect a large amount of movement in your top, don’t glue the outermost mortises and tenons. Even up the top and breadboard ends using a hand plane, scraper plane, or random-orbit sander.
Here are some supplies and tools we find essential in our everyday work around the shop. We may receive a commission from sales referred by our links; however, we have carefully selected these products for their usefulness and quality.