


We may receive a commission when you use our affiliate links. However, this does not impact our recommendations.
When hobbyist woodworkers do any sort of veneering, they usually work with raw veneers. These un-backed sheets are great for small projects, and though they can be used for large work, most commercial woodworking shops use paper or phenolic-backed veneers because they’re more convenient. You can decide for yourself which is better for your project, but here’s how to apply wood veneer with backing.
Veneers are backed with either paper or phenolic. The paper-backed stuff is exactly what you’d think- veneer with a thin layer of paper applied to one side. Phenolic is used in plastic laminate, and it’s that layer of black material you see on all the filed edges of a laminated countertop. Paper and phenolic-backed veneers can be worked the same ways.
Backed veneers are easy to work with. They don’t split or crack as easily as raw veneers, and they work with a wide variety of adhesives. PVA glue, contact adhesive and hide glue will all work. The backing holds the veneer together and prevents cracking. A backed veneer won’t need to be flattened; it’s ready to apply immediately.
Always cut your veneer slightly larger than the substrate. You’ll trim it to size after it’s applied. For a 25-1/2” x 84” countertop, you might want to cut your veneer to 26-1/2” x 85.” Apply a thin, even coat of contact adhesive to the backing and the substrate. Wait a few minutes for the adhesive to get tacky. The instructions on the can should tell you how long this will take.
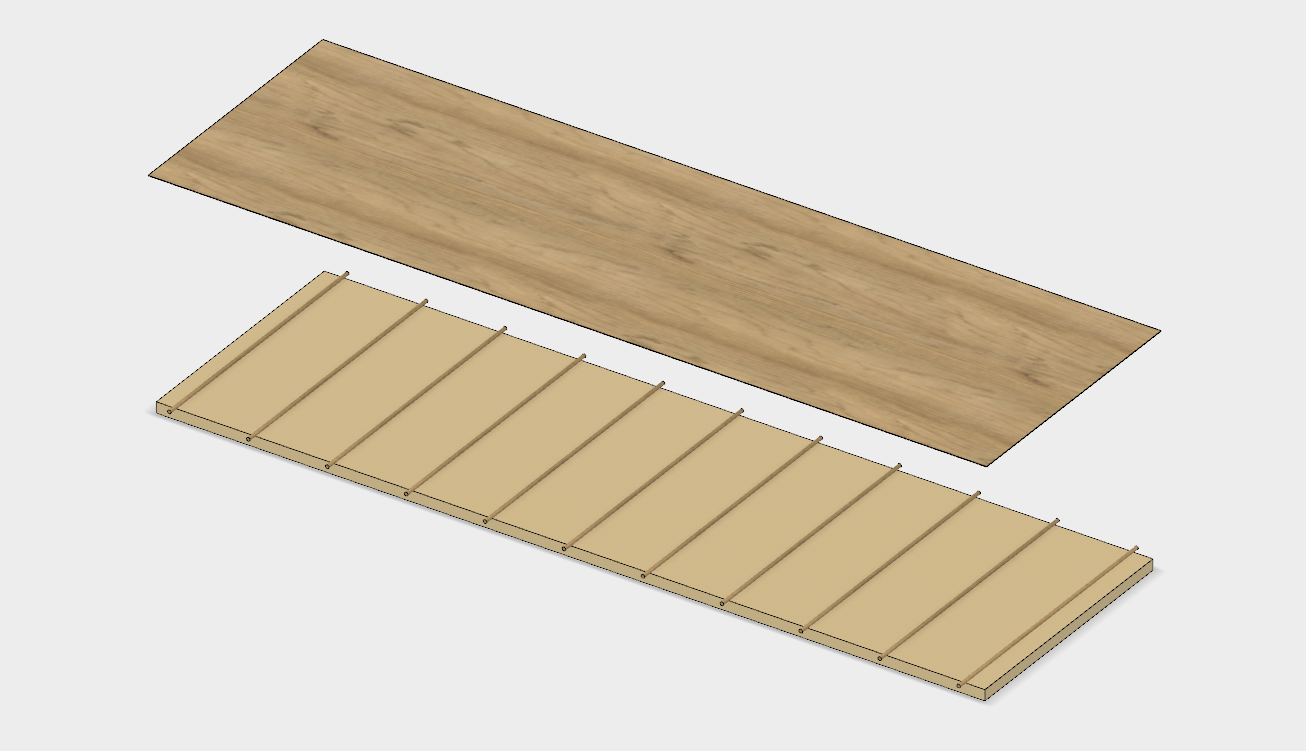
Contact adhesive bonds instantly, so dowels are often used to keep the veneer and substrate separated until they are properly positioned.
When you place the veneer on the substrate, it will bond instantly, so you’ll need to use some dowels or thin strips of wood to keep it separated until you have it positioned correctly. If you cut your veneer 1” larger than the substrate, you can leave ½” of overhang all the way around the piece and then start removing dowels, one at a time. Pull out a dowel, rub your hand along the veneer to press it into the substrate, and then move on to the next dowel. You can start at one end of the work piece or from the middle, but don’t start from each end. That’ll create a bubble in the center of your piece that won’t come out.
Position the veneer so that it overhangs the substrate evenly on all sides, then start removing dowels from one end, working towards the other.
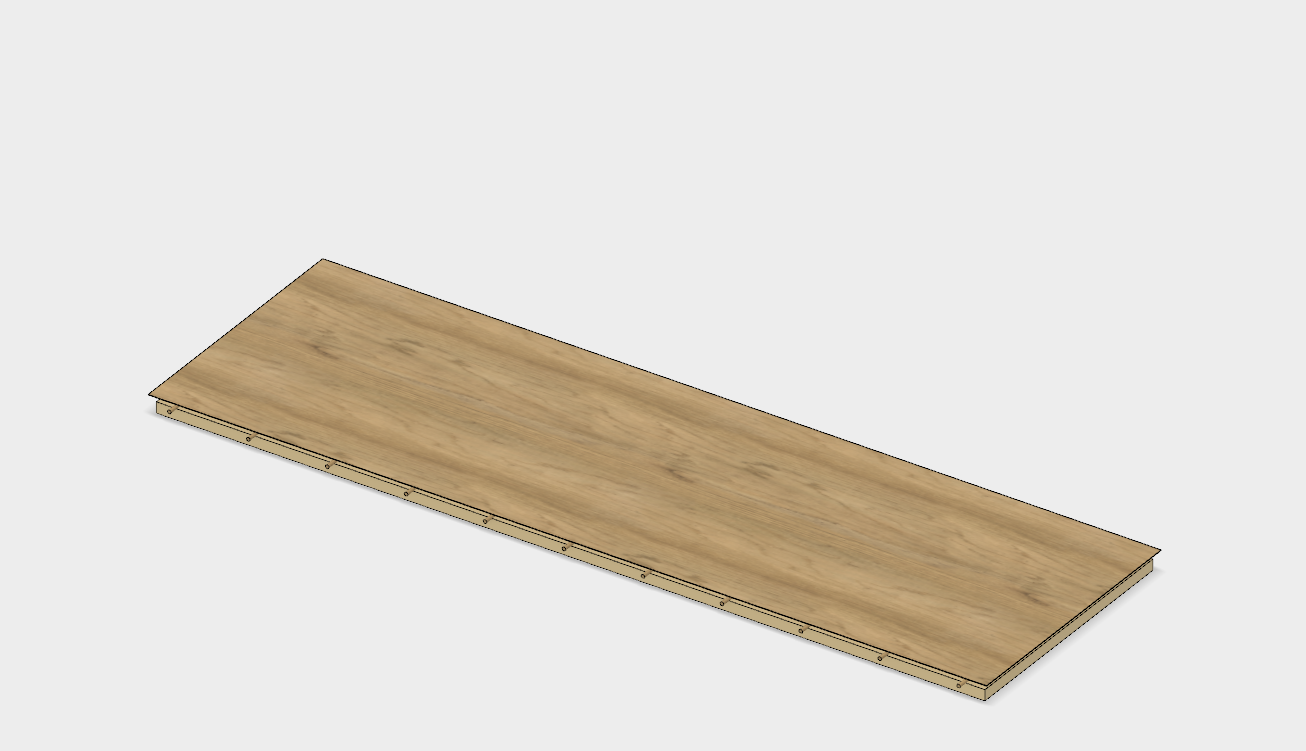
Once you have all the dowels removed, you can trim the veneer to size with a router and flush-trimming bit. After that, use a j-roller or a piece of solid wood with a rounded edge to apply even pressure to the entire surface, ensuring a good bond. You’ll have some fuzzy edges where you trimmed the veneer flush to the work, but that can be quickly removed with some sandpaper. Phenolic-backed veneer can be filed like plastic laminate.
MDF, MDO and particleboard are all good substrates for backed veneers because they tend to be flat and smooth. The edges can soak up a lot of adhesive, so you need to coat them thoroughly to ensure the veneer will stick.
A backed veneer might not always be the right choice. It’s great for cabinets and countertops, but a trained eye will notice the small line of the paper backing underneath the veneer. For fine furniture, you might want to stick with the raw stuff, but when you’re looking for a combination of good looks and easy application, think about a backed veneer.
For more information about veneering, check out Jonathan Benson’s Popular Woodworking University Course, Advanced Veneering Techniques. You’ll learn how to flatten raw veneers, how to apply veneer with heat, and how to make complex patterns.
Here are some supplies and tools we find essential in our everyday work around the shop. We may receive a commission from sales referred by our links; however, we have carefully selected these products for their usefulness and quality.


