We may receive a commission when you use our affiliate links. However, this does not impact our recommendations.
Cutting your own dovetails is a right of passage for many woodworkers. Many out there find it intimidating when they first start though. Here are a few techniques that will help you out (or help you improve the skills you already have).
1. Cut By Hand
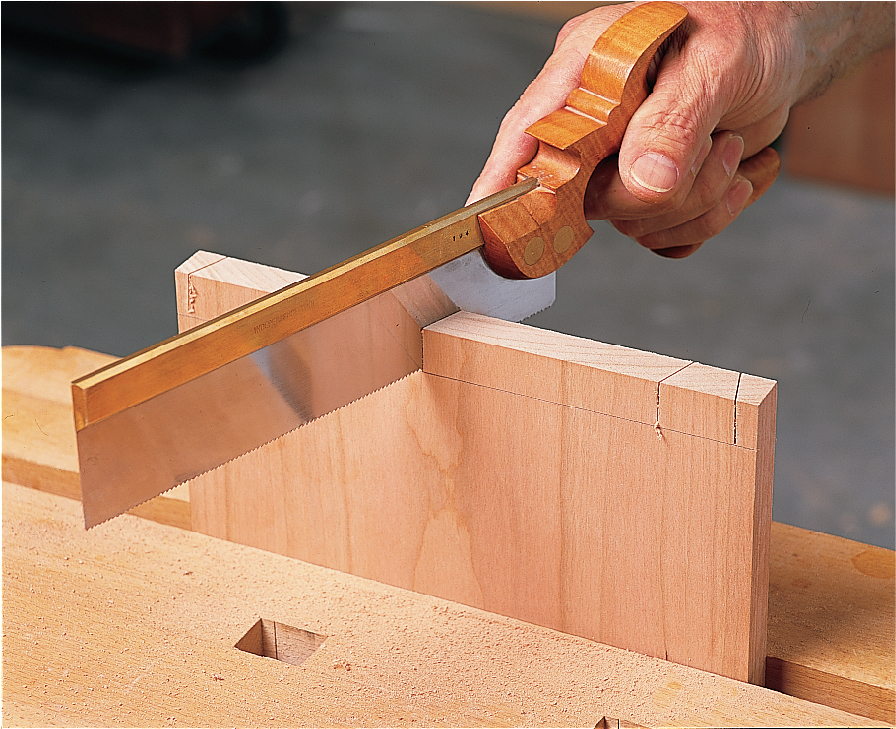
When dovetailing by hand, be bold. Don’t bother with a try square or sliding bevel. After gauging a thickness line across the board, lay out the pins with your saw as you make each cut. Trust your eye to find a pleasing dovetail angle and repeat it over and over. Trust your hands with a sharp saw to cut straight down. If you’ve never done this before, let go of your anxiety and just do it. Practice, practice, practice. You’ll be amazed at how easy it becomes.
Don’t worry about the exact sizes of the pins or the spaces between them. In fact, a little variation is a good thing. Your right and left hands aren’t perfectly symmetrical, so it’s okay if your dovetails aren’t, either.
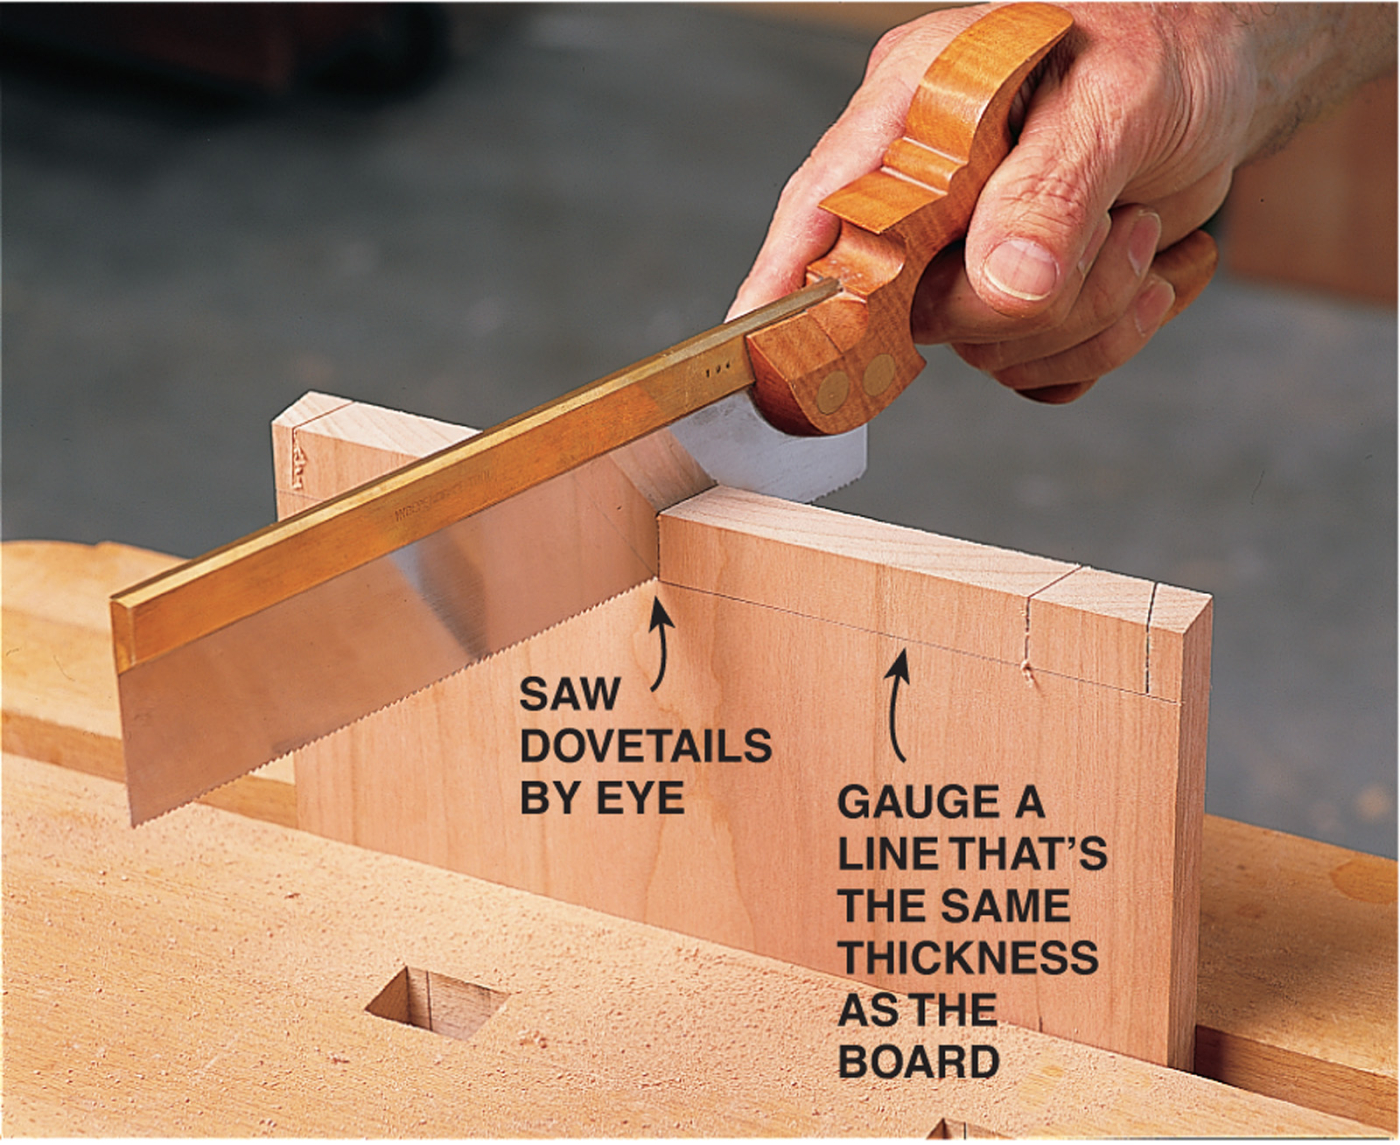

Follow a “rule of halves” when you saw the pins. First, cut two half pins, one on each end. Then cut the other side of one tail.
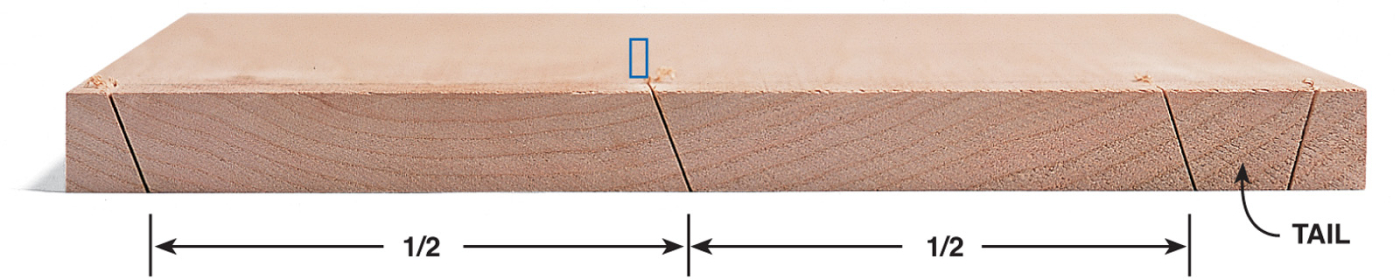
Eyeball half the distance between the tail and the opposite half pin and make another cut.
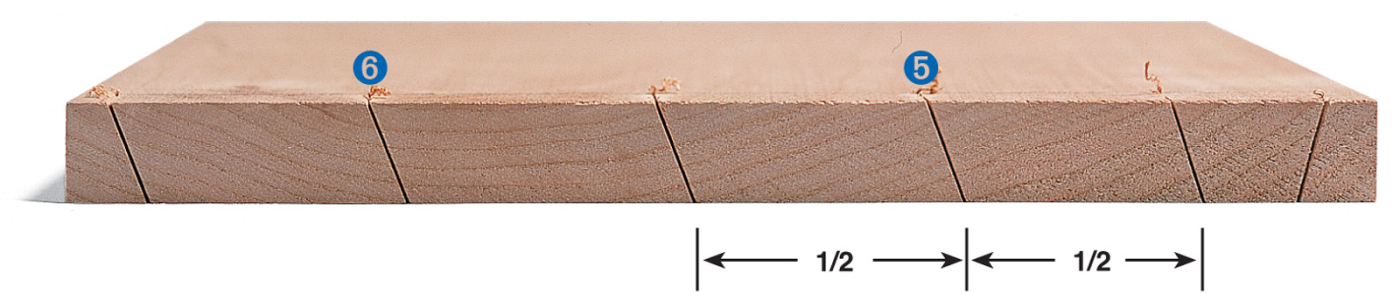
Divide the remaining spaces in half again with additional cuts
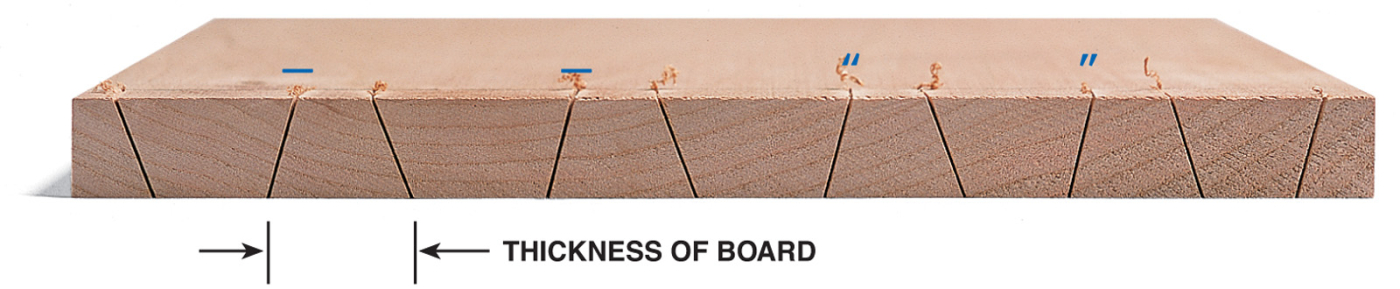
Turn the saw in the other direction and saw each complete pin. Judge their width by looking at the thickness of the board.
2. Chop With Vigor
Chop out the pins like there’s no tomorrow. Good, solid blows on a very sharp chisel get the job done in no time.
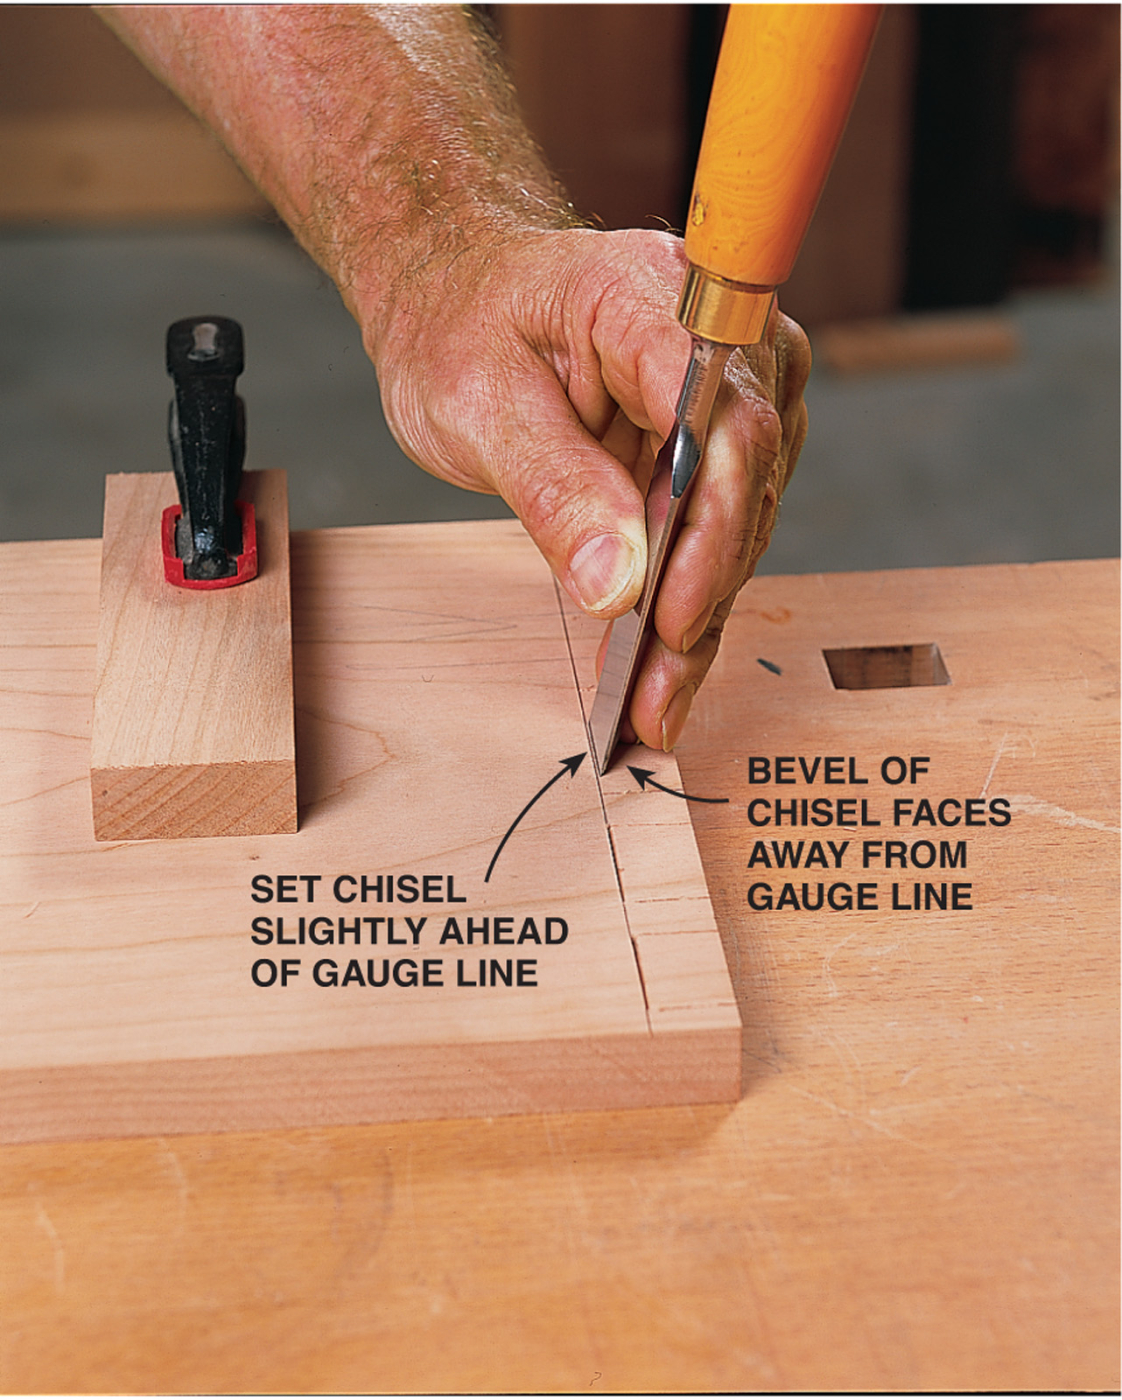
To start, plant the chisel slightly ahead of the gauge line and give it a whack with a round-headed mallet. The slope of the chisel’s bevel moves the cut right to the line. Experience tells you how far away from the line to set the chisel. March across the board, repeating the same cut.
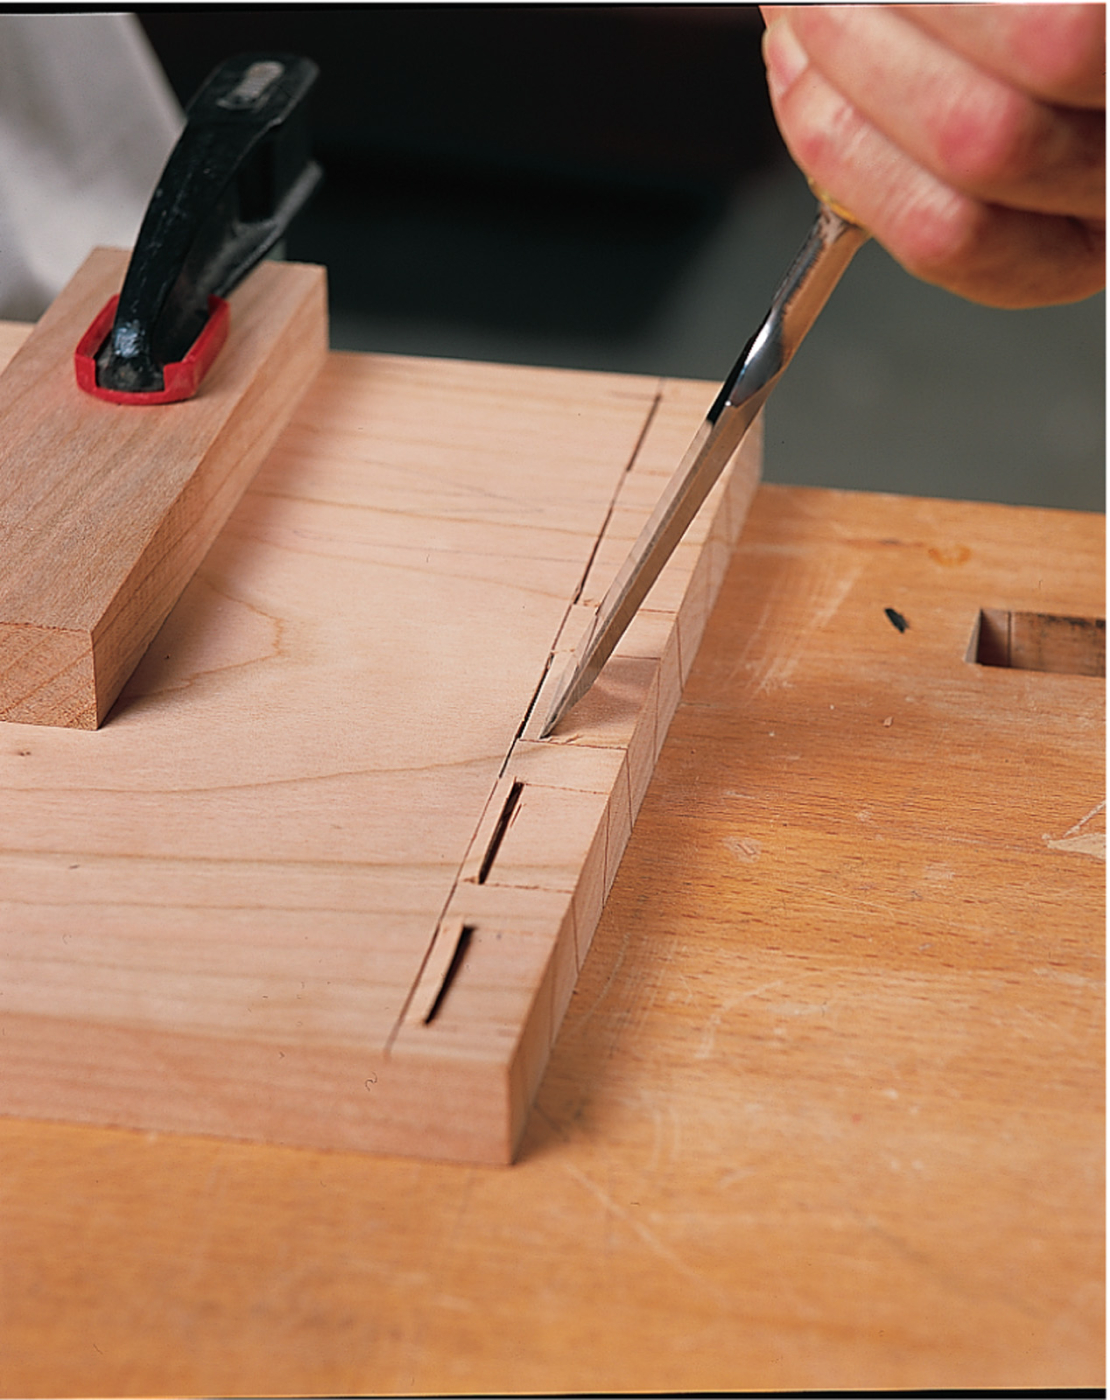
Next comes a sloped cut that defines the shoulder. It’s made with the chisel facing the same direction as the initial cut—an economy of movement that’s common to all good handwork. This cut carries the chisel pretty deep, almost up to the first cut.
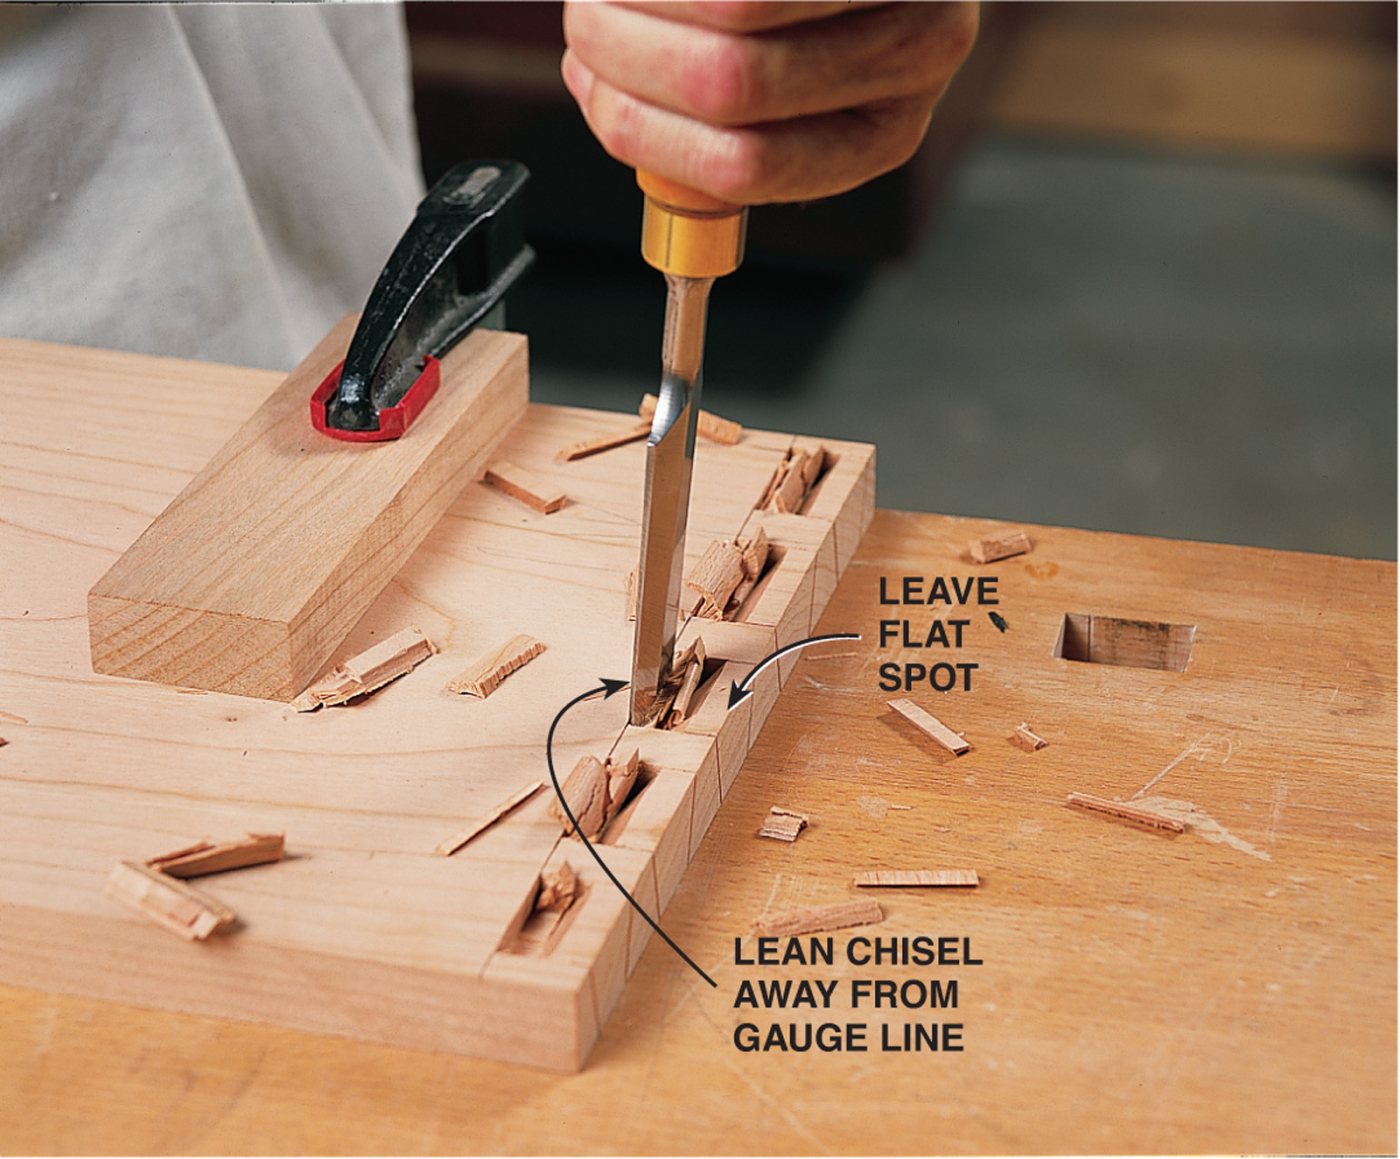
A combination of vertical cuts and sloped cuts remove most of the waste. Slightly tilt the vertical cuts. This “undercutting” saves a lot of time in cleaning up the dovetails.
Leave a flat spot at the end of the waste.—if you’ve ever torn out the interior of a hand-chopped dovetail, you’ll appreciate this tip. Chop halfway down one side of the board, brush away the chips and turn the board over. The flat spot supports the waste so there’s no tear out.
3. Fix Mistakes
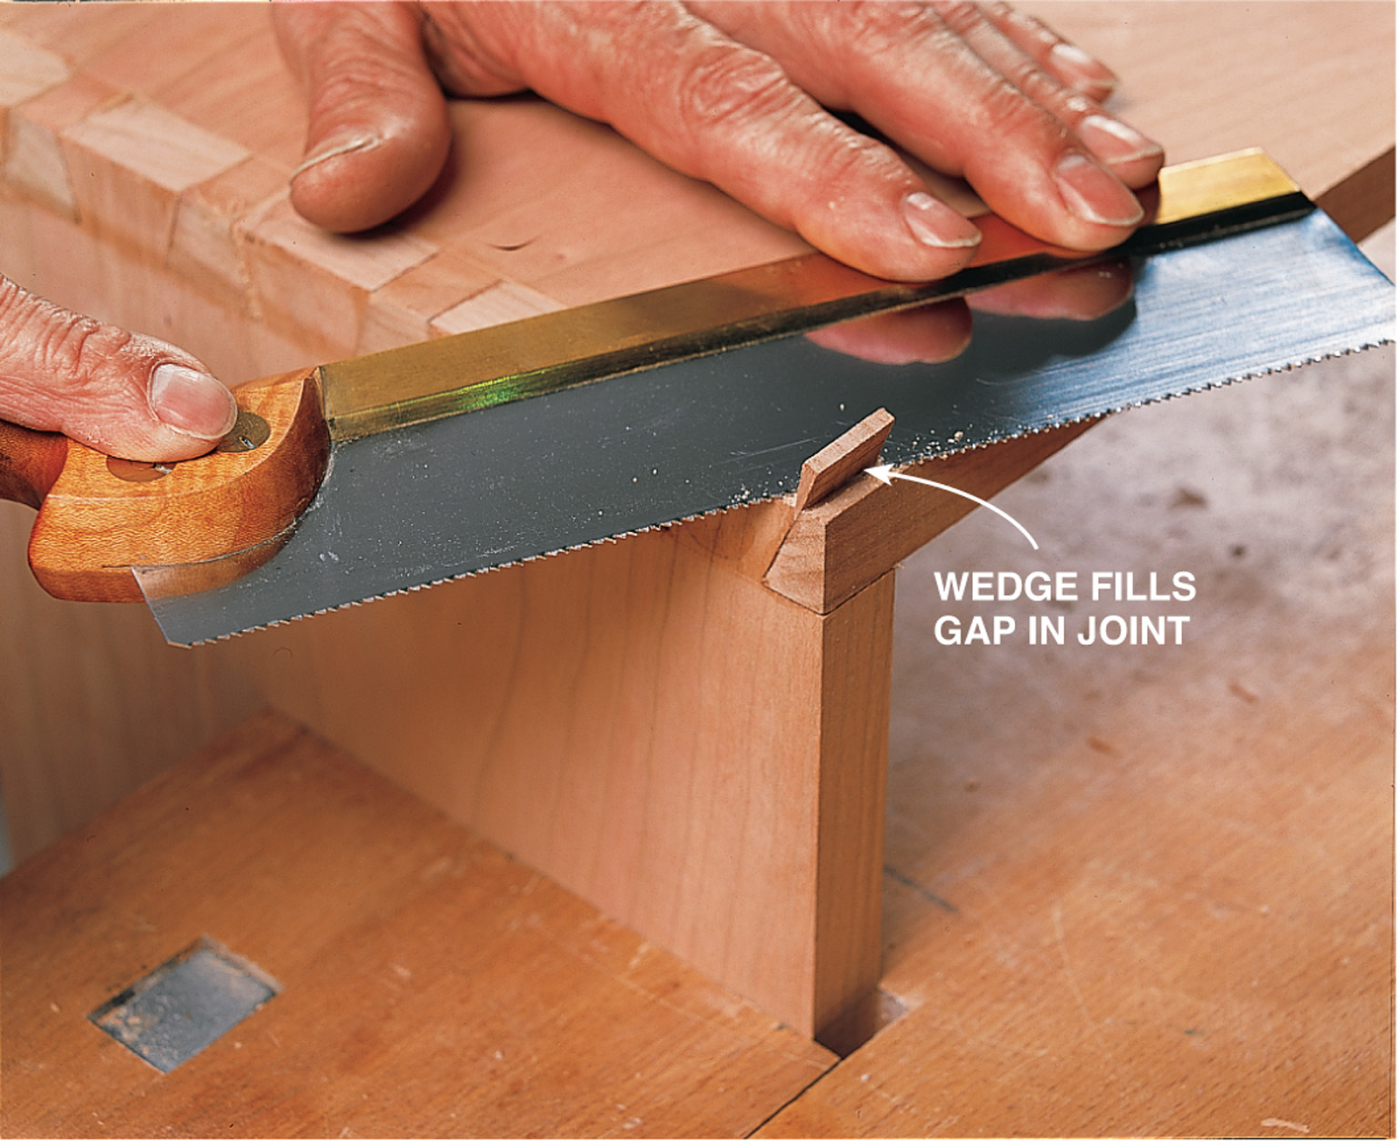
Don’t worry about making a few mistakes—just learn to fix them. Here a mistake in cutting left an open joint. So while the glue was still wet, a wedge was sawed and lightly tapped into the gap. Now that the glue has dried, the end of the wedge can be off.
4. Level Quickly
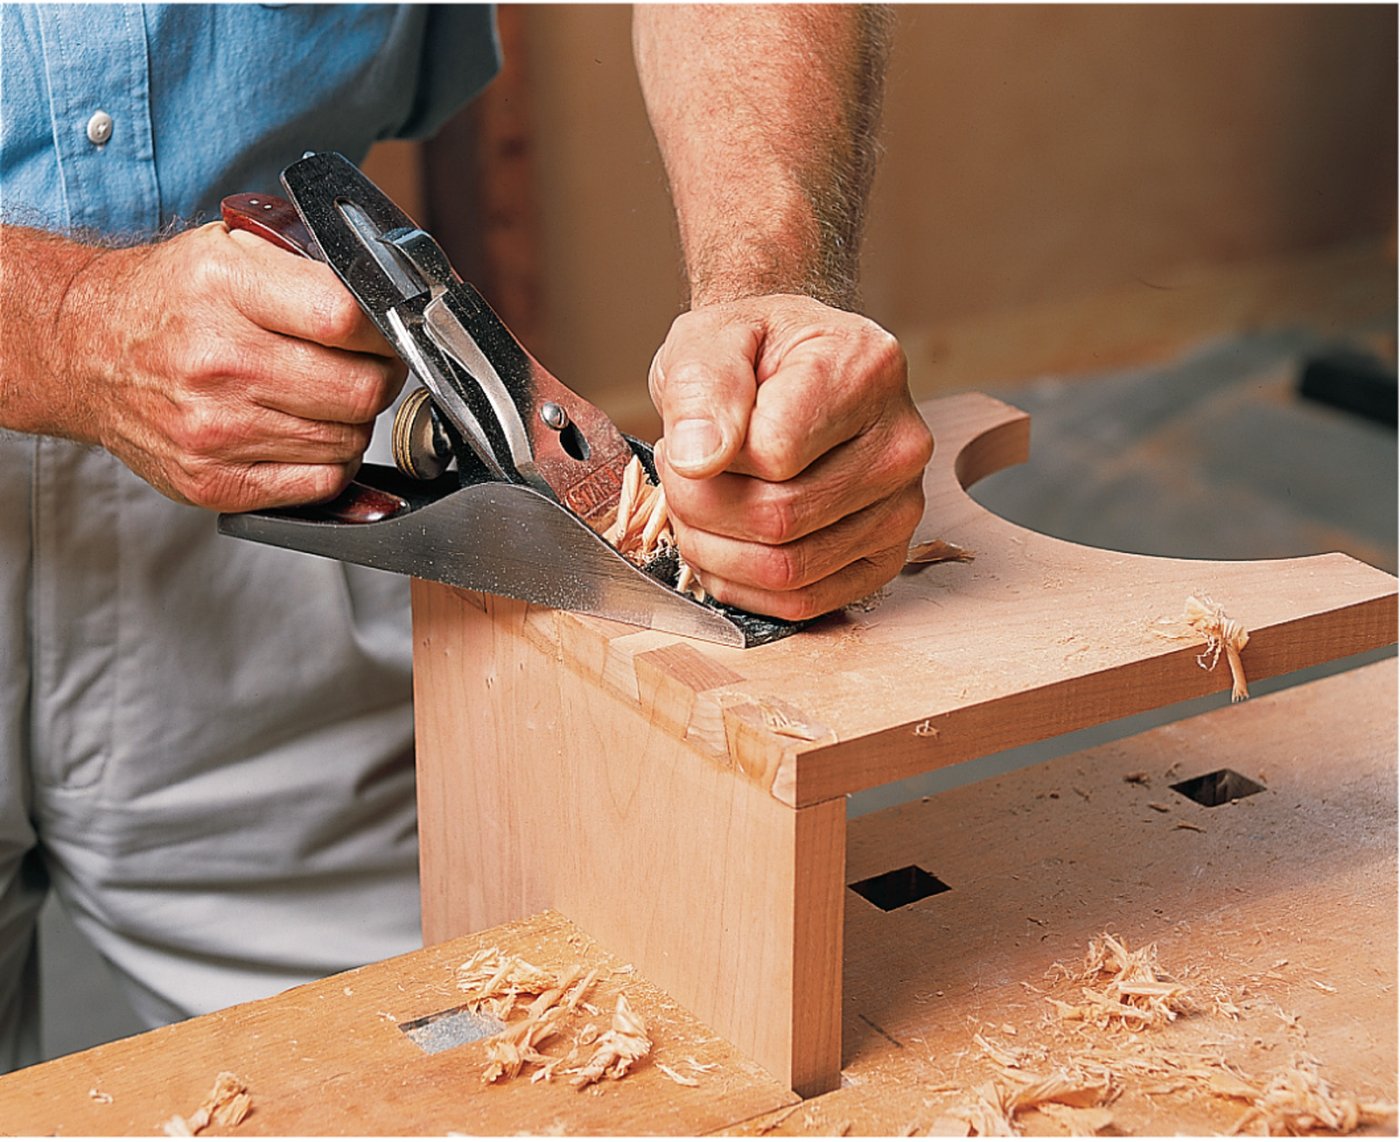
use a plane to clean up, working from the corners to the middle. When finely set and super sharp, a hand plane slices through the end grain, leaving a smooth, flat surface that you can’t get with sandpaper. Remove any ridges the plane may leave with a cabinet scraper.
Here are some supplies and tools we find essential in our everyday work around the shop. We may receive a commission from sales referred by our links; however, we have carefully selected these products for their usefulness and quality.