


We may receive a commission when you use our affiliate links. However, this does not impact our recommendations.
Wood inlay is one of the most striking techniques in woodworking, combining precision craftsmanship with visual contrast. Traditionally, inlay required hand tools, chisels, and a great deal of patience. Today, laser engravers make the process far more accessible, repeatable, and accurate—especially when you’re working with detailed designs or producing multiple identical pieces.
In this guide, we’ll walk through the complete process of creating a laser-cut wood inlay, based on our workflow with an OMTech CO₂ laser, which offers the consistent depth control and cutting accuracy required for tight-fitting inlays. Let’s get started!
Materials and Preparation
 Before starting, gather all tools and materials. Having extra wood for testing is strongly recommended.
Tools and Materials
- A CO₂ laser engraver (this example uses an OMTech Polar 50W CO₂ Laser Machine)
- A computer with LightBurn installed (or the machine’s bundled software)
- One piece of 300 × 300 × 6 mm black walnut (plus extras for testing)
- One piece of 300 × 300 × 2 mm basswood plywood (plus extras for testing)
- PVA (white) wood glue
- Sandpaper or an orbital sander
- Wood wax oil (optional, for finishing)
When choosing a laser machine, always consider the types and sizes of projects you plan to work on. A mid-power CO₂ laser (such as the OMTech Polar 50W used in this example) provides the ideal balance of engraving depth, spot size, and repeatability for wood inlay projects.
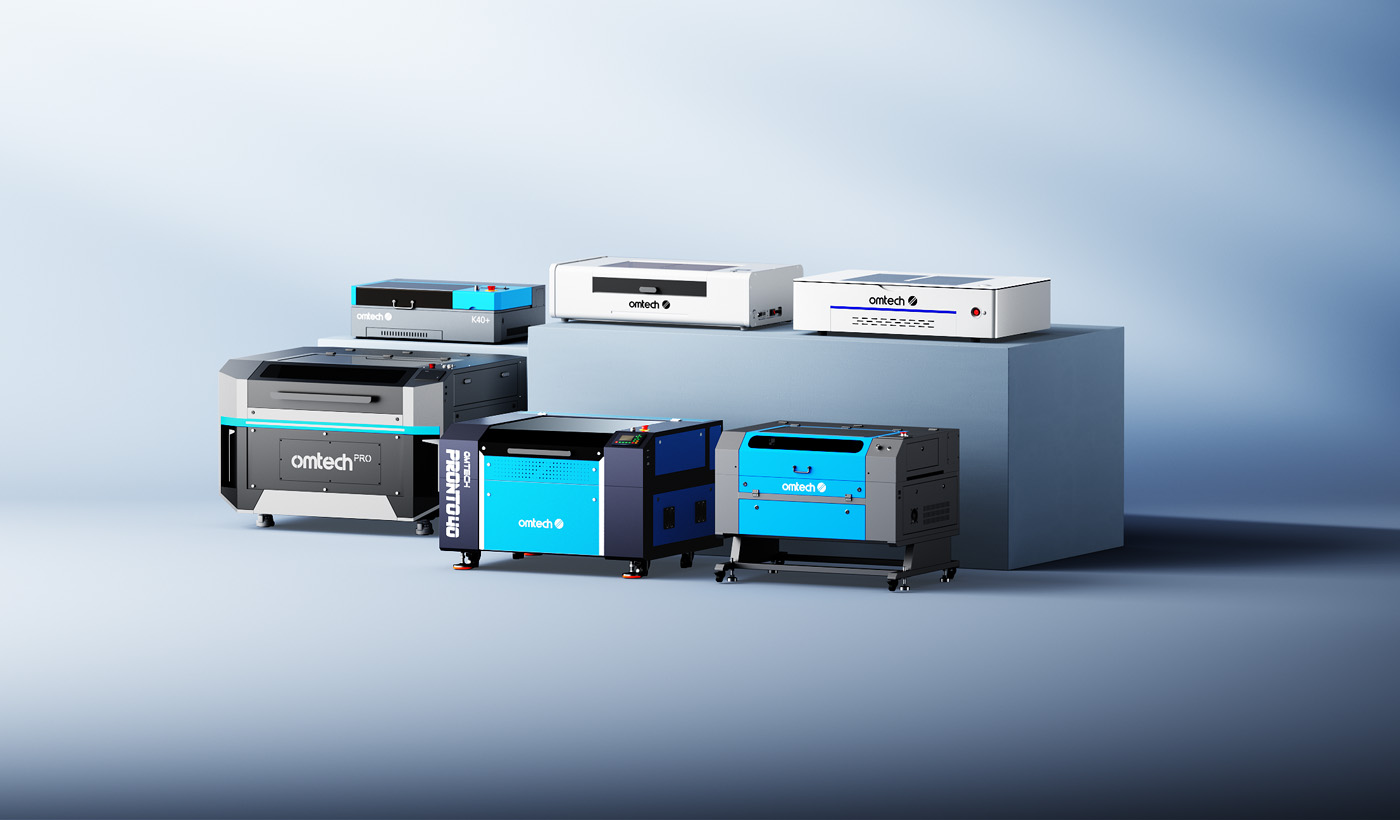
Working area is another important factor. Larger designs or batch production may require a machine with a bigger bed, while smaller projects benefit from compact desktop systems. OMTech offers a wide range of CO₂ laser options, making it easy to find a machine that fits projects of different sizes.
Material Selection
- Substrate: 6 mm black walnut provides excellent stability and engraving depth
- Inlay piece: 2 mm basswood plywood is soft, cuts cleanly, and press-fits well
- Target pocket depth: Approximately 2.1–2.2 mm engraved into the walnut
This thickness combination allows the basswood inlay to sit flush after sanding without risking veneer damage. For the best results, we recommend using solid wood for both the base and the inlay pieces. This ensures a consistent grain and prevents the unattractive inner layers of plywood from being exposed during the final sanding and leveling process.
Step 1: Determine Optimal Laser Parameters
Before engraving or cutting your final materials, determine optimal laser settings. Because every laser machine and type of wood behaves differently, it’s best to test the settings for consistent depth, clean edges, and predictable results.
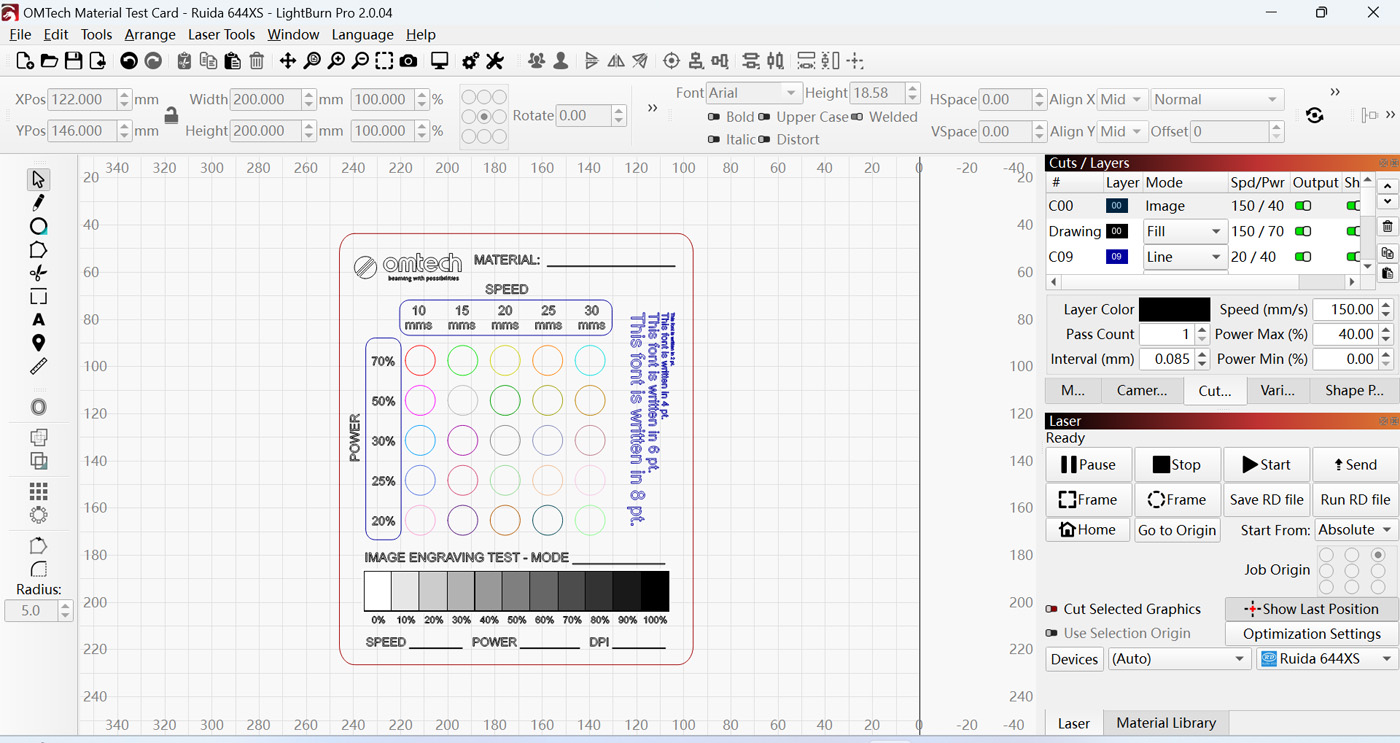
LightBurn includes a built-in Material Test feature that allows you to test different power and speed combinations. For the Polar, we used an OMTech Material Test Card to identify the best engraving depth for walnut and cutting parameters for basswood.
 Step 2: Import the Design Into LightBurn
Create your design in Adobe Illustrator or another vector-based design program, then import it into LightBurn.
To import:
- Open LightBurn
- Click File > Open
- Locate your design file and select it
 This single design file will be used for both engraving the pocket and cutting the inlay.
Layer Setup
- Substrate (walnut): Use Fill mode to engrave the pocket
- Inlay (basswood): Use Line mode to cut the profile
No separate files are required—only different layer settings.
Step 3: Engrave the Pocket (Substrate)
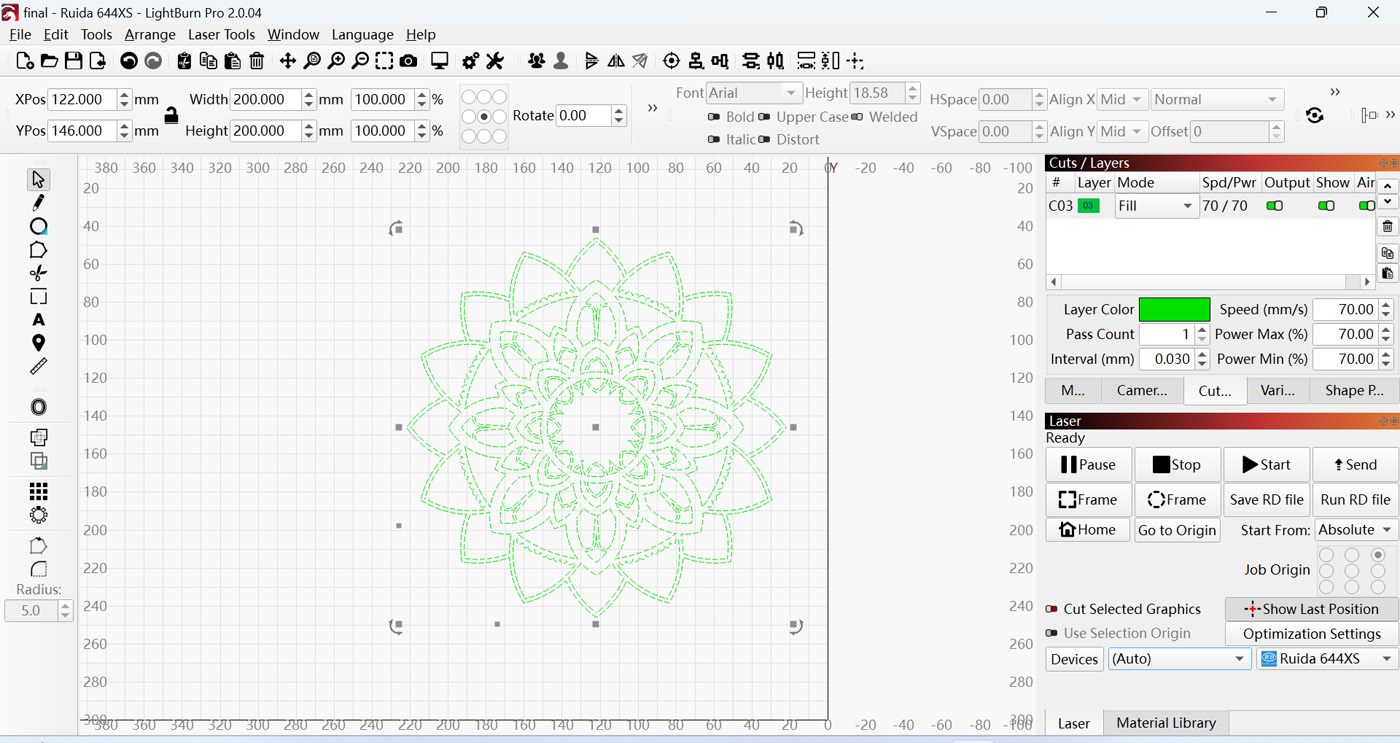
 Place the black walnut into the laser and engrave the recessed pocket using the following recommended LightBurn settings:
- Mode: Fill
- Line Interval: 0.03 mm (produces a smoother pocket base)
- Cross-Hatch: Optional but recommended. Enabling this feature directs the laser to engrave in a grid pattern. This makes it much easier to remove the carbonized layer (char) and ensures a flatter pocket base.
- Power and Speed (50W CO₂ Laser)
-
- Speed: 70 mm/s
- Power: 70%
These values target a pocket slightly deeper than 2 mm when cross-hatching is enabled. If cross-hatch is disabled, slower speeds and higher power may be required. The engraving time depends on design complexity, depth, and machine performance.
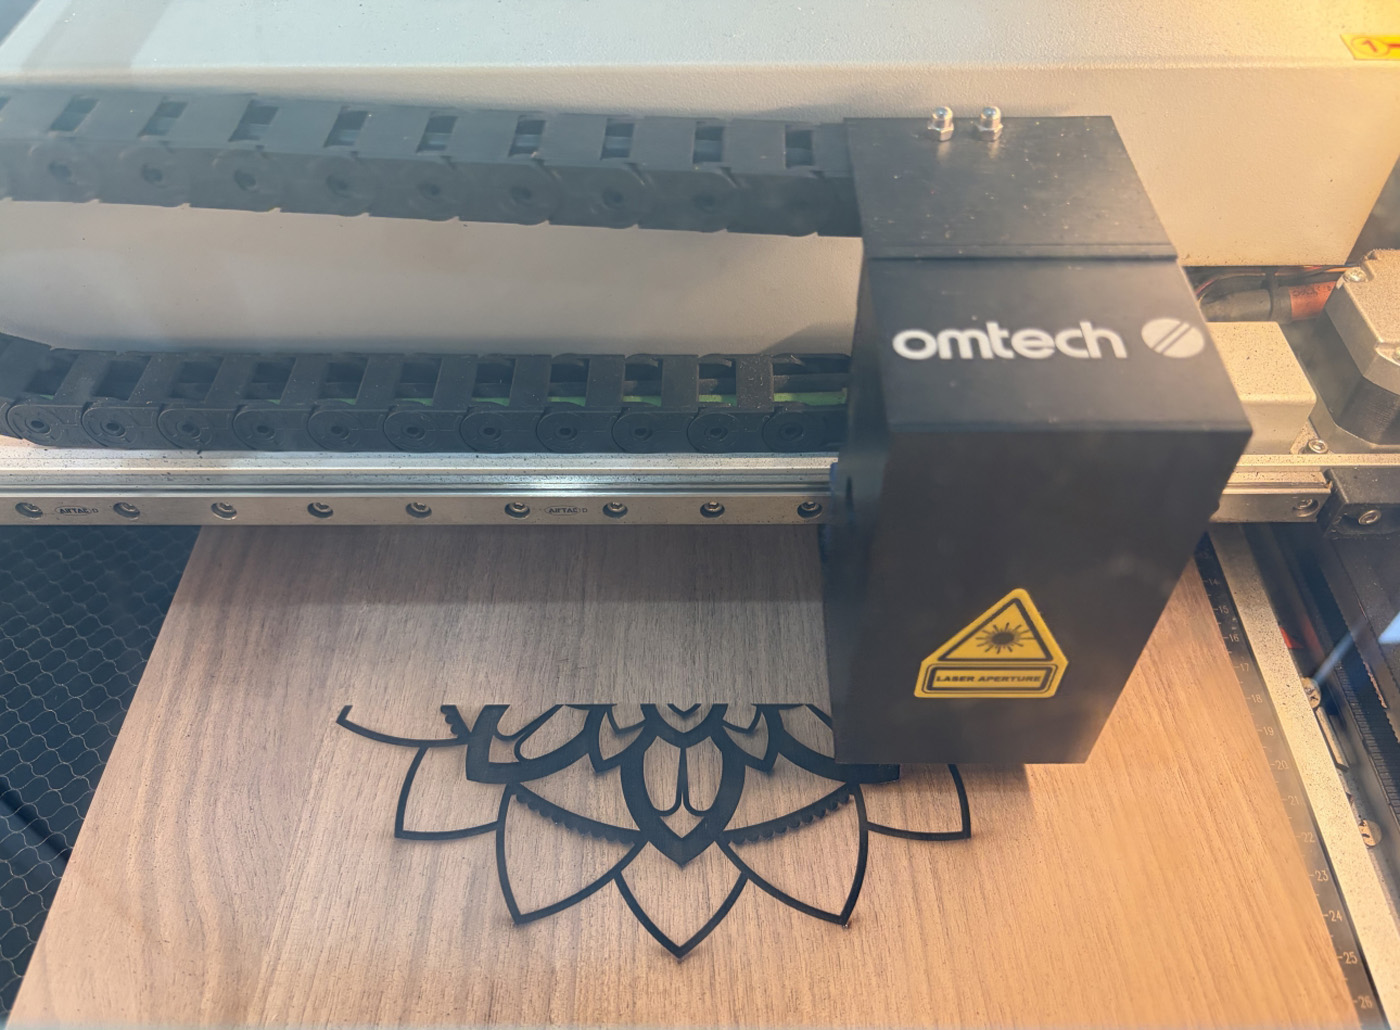
Step 4: Cut the Inlay Piece
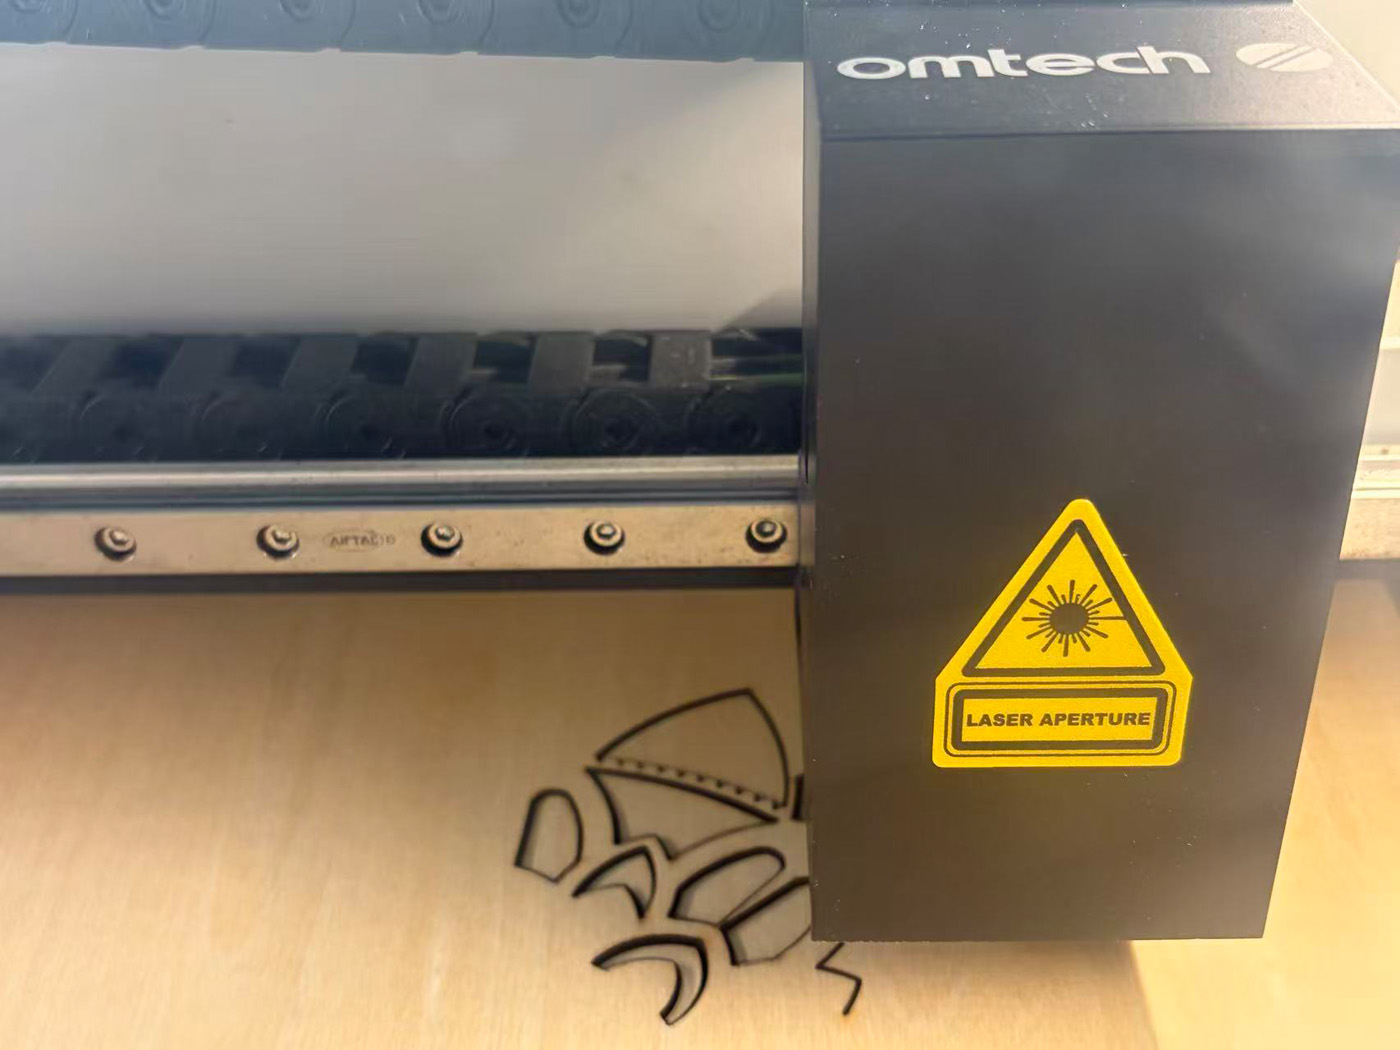 Laser cutting introduces kerf—the width of material removed by the laser beam. Without compensation, this results in:
- A pocket slightly larger than the design
- An inlay piece slightly smaller than the design
To achieve a tight fit, use LightBurn’s Kerf Offset function to slightly enlarge the inlay.
Finding the Correct Kerf Offset
Because kerf varies by machine and material, a test is required:
- Draw a small square in LightBurn
- Apply different kerf offsets (typically 0.05 mm–0.15 mm)
- Cut test pieces
- Test-fit them into a matching pocket
The correct value—often called the “golden parameter”—is when the piece can be pressed in firmly and does not fall out.
Cutting Settings for the Inlay
- Mode: Line (Cut)
- Kerf Offset: 0.15 mm
- Speed: 5 mm/s
- Power: 90%
These settings ensure full penetration of the 2 mm basswood while minimizing tar buildup on the edges.
Important: Because the walnut and basswood have different thicknesses, refocus the laser before cutting the basswood to maintain accuracy.
Step 5: Gluing and Assembly
Once both parts are ready, assembly begins. We use white PVA glue to account for seasonal wood movement. Since different wood species expand and contract at different rates due to temperature and humidity, the glue ensures the inlay stays securely locked in place over time.
Glue Application
Apply the glue directly to the basswood inlay rather than the walnut pocket. For intricate designs, brushing glue into the pocket often leads to messy squeeze-out, which can stain the walnut and ruin the final finish.
Press-Fitting
- Align the basswood inlay with the pocket
- Place a flat scrap board on top
- Apply pressure using an F-clamp or heavy weights
Basswood is soft, so pressure allows it to conform perfectly to the walnut pocket. Once clamped, promptly clean any residual glue squeeze-out with a cloth dampened with alcohol while the glue is still wet.
Troubleshooting Common Issues
- Visible gaps: Kerf offset was too small—increase to 0.12 mm or 0.15 mm
- Inlay won’t fit: Offset too large or carbon buildup in the pocket—lightly sand the basswood edges or clean the residue from the walnut pocket.
- Inlay lifting: Uneven glue application or insufficient pressure
Small adjustments make a big difference, so keep notes on settings that work well.
Step 6: Fine Sanding and Oiling
 Once the glue has cured, sand the piece to make the surface flush. Use sandpaper or an orbital sander to smooth the surface, focusing only on the raised basswood until it is level with the walnut. Be very careful during this step—basswood plywood has a very thin top layer, so it is easy to sand through it if you apply too much pressure or sand for too long.
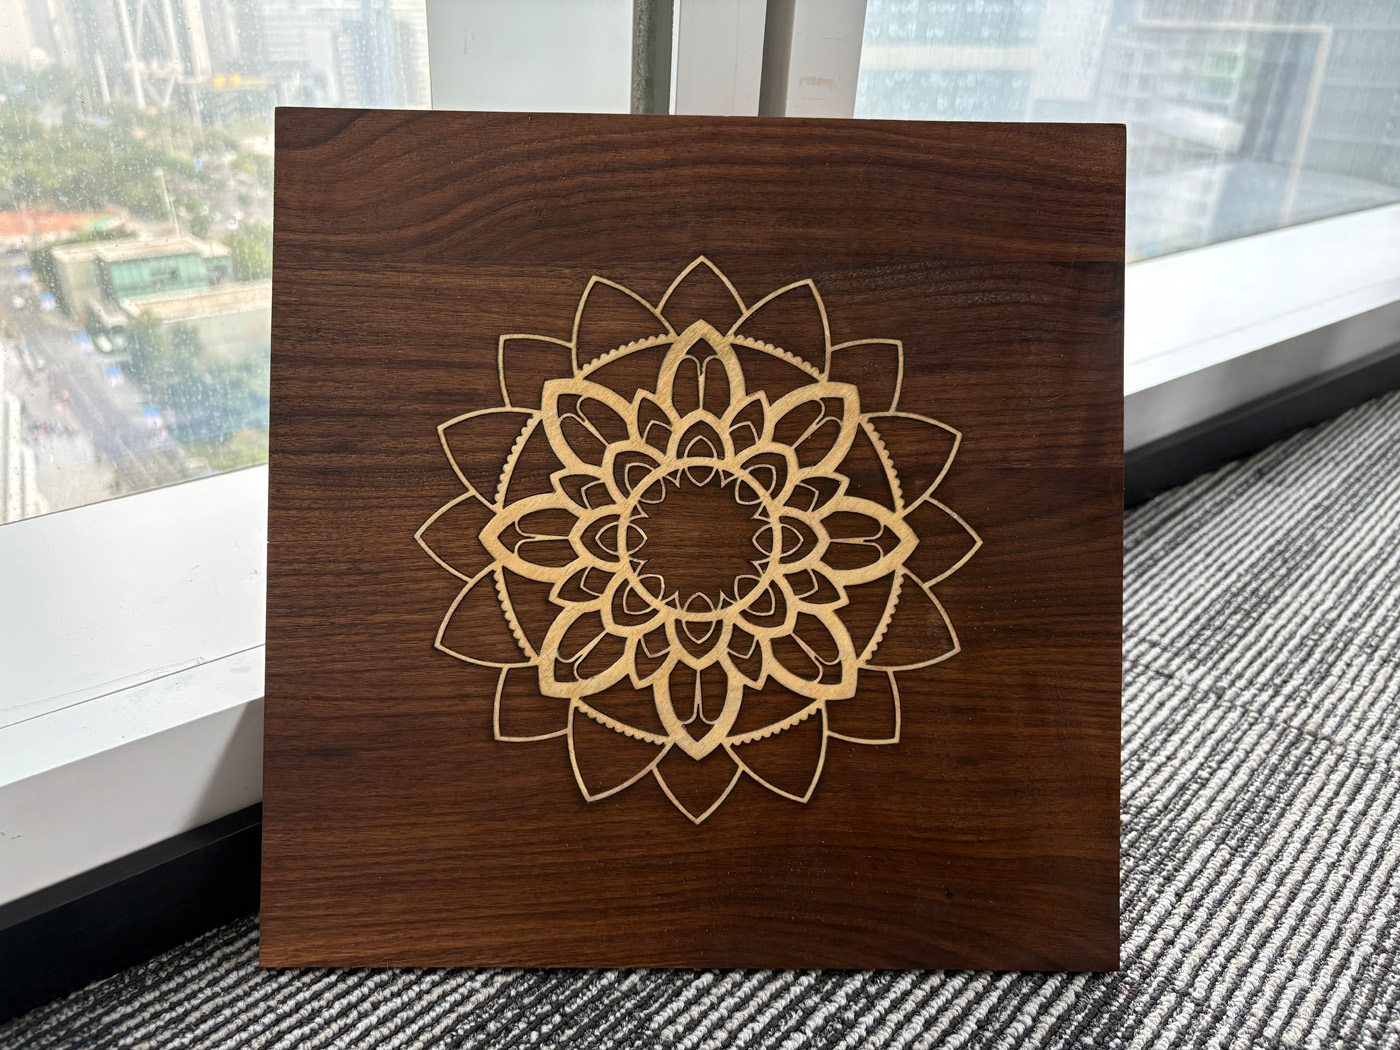
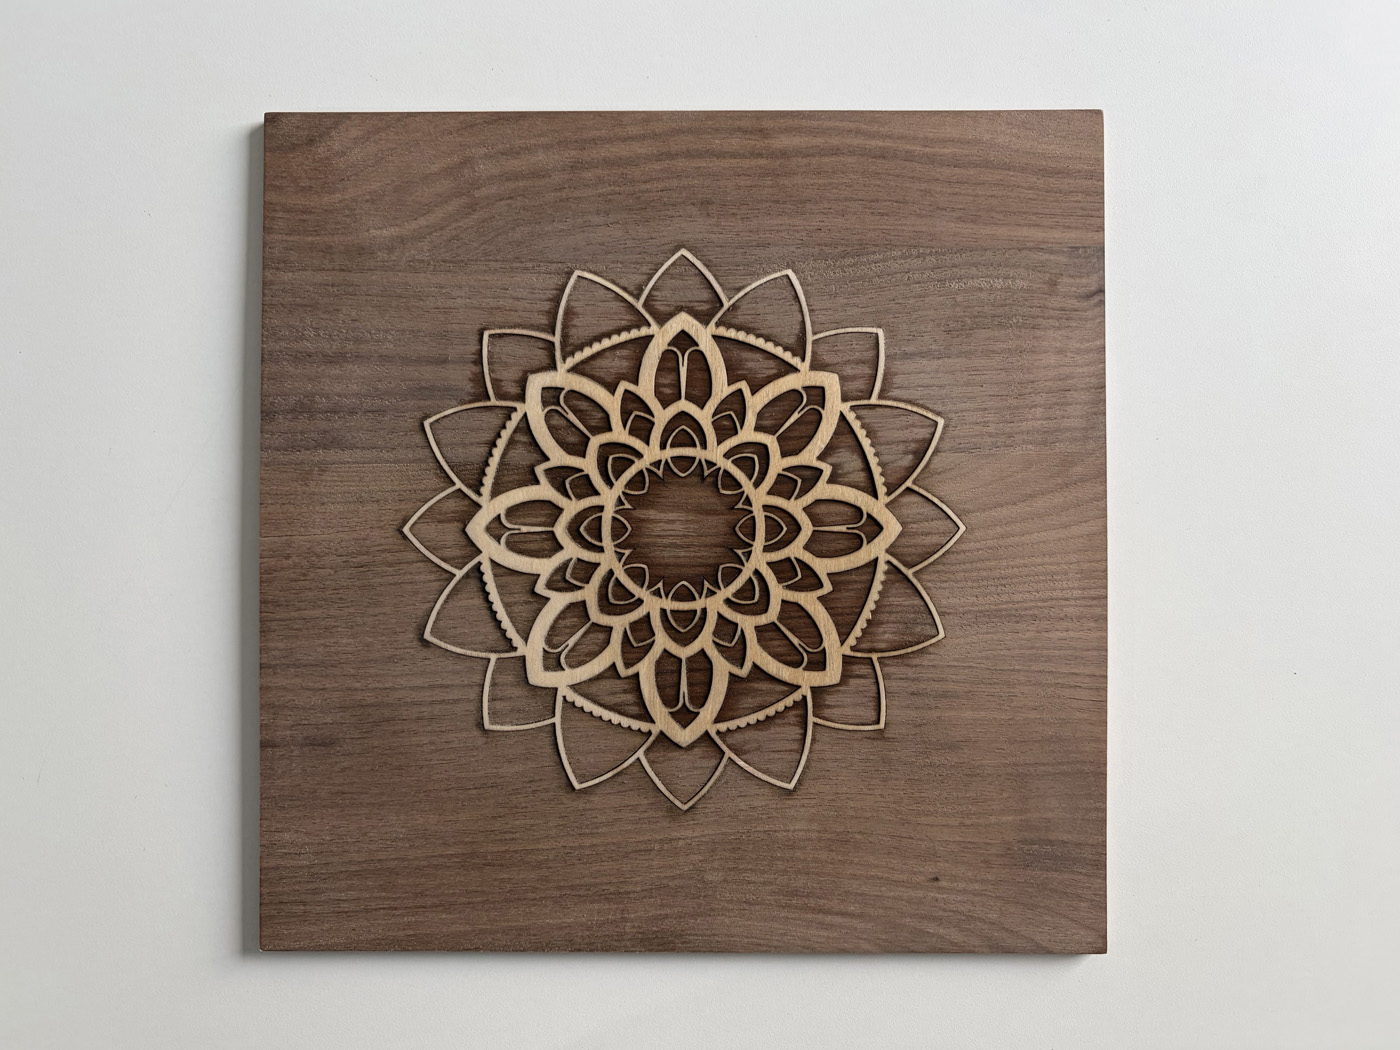
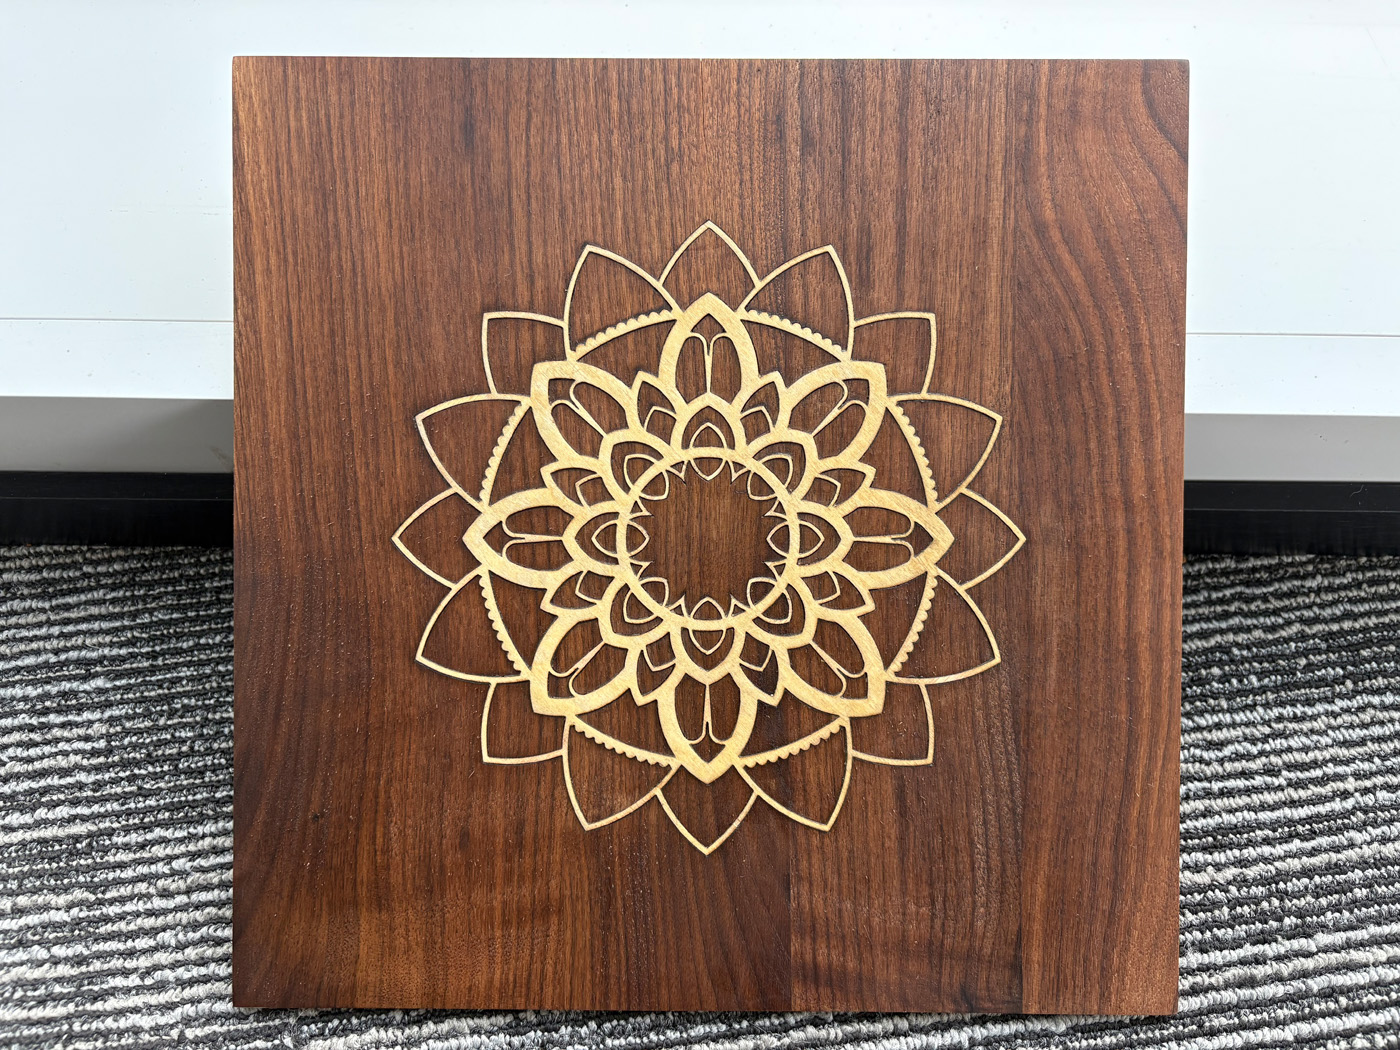
For finishing, apply wood wax oil if desired. The walnut deepens into a rich chocolate tone, while the basswood stays light, creating a high-contrast, premium look.
Producing Consistent Results With CO₂ Lasers
 Laser wood inlay is especially well-suited to CO₂ laser engravers. Once your parameters are dialed in, the process becomes highly repeatable—ideal for producing multiple identical pieces without variation.
CO₂ machines allow you to engrave clean pockets, cut precise inlays, and maintain consistent depth and fit across runs. For makers producing signage, decorative panels, furniture accents, or small-batch products, this reliability saves time and reduces waste.
OMTech CO₂ laser engravers—including desktop systems Polar series and higher-speed options like the Pro Quantum—are well suited for woodworking applications. The Polar series offers a compact design with medium power for versatile wood inlays. For those scaling up, the Quantum delivers a finer laser spot (0.003 in.) for intricate detail and higher speeds (4200mm/s) for maximum efficiency, making it the perfect powerhouse for a small business.
Final Thoughts
Wood inlay with a laser combines traditional craftsmanship with modern precision. By carefully controlling engraving depth, compensating for kerf, and using proper assembly techniques, you can achieve tight-fitting, professional results that would be difficult to replicate by hand.
With the right materials, testing, and workflow, laser inlay becomes not just achievable—but scalable. Whether you’re creating one-of-a-kind pieces or producing consistent designs in volume, CO₂ laser engraving opens the door to repeatable, high-quality woodworking results.


