


We may receive a commission when you use our affiliate links. However, this does not impact our recommendations.
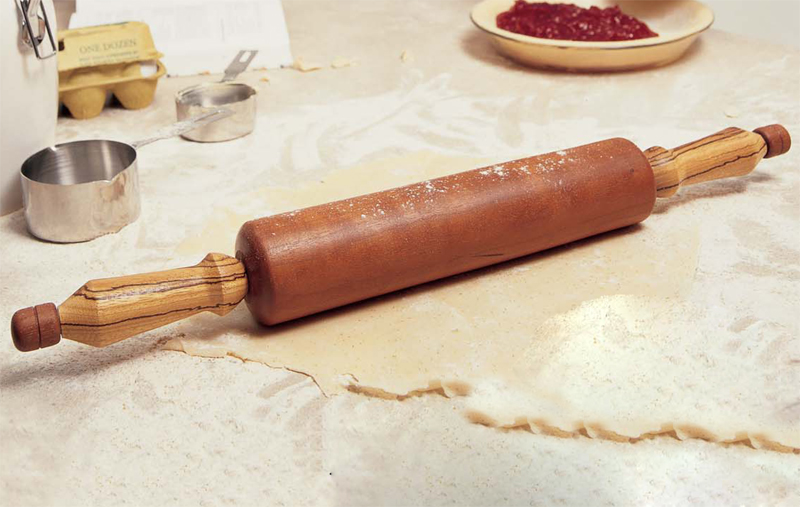
Turned Rolling Pin
Only 6 steps and you'll be rolling in dough.
By Alan Lacer
Once you get the hang of it, these rolling pins take only a couple of hours to make. The beauty of this project is that only a few tools are required and it offers several challenges, especially turning a true cylinder and drilling and aligning all the parts on the same axis. Follow our photo sequence and make a bunch of these rolling pins—they’re great gifts.
Wood to turn
Use “closed-grain” wood—cherry, maple, birch or beech—for the roller so food particles aren’t pushed into the wood pores.Don’t use exotic hardwoods—zebra wood, cocobolo, and others—for the roller because they can be toxic. For other turned parts, use whatever scrap hardwoods you have around the shop.
Tools and supplies
Here’s what you’ll need:
- A 1/2-in. spindle gouge, a larger gouge for roughing out the main cylinder and a 1/4-in. parting tool.
- An outside calipers with at least a 3-in. capacity and well-rounded ends with absolutely no sharp edges.
- A 3-1/2-in. dia. disc of pine or poplar, 2- to 3-in. thick for the shopmade cone center.
- A 3-in. faceplate to mount and turn the cone center.
- A ball-bearing live center to hold blanks while turning. It should have a conical tip (see Sources).
- A drill press for drilling holes in the blanks, plus a 1/2-in. brad-point bit and either a 14mm brad-point bit or a 9/16-in. spade bit.
- A 1-in. square piece of leather or thick fabric to protect the axle cap from the live center when turning.
- Mineral oil for the finish.
|
1. Drill axle holes in the blanks for the handles, caps and one end of the barrel using a shop-made corner block. Drilling the holes before turning ensures that the holes will be centered. Clamp the pieces firmly in the corner block to ensure the holes are vertical. Drill holes for the axle clamps and one end of the barrel with a 1/2-in. brad-point bit. It’s crucial that the hole in the large roller is centered and vertical. Use a 14mm brad-point bit or a 9/16-in. spade bit to drill the 4-in.-long axle hole in the |
Click any image to view a larger version.
|

|
2. Make the roller. Mount an 11-in.-long blank between centers on the lathe. Place the end you previously drilled on to the live center of the tailstock.Your driving center should be located on the opposite end of the blank’s center. Turn the blank into a cylinder using a gouge. |

|
|
With practice you can turn pretty true cylinders by eye and feel but until then, use calipers to help. Set your outside calipers to within 1/16 in. of the intended diameter of the cylinder. Using the calipers and a parting tool, turn down to the desired diameter at 4 or 5 points along the blank. Next, simply connect these with your roughing gouge to make a cylinder. To turn it by eye, sight along the top horizon—rather than watching the tool. Check your progress with a straightedge and calipers. Soften the corners of the roller using a small gouge. Remove the tool rest and proceed with sanding. If you still need a little help in leveling the cylinder, try sanding with 80-grit paper over a back-up block at least 4-in. in length. After sanding with the lathe in motion, it often helps to remove “ringing” by sanding with the lathe off, but with the grain.This is especially helpful for the final sanding with 150-grit paper. |
|

|
3. Make a cone center. Turn a 2- to 3-in. thick, 3-1/2-in.-dia. disc of pine, poplar or other soft material into a cone to help hold the drilled handle parts.The exact angle of the cone isn’t critical—between 60 and 80 degrees will work fine.To make the cone center, screw the disc onto a 3-in. faceplate using screws that penetrate the |
|

|
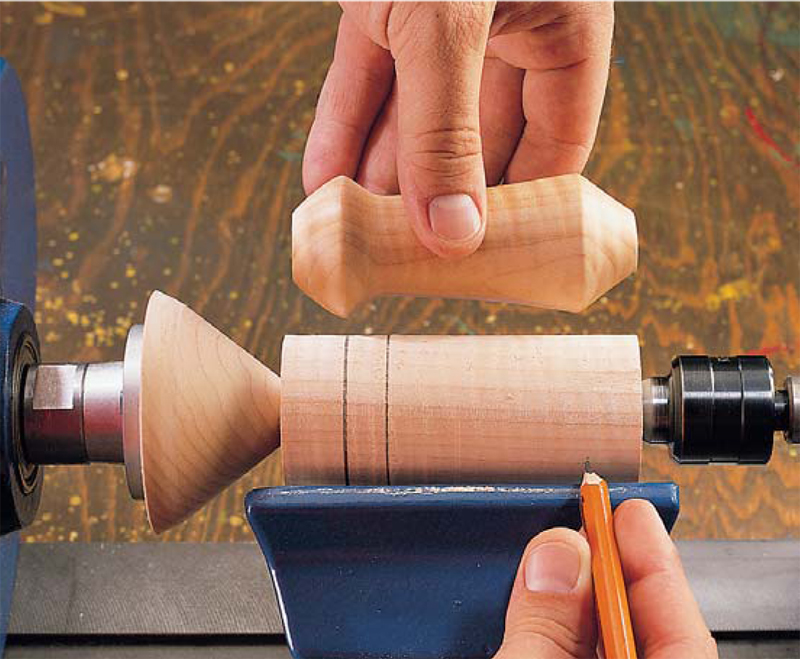
4. Make the handles. Turn one handle holding it between your cone center and a conical live center. If the handle stops spinning while you’re turning, crank the live center into the wood and take lighter passes with the gouge. Use the handle you just turned as a pattern and turn a duplicate. Hold a pencil on the tool rest, as shown, to transfer high and low spots of the shape to the spinning wood.You may want to use your outside calipers to do a more exact sizing of the second handle to the first. Carefully sand both handles. |
|
|
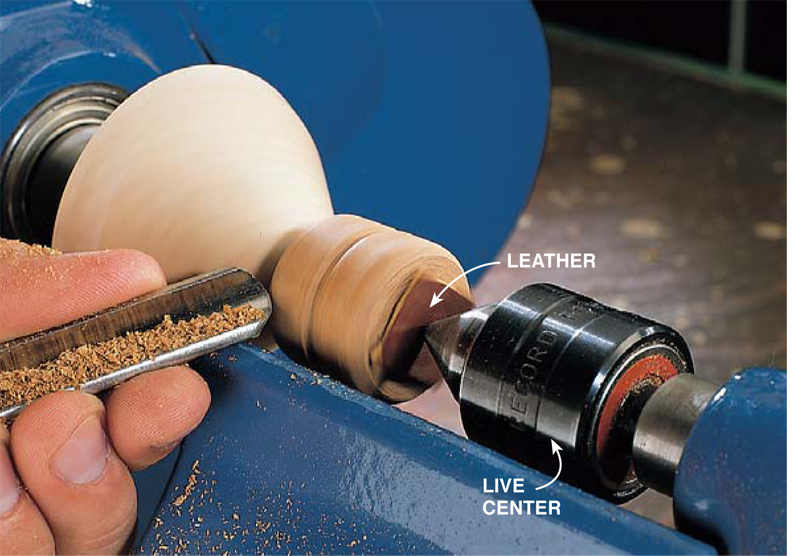
5. Make the axle cap. Mount the cap blank in the lathe between |
|
|
6. Final assembly. When you’re finished turning and sanding, return the roller to the corner block jig on the drill press and drill the 1/2-in. hole on the other end. Use the hole from your drive center to pilot the point of the brad-point bit.Glue the dowels into the roller, slide the handles over the dowels and glue the axle caps on the ends. Finish the whole thing with mineral oil and wax. |
|

Sources(Note: Source information may have changed since the original publication date.) Craft Supplies USA, woodturnerscatalog.com, 800-551-8876. Apprentice 60 Degree Revolving Cone Center, #9794760001. Woodcraft, woodcraft.com, 800-225-1153, Metric 14 mm brad-point bit, #146623; Fractional 1/2" This story originally apeared in American Woodworker, April 2000, issue #79
|
Cutting List
Fig. A: Rolling Pin Dimensions
|


Here are some supplies and tools we find essential in our everyday work around the shop. We may receive a commission from sales referred by our links; however, we have carefully selected these products for their usefulness and quality.


