


We may receive a commission when you use our affiliate links. However, this does not impact our recommendations.
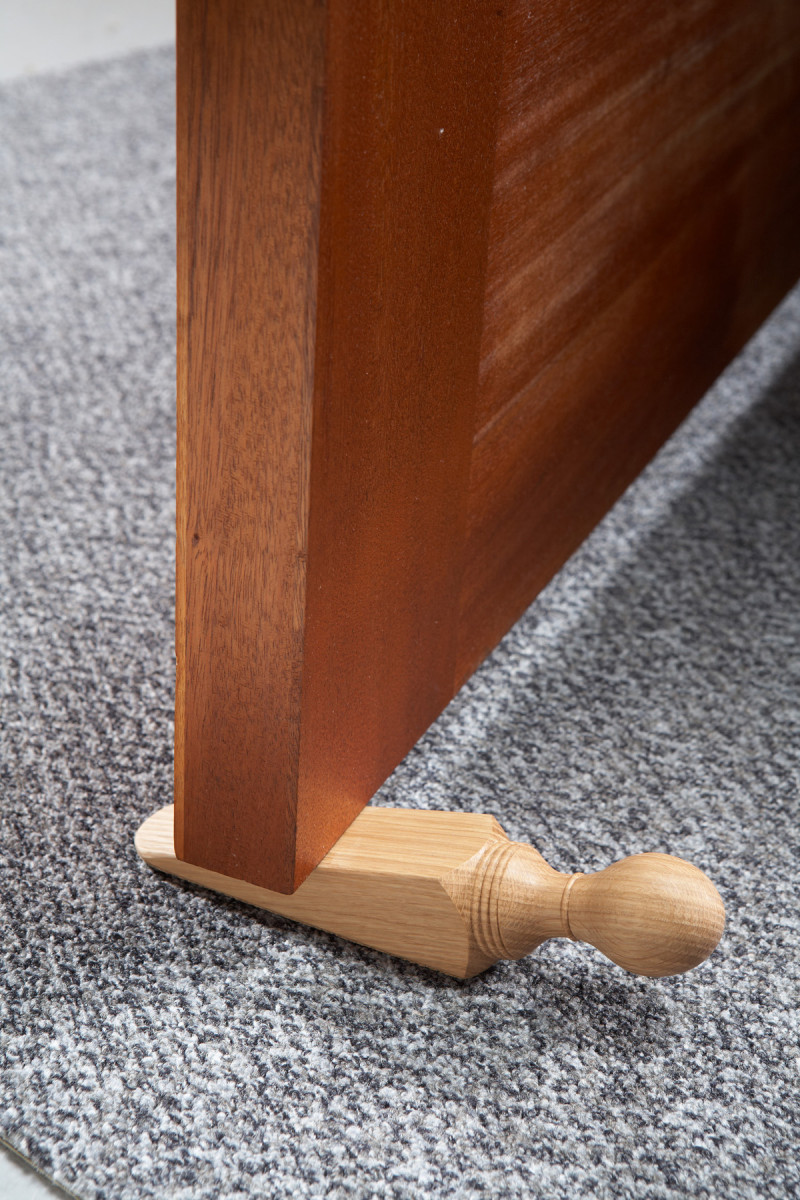
Perfect for the house that has everything.
Take the humble rubber doorstop—please! Then head to your lathe and create something that you can’t buy in a store—a doorstop that looks as great as it works. In addition to creating a functional item and a unique gift, this simple project provides an excellent opportunity to practice the art of creating pommels (a pommel is any part of a spindle turning that’s left square). Disaster lurks at the end of a pommel, where the turning changes from round to square, because one wrong move can cause ruinous splintering. That’s why artfully making the transition is an important technique to master. As each blank produces two doorstops, you’ll be able to practice creating pommels in both directions with every blank.
Doorstops take a real beating, so use tough wood; oak, maple, cherry and walnut all work well. A 12″ long by 1-1/2″ to 1-3/4″ square blank is a good size to start with, although the pitch of the stop’s wedge and its overall length will often be dictated by the gap under the door.
A parting tool, a skew chisel and a detail gouge are the only turning tools you’ll need. A bandsaw and a stationary belt sander are desirable, but not absolutely necessary—a handsaw and a sanding disc mounted on the lathe also work quite well. Add a straightedge, a square, an awl and a pencil and you’re ready to go.
1. Square the blank using a tablesaw or planer and remove any milling marks by sanding.
2. Create centered mounting holes on both ends of the blanks. Carefully scribe from corner to corner using the straightedge and the awl. Push in with the awl where the two lines intersect to make the holes.
3. Mount the blank, making sure that both lathe centers are in the mounting holes.
1. Divide the blank into three parts. Only the end portions will be turned, as each blank contains two doorstops. The pommel will be cut diagonally to create the wedge-shaped stops.
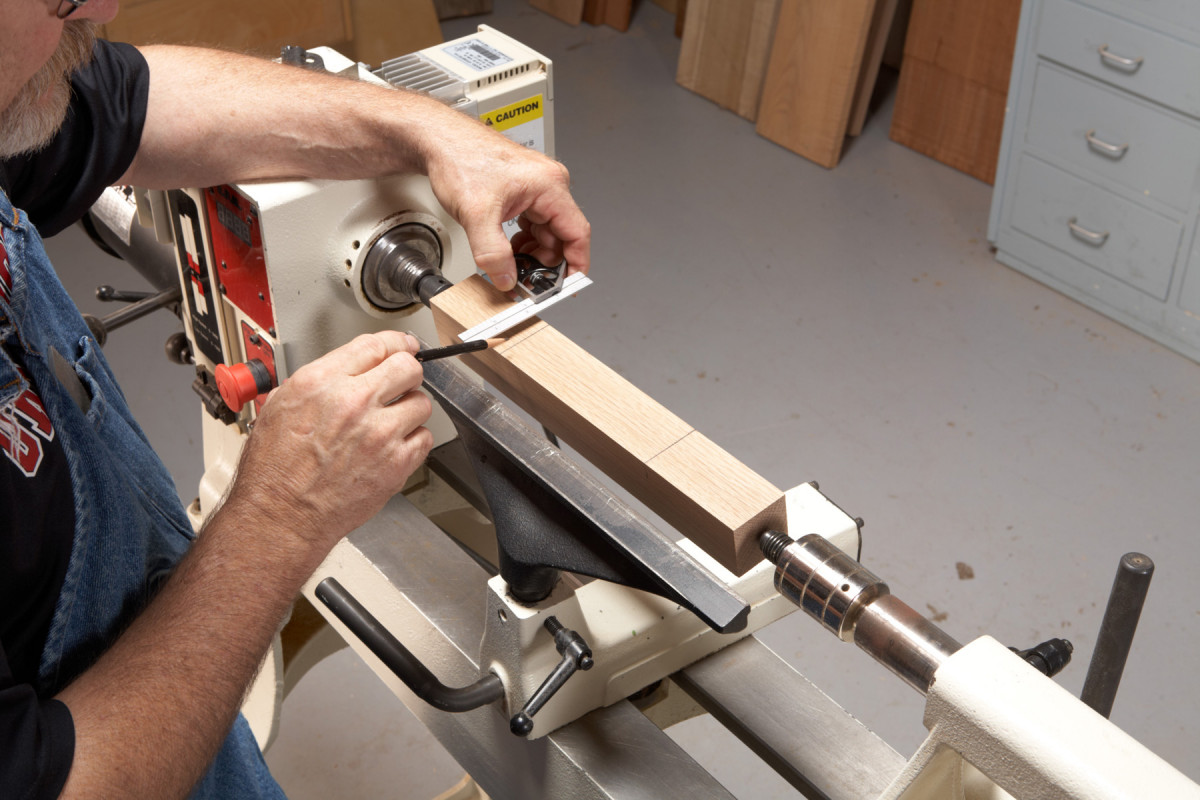
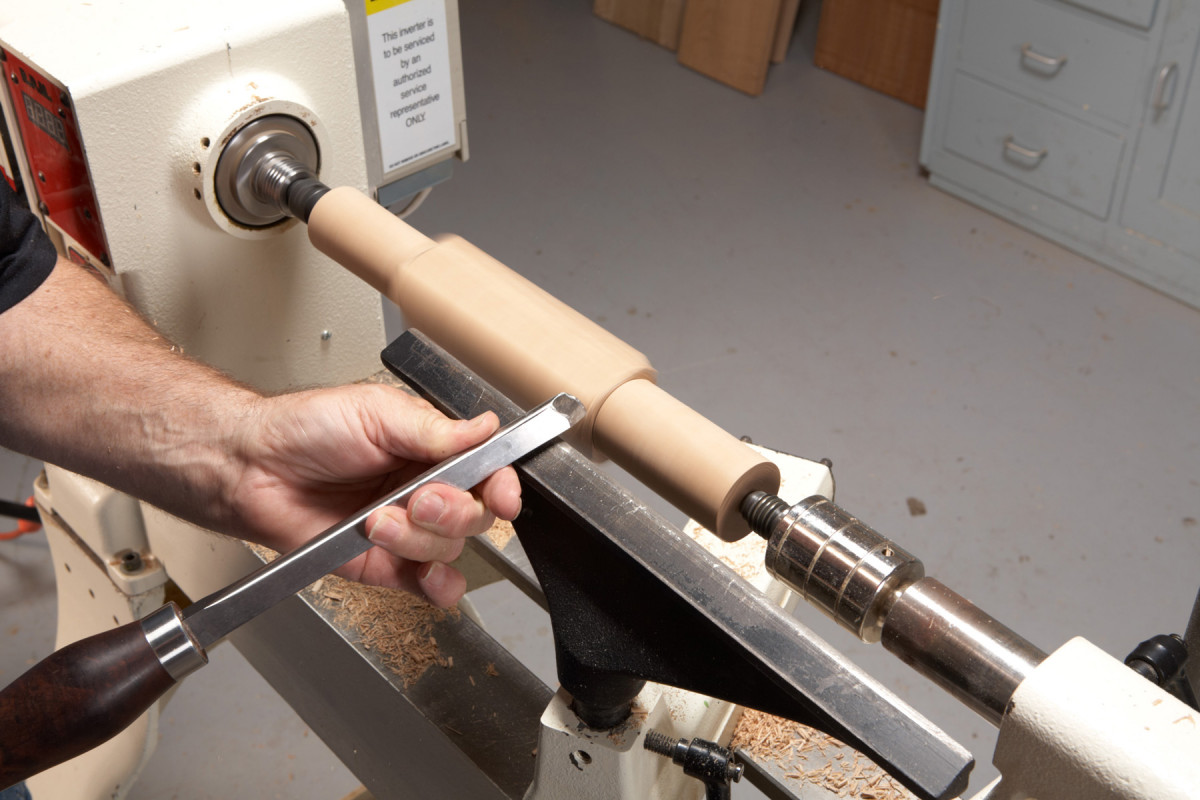
4. Both ends will be turned into knobs, so measure about 2-1/2″ in from the ends and mark a line at both points (Photo 1). The area between the lines (the pommel) will be left square. Marking all four faces makes the lines easier to see when the workpiece is spinning. Use a white or yellow pencil if the blank is a dark-colored wood.
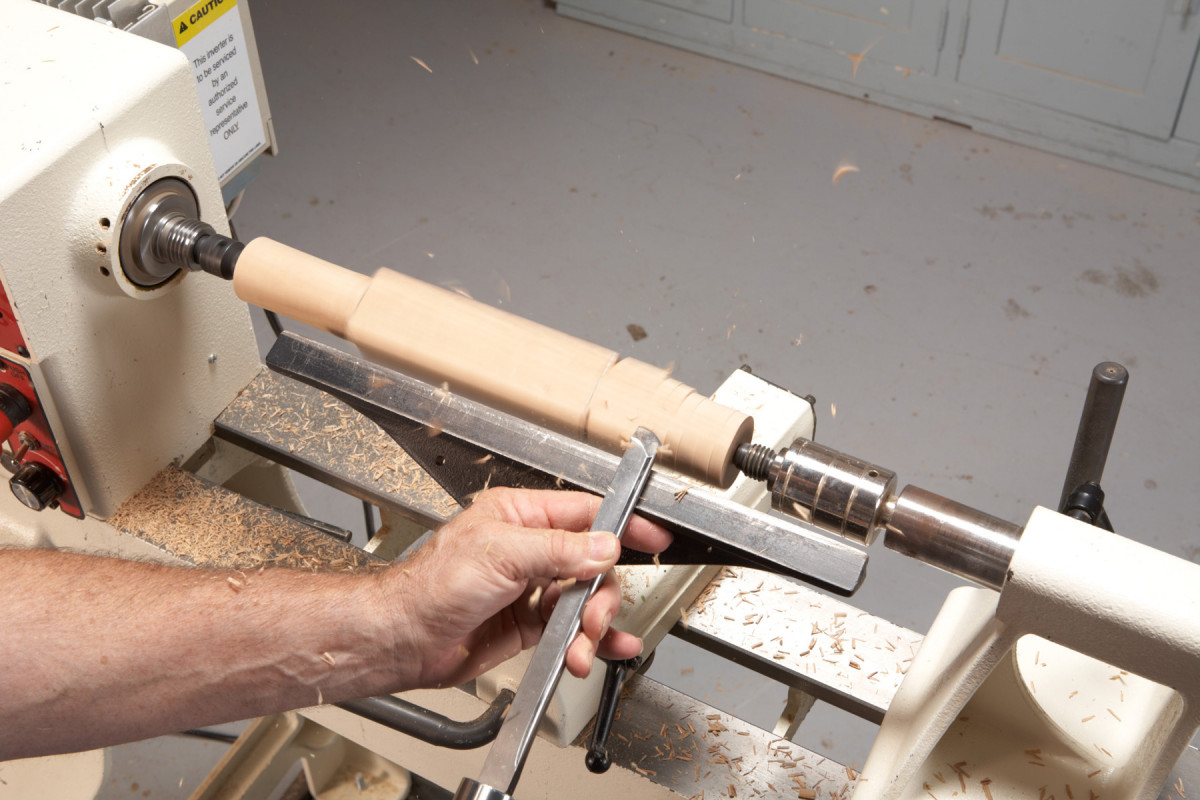
2. Rough out the pommel with the skew chisel, alternating between shallow V cuts made slightly outside the layout lines and peeling cuts used to round the ends.
5. Start the turning process by creating square shoulders on the ends of the pommel. Creating a clean square shoulder is one of the hardest parts of the entire process; so practicing on waste material is good preparation. Using the skew chisel long point down, make a series of V cuts slightly away from the lines, in the areas that will turned into knobs. Because of the skew’s bevel, the initial V cuts cannot go very deep. Instead, alternate between shallow V cuts and peeling down the turned end portions to create clearance (Photo 2).
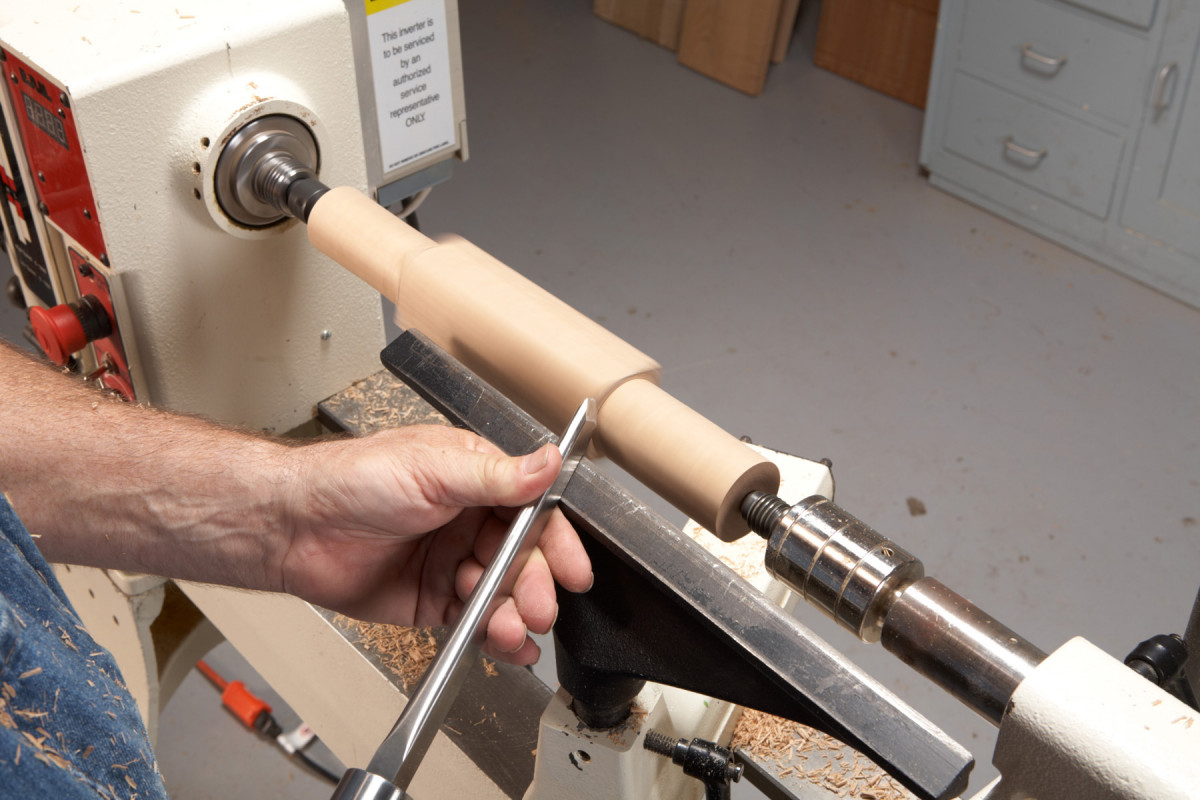
3. Square each pommel shoulder after rounding the ends, by cutting in at the layout line, using the skew with its long point down.
Go easy, as a peeling cut that goes deeper than the preceding V cut can splinter the pommel. When the end sections are nearly rounded, cut in a clean square shoulder right at the layout line (Photo 3). Square shoulders can also be created with a parting tool, but it’s risky: Delicate cuts are necessary to avoid splintering the shoulders. Finish by truing the two rounded sections with the skew—make planing cuts moving from the outside end right up to the shoulder.
4. Round the pommel shoulders in stages by making successive rolling cuts with the skew (long point down) or the detail/spindle gouge.
6. Use either the long point of the skew or a detail/spindle gouge to round over the pommels’ shoulders (Photo 4). Rounded shoulders are much more durable than square ones, which are prone to splintering.
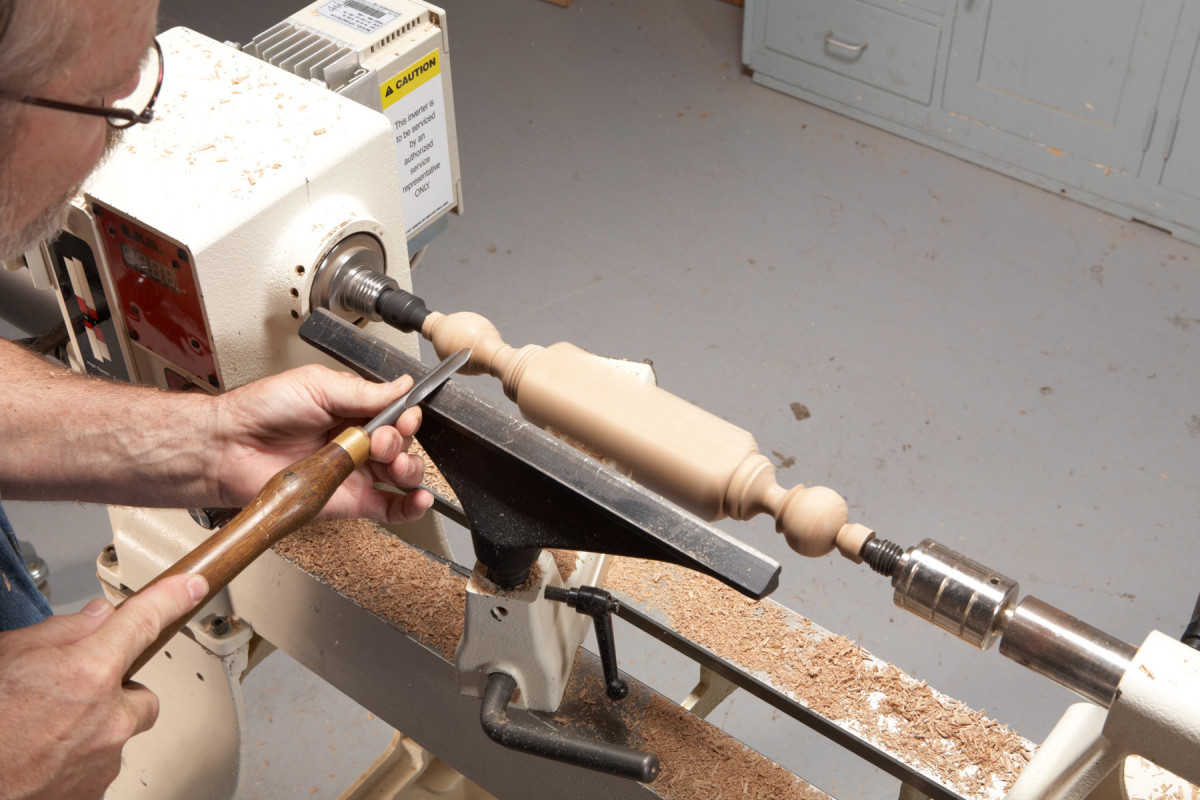
5. Shape the knobs with the detail/spindle gouge and the skew. The knobs don’t have to match, because you’re creating two separate doorstops. Ball or bulb shapes are easiest to grip.
7. Shape the knobs (Photo 5). Turn the knob at the tailstock end first, to avoid working with a weak spot (the narrow neck) near the drive center. The knobs’ concave and convex shapes can both be cut with the detail/spindle gouge, but a skew will leave a cleaner surface on the convex shapes. (Using the skew, though, requires more skill and practice.) Leave at least 1/4″ waste at both ends for removing the mounting holes.
8. When you’re happy with the knobs you’ve created, reduce the diameters at both ends. Then finish-sand to 220 grit.
9. Take the blank off the lathe and remove the waste at both ends with a small saw. Then finish-sand the ends by hand.
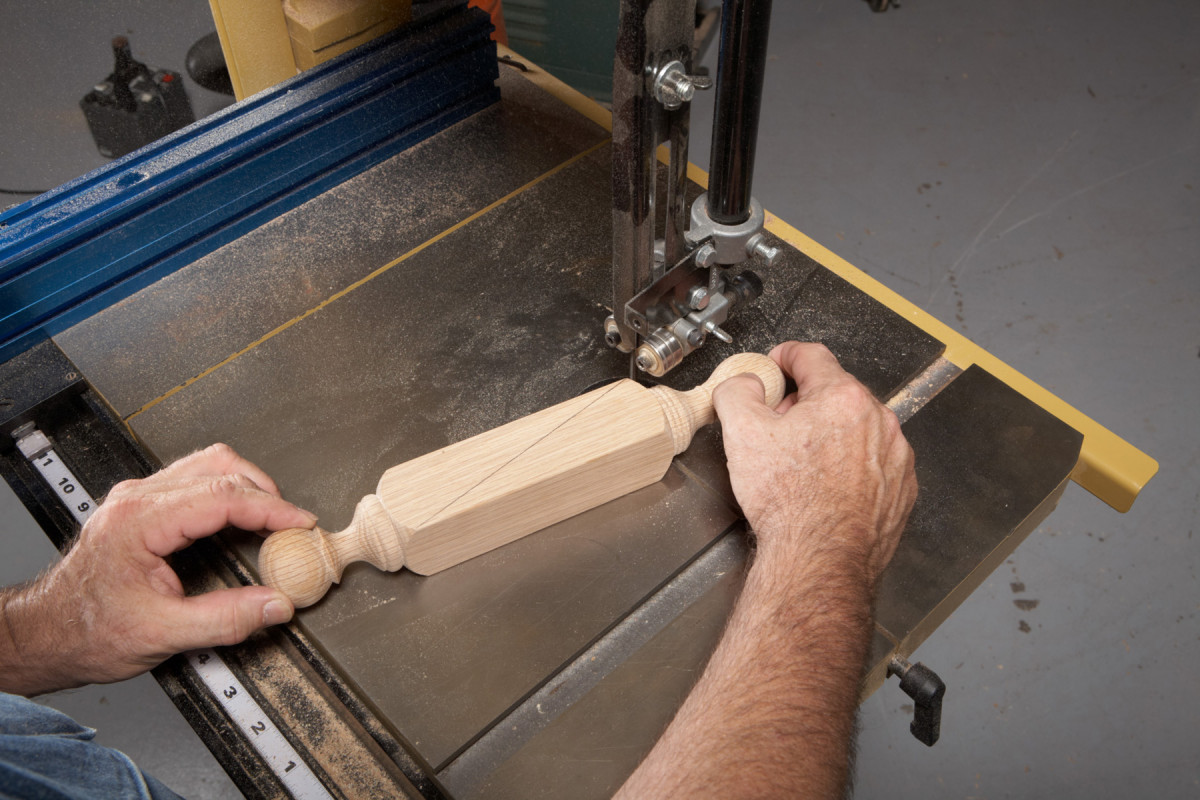
6. Cut diagonally across the pommel to create two wedge-shaped doorstops. The sawn edges are the bottoms. Flatten them by sanding.
10. Mark one of the blank’s flat pommel faces from corner to corner. Then saw this line to create two wedge-shaped doorstops (Photo 6). Sand their sawn faces flat.
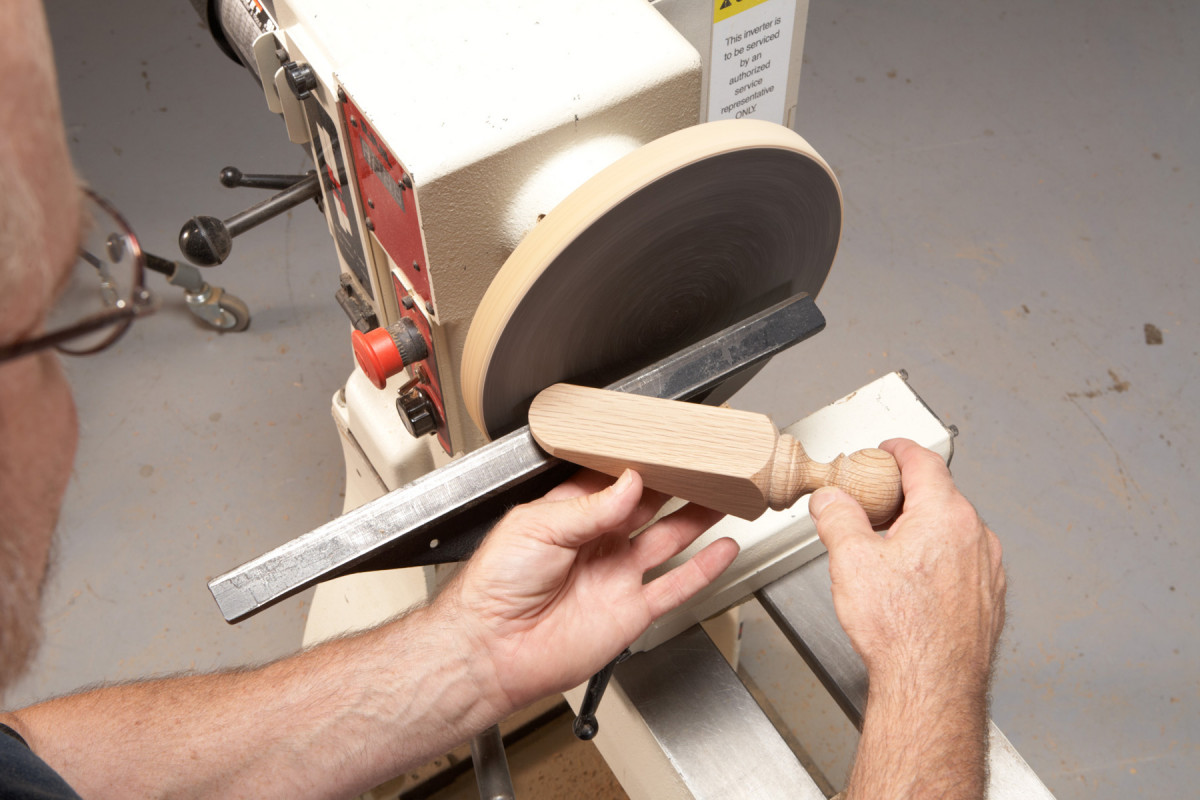
7. Round the end of each doorstop to reduce chipping and create a more graceful look.
11. Shape the end of each doorstop (Photo 7).
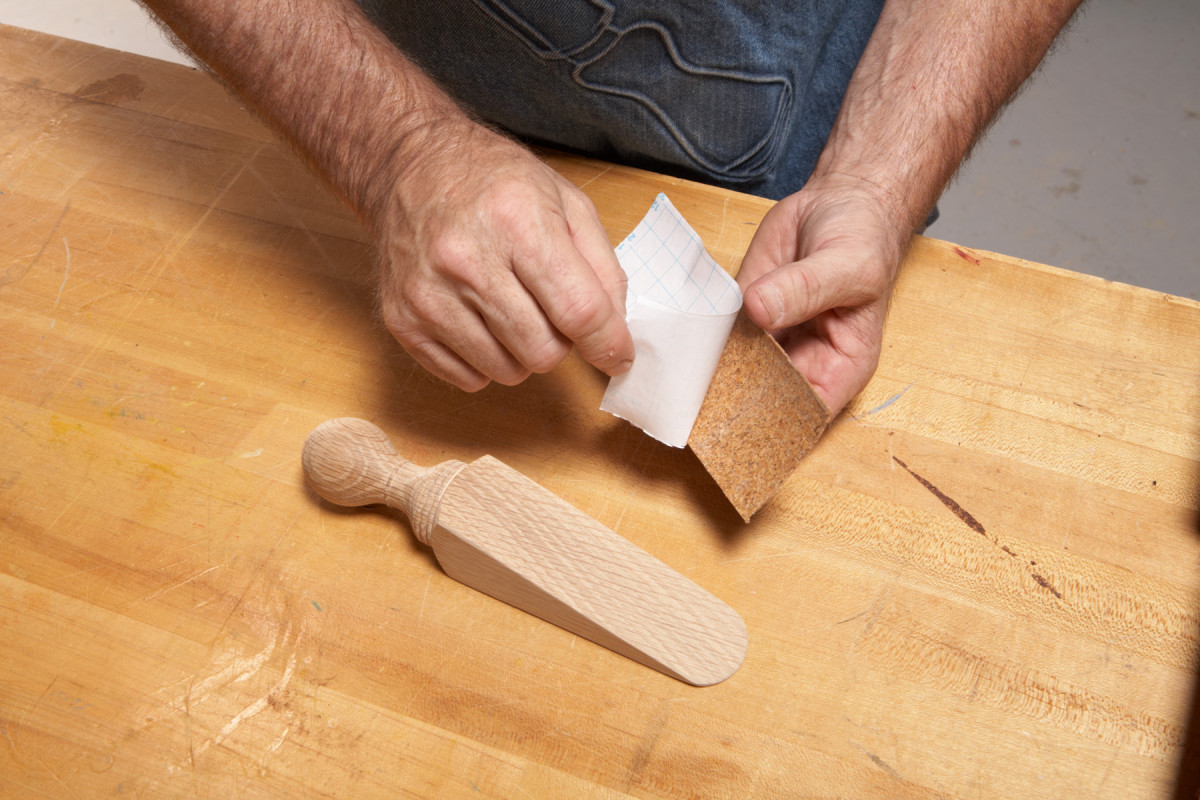
8. Keep the doorstops from slipping on hardwood or tile floors by attaching a piece of foam or cork to the bottom. Trim the waste with a utility knife.
12. Use any finish you like—or none at all. Leave the bottom face unfinished if the doorstop will be used on wooden or tile floors, so you can glue on cork, foam or some other anti-slip material (Photo 8). Check out drawer or toolbox liners sold at home centers and hardware stores. The self-adhesive cork liner shown in the photo costs about $8 for a 4′ roll—that means you’ll have plenty left over to upgrade your tool drawers.


