We may receive a commission when you use our affiliate links. However, this does not impact our recommendations.

Flaring sides, tapering bevels and asymmetrical corners make these mid-century modern style frames perfect for wacky photos or jazzing up a wall. They’re surprisingly easy to make and just as easy to modify. Flare only the top, for example or flare both sides toward the bottom. Alter the flares’ pitch. Change the bevel angles. Change the width of the frame pieces or the size of the opening. You can these frames using only a tablesaw and bandsaw, but the job will go faster if you also have a miter saw, jointer and router table.
Start Square
Believe it or not, each of these frames starts out as a plain rectangular frame with a wide bevel around the opening. You can buy such a frame (watch out for metal fasteners at the miters) and skip to the next section, or build your own frame. The frames shown here are sized for 12″ x 14″ images—or 8″ x 10″ images surrounded by 2″ matts. To build one of these frames, you’ll need two pieces of 3/4″ x 3″ x 40″ stock. Each piece contains one long side and one short side.
Cut a 2″ wide bevel on the inside edge of both frame stock pieces by tilting the blade to 10° and setting the tablesaw’s fence to leave a 1/2″ shoulder on the edge of the stock. Sand, plane or joint each bevel to remove the saw marks.
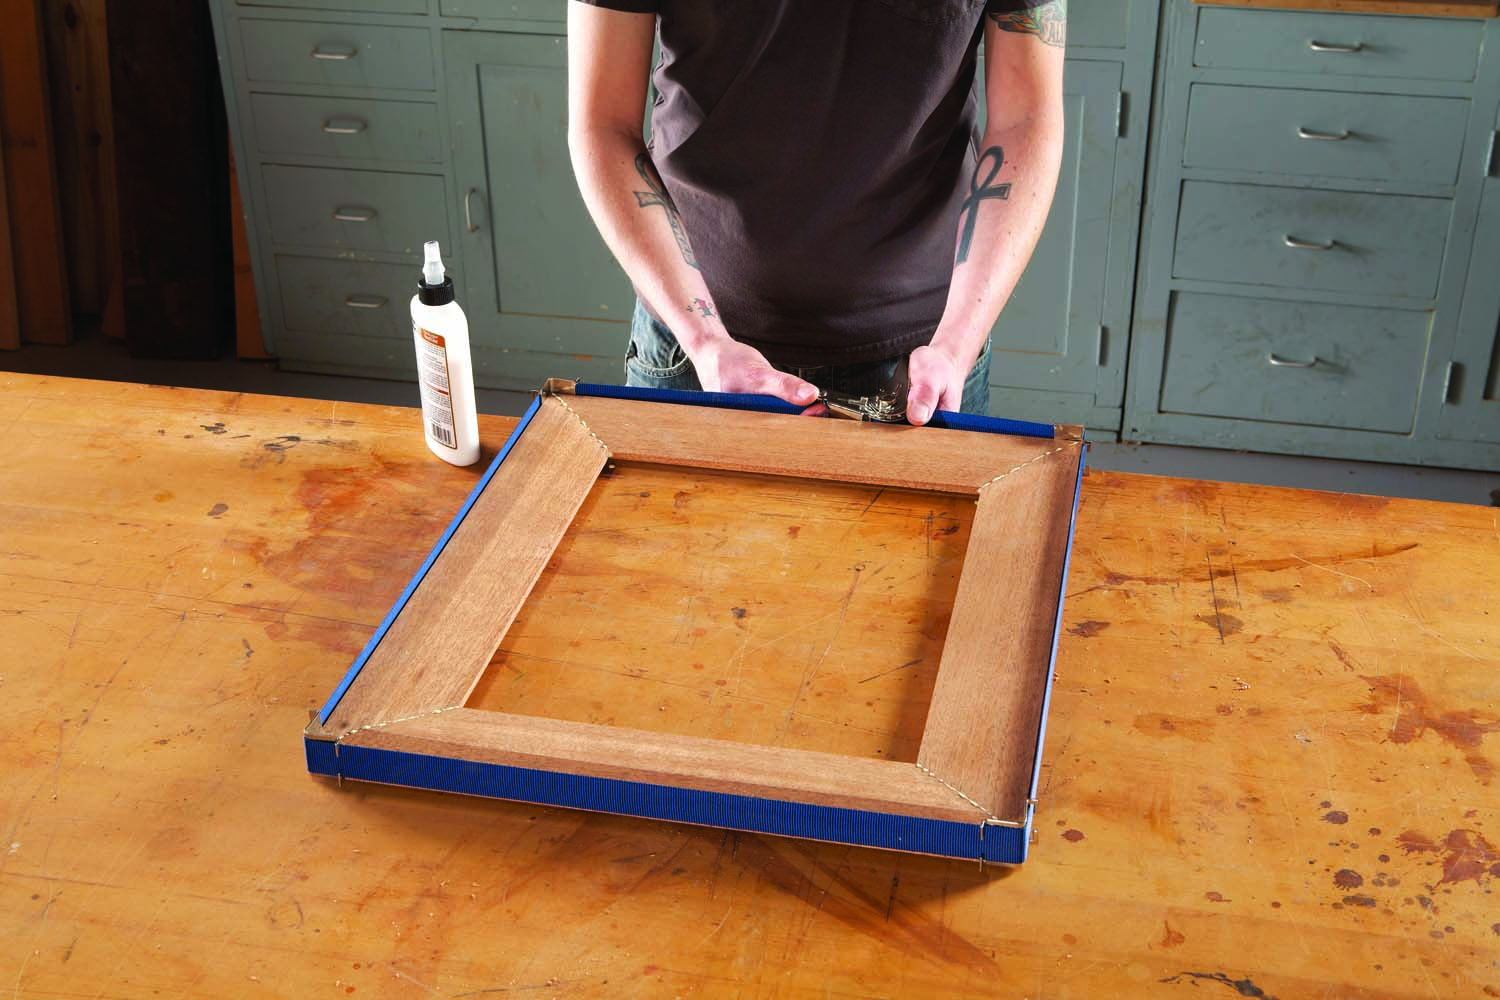
Photo 1. Start by making a mitered frame with a wide inside bevel. Apply glue and butt the miters—don’t reinforce the joints with biscuits or mechanical fasteners.
Rout a 1/4″ wide x 1/4″ deep rabbet for glass on the inside edge of each piece. Next, cut the four sides to length by mitering the corners to create a 11-9/16″ x 13-9/16″ opening. Simply butt the miters when you glue the frame together—don’t reinforce the joints with biscuits or mechanical fasteners (Photo 1). Note: The miters must meet precisely at the corners and all four sides must be flush, so the frame sits flat on its back.
Create Dramatic Tapers

Photo 2. Map out the frame’s tapered edges using a different point on each miter to create unique corners and tapers. The narrowest corner must be at least 1-5/8″ wide.
To establish a different taper on each side of the frame, leave one mitered corner full width and mark different points to uniquely shorten the other three corners (Fig. A, below). Then connect the dots (Photo 2). Taper the frame’s outside edges (Photo 3). Then sand, plane or joint each edge to remove the saw marks, making sure each corner remains centered on the miter. Make adjustments to match up the corners if they’re off.
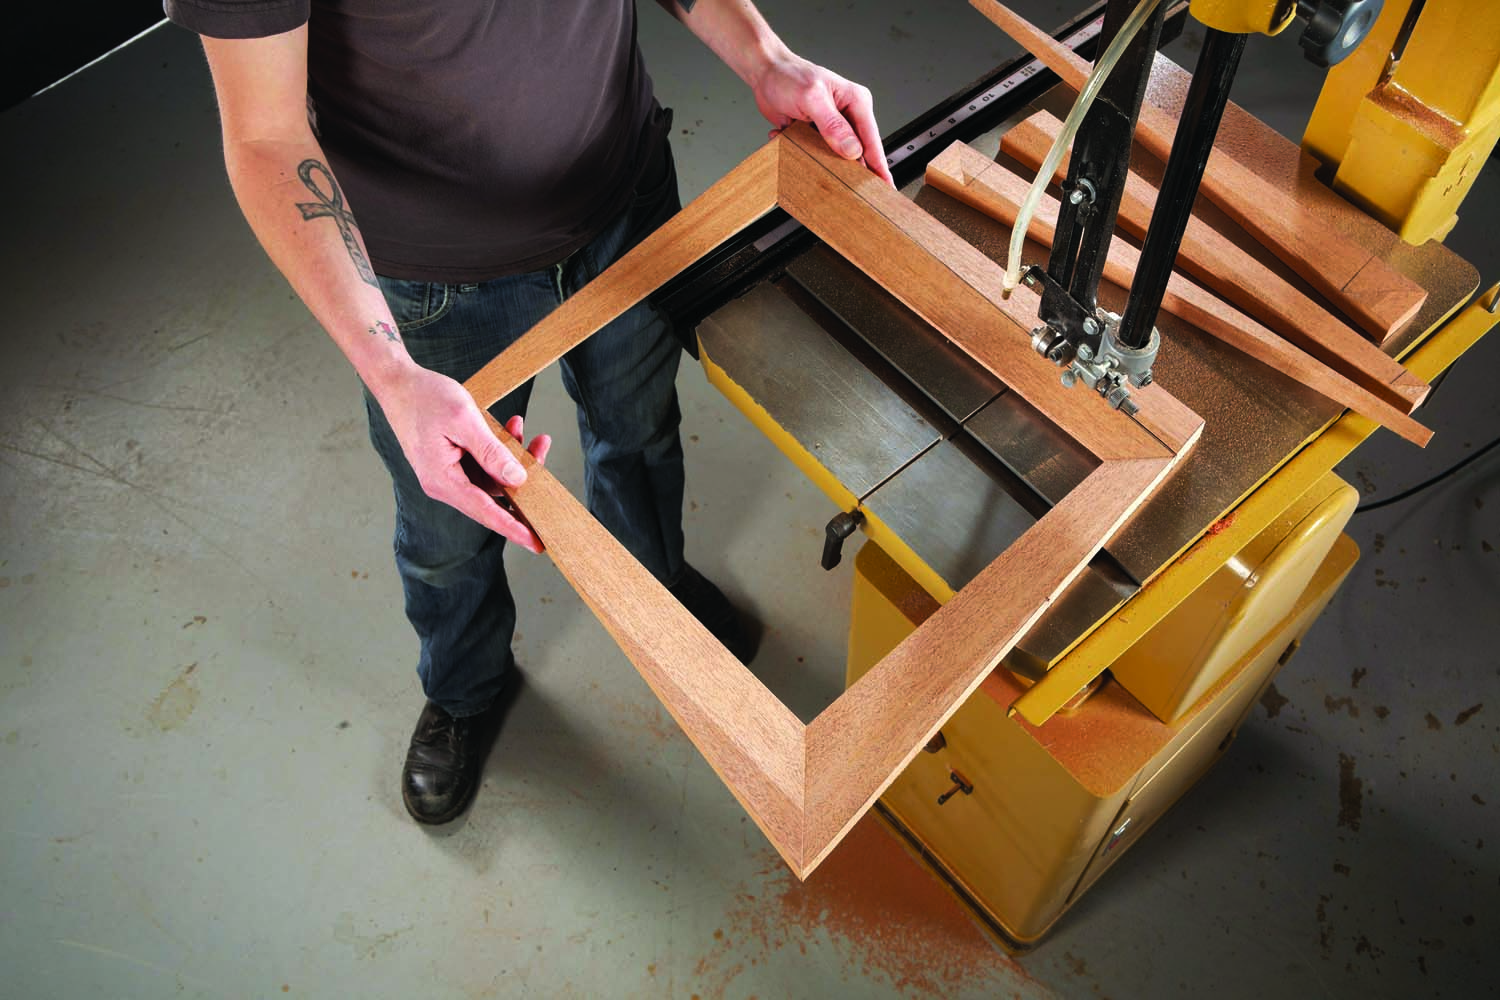
Photo 3. Bandsaw the frame’s tapered edges. Exaggerated tapers are most dramatic.
Make a Jig
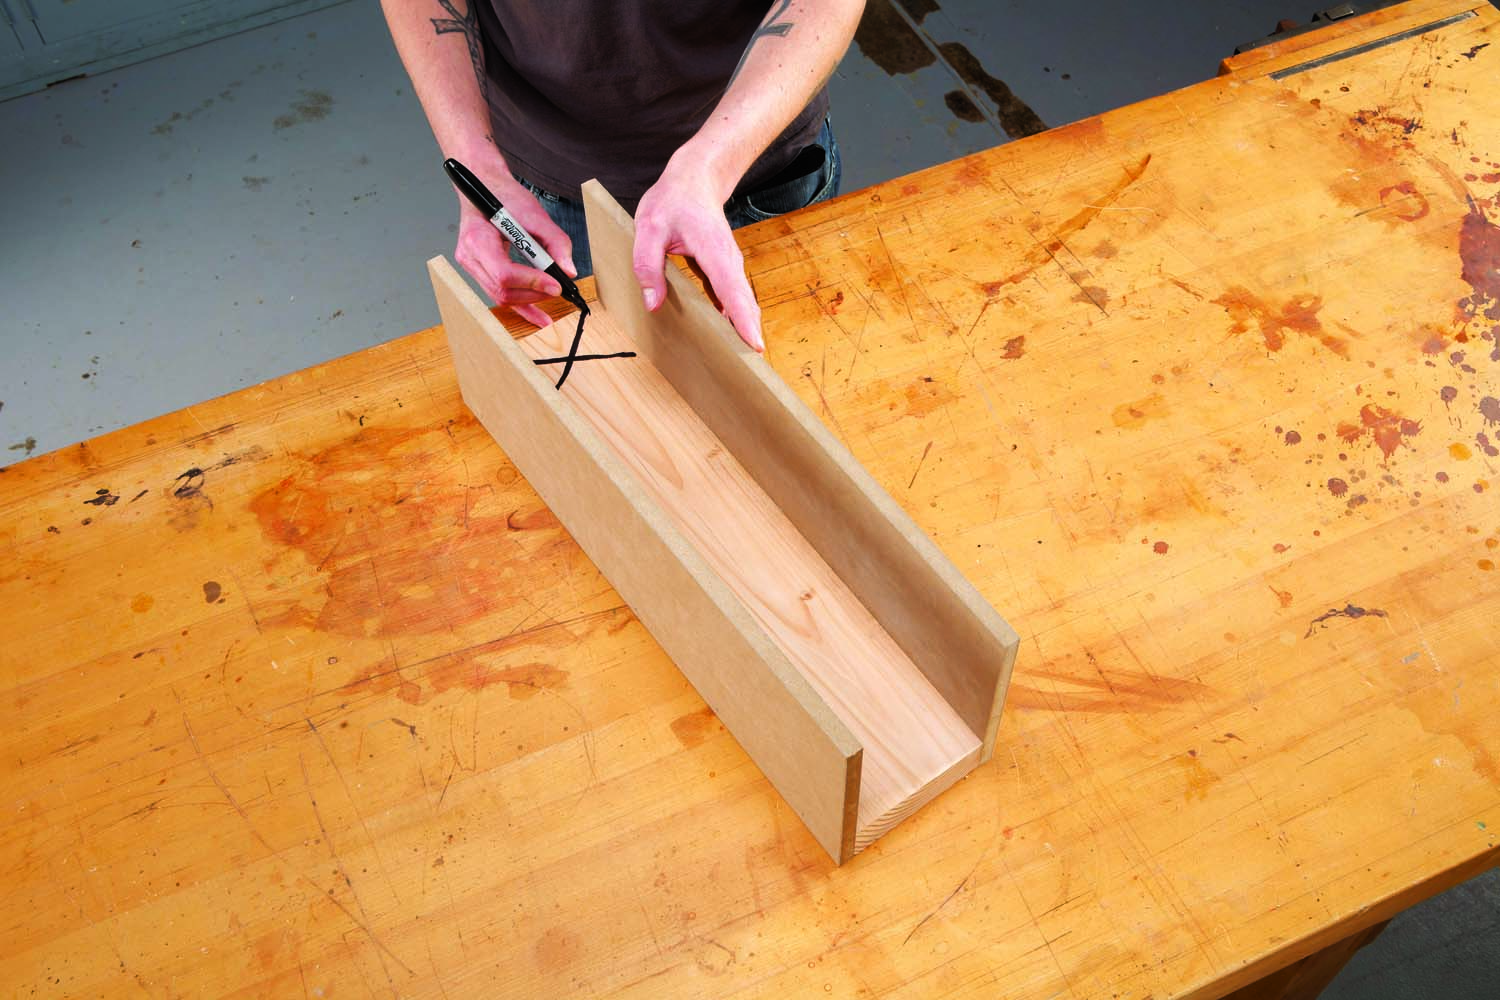
Photo 4. Make a two-sided jig from a 2×6 with one tapered edge to cut tapered bevels on the frame’s tapered outside edges. (Yes!) Mark the wide end of the jig.
Make a tapered jig to bevel the outside edges of the frame (Photo 4). One side of the jig will increase the bevel and the other will decrease it.
Joint one face and one edge of a 20″ long 2×6 so both surfaces are flat and the corner is square. Mark a 1/2″ end-to-end taper on the opposite edge. Bandsaw the taper and joint the edge to remove the saw marks. Fasten 3/4″ X 6″ MDF fences to both edges, for clamping the frame to the jig. Mark the wide end of the jig.
Cut Wonky Bevels
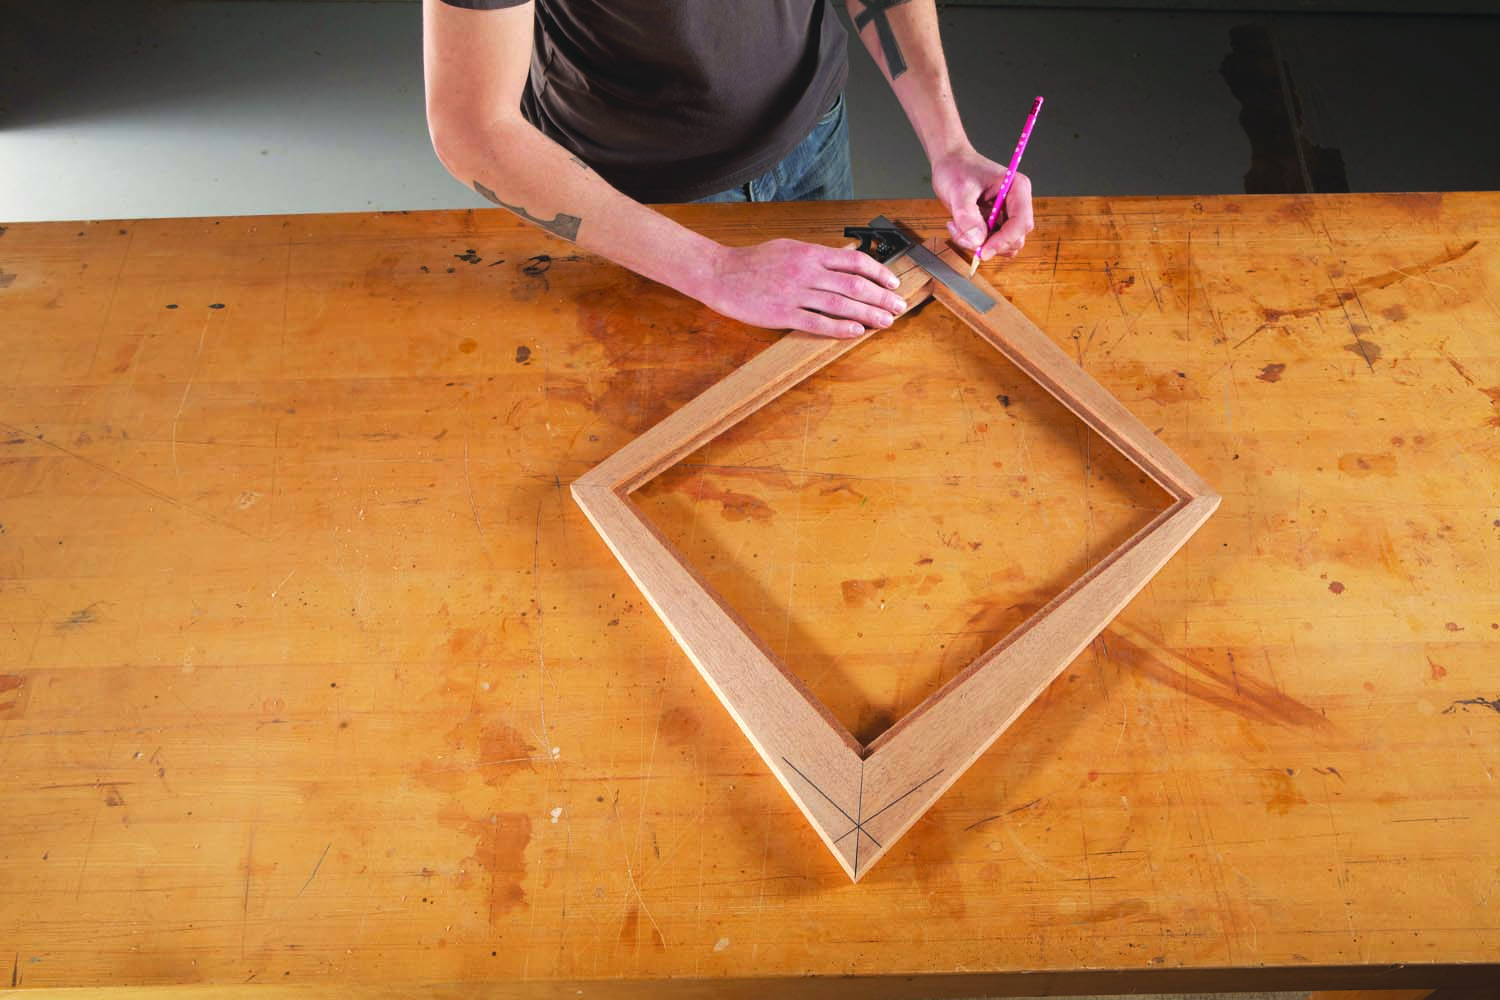
Photo 5. Mark the back of the frame to position the jig. Use a square to draw registration lines that intersect at the miter on the two wide corners, exactly 1″ from their outside edges.
Draw registration lines on the two widest corners to position the jig (Photo 5). On this frame, the widest corners are opposite one another. Use a square to mark a line that crosses one of the wide miter joints exactly 1″ away from its outside corner. Mark a second line from the adjacent side, so that the two lines intersect at the miter. Repeat the process to mark the frame’s opposite corner.
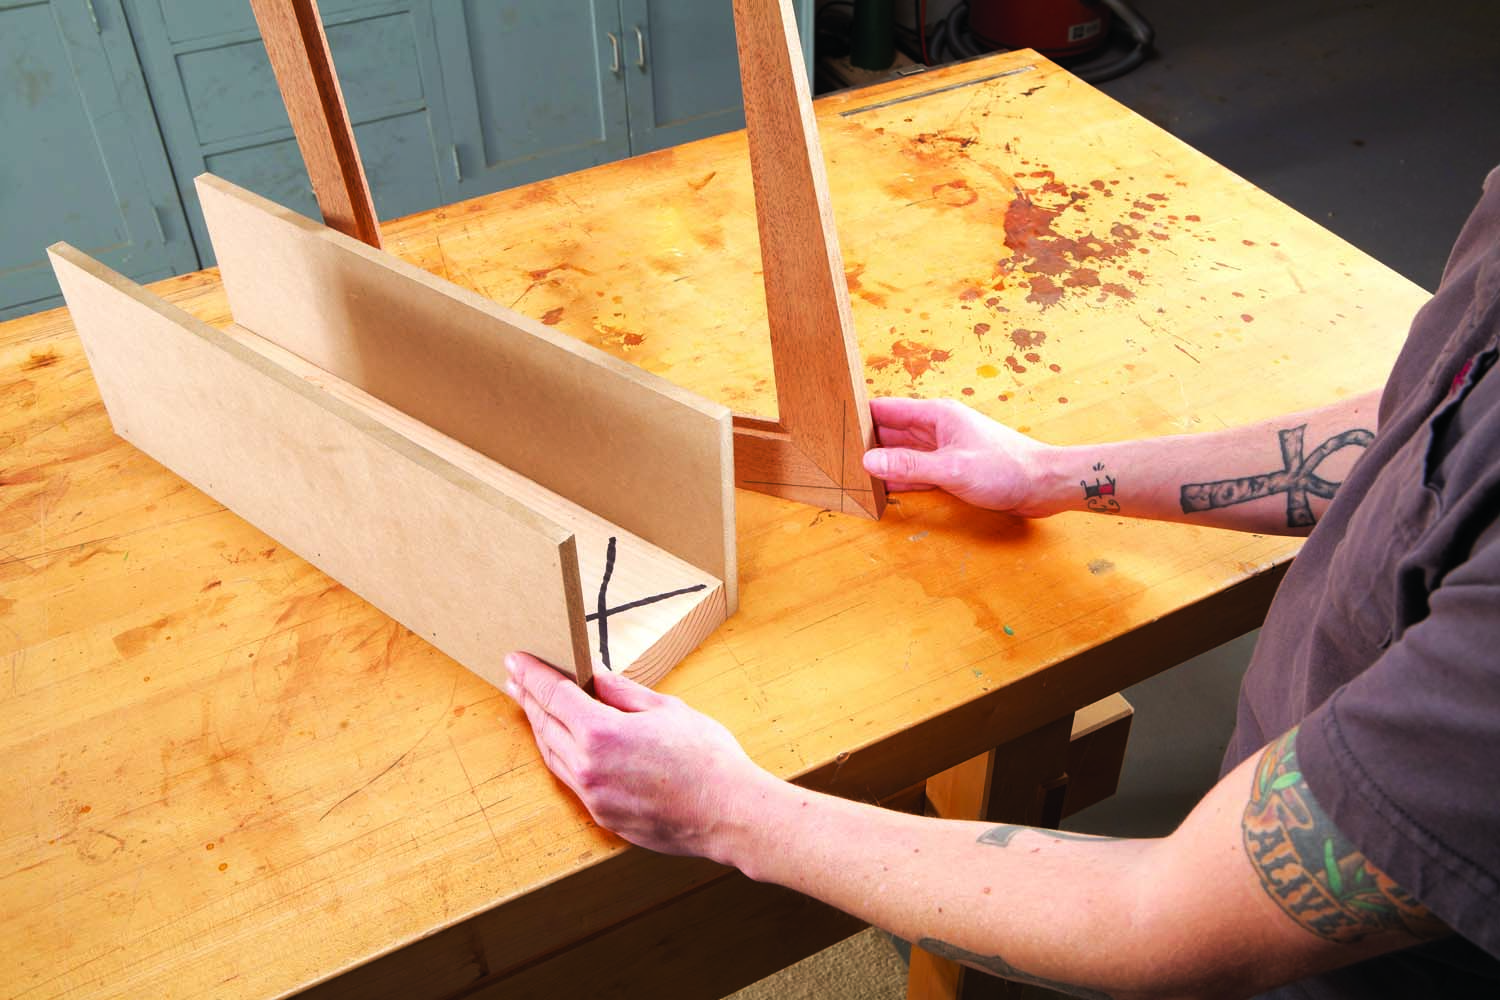
Photo 6. Align the wide end of the jig with the registration line on the long side of the first miter. Then clamp the frame to the jig.
Orient the frame on one of its long sides to cut the first tapered bevel (Photo 6). This places the registration lines at the front end of the frame. Align the wide end of the jig with the vertical registration line. Then clamp the frame to the jig. Tilt the blade to 30° and set the fence to leave a 3/16″ shoulder at the front of the frame. Then cut the bevel (Photo 7).
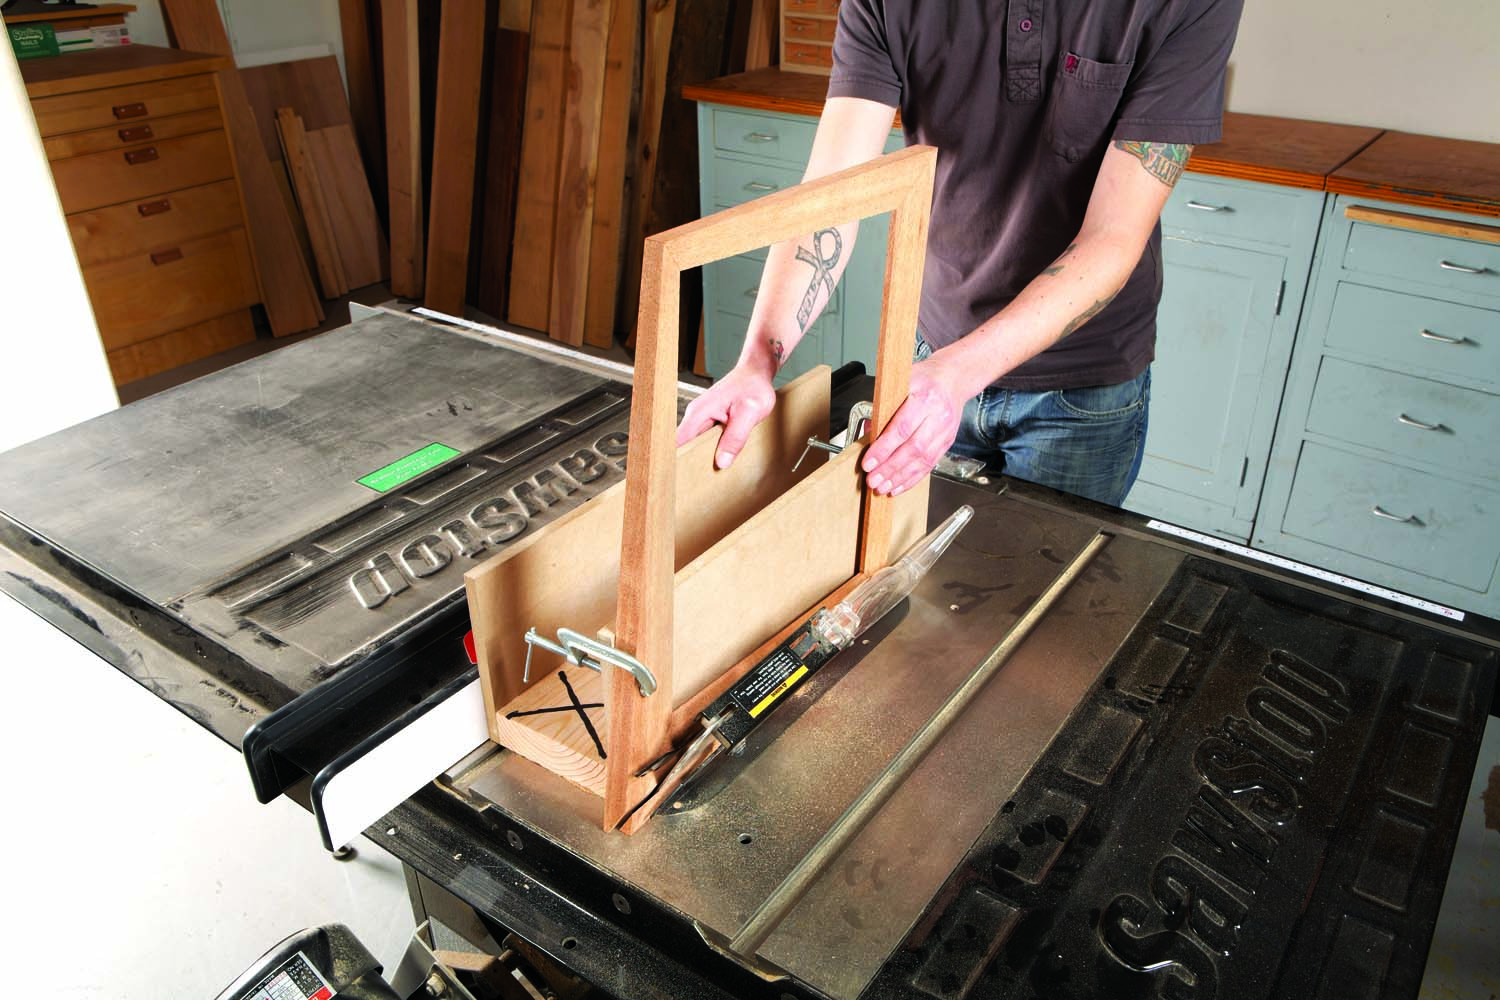
Photo 7. Cut the first tapered bevel with the wide end of the jig at the front. This bevel decreases in width along the cut and simultaneously tapers both the frame’s beveled face and its outside edge—in the opposite direction!
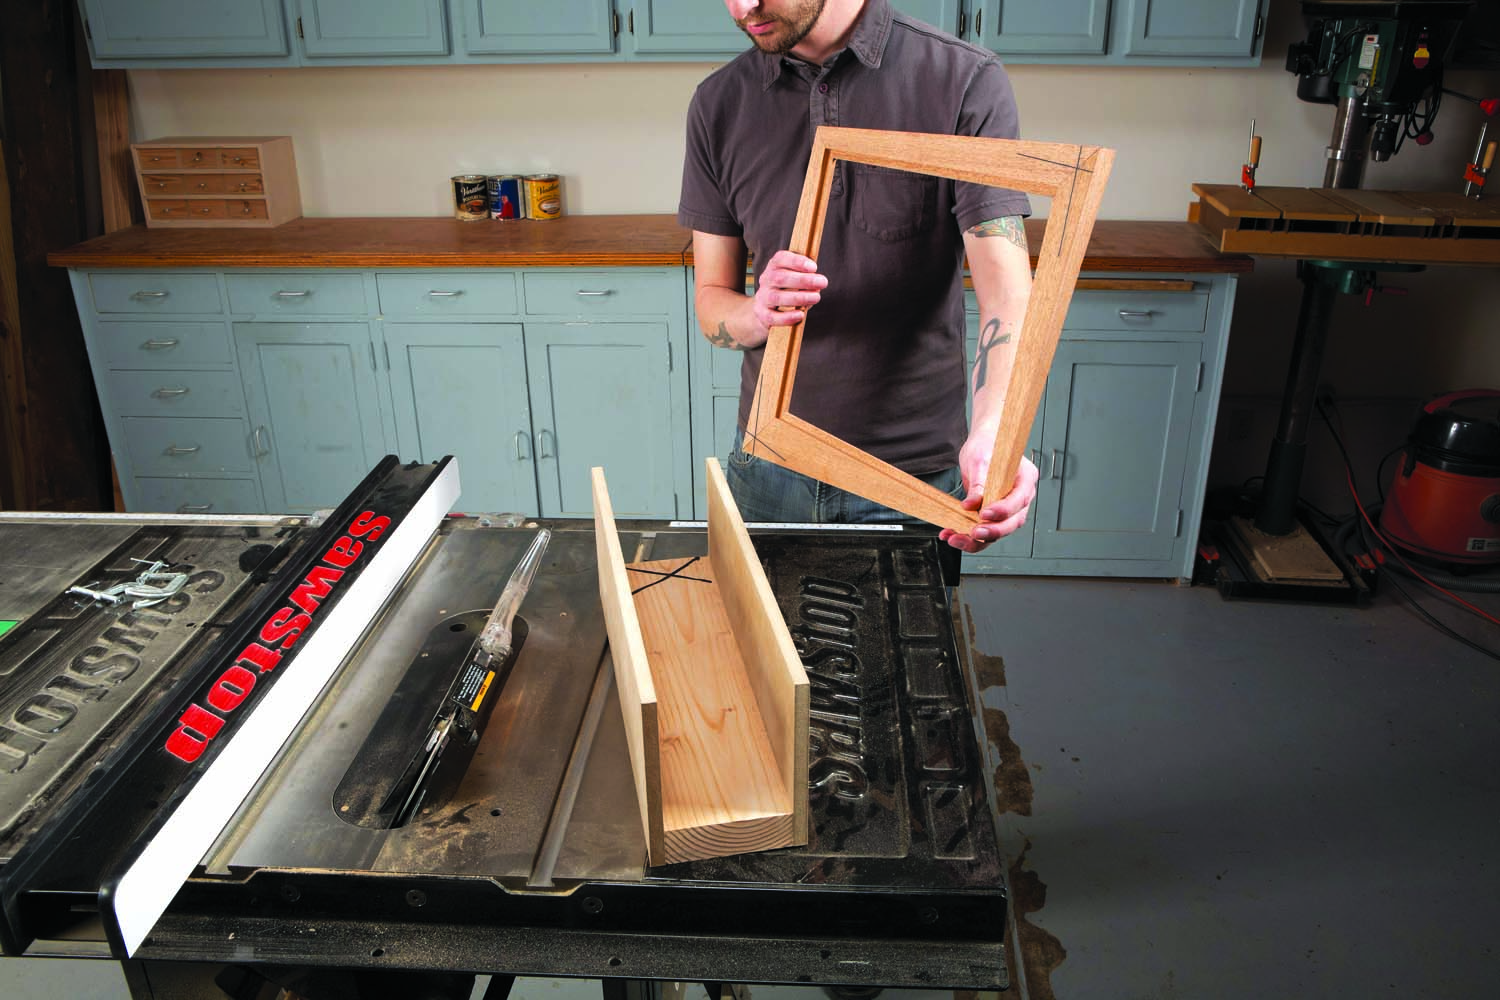
Photo 8. Rotate the frame and turn the jig around to cut the tapered bevel on the adjacent side. Align the jig’s wide end with the registration mark. This setup will make the bevel’s width increase along the cut.
Now, bevel the adjacent side of the miter. Remove the frame and rotate it 90°, so the registration lines are at the back end (Photo 8). Likewise, spin the jig 180° so its wide end is also at the back. Align the wide end of the jig with the vertical registration line. Then clamp the frame to the jig and cut the bevel without changing the saw setup (Photo 9). Because the wide end of the jig is registered from the same point for cutting both tapered bevels, they’ll meet perfectly at the miter.
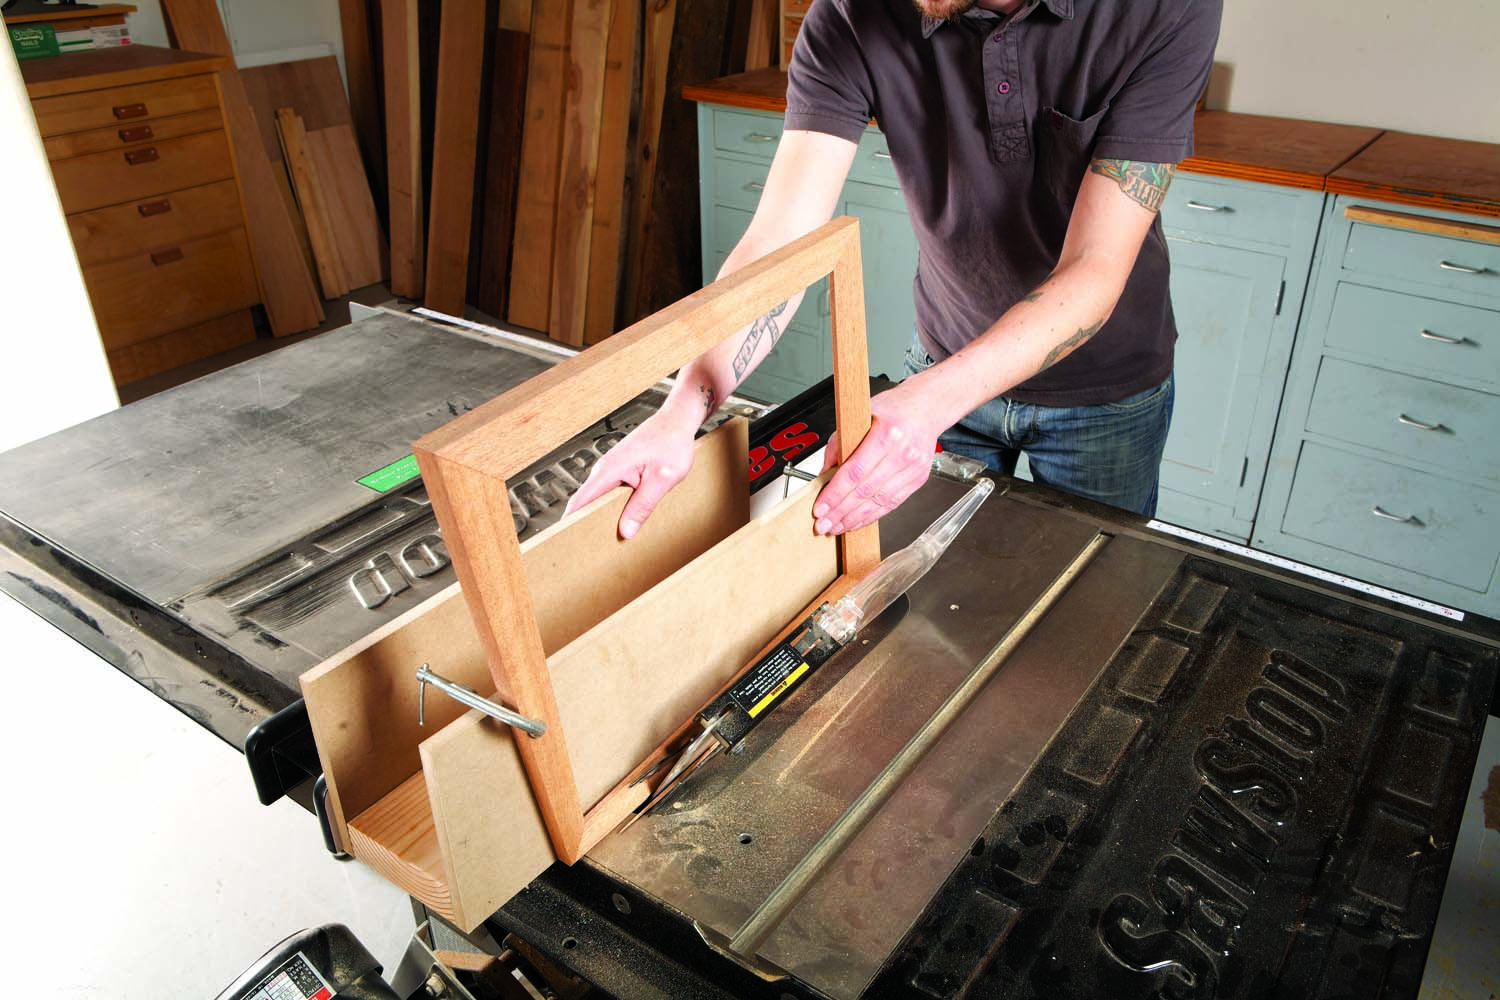
Photo 9. Cut the second tapered bevel. Because it runs in the opposite direction and is registered from the same points as the first tapered bevel, their sloped surfaces rise to meet flush at the miter.
Move to the opposite corner and repeat the process to bevel the two remaining sides. Because the jig tapers at the same ratio during all four cuts, the bevels on the two narrow corners will automatically meet at their miters.
Take a break to comb your D.A. and plan your snazzy frame. The key to making variations—both wide ends at the top, for example—is to always register the frame on same end of the jig (wide or narrow) when you cut the tapered bevels on adjacent sides.
Here are some supplies and tools we find essential in our everyday work around the shop. We may receive a commission from sales referred by our links; however, we have carefully selected these products for their usefulness and quality.