We may receive a commission when you use our affiliate links. However, this does not impact our recommendations.
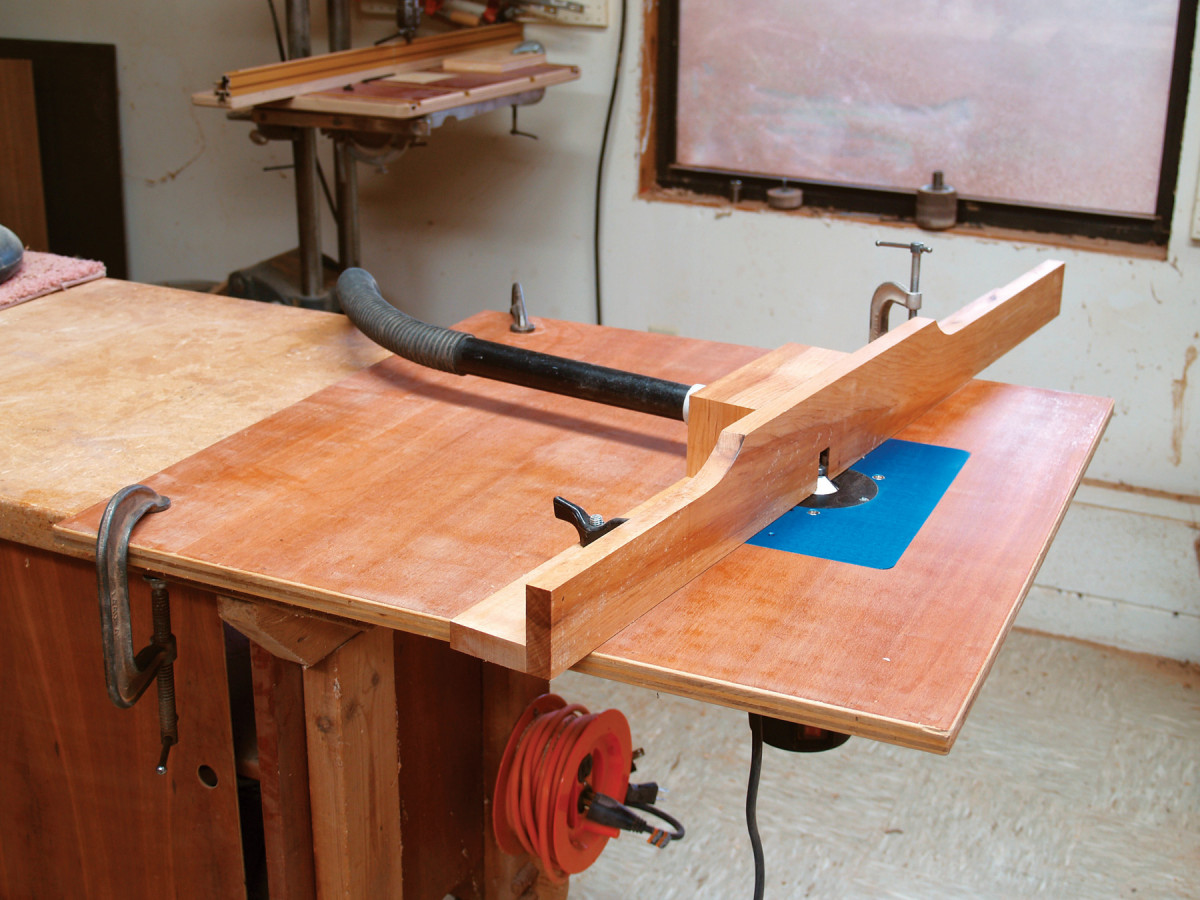
Simple Router Table
While many woodworkers spend weekends making stationary router tables, mine have always been very simple, driven by expediency, and the desire to get other things done. My first was just a router base screwed to the underside of a piece of plywood. I simply clamped the plywood to a workbench, installed the router and bit, clamped on a board as a fence, and let her rip.
Things haven’t changed much in my shop. I still like the convenience of a router table that I can quickly disassemble and store, so I don’t lose the floor space that a stationary router table would require. One thing that has changed, however, is that the router table I use today is more sophisticated. It has an aluminum router plate and a pivoting fence with dust collection. This table takes only an hour or two to build, and it can last for years. To make your own, you’ll need a router plate and a plunge router equipped with a template guide.
Manufactured router plates work great. They include zero clearance inserts for safer routing and they make it even easier to put the router table away when I’m done with it. The method I use to install the router plate is nearly foolproof, and it’ll work for any square or rectangular router plate (the one shown here came from Rockler, see Source). This method is very accurate, too, so it’s suitable to use on even the most deluxe router table.
Make the table and install the plate
The first step is to choose a suitable piece for the table (A, Fig. A), which must be absolutely flat and very rigid. I usually use 3/4″ plywood. The table’s dimensions can vary, but I prefer a large surface, with at least 12″ of support on both the infeed and outfeed side of the bit.
Clamp the table with one end overhanging your bench, so you can rout the hole for the router plate. Locate the plate on the table so it’s centered between the sides and offset toward the front edge. This orientation makes the table more versatile: The short side works for most routing operations; the long side provides additional support for large pieces such as door panels.
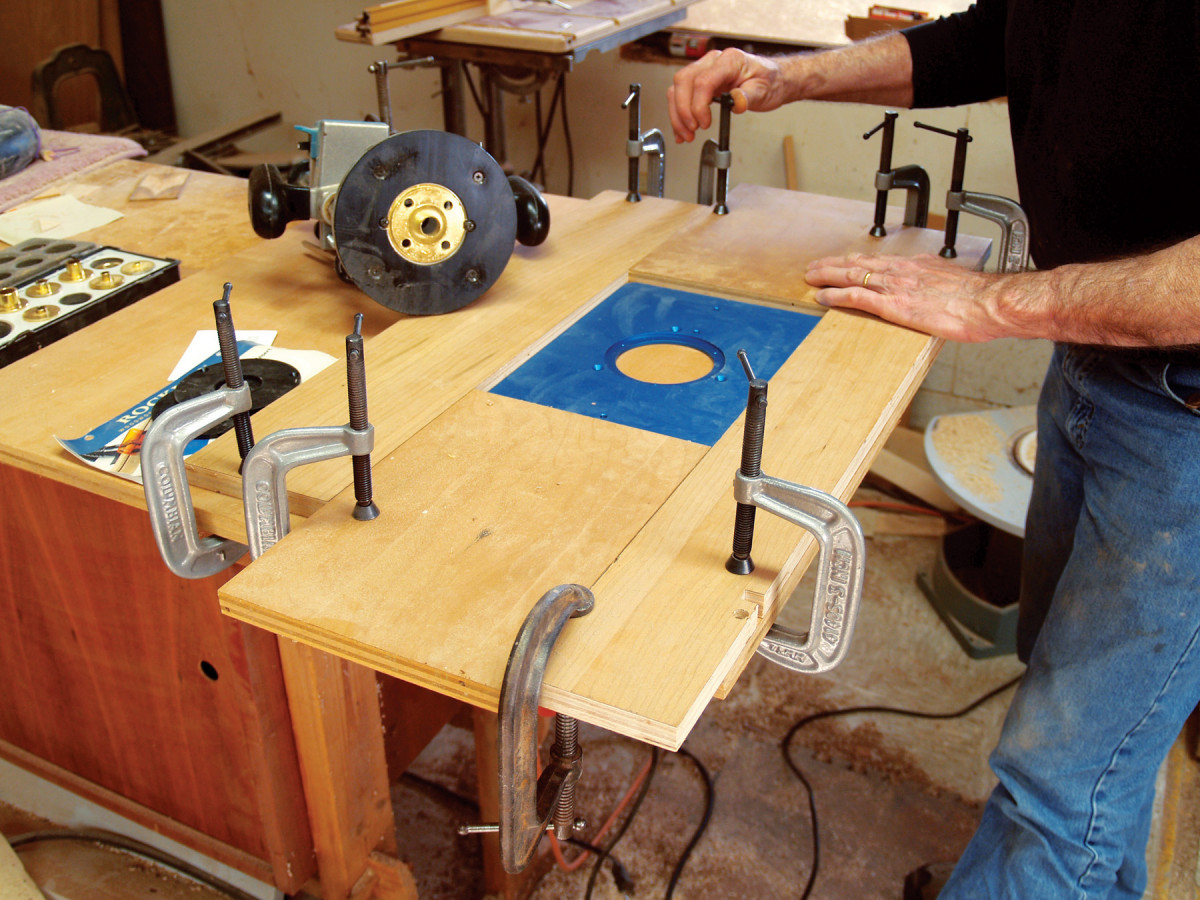
1. Start by positioning the router plate on the router table blank. Clamp pieces of uniform thickness all around it, to create a routing template. Then remove the plate.
Use the router plate to create a template to rout the hole. Position the plate on the table and then frame it with scrap pieces that are uniform in thickness. The pieces at the ends of the plate must be exactly the same width as the plate. Securely clamp the pieces around the mounting plate, making sure the joints are flush (Photo 1). Then remove the router plate.
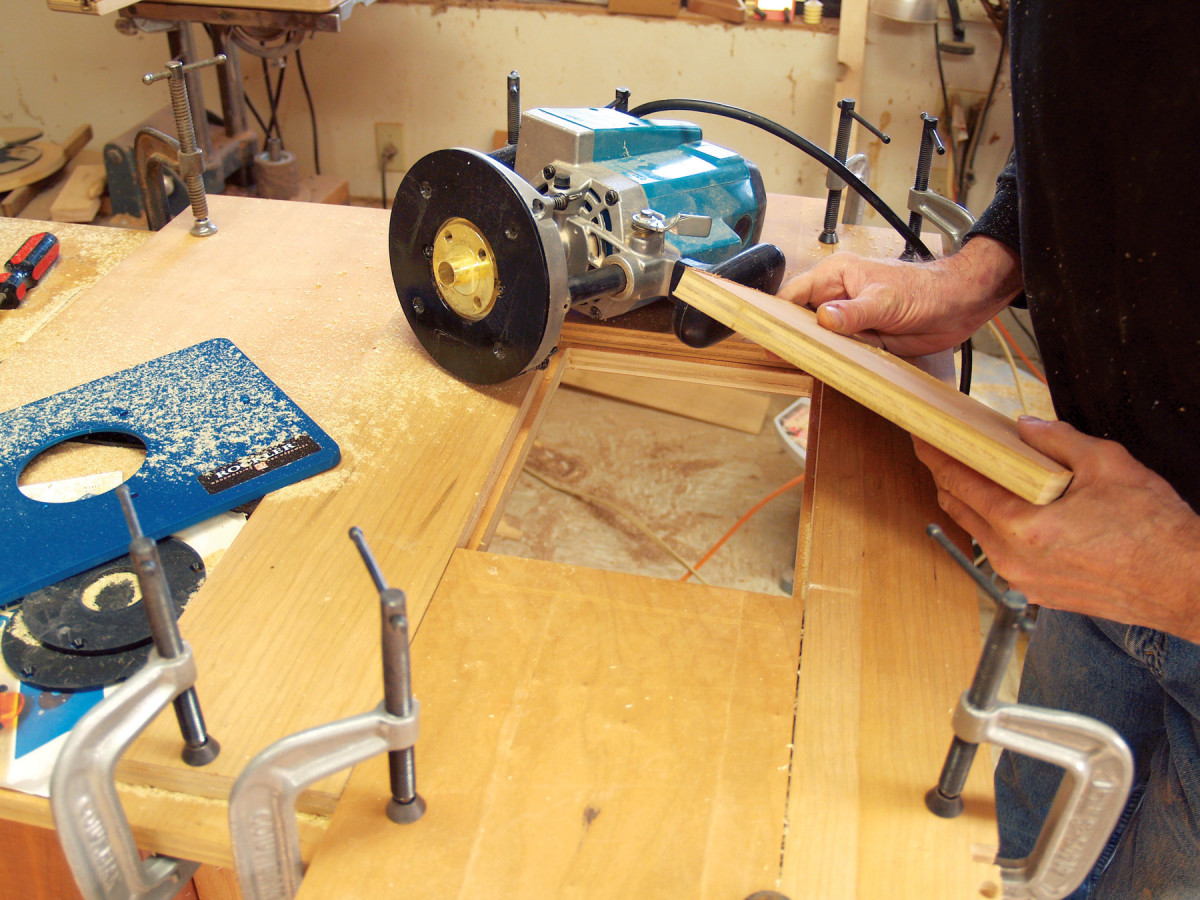
2. Remove the waste by plunge routing, using a spiral bit and a template guide. This operation leaves a 1/4″ lip inside the clamped-on routing template.
Use a plunge router equipped with a 3/4″ O.D. template guide and a 1/4″ spiral bit to cut out the center (Photo 2). Move counterclockwise around the form and hold the template guide fast against the template. For the best results, complete the cut in several passes, plunging the router bit slightly deeper with each successive pass.
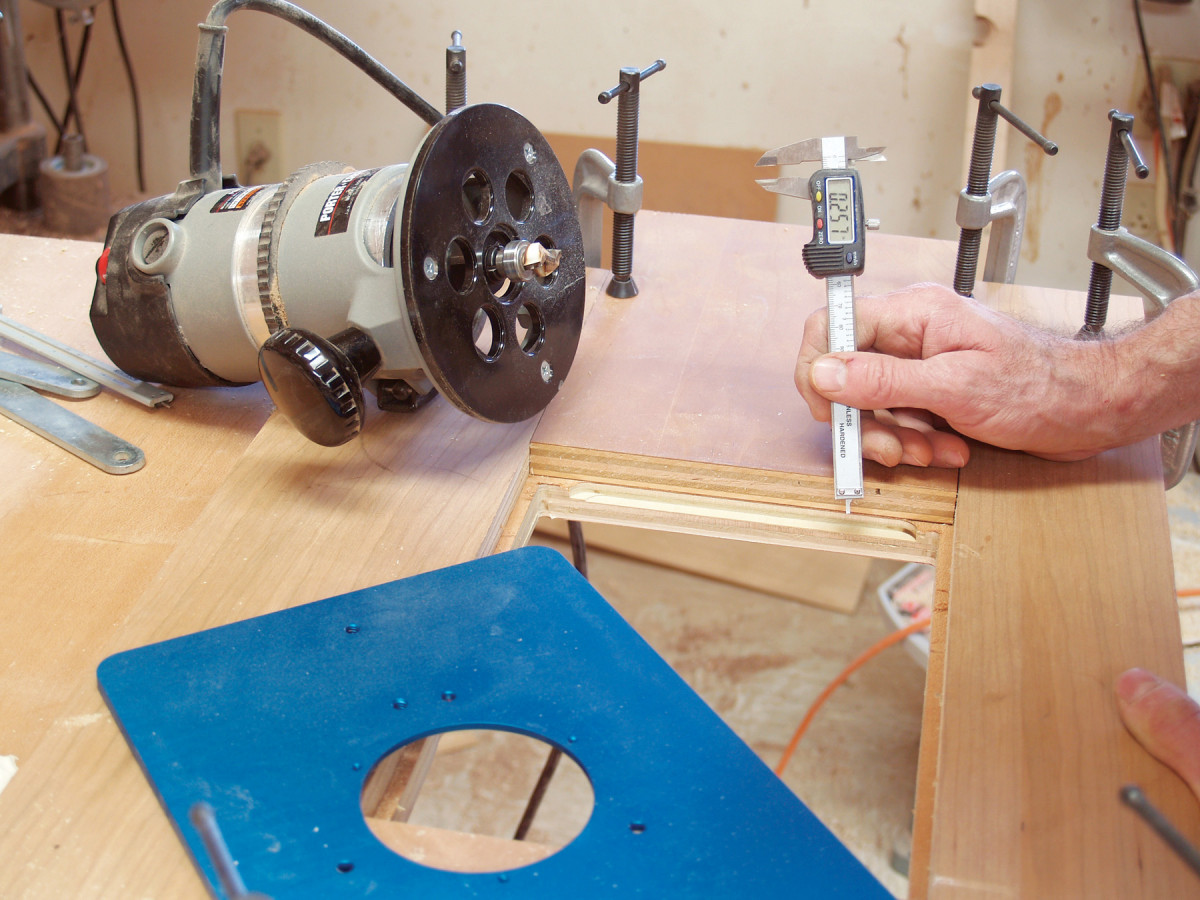
3. Rout a rabbet to house the router plate, using a pattern bit. The depth of the rabbet must match the thickness of the plate.
Install a 3/4″ dia. pattern bit and use the clamped-on template to rout a 1/4″ wide rabbet to house the router plate in the table (Photo 3). A pattern bit is a plunge-style flush-trim bit; its bearing is mounted above the cutters. Set the plunge depth slightly shallow to start, and rout only a small spot. Measure the depth of the rabbet, adjust the plunge depth and go again. When the depth of the rabbet exactly equals the thickness of the mounting plate, go ahead and rout all the way around. Remove the template pieces. Then mark and drill the 3/8″ pivot hole for the fence.
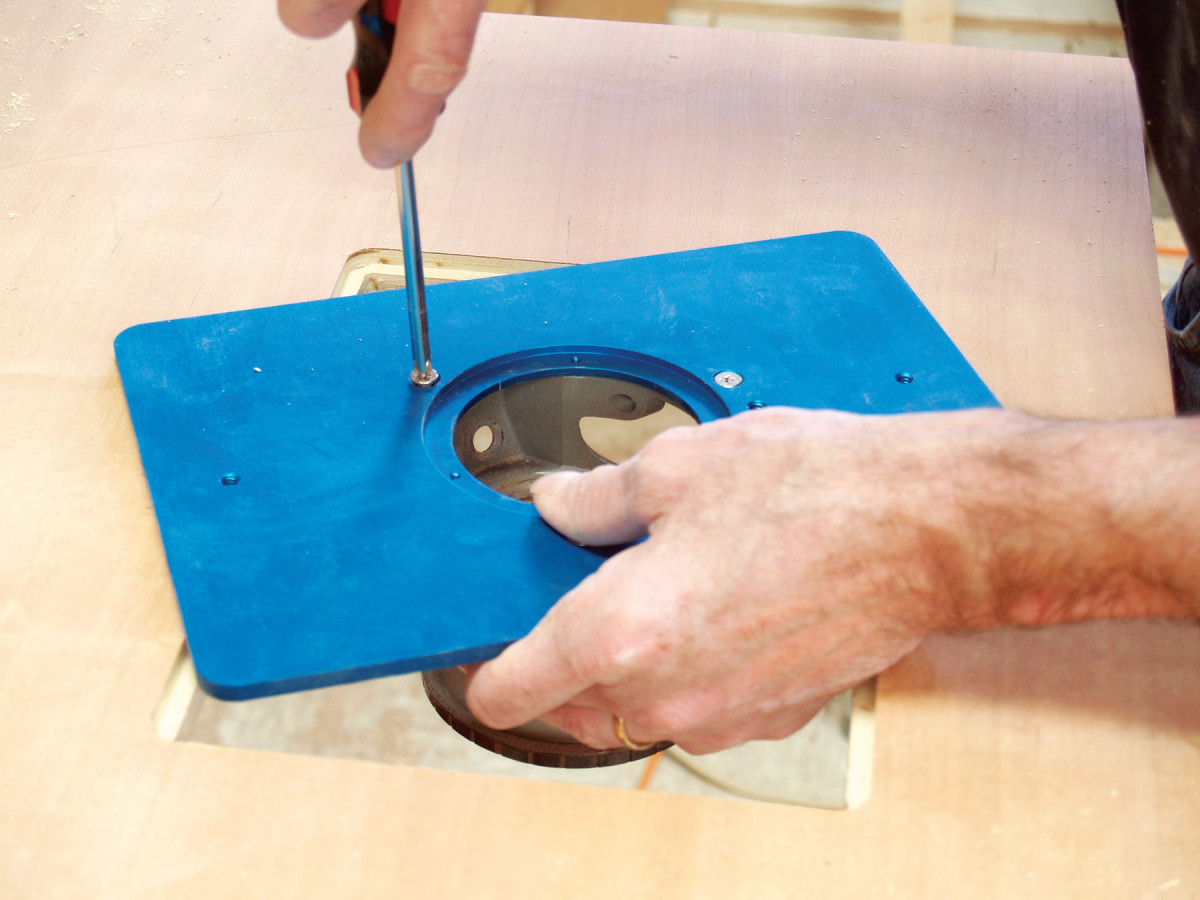
4. Fasten the base from your router to the router plate. Reinstall the router motor and then fit the router plate assembly in the table.
Disassemble your router by removing the motor from the base and the base plate from the router base. Then screw the router base to the router plate, using the screws from the base plate (Photo 4). Reinstall the router motor and then install the router plate assembly in the table.
Build the fence
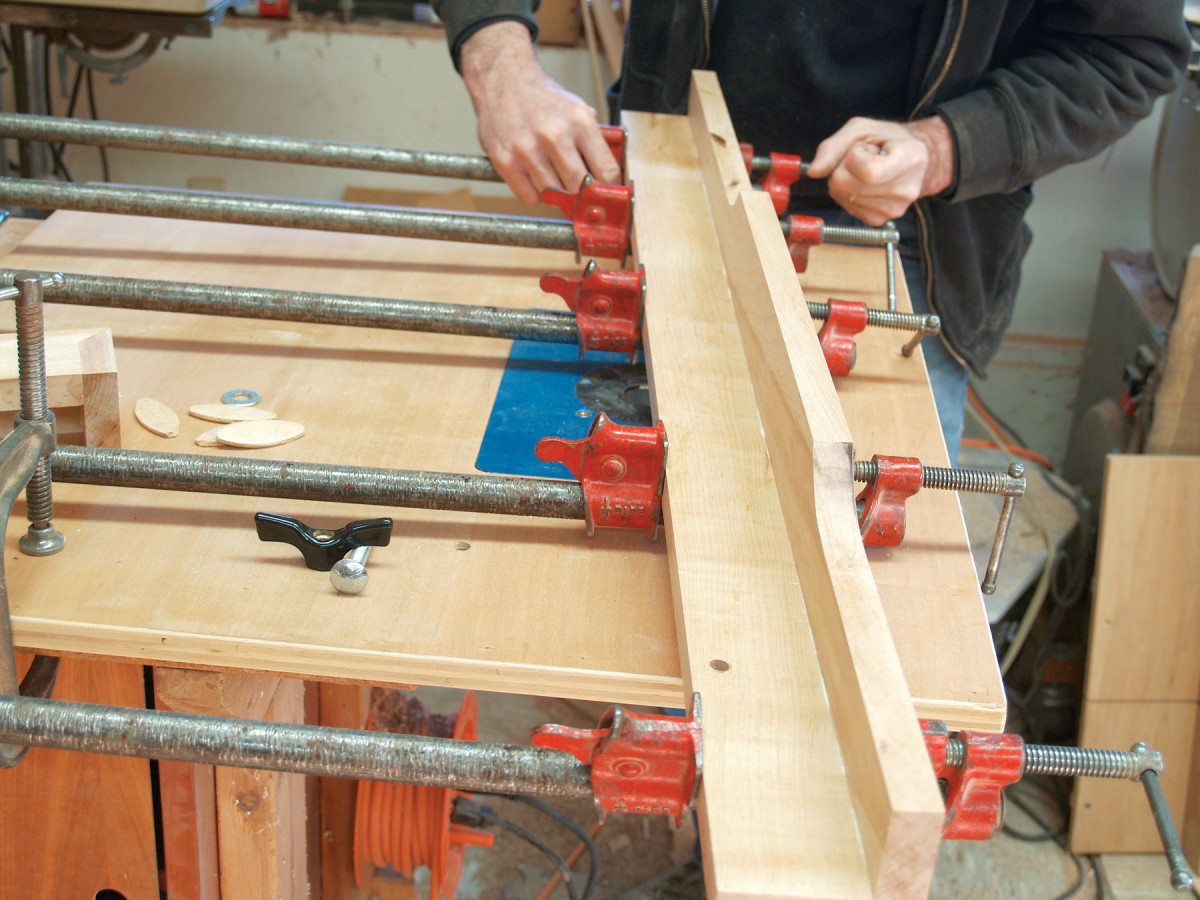
5. Assemble the pivot fence with biscuits and glue. Make sure the joint is flush on the bottom when you clamp the parts together.
The table’s pivoting fence is easy to use and adjust, and it includes dust collection. A wing nut at one end and a C-clamp at the other hold the fence securely, and it’s adjustable by tiny increments—a slight change at the C-clamp end of the fence translates to a fraction of that change at the center, where the bit is located. The fence itself consists of two pieces. Shape the face (B) and drill a 3/8″ hole in the base (C) at the pivot point. Then glue the two pieces together (Photo 5).
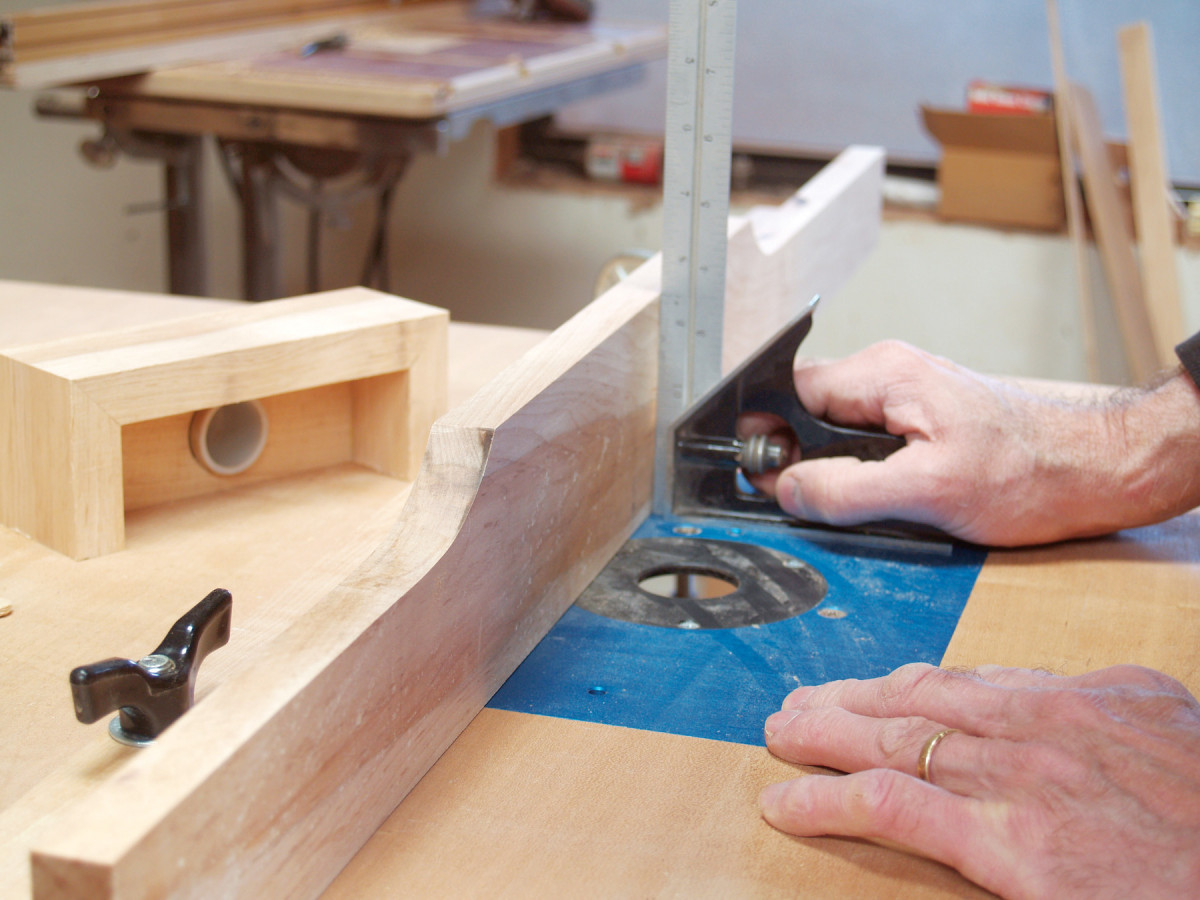
6. Check the fence to see that it’s face is square to the surface of the table. If it is not, use the jointer to make it square.
Miter the dust collection box top (D) and sides (E) and glue them together. Cut the back (F) to fit and drill a hole in it for the dust collection hose. To create a durable connecting piece, I saw off an old extension tube from a vacuum cleaner and glue it into the hole, using construction adhesive. Vacuum parts can often be found at thrift stores.
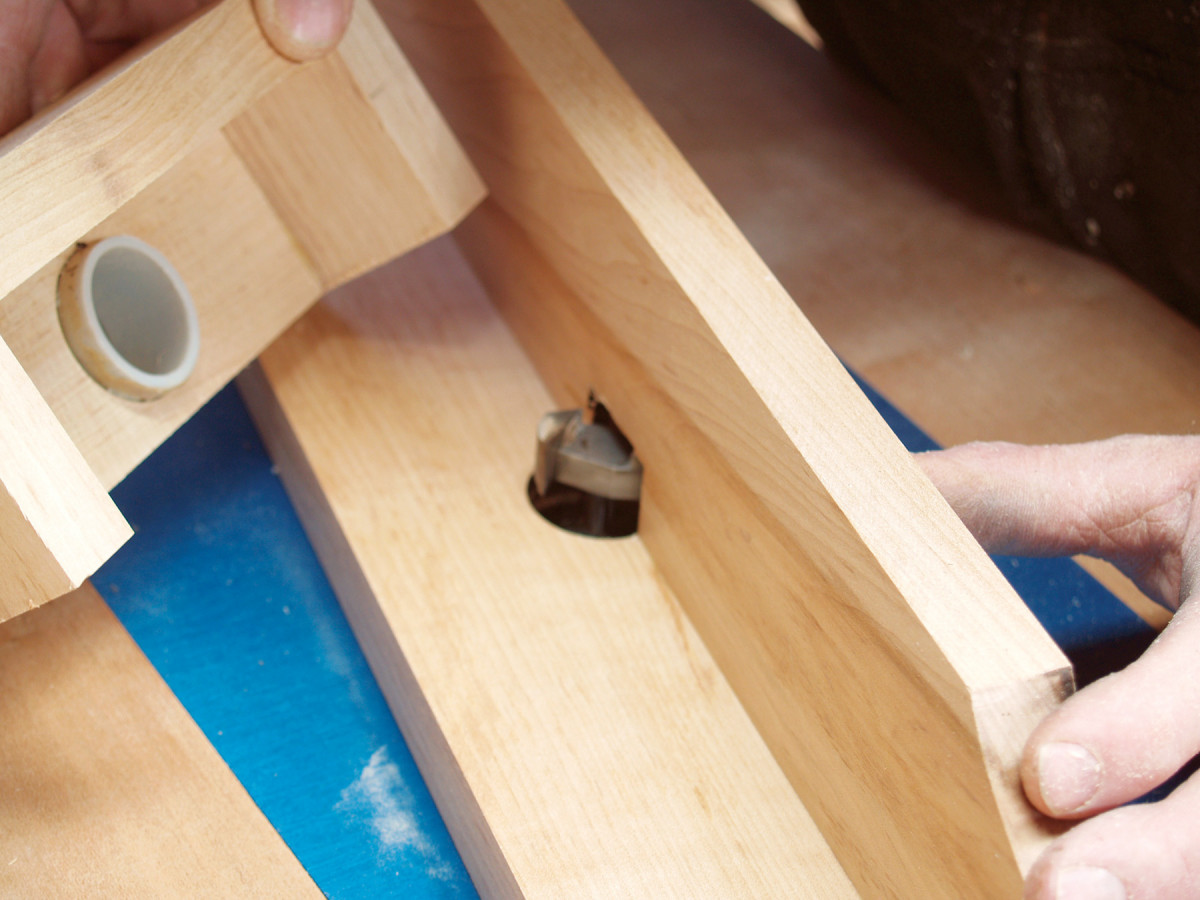
7. Mark the location of the router bit and drill a pilot hole through the bottom of the fence at that point. Then raise a larger router bit through the hole and into the fence to create a suitable opening for routing and chip removal.
Install the pivot fence and make sure its face is absolutely square to the table’s surface (Photo 6). Then create clearance for the router bit (Photo 7). Pivot the fence over the router and mark the center of the bit. Remove the fence and drill a 3/4” dia. hole in the bottom at the mark. Reinstall the fence over the router and incrementally raise a slightly larger bit through the hole and into the fence. Screw on the vacuum box and you’re ready to rout.
Simple Router Table Cut List
|
Part |
Name |
Qty. |
Material |
Th x W x L |
|
A |
Table |
1 |
Plywood |
3/4″ x 28″ x 28″ |
|
B |
Fence Face |
1 |
Hard maple |
3/4″ x 3-1/2″ x 41″ |
|
C |
Fence Base |
1 |
Hard maple |
3/4″ x 2-3/8″ x 41″ |
|
D |
Dust Box Top |
1 |
Hard maple |
3/4″ x 2-3/8″ x 7″ |
|
E |
Dust Box Side |
2 |
Hard maple |
3/4″ x 2-3/8″ x 2-3/4″ |
|
F |
Dust Box Back |
1 |
Hard maple |
3/4″ x 2″ x 5-1/2″ |
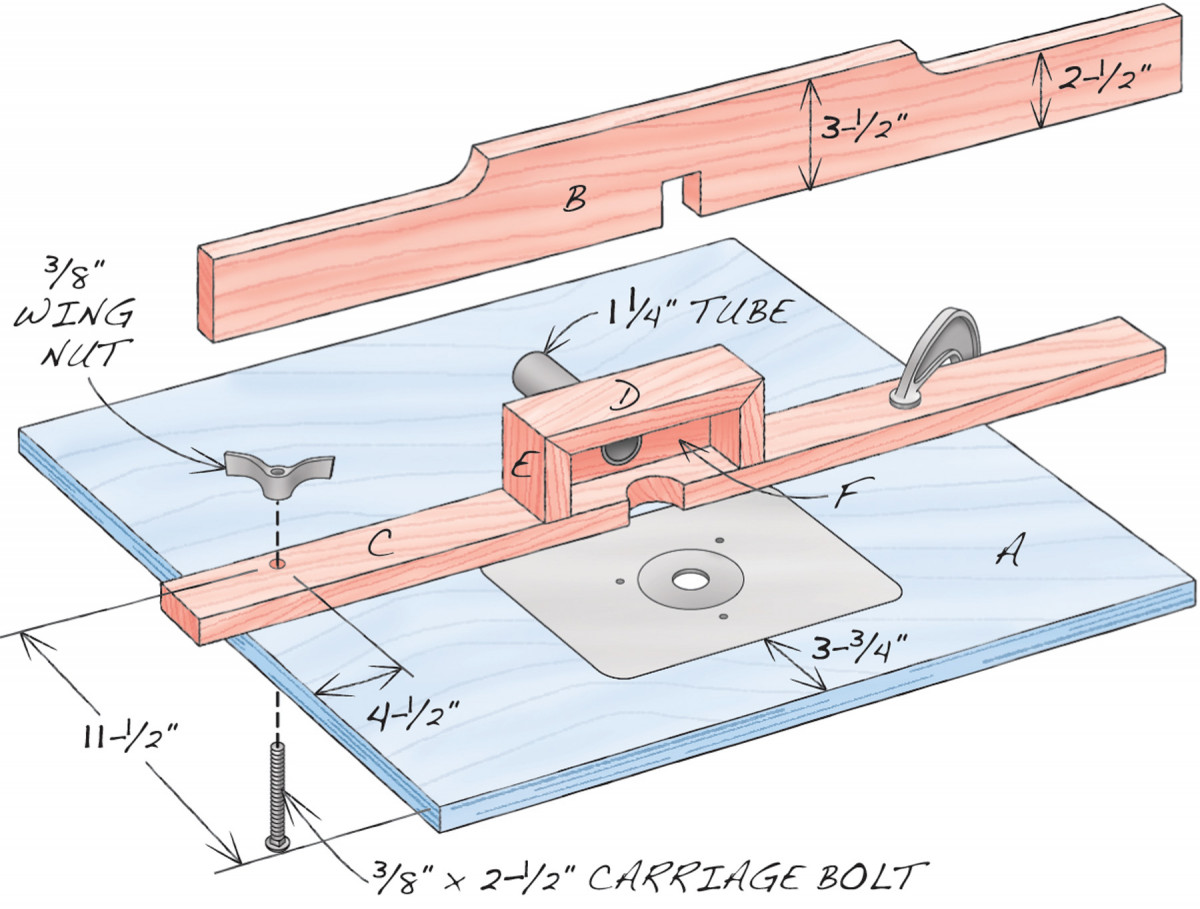
Figure A) Exploded View
Source
Rockler Aluminum Router Table Plate (different versions for different routers), $69.99.
Here are some supplies and tools we find essential in our everyday work around the shop. We may receive a commission from sales referred by our links; however, we have carefully selected these products for their usefulness and quality.


