We may receive a commission when you use our affiliate links. However, this does not impact our recommendations.
With this inviting and accessible setup, there’s no excuse for dull blades.
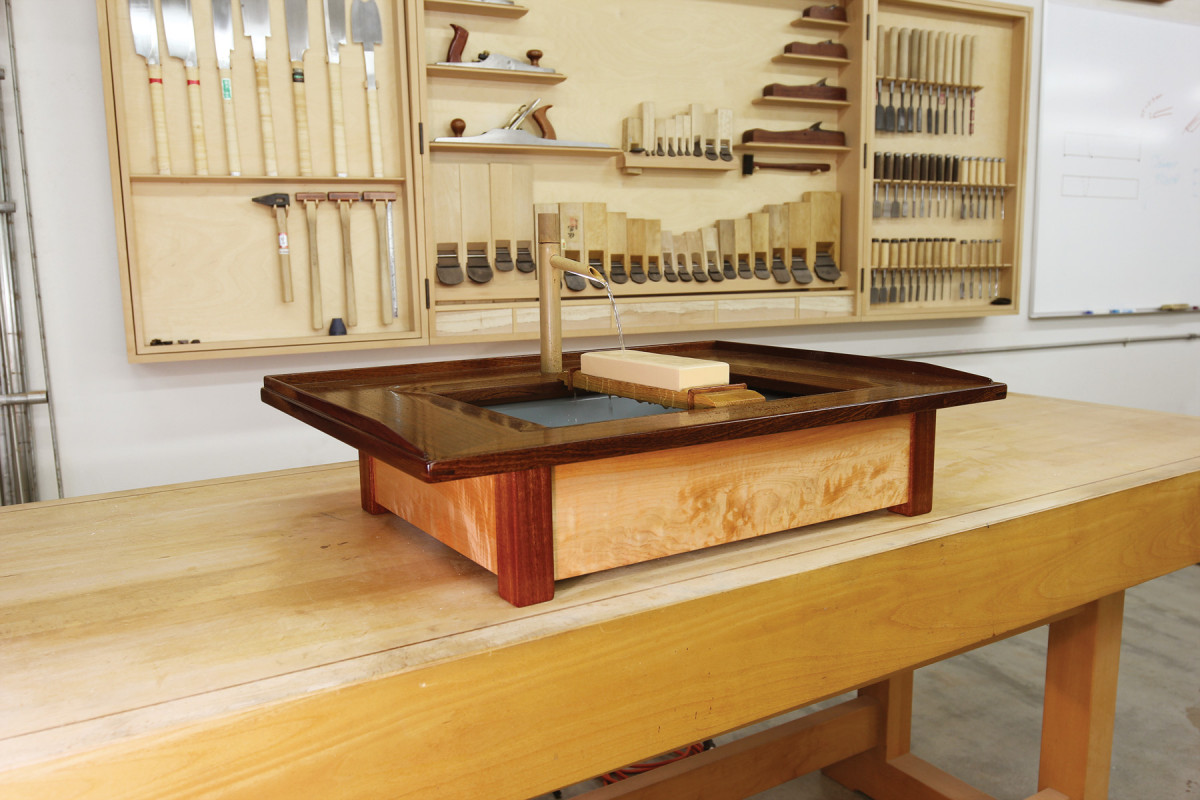
The ability to keep tools sharp is a most important woodworking skill – that’s why I have a dedicated sharpening station in each of my classrooms, readily available for my students. Many woodworkers think of sharpening as drudgery, right up there with sanding. So I sought to design a sharpening station that was fun, relaxing and inviting, and facilitates the sharpening process.
I chose sapele, white oak and maple for this project (though I’ve built a couple of these using beech). Sapele, which is in the mahogany family, is a great outdoor wood; I use it for the station’s top, knowing it will be in contact with water, and for the legs. White oak is also a good outdoor wood. It’s hard and rigid – perfect for the bridge that supports and holds the stones. Light-colored maple or beech (used for the base sides, front and back) adds a bit of Asian flavor, providing a pleasant contrast to the sapele. For the tub itself, I use a bus tray. It’s tough and rugged enough to withstand any abuse without worry of it cracking. The proportions and design of the sharpening station are relative to the size of the bus tray.
First, Base
I use rift-sawn wood for the legs, because of its straight grain on all sides. Arrange the legs for a pleasing grain pattern before marking out then cutting the mortises. The 3⁄8“-wide x 4 1⁄2“-long x 5⁄8“-deep mortises are located 3⁄8” from the outside edge on the legs.
I like a 3⁄16” reveal for the leg and panel joint, and I use a 1⁄8” roundover on most of my furniture builds. When I round over the legs, I have a 1⁄16” tolerance between the leg and panel.
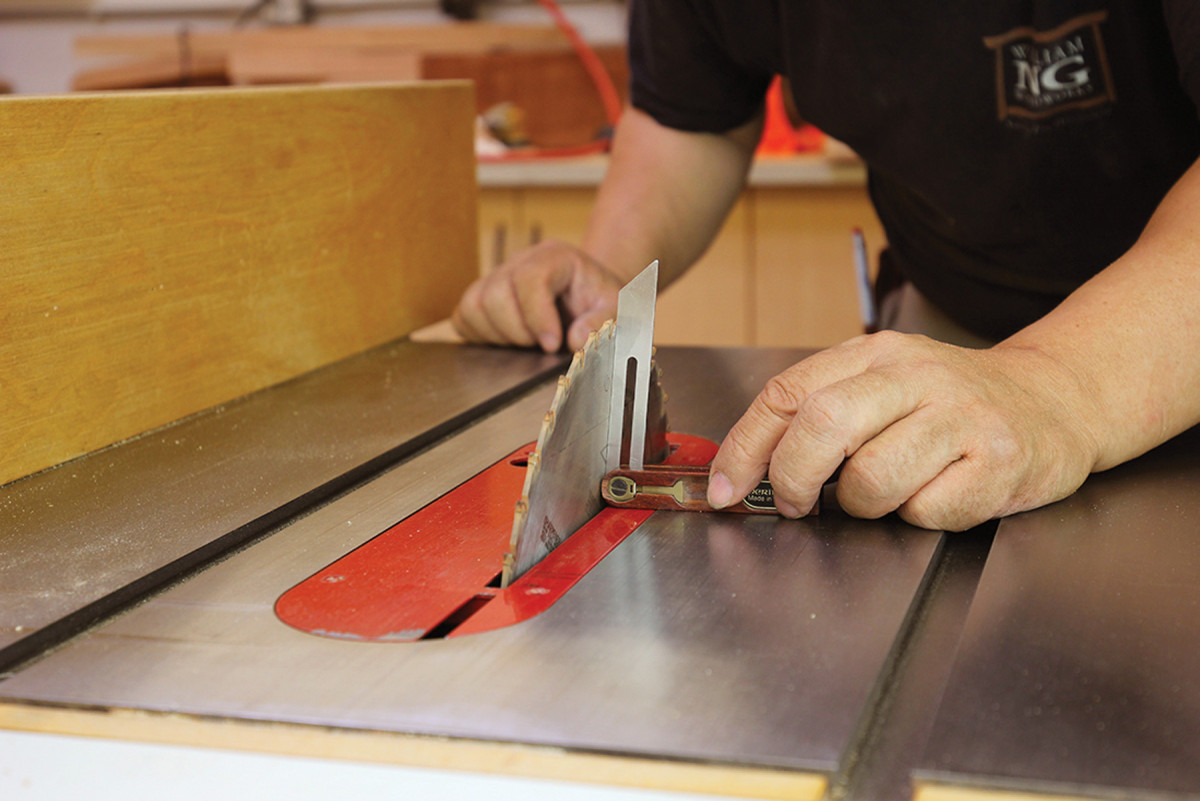
I cut the tenons at the table saw, using a dado set.
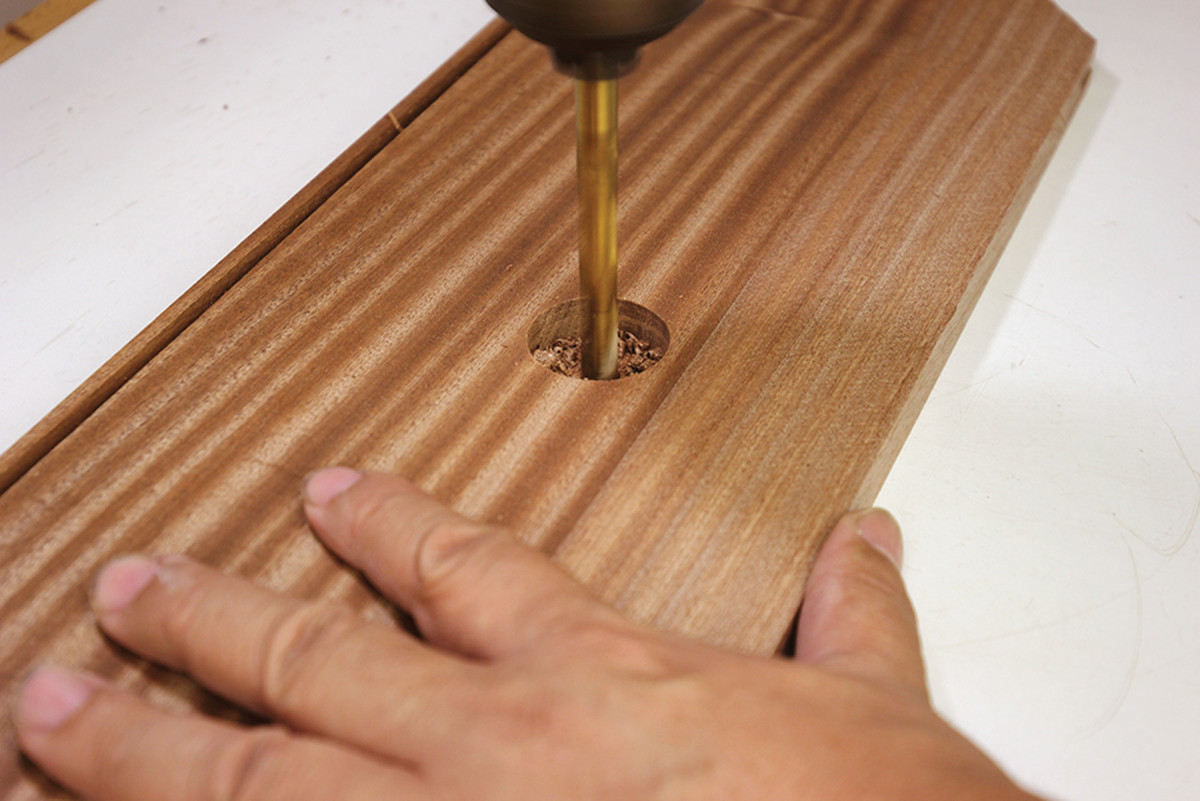
After dry-fitting the base, mark and drill a 3⁄8” hole in the left top edge of the back panel; it’s for inserting the 1⁄4” tubing that connects to a water pump.
Now use PVA glue to glue up the base.
On Top
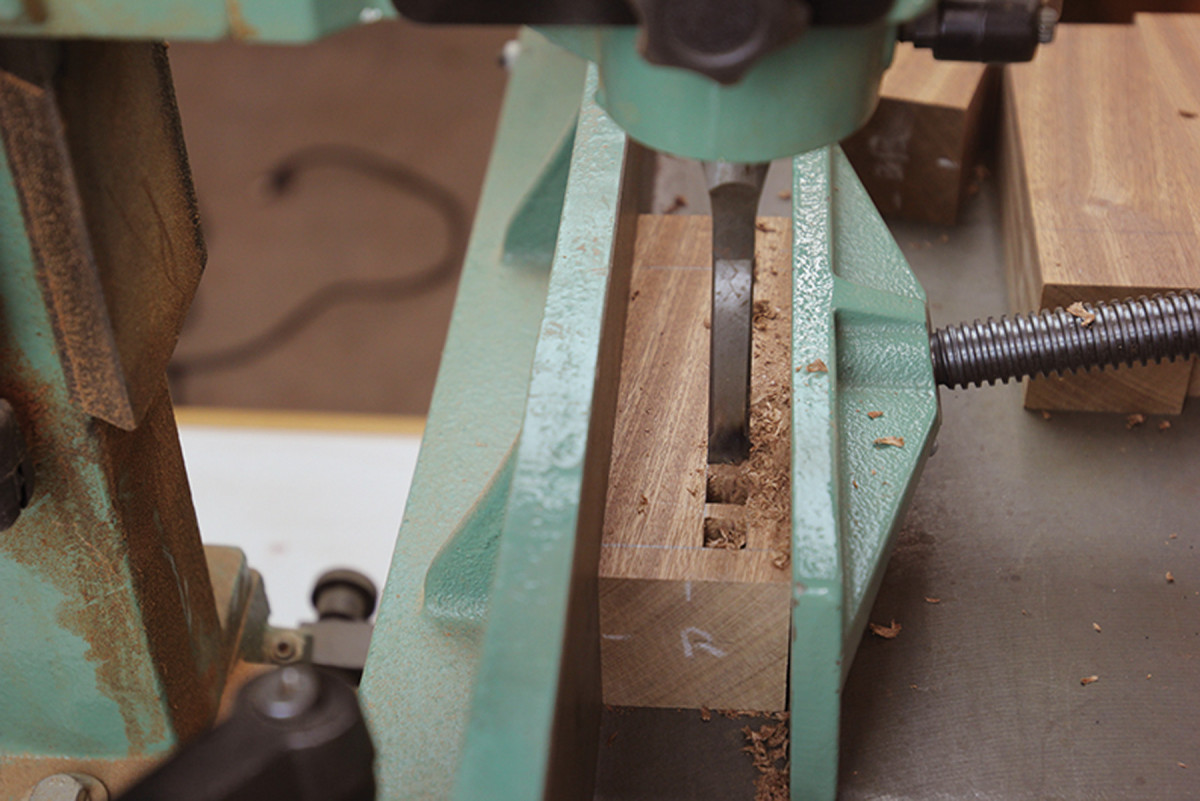
Skip & plunge. I alternate the mortise cuts, skipping every other cut. This way I have wood on all four sides of the mortising chisel. I then come back and clean up the rest of the cuts, which have wood on two sides of the mortising chisel. That helps to exert even pressure and results in cleaner cuts.
You’ll notice in the cutlist that the top’s front is narrower than the other three sides for ergonomic reasons.
When standing in front of the pond, I don’t want to reach forward to sharpen. It puts stress on the upper back, so I sized the top with that in mind. I chose 7″-wide boards for the two sides and back to accommodate the size of the waterstones and to provide a workable side area. To find the width of the top’s front, I use a basic trig function. Because we know the angles (30°, 60° and 90°), either of two formulas will work: Tan 30 = Op/Adj or Tan 30 = x/7 or Tan 60 = Op/Adj or Tan 60 = 7/x. Either way, that gives me 4.04″.
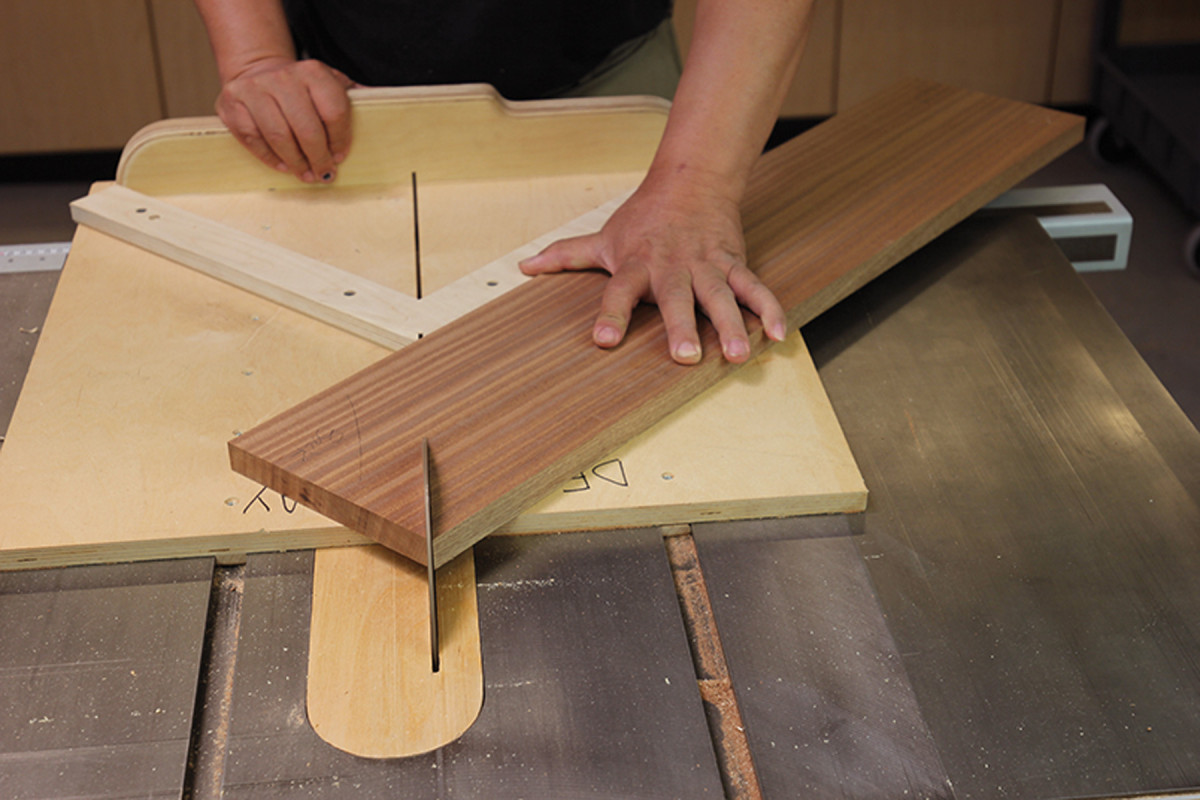
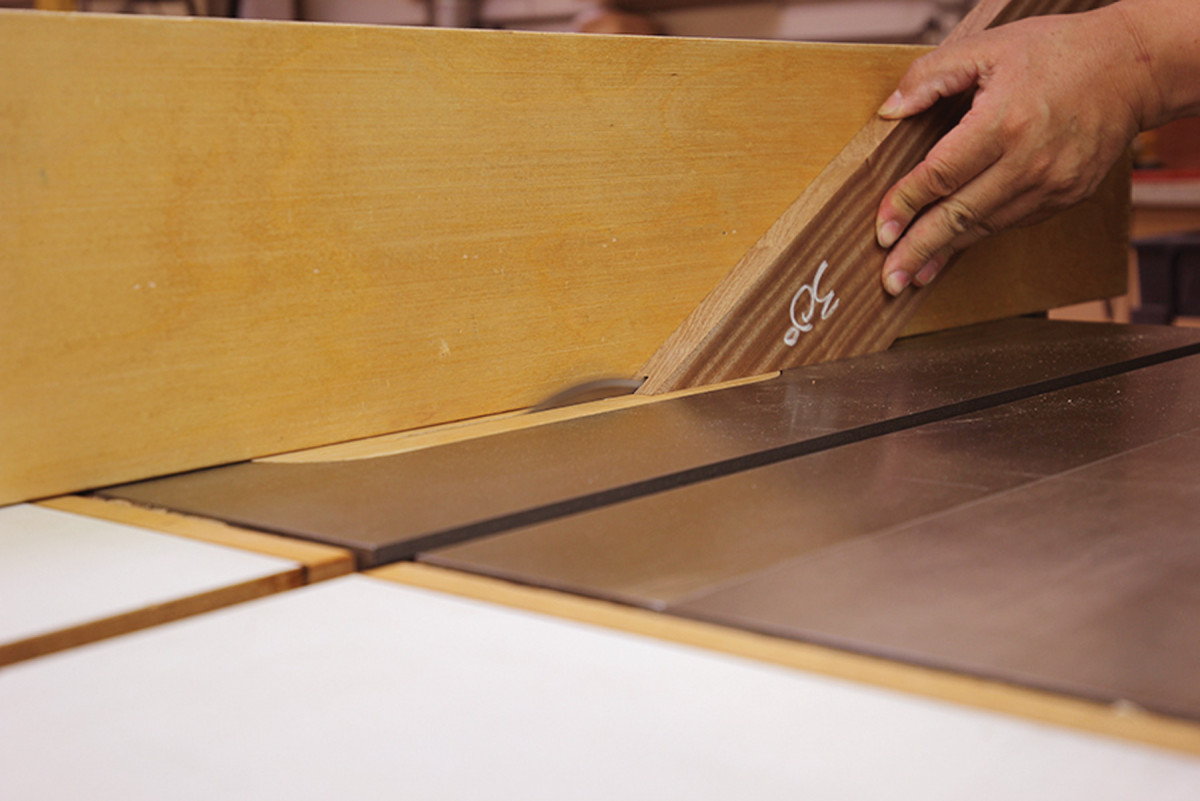
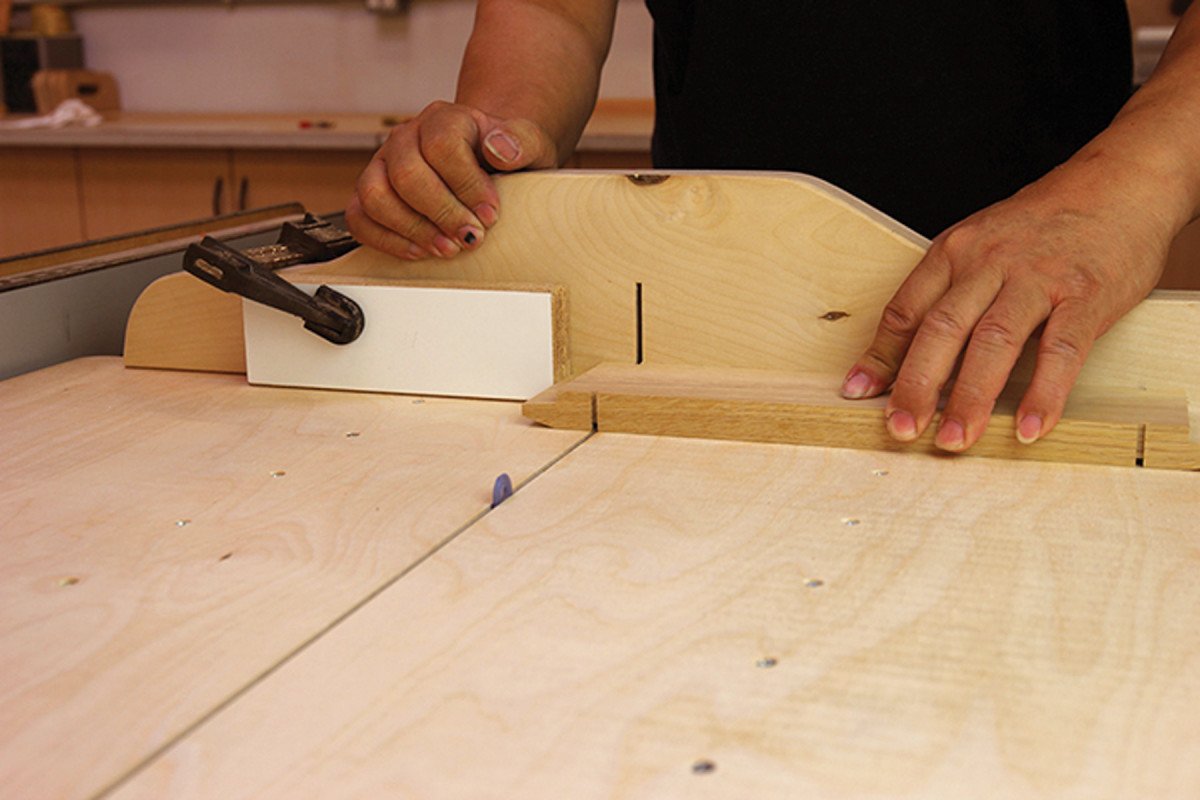
Sled ride. Miter sleds make it safe, quick and easy to cut perfect miters at the table saw.
Mill the stock for the top to its final thickness and width, but leave it slightly long.
To make the miter cuts, you’ll need 45°, 30° and 60° miter sleds. Start by cutting the back top with one 45° miter.
Measure out 31″ from the point then cut the other 45° miter.
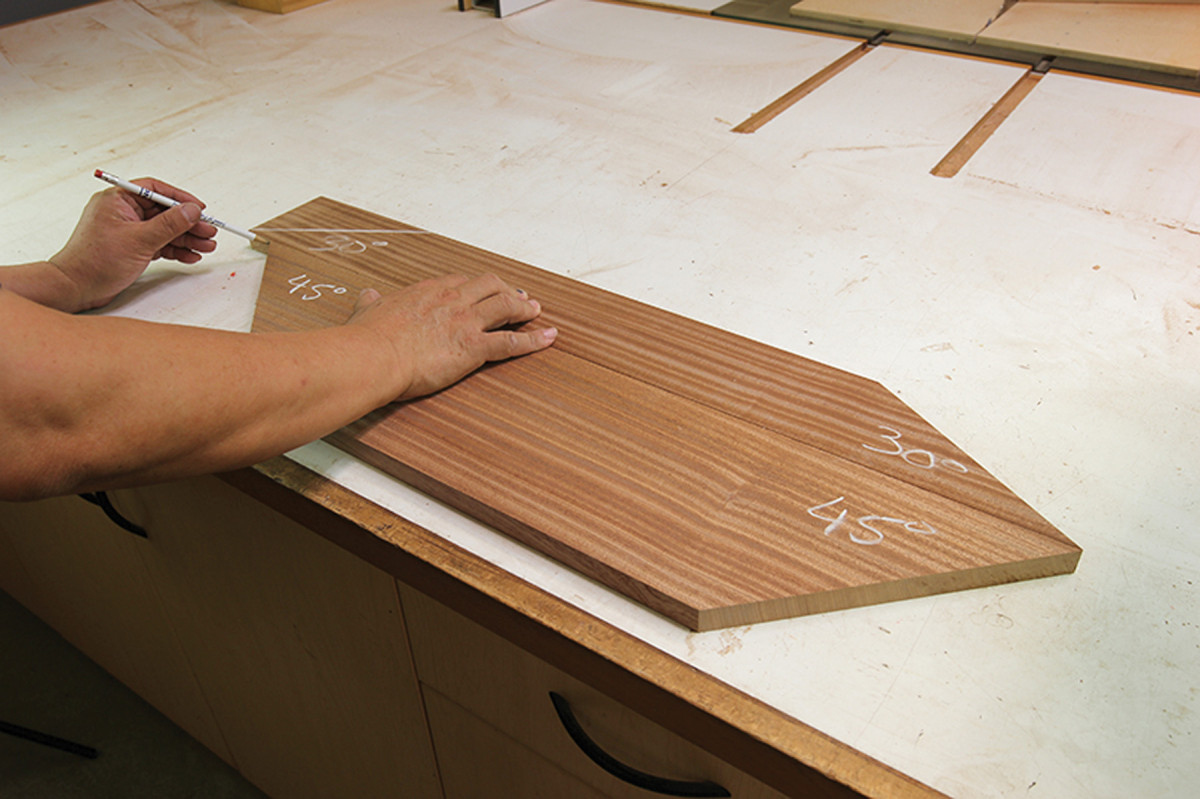
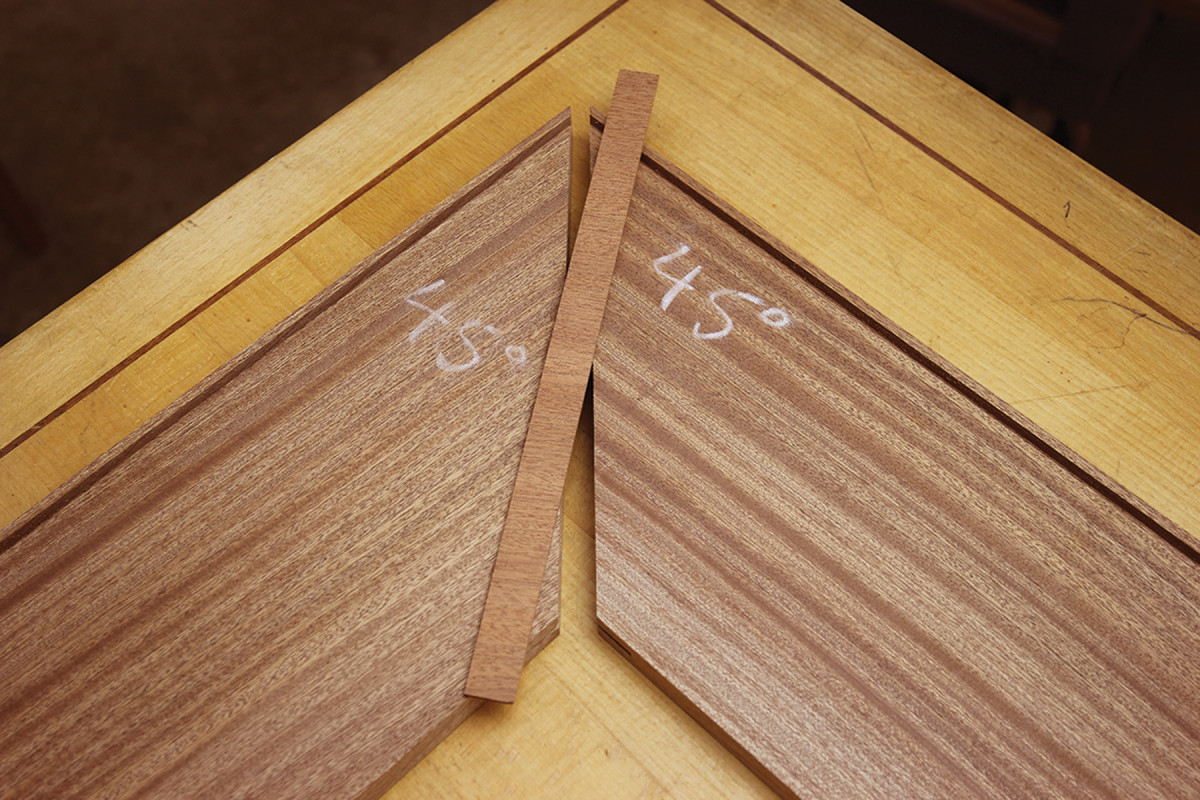
Match length. After cutting the 45° miters on the back top, cut one 30° miter on the front piece, then match up the front and back to mark the point for the second 30° miter.
Next, cut the top front with the 30° miter on one side. Put the top and front back-to-back and mark for equal length. Do the same for the two top side pieces, cutting the 45° miter first, then the 60° miter to ensure both pieces are the same length.
On end. The workpiece rides firmly against the tall table saw fence as I cut the spline grooves on the mitered ends. Use a flat-top blade and center the cut on the workpiece.
Next, cut 1⁄2“-deep grooves for the splines using a flat-top blade on the table saw.
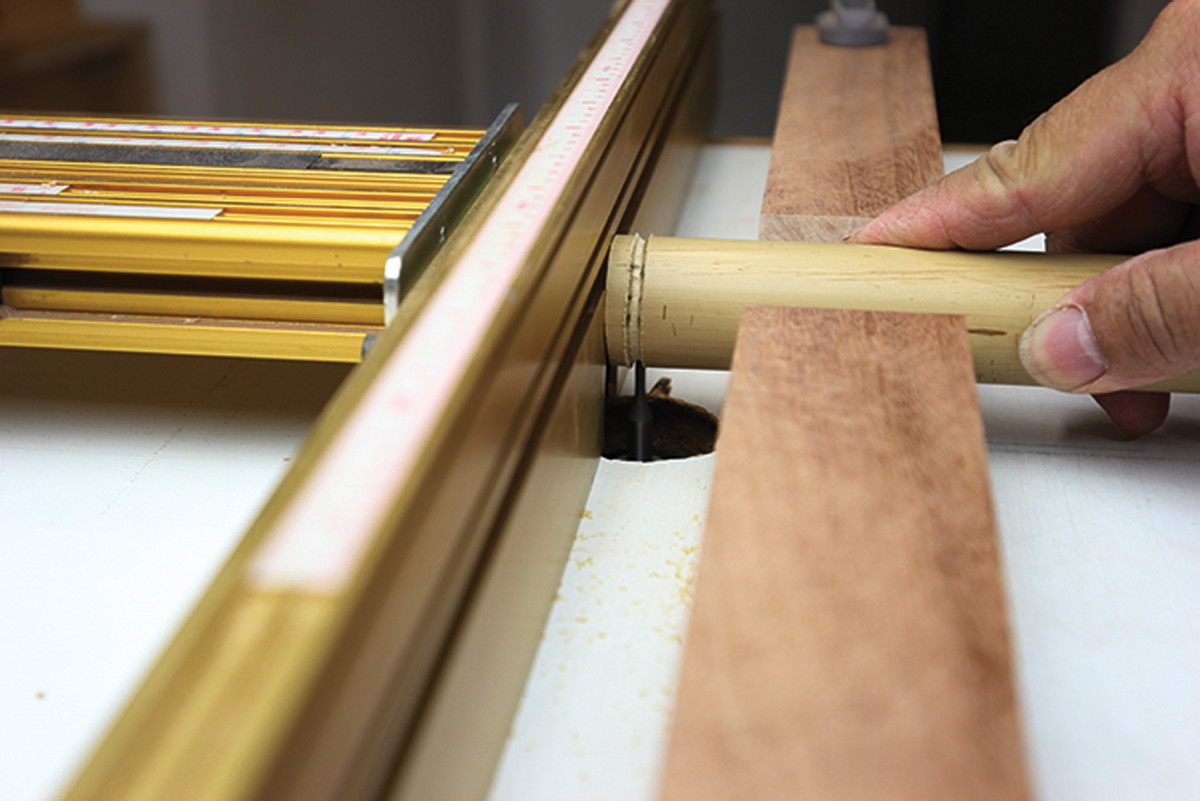
Make the spline material by resawing a 10″-wide board on the band saw and sanding it to 1⁄8” thickness. Crosscut the material to 1″ wide, ensuring correct grain direction.
Spline strength. Notice that the grain runs side to side on the spline material. This orientation provides the most strength.
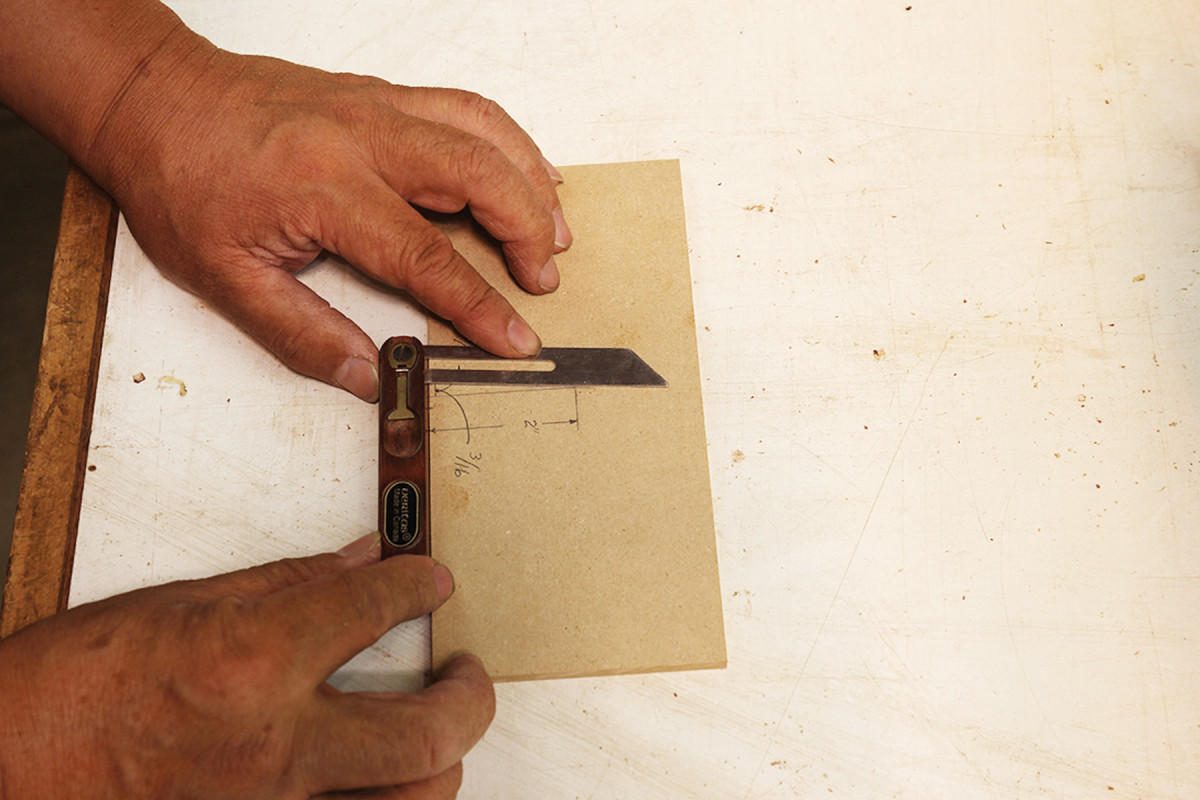
A slope on the inside of the top’s four pieces allows water drainage back into the pond. I wanted a 3⁄16” slope to start 2″ back from the inside edges, so I simply drew it out on a piece of MDF and used a sliding T-bevel to get the angle for the cut. This angle is only for the two sides and back. The top front slope-angle cut is both shorter and steeper because of the width of the board; it starts 1 5⁄32” back from the inside edge, and will require a separate T-bevel setting.
Cut the slopes at the table saw by tilting the blade to the desired angle.
Water & Stone Protection
Bevel angle. Use a piece of scrap to determine the bevel angle, then set your bevel gauge.
Now it’s time to add a raised border to the top’s sides and back for a couple of reasons: to contain any water overflow and to rest and dry the stones, without risk of inadvertently knocking them off.
The saw blade is angled to match the bevel gauge.
Use a 3⁄16” bit to rout 1⁄4“-deep grooves inset 3⁄16” from the outside edges. On the back, the groove runs end to end. On the two sides, the grooves terminate about 5⁄8” back from the front edge.
With the grooves cut, drill holes for the bamboo spout. I drill a 1⁄2“-deep recess hole first (centered side to side, and about 23⁄4” from the back edge), using a Forstner bit. Always select an O-ring close in size to the diameter of your bamboo, and drill to the size of the O-ring, not the bamboo. For example, if the bamboo diameter is 13⁄16“, I would use an O-ring with a 1 1⁄4” outside diameter, and drill to that size. (I use an O-ring because it’s nearly impossible to find bamboo in an exact size to match a Forstner bit.)
Drill through the rest of the way using a 3⁄8” brad-point bit.
Use epoxy to glue up the top (don’t forget to insert the splines).
For the 3⁄16“-thick x 11⁄16“-tall borders, cut two side pieces 23 ” long, and a back piece 30 5⁄8” long. Taper the side pieces at a pleasing angle at the front, then cut and fit the mitered corners.
Because they will be in contact with water, I use epoxy to glue the borders in place. And because of the narrow groove and the messiness of using epoxy, I tape the outside edges of the groove. That way, I don’t need to be too careful while applying the epoxy.
Sharpening Pond Cut List
No.ItemDimensions (inches)MaterialComments
t w l
❏ 4 Legs 1 5⁄8 x 1 5⁄8 x 5 1⁄2 Sapele Riftsawn
❏ 2 Base sides 3⁄4 x 5 x 22 5⁄8 Maple or Beech 5⁄8“ TBE*
❏ 2 Base front/back 3⁄4 x 5 x 15 1⁄2 Maple or Beech 5⁄8“ TBE*
❏ 2 Top sides 13⁄16 x 7 x 23 Sapele
❏ 1 Top back 13⁄16x 7x 31 Sapele
❏ 1 Top front 13⁄16 x 4 1⁄32 x 31 Sapele
❏ 4 Splines 1⁄8 x 9 5⁄8 x 1 Sapele
❏ 2 Side borders 3⁄16 x 11⁄16 x 22 Sapele
❏ 1 Back border 3⁄16 x 11⁄16 x 30 5⁄8 Sapele
❏ 1 Stone holder 7⁄8 x 3 x 13 3⁄8 White oak
❏ 1 Stem 1 1⁄4-dia. 9 Bamboo
❏ 1 Spout 5⁄8-dia. 5 Bamboo
*TBE=tenon both ends
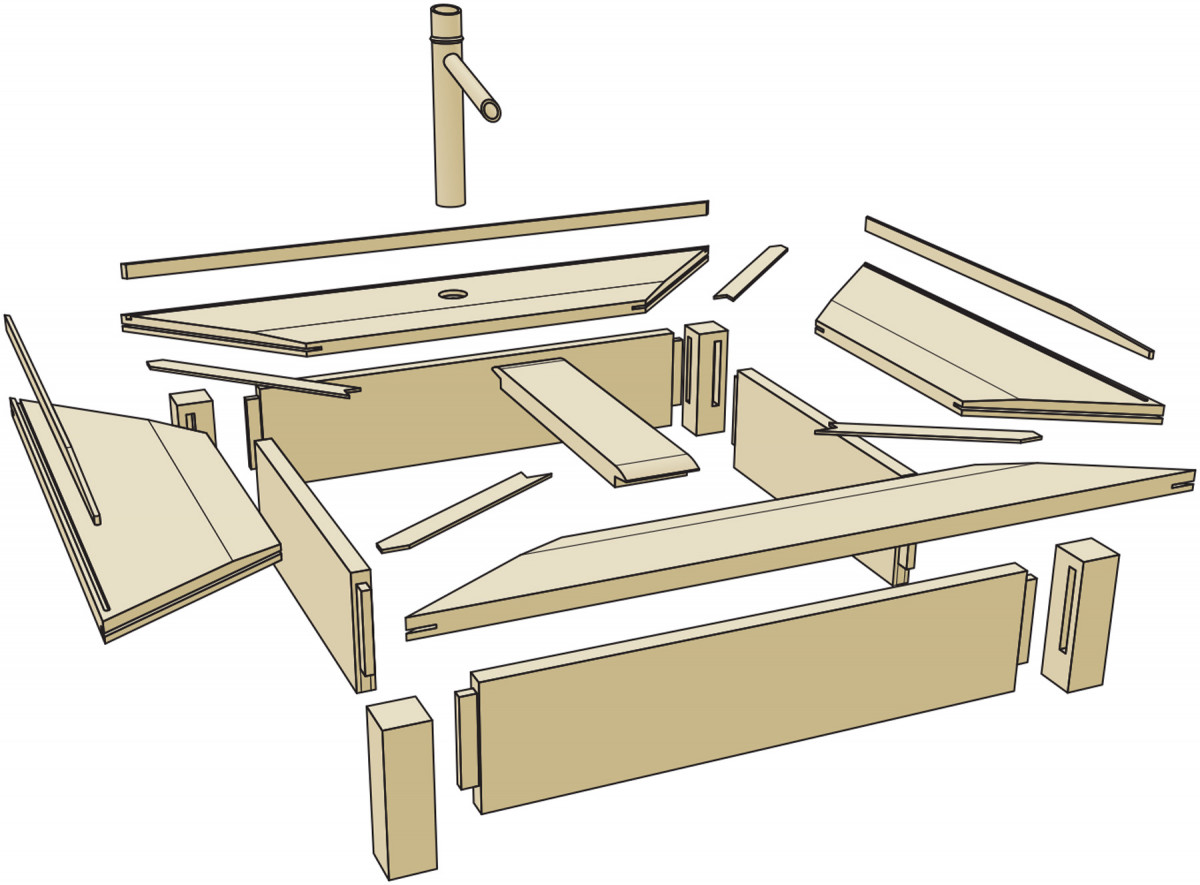
Exploded View
Make the Spout
Recess & through. Use a Forstner bit matched to the outside diameter of your O-ring to drill a mortise to house the bamboo, then drill a centered through-hole for the pump tubing.
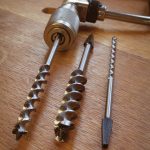
For the spout, I like the look of bamboo – but it’s not the easiest material to work; it’s splintery and susceptible to cracking or splitting.
To minimize this, I first cut the bamboo to length. I like the stem to be around 11⁄4” in diameter and 9″ in length. From the bamboo node, I cut 11⁄2” to the top and 71⁄2” to the bottom. I then drill a 1⁄16” diagonal hole about 1⁄4” below the node toward the top, penetrating the node membrane. This doesn’t guarantee the bamboo won’t split, but it reduces the chances.
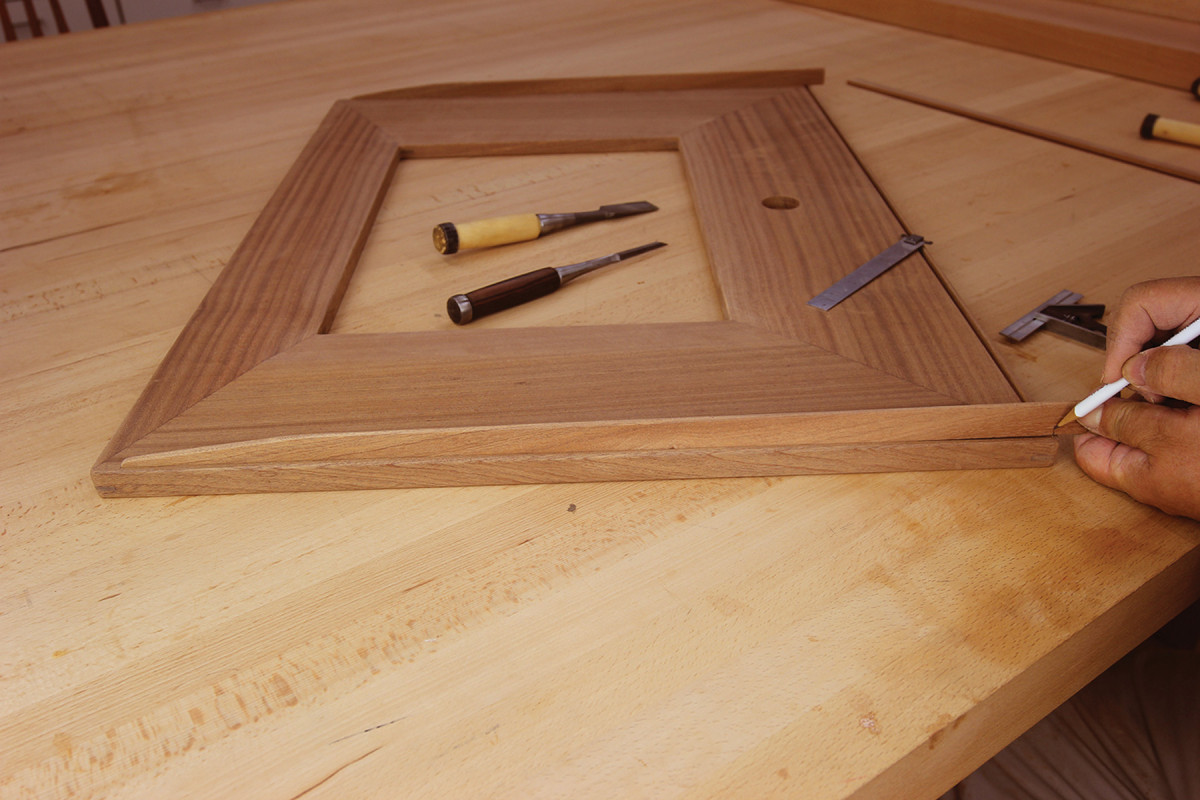
Tapered & mitered. The borders on the side pieces are tapered at the front and mitered at the back. After cutting and fitting them, glue them in place with epoxy.
For the spout, I like bamboo branches around 5⁄8” in diameter and 5″ in length. Cut a bevel on the tip of the spout about 11⁄4” back.
After the stem parts are cut to size, soak them in boiled linseed oil for about a day to give the oil enough time to penetrate all the pores. Then let the pieces dry for a couple of days so the oil can completely cure and seal the pores.
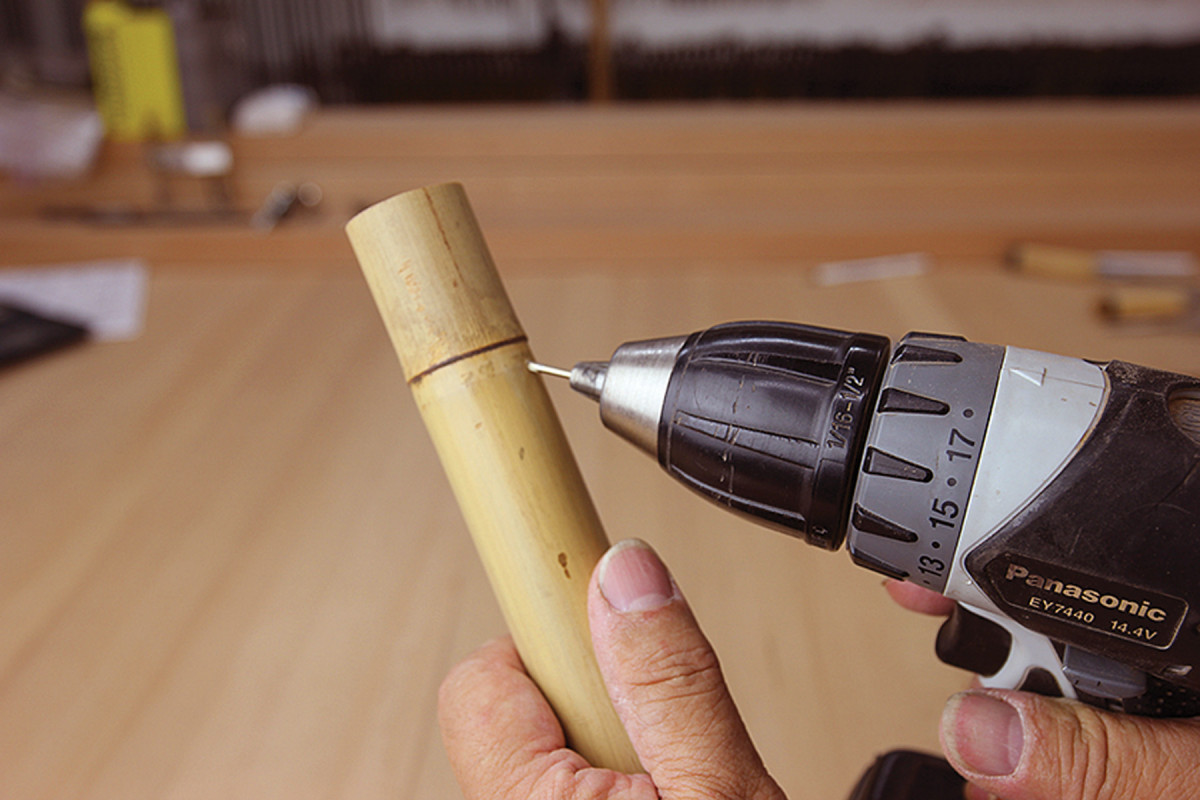
Split insurance. While it’s no guarantee, you can minimize the tendency of bamboo to split by first drilling a small hole that penetrates the membrane.
Use #0000 steel wool to remove any of the oil’s luster; that returns the bamboo to its natural appearance.
To join the spout to the stem, I find my desired angle (10°) and drill using an angle jig on the drill press.
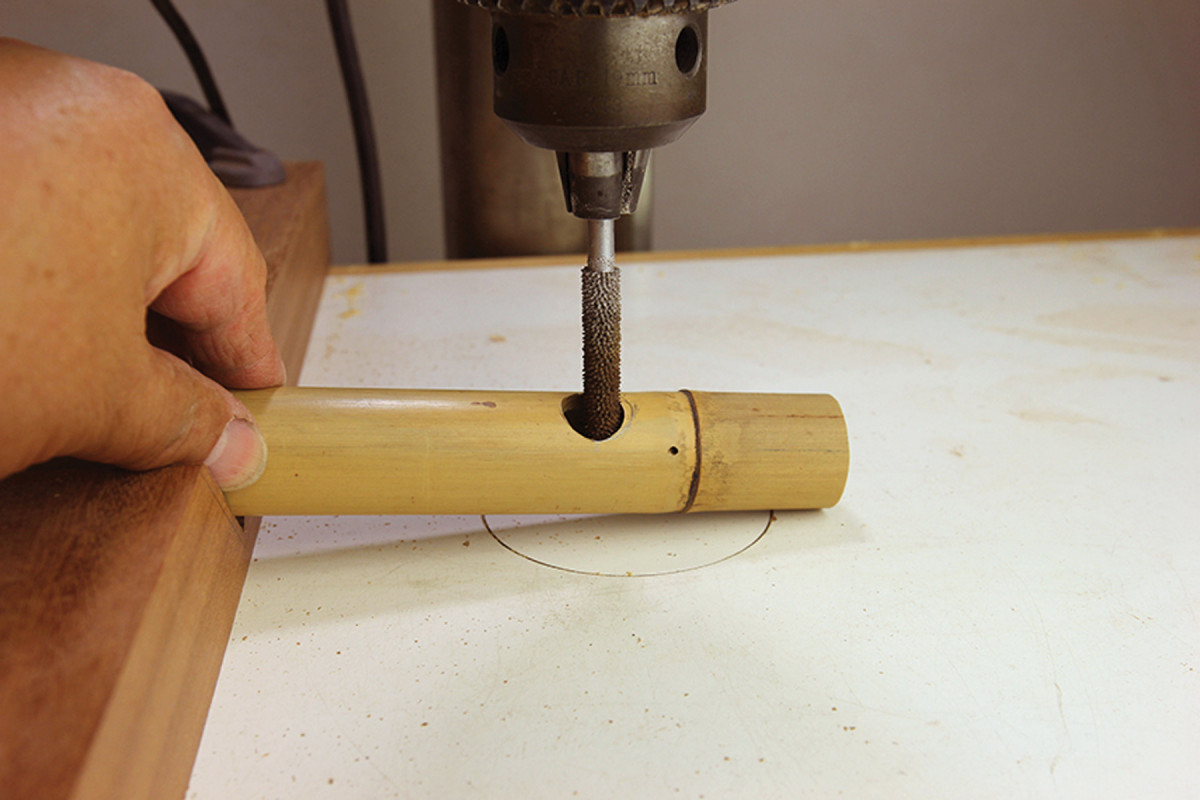
Burr cut. After cutting the initial hole for the spout, I scribe the angle of the oval fit onto the pipe from the spout, then use a burr bit to cut to the line.
Always use a drill bit that’s one size smaller than the diameter of the spout, then use a rasp or burr to customize the fit. Because the spout is fitted at an angle, the hole drilled has to be slightly oval in shape. After drilling the initial hole, I place the spout and scribe a line that matches the angle for the oval, then change to a burr bit to cut to the line.
O-ring recess. Rout a recess for an O-ring at the bottom of the stem. Notice the cradle that holds the bamboo to safely perform this operation.
Next, rout a groove, using a 1⁄8” radius bullnose bit, at the bottom of the stem to fit the O-ring. The depth of cut is one-half the thickness of the O-ring. The O-ring will fit snug around the bamboo and in the stem hole – but not so tight that you can’t turn the assembly if you wish to redirect the water flow.
To pump the water, I use a fully submersible, self-contained fountain pump with a 23″ head, which means it’s powerful enough to push water 23″ high. The tubing goes from the pump through the back of the base, and up through the stem and spout, stopping about 1⁄4” shy of the opening.
Build a Bridge
Stop gaps. Lower your table saw blade to cut about halfway into the bridge where you want the stone stops. That kerf serves as the groove for the mitered stop pieces.
A 7⁄8“-thick x 3”-wide white oak bridge, with mitered stops at both ends, spans the pond from front to back to hold waterstones in place under the spout for sharpening.
At both ends, cut a 1″-long x 7⁄16” deep (at the shoulder) sloped rabbet, angled to match the slopes on the top. I make all the angle cuts at the table saw using a tenoning jig.
Now cut a narrow groove for the stops, located to accommodate your longest stone. Cut sapele pieces to fit, miter them at the corners, then glue them in place with epoxy. The stops serve two purposes. First, they can be used along with a wedge to keep the stones in place. Second, they help contain the flow of water to the bridge and stone.
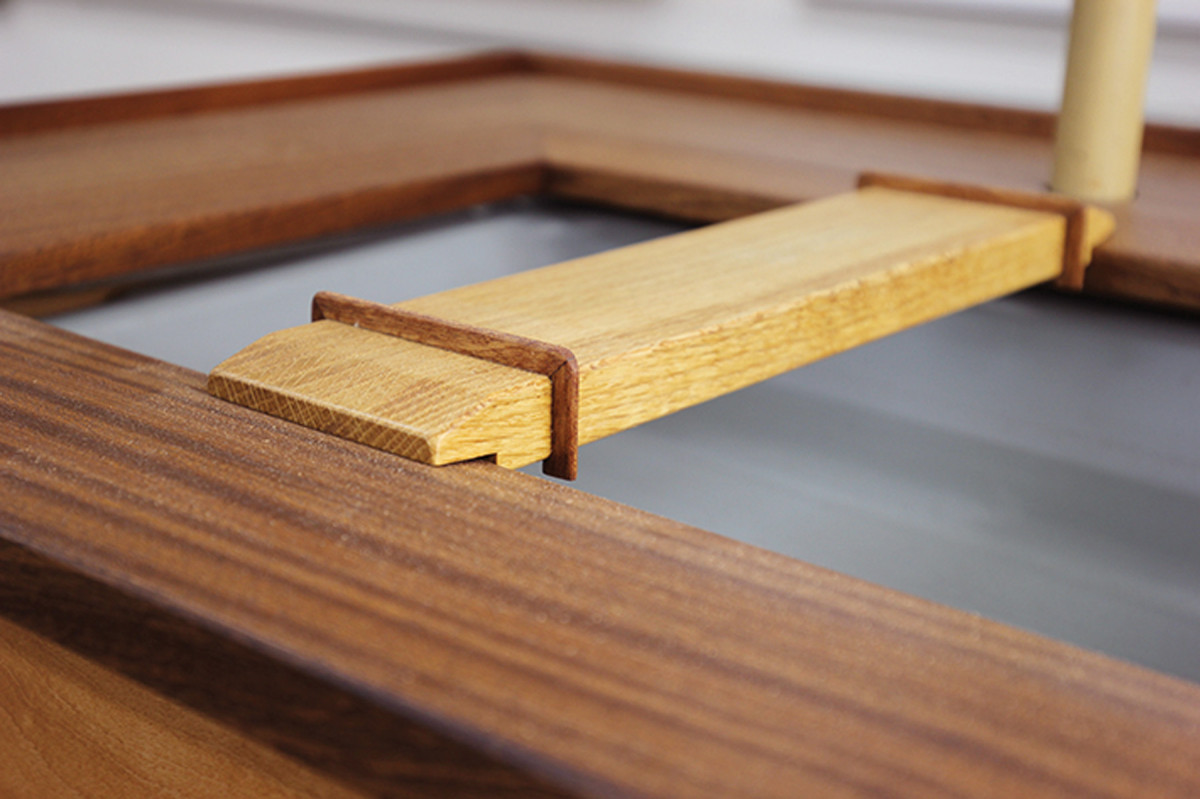
Close up. Here’s a close look at the mitered stone stops, and how the bridge sits across the pond.
For the finish, I used a three-part clear marine varnish. I recommend spraying (taking proper safety precuations) for the best appearance.
After I applied three coats, I noticed the finish imparts a non-slip surface that eliminates the need for wedges to keep the stone in place. (A different finish may require the wedge tactic.)
Install the tubing and hook up the pump, and you’ve no excuse for not keeping your edge tools sharp.
Plan: Download a free SketchUp model of this project.
Article: Read our guide on the basics of sharpening a handplane blade.
Here are some supplies and tools we find essential in our everyday work around the shop. We may receive a commission from sales referred by our links; however, we have carefully selected these products for their usefulness and quality.