We may receive a commission when you use our affiliate links. However, this does not impact our recommendations.

After drilling out the mortises in the feet using my drill press, I cleaned up the mortise and squared the corners with a chisel. I’m glad they shot this picture because I don’t use hand tools too often.
Part of the job requirement of being a self-employed custom woodworker is self-promotion. Word of mouth works well, but starting the word can sometimes be a challenge. That’s where competitions come into play. There are a number of woodworking shows every year throughout the country where I set up my booth and sell my wares. Many of them also have some type of woodworking competition. The competition can be organized so woodworkers compete in a certain category (professional, amateur, intarsia, turning). But it was a slightly different competition that brought me to the table pictured here. It’s called a “side-by-side,” and the idea is that an original piece, usually an antique of some note or reputation, is chosen by the event’s organizers, and the competitors build a reproduction to mimic the piece.
The table shown is attributed to the Shaker community at Harvard, Mass., and is believed to have been used as a work table, side table or writing desk. The table is a wee bit wobbly, and the drawer may have been added at a later time. On the original, the drawer is maple, while the rest of the table is cherry. My desk is also cherry and maple, but the finish is done so it’s hardly obvious.
As mentioned above, the reproduction (like the original) is a little unsteady. My recommendation for your piece is to make the stretcher between the legs considerably wider (6″ or more), perhaps even cutting a decorative arch in the stretcher to lighten the look. Depending on how you plan to use the table, you may want to take that into account.
The Wood

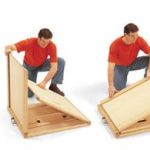
With the mortise-and-tenon joints complete, I transferred the shape of the legs from the template to the pieces. Band saw the shape, then sand the edges smooth. You might note that the grain orientation on the feet isn’t really the best, as it makes a weak support. But when making a reproduction....
This is a fairly simple table with some basic mortise-and-tenon construction, so contrary to Shaker philosophy I wanted to adorn the heck out of this thing with some amazing flame cherry. Quite honestly, I’m not allowed to tell you where I got it, and I don’t know if I’ll ever get any like this again. Suffice it to say you should look for some nicely figured cherry, then follow the cutting list to rough the material to the sizes given.
The Joints
The legs are made from three boards that are joined together with mortise-and-tenon joints and then shaped. It’s easier to make the mortises in a square piece of wood, so I cut the mortises on the feet and top cross braces before shaping them. I used my drill press to cut the 3/8″ x 2″ x 1-1/8″-deep mortise on the feet because the 7-3/8″-wide board wouldn’t fit in my benchtop mortiser. However, my mortiser worked fine for the 3/8″ x 2″ through-mortises in the top braces.
Cut the tenons on the leg pieces (which go between the feet and top cross braces) on the table saw. First define the shoulder of the tenon by setting the rip fence for the tenon length and set your blade height for 1/4″. Cut the shoulders on the two wide sides of the legs using the miter gauge, then raise your blade height to 1-3/16″ and define the shoulders on the two edges. Reset the fence for the length of the other tenon and repeat the process.
Here are some supplies and tools we find essential in our everyday work around the shop. We may receive a commission from sales referred by our links; however, we have carefully selected these products for their usefulness and quality.