


We may receive a commission when you use our affiliate links. However, this does not impact our recommendations.
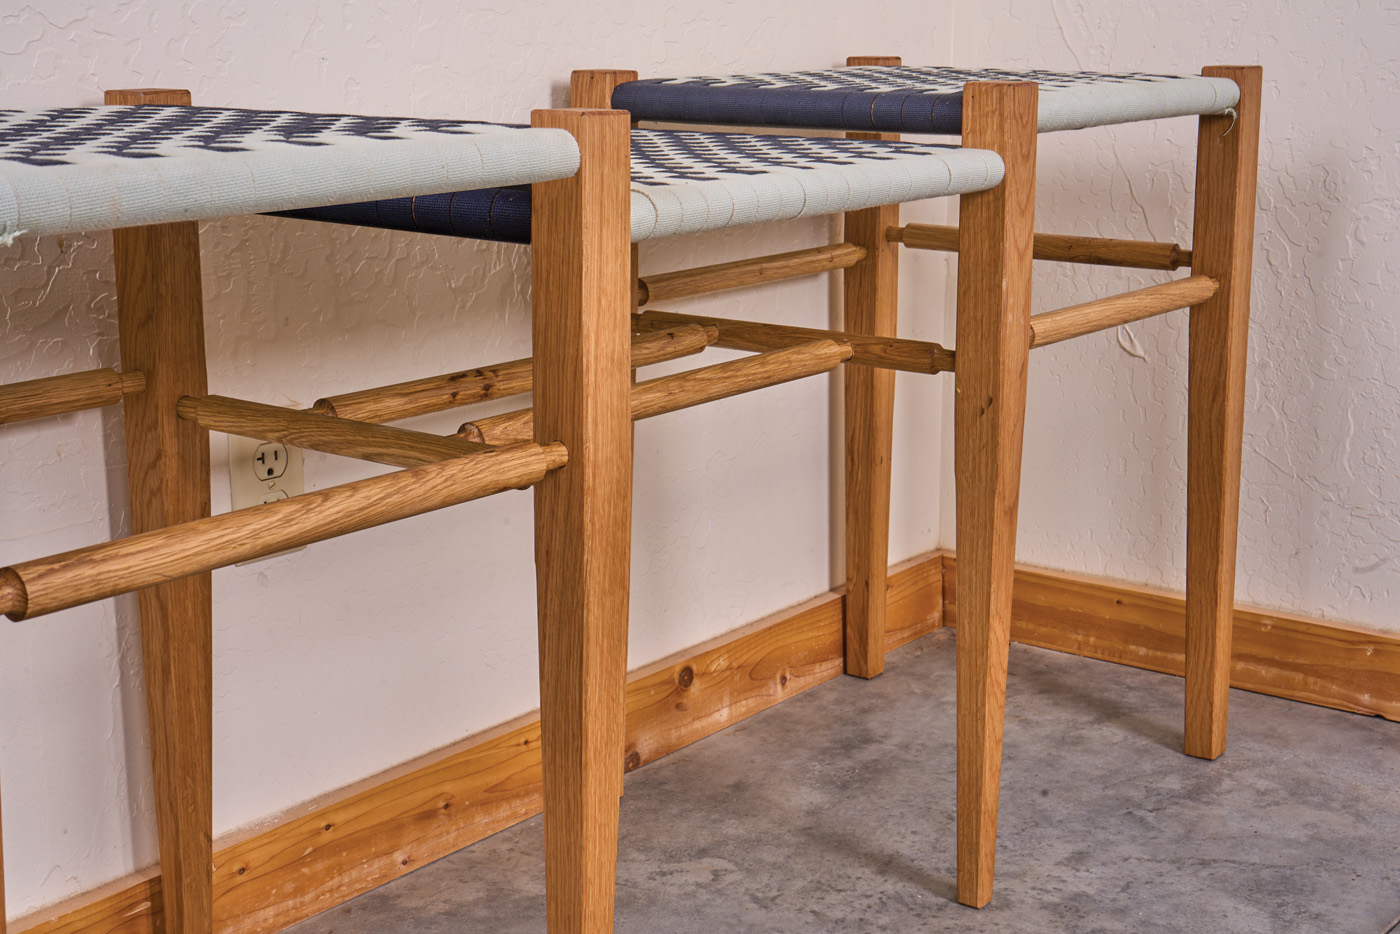
 This woven bench is a simple project to build, and is elegant enough to fit in any decor.
The Shakers were incredibly inventive, not just of the furniture they designed, but of their techniques with which it was assembled. As a craftsman, I’ve been interested in working my own inventiveness, but utilizing that which they’ve given me including seating woven from “Shaker tape.” It’s relatively easy and long lasting and is woven in uniform sizes and colors from cotton. This particular cotton tape can be purchased by the roll in a variety of colors from Amazon and other craft suppliers.
More to do: Check out all of our Shaker Projects
Additional Reading: Learn about ESSA, the school that Doug Stowe co-founded.
eLearning: Take the No-Fear Chairmaking Course from Christopher Schwarz
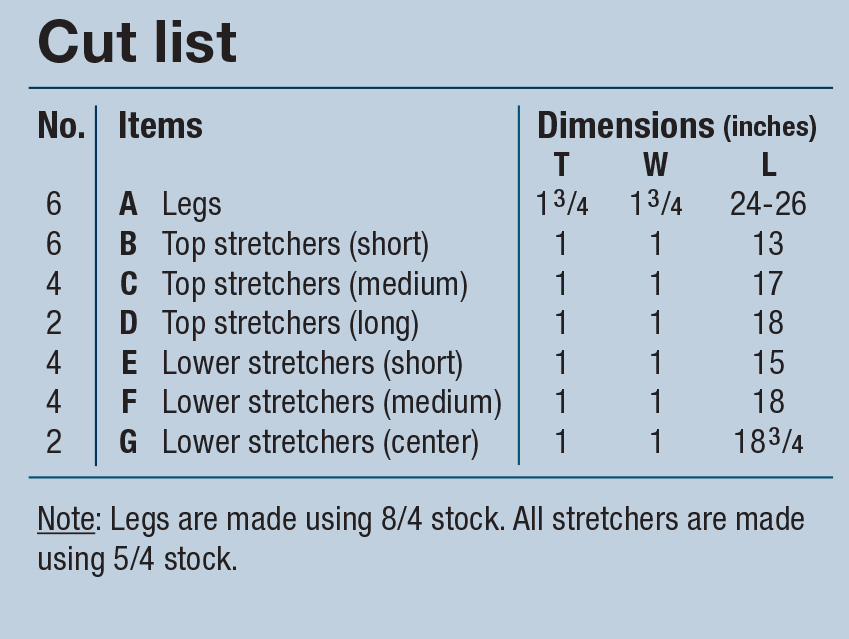
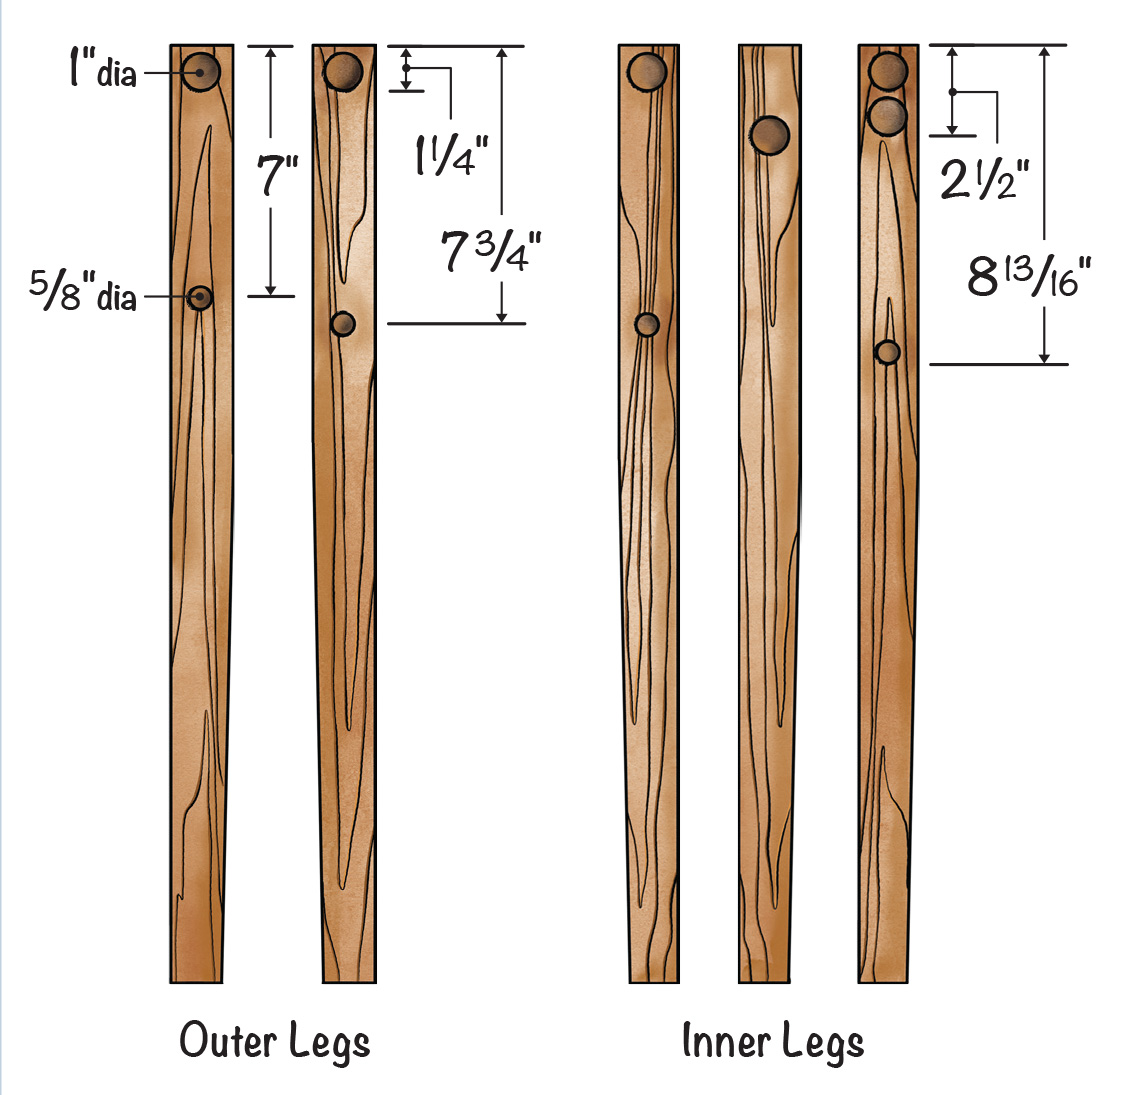
Cutlists and Diagrams
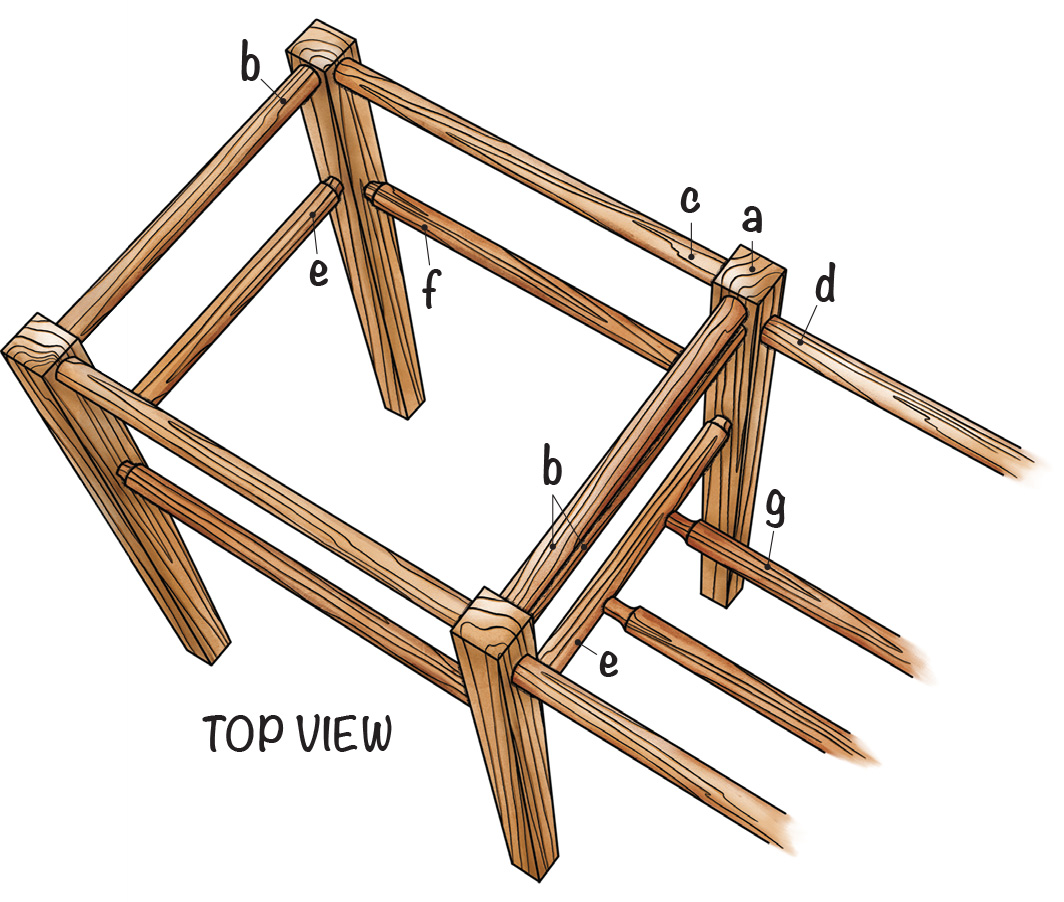
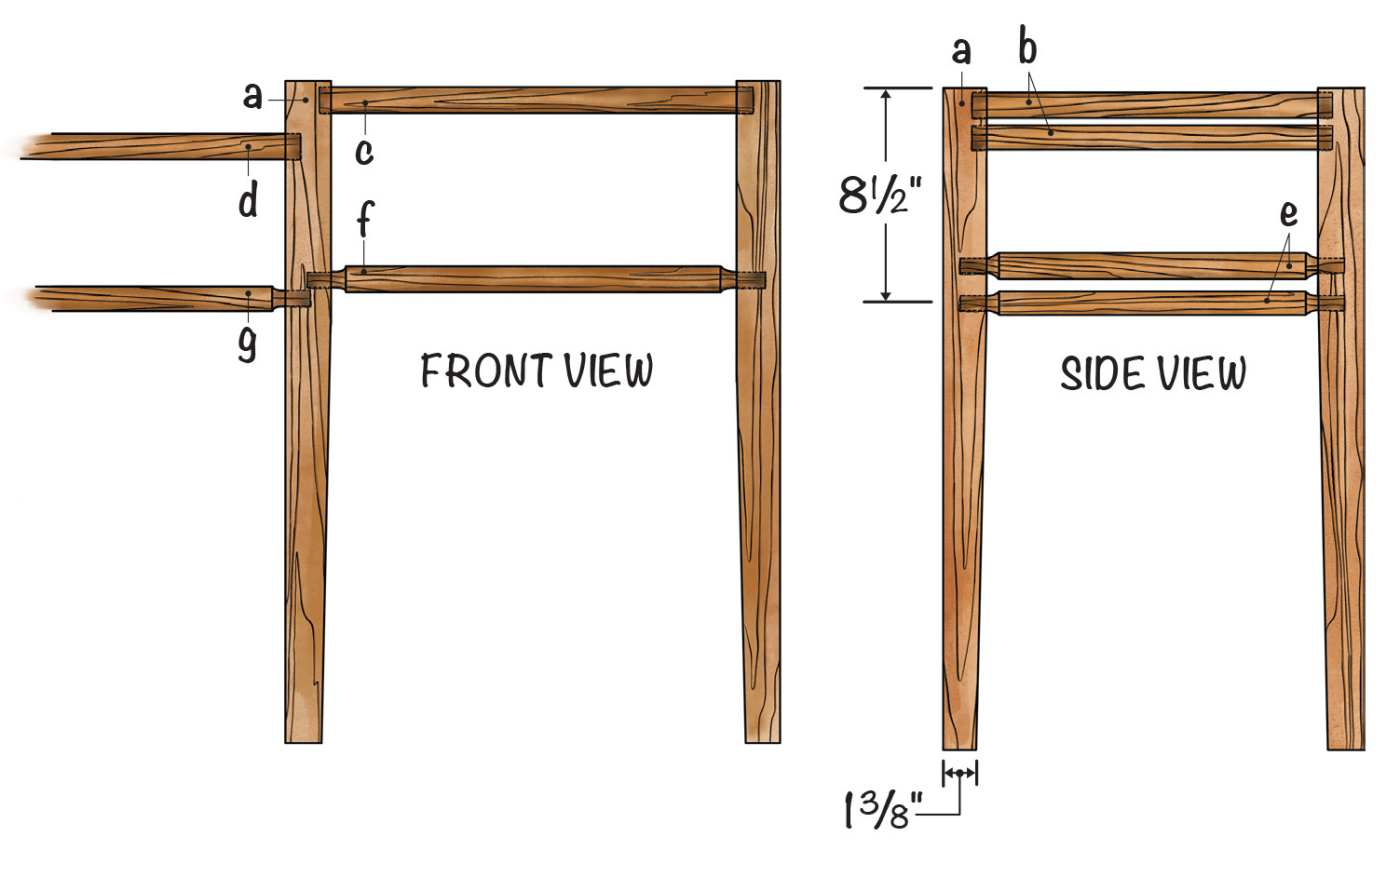
 Designing the Bench
This bench is not inspired by one of their designs, though it might be better if it were. It was instead the result of a stroke and a visit to the local physical therapist’s office where a relatively tall bench was a much more comfortable height to wait for the therapist than the low seating provided by armchairs. As a recent victim, I was ready to get up and with it, as my recovery was waiting. It is also a good height for placement at the foot of the bed for getting dressed in the morning and storing the bedspread at night. I also found it to be a challenging project for my post-stroke recovery as it required the making of several sets of mirror-imaged parts.
Let’s Get Building
I utilized air-dried white oak for this project, in 8/4 (2“ or 50.8mm) and 5/4 (1-1/4“ or 31.75mm) dimensions. The 8/4 wood will be used for the legs and the 5/4 for the stretchers between the legs. You can use common dowels for some of the parts, but I chose to avoid the expense and make my own dowels from white oak to provide greater strength.
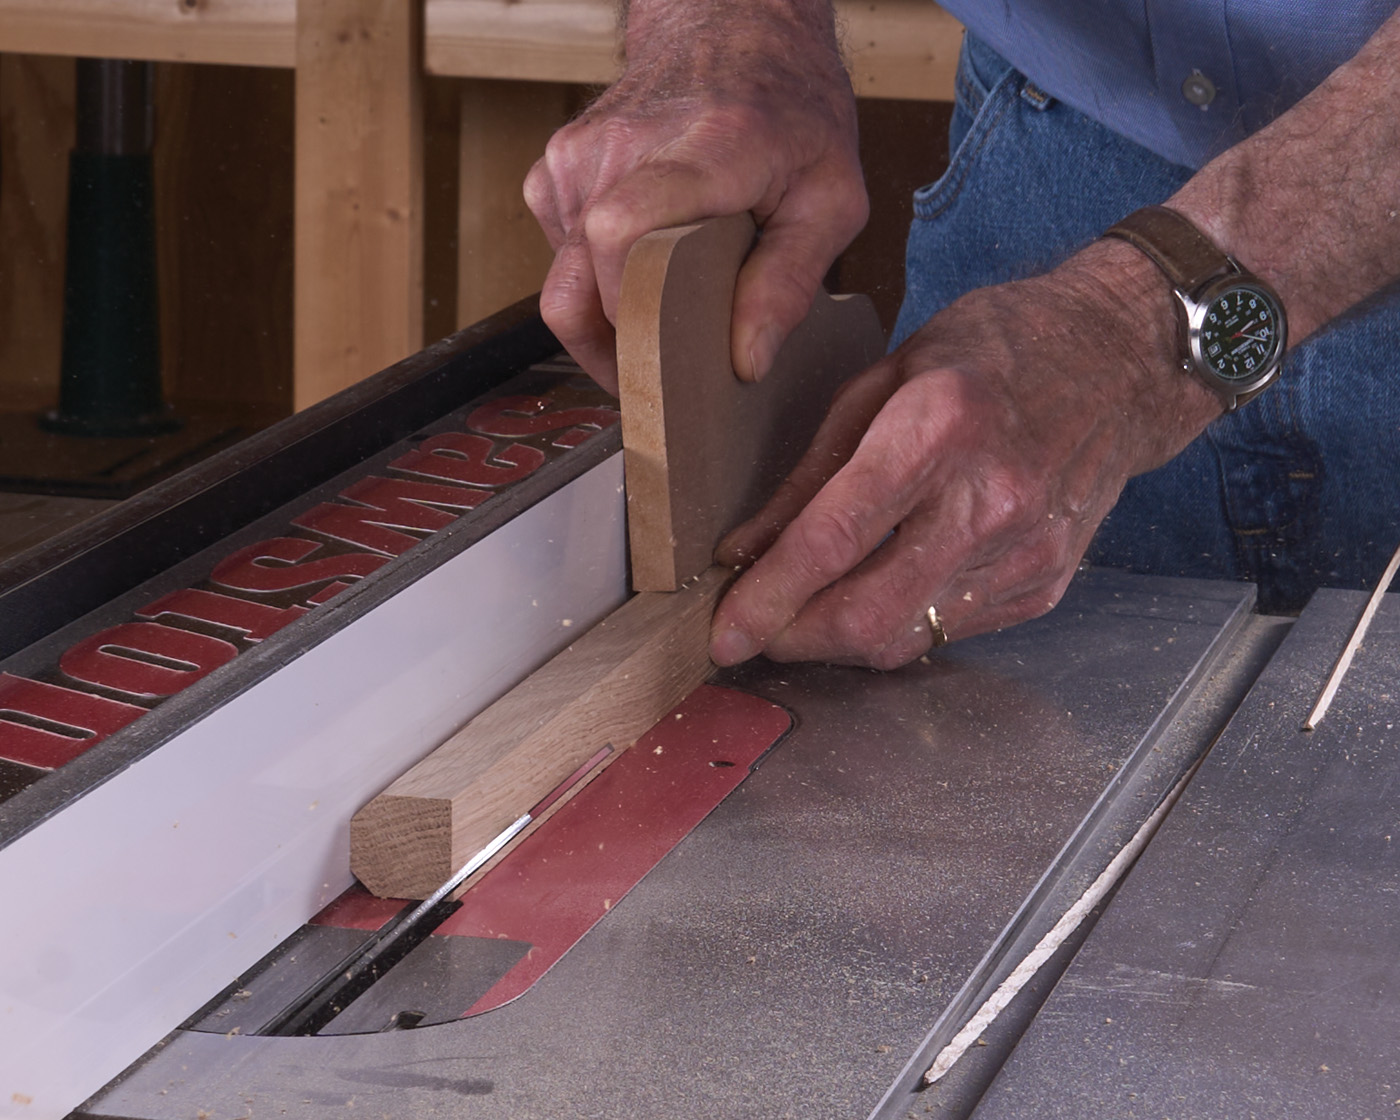
1 Start to form the rounded spindles at the table saw.

2 Tilt the blade to 45° and knock off all the corners.
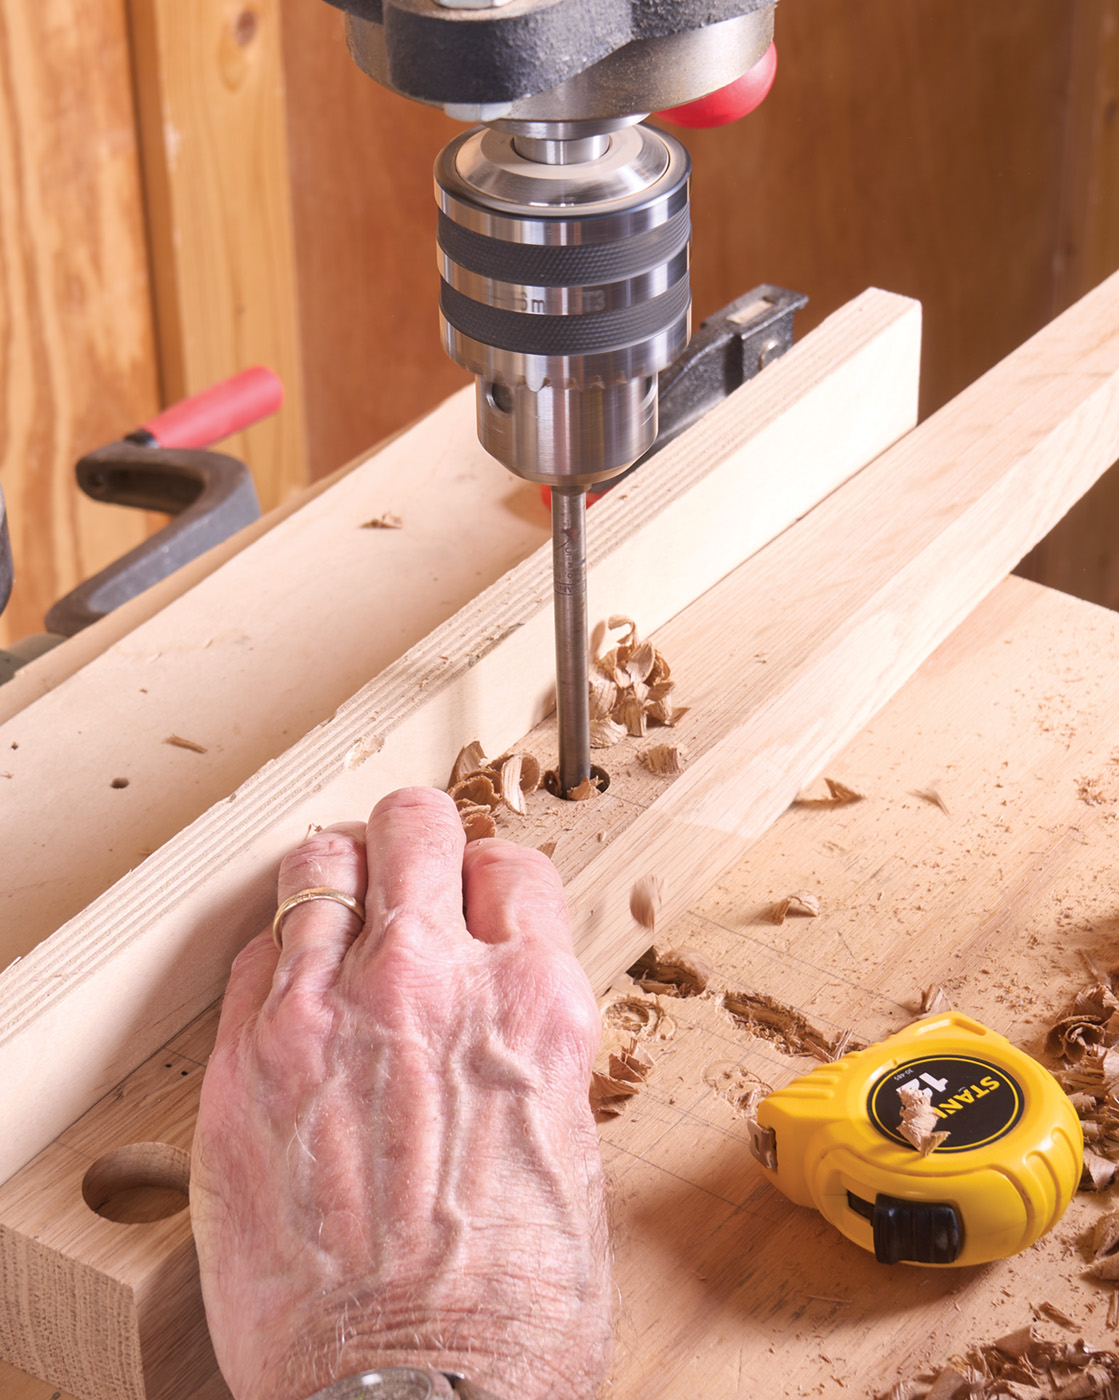
To convert the 5/4 into 1“ diameter dowels, I first ripped to 5/4 square stock and then planed it to 1“ thick squares. To ease the work on the router table, cut the stock into octagonal shape on the table saw. Simply tilt the blade to 45° and rip off each corner. Removing some of the material first will make routing with a large 1/2“ radius roundover bit far easier. Setting up the exact height of the router bit and the correct position of the router fence is essential to get a round dowel. Don’t forget a push stick here as well. A total number of 22 parts are required for this bench though fewer would be required for a simpler design. In order to be as accurate as possible, I leave about 4“ of extra length is on each part. This allows us to cut them to the exact dimensions as we need them.
3 Rout the spindles round with a roundover bit.
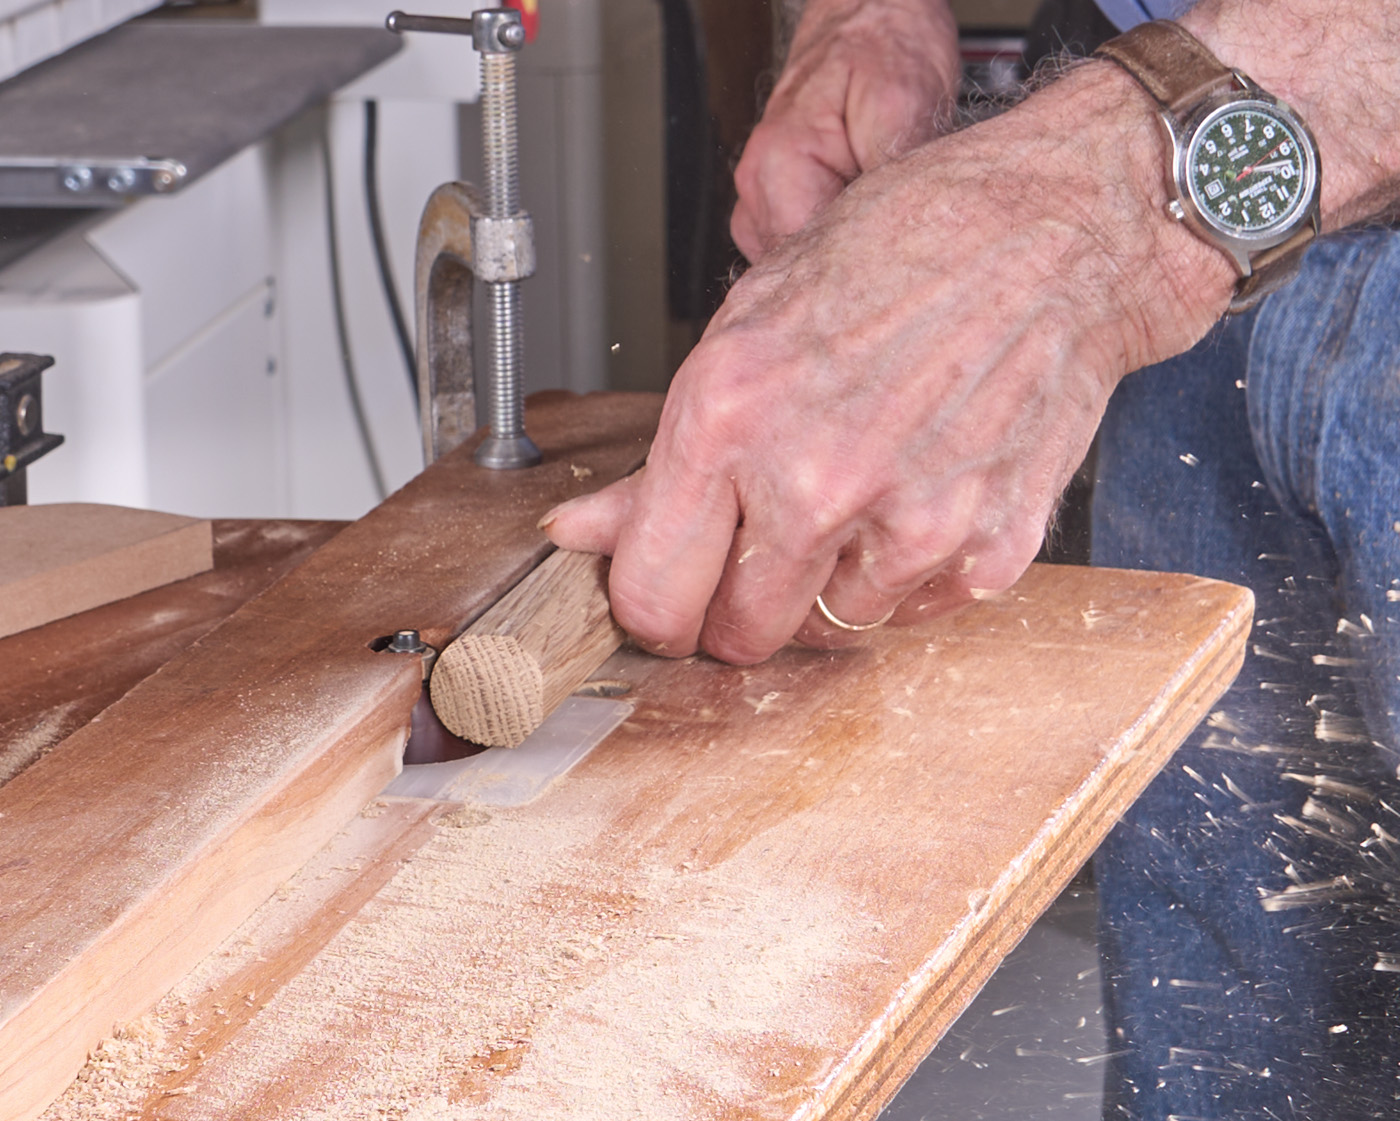
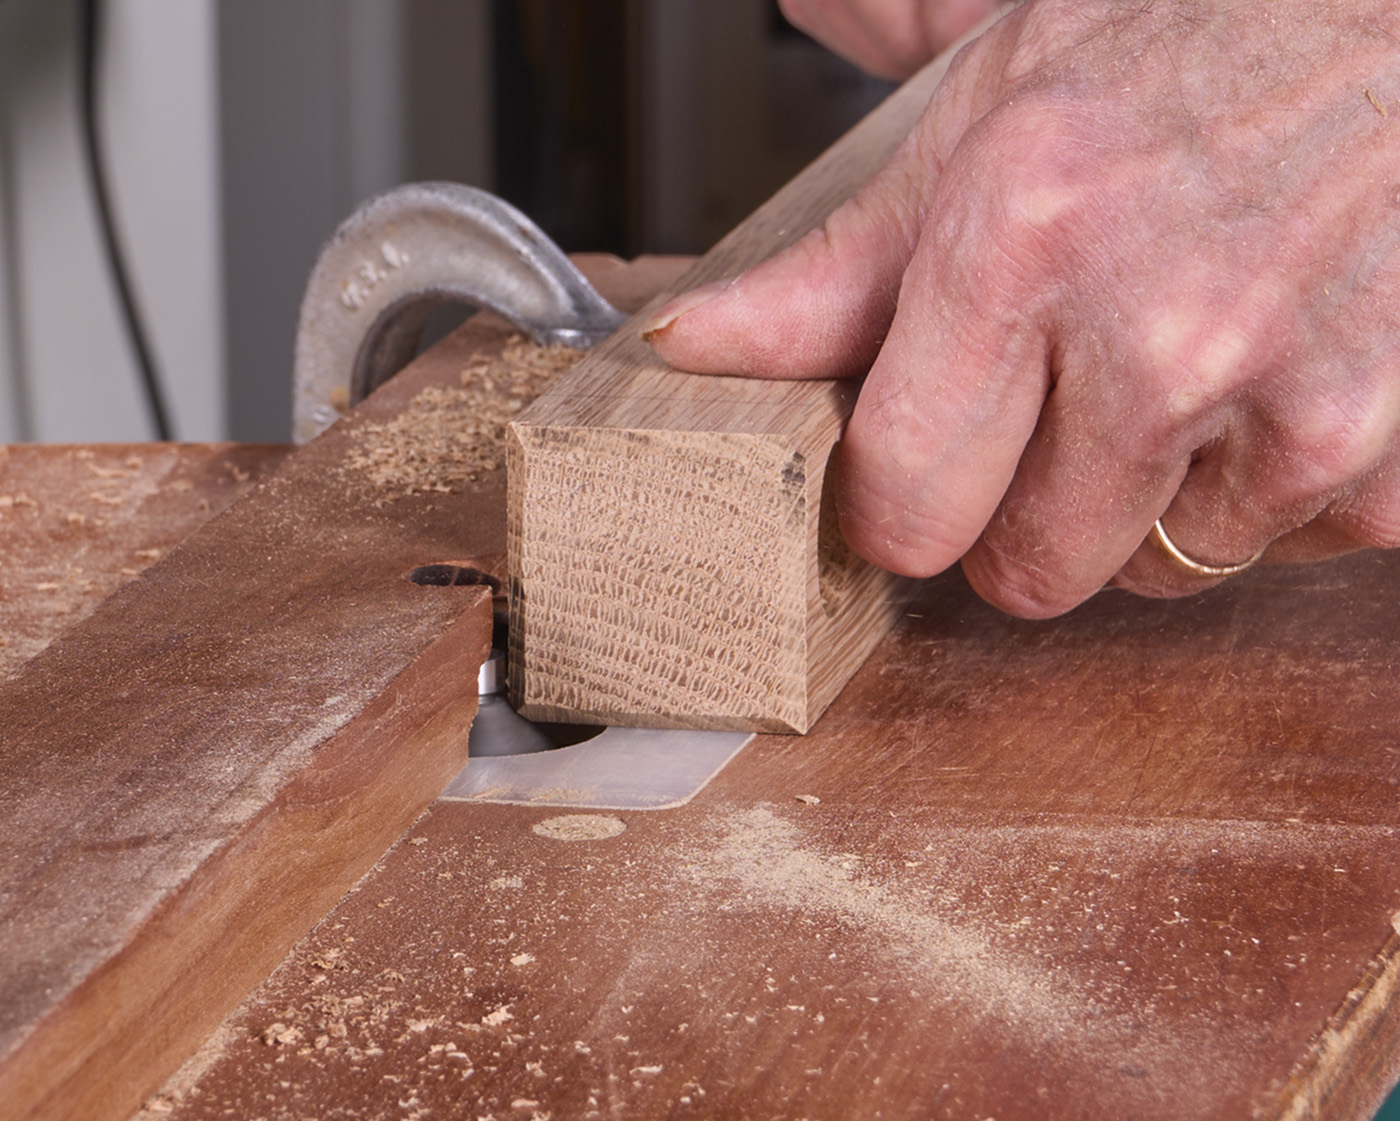
I used an interesting router table technique in this project to mill the lower stretchers. It involves a V-shaped block so that you can place the part within it, and turn it over a running bowl and tray bit. Doing it this way allows you to form a tenon on the end of each stretcher without needing to touch a lathe (though, if you have a lathe, you can certainly turn them as well).
4 Form the tenons by turning the stock over a running bit.
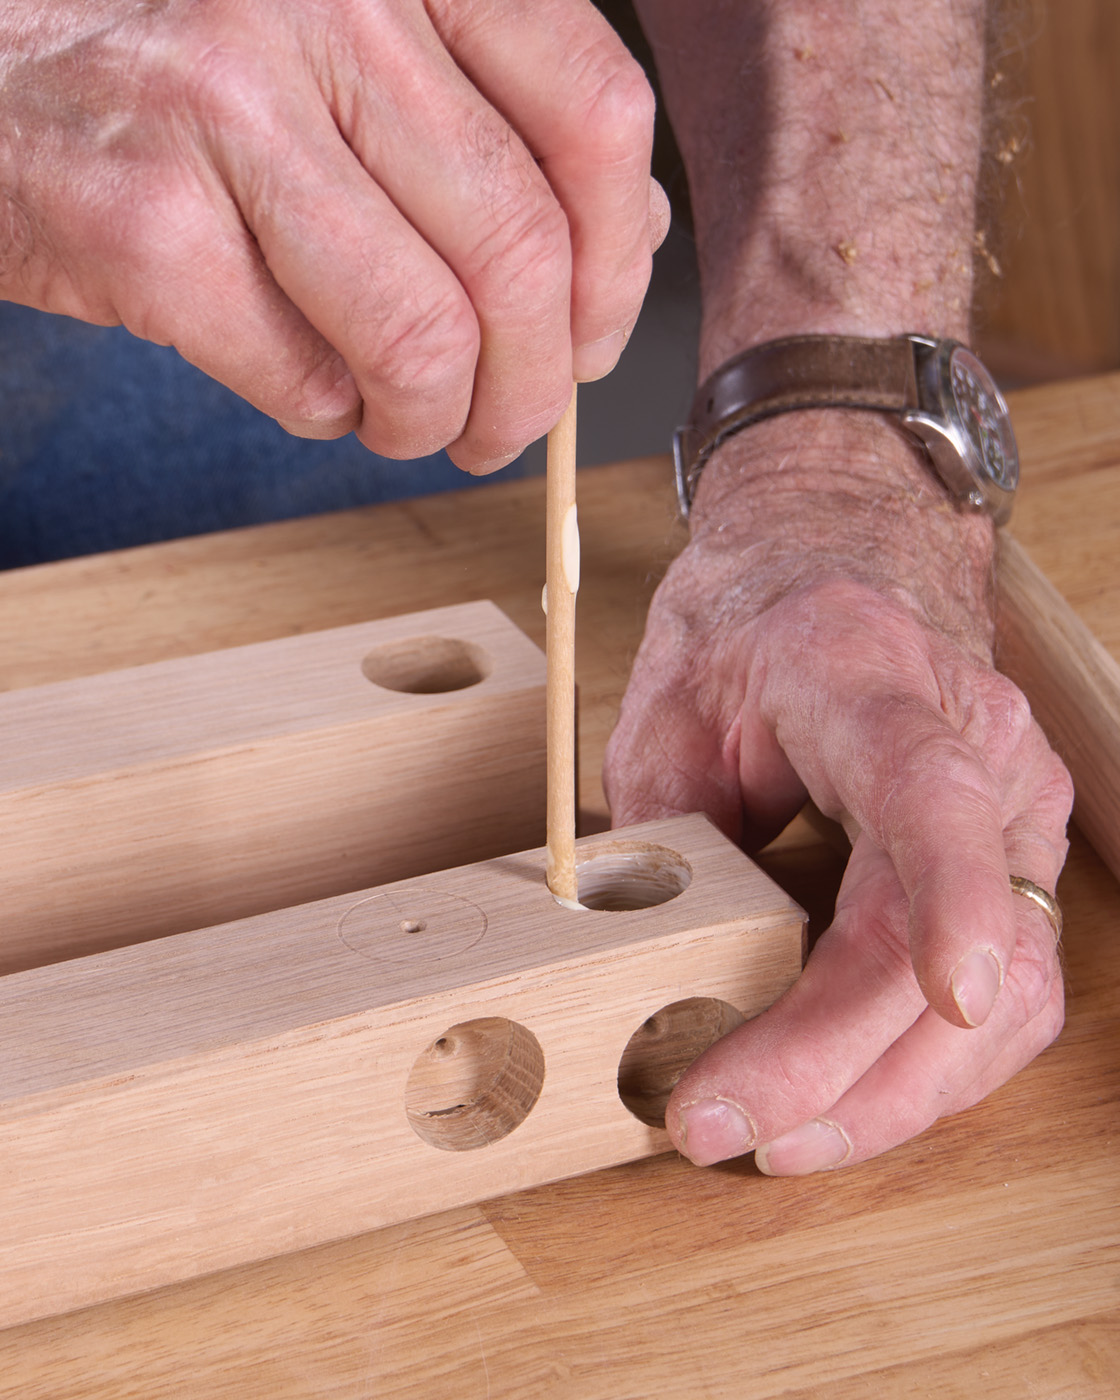
A bit of practice may be required to get the technique right. Remember, to get an accurate fit, raise the bit in small increments, stopping when you get a fit that’s close to the 5/8“ final dimensions. Since the router will remove material in each dimension, only a very slight change of depth can have significant effect. If given my choice, I choose to leave the tenons slightly large — a bit of hand sanding, or work with a rasp is easy enough to do the final sizing. It should be remembered that since you’ve made the dowels yourself, they can vary from one part to the next or even from end to end, so test fit each part as you go, making sure to match each tenon with its corresponding mortise.
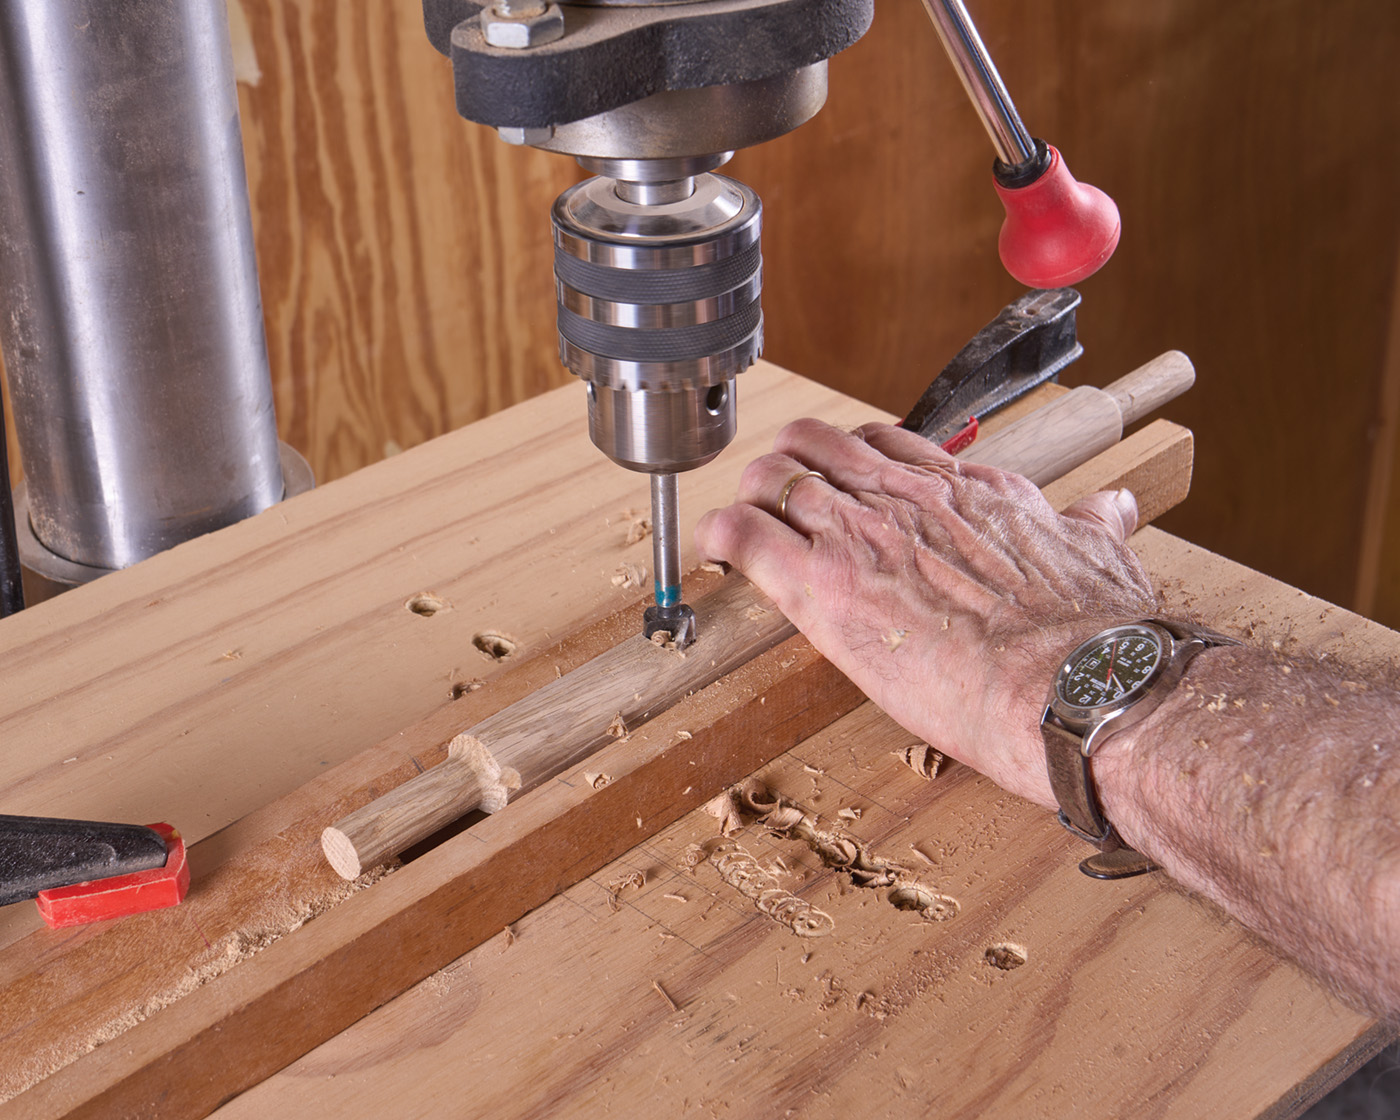
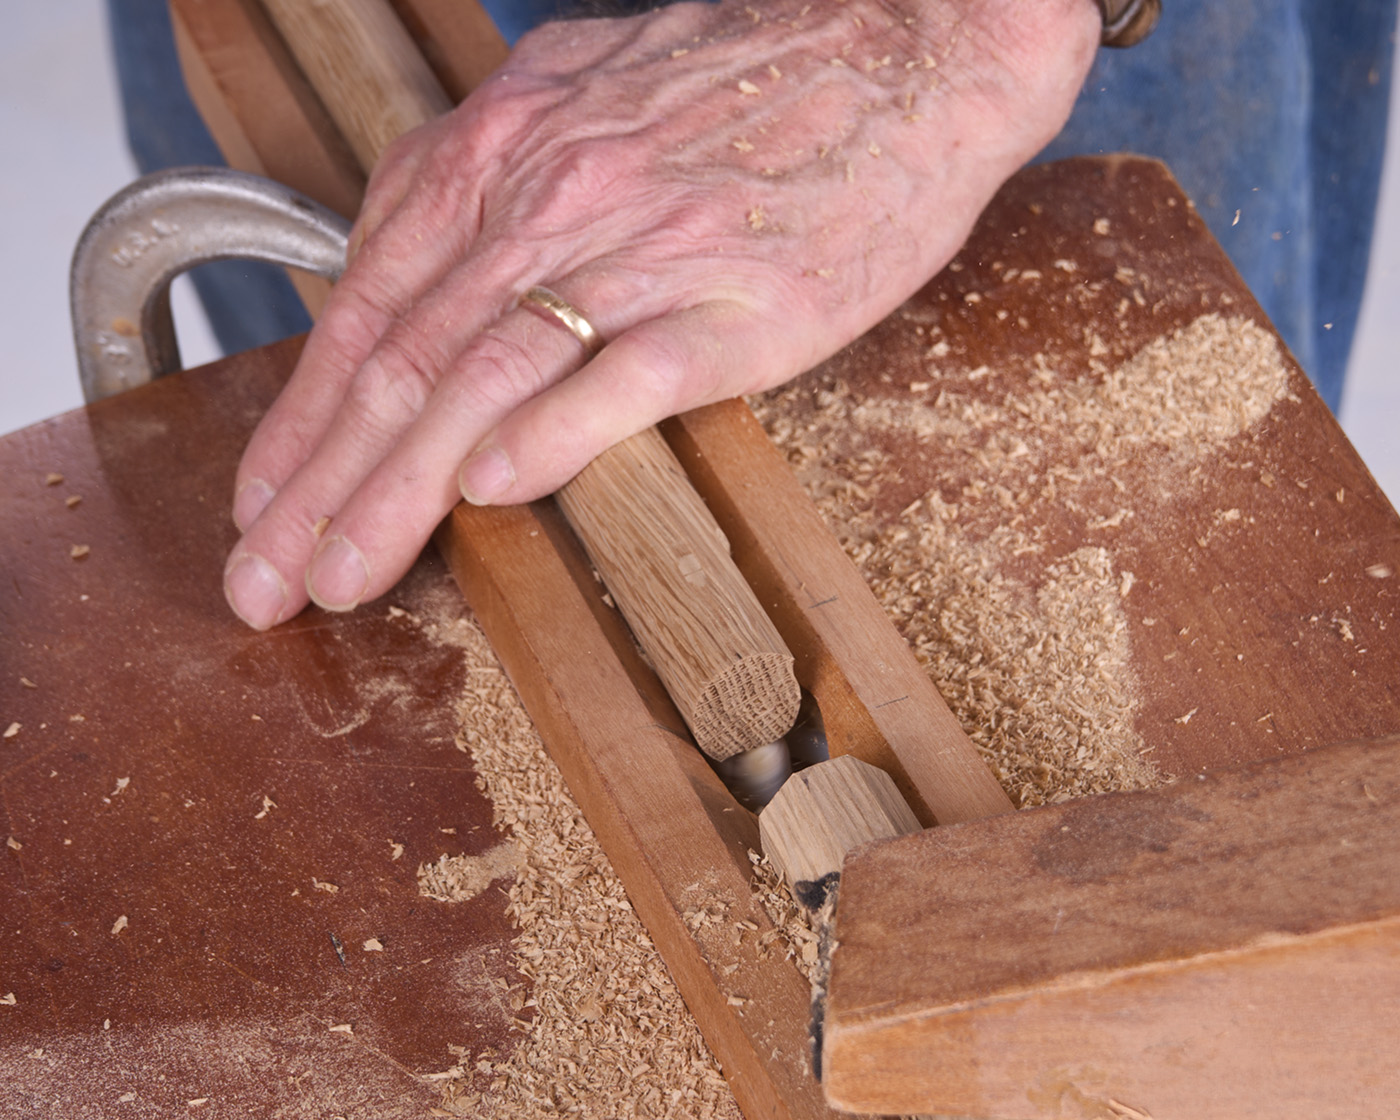
5 The center spindles are drilled for lower stretchers.
Drilling & Tapering Legs
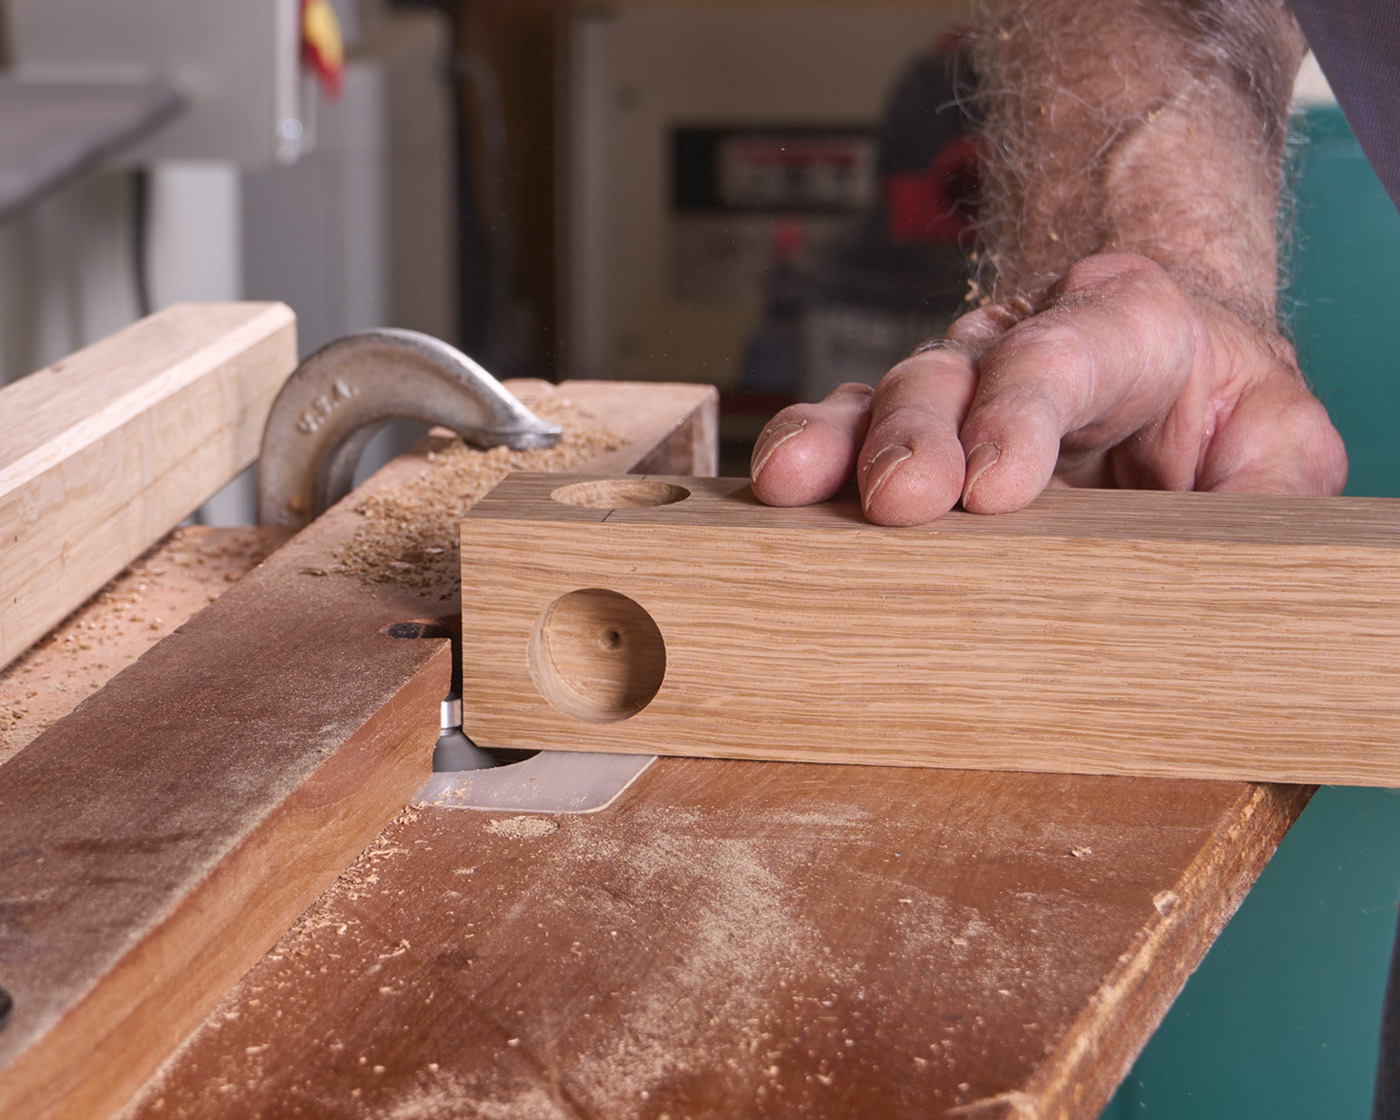
The legs have several mortises in them—the uppers are drilled to a 1/2“ depth so not to interfere with each other in the stock (now milled to a dimension of 11-1/16“ square) and cut to length. The lower mortises are drilled to a full 1“ depth, as they are arranged to be slightly offset from each other. Extreme care must be taken in the mirror imaging of parts. I made the upper hole a bit offset towards the outside so that the shaper tape is close to the edge of the leg. It is certainly easier to center it, if you wish.
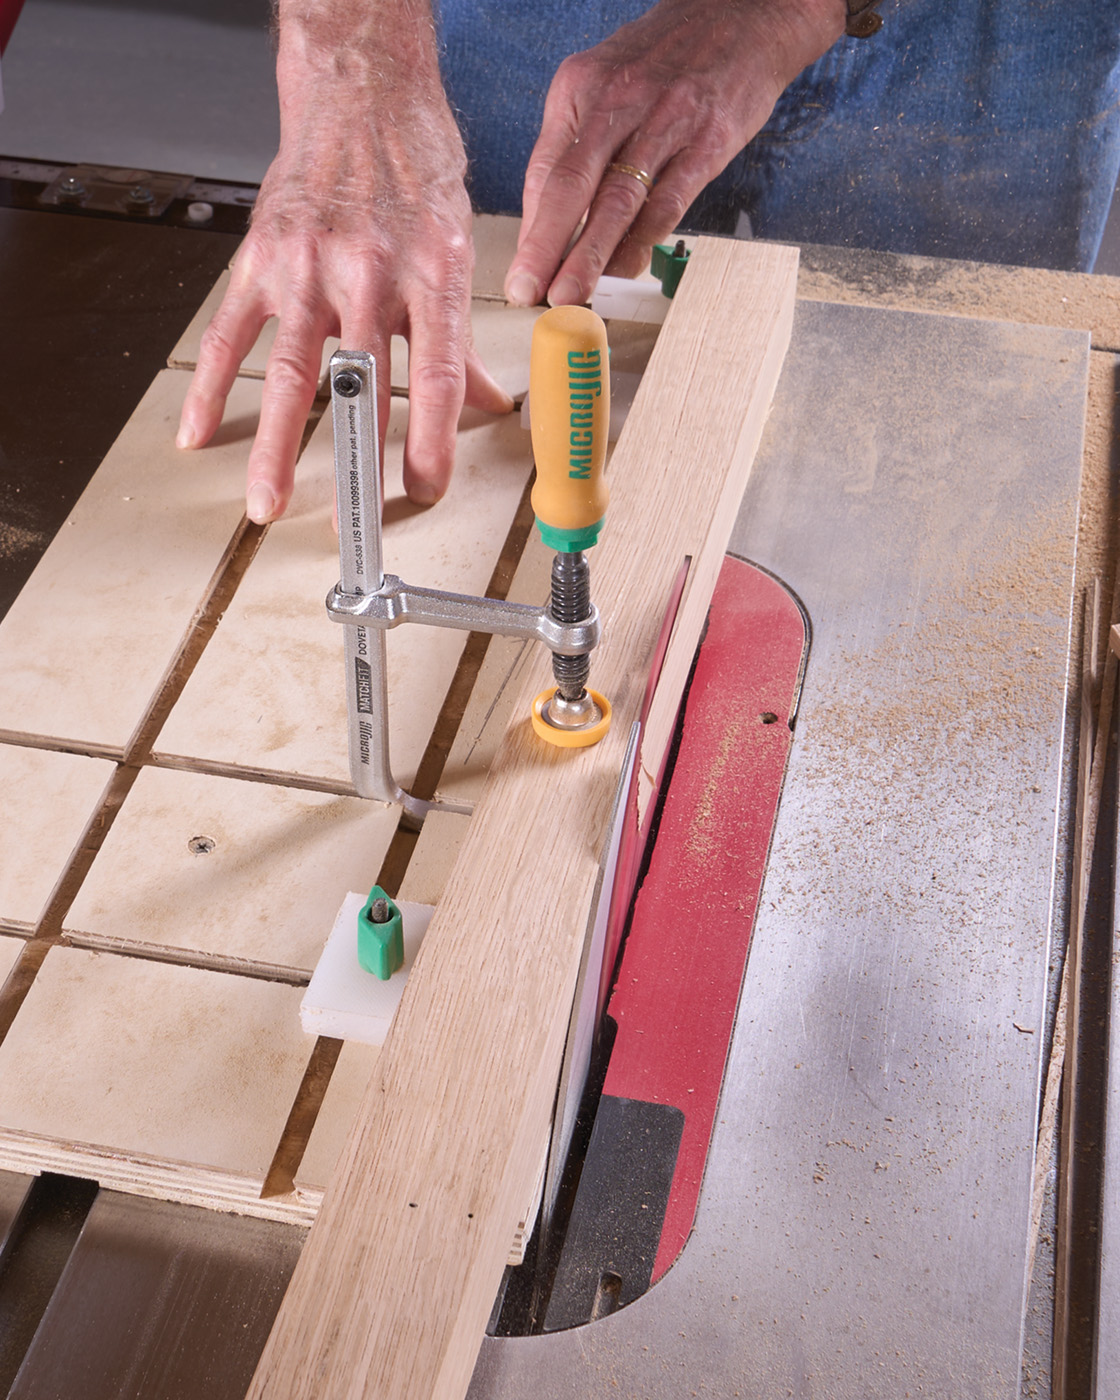
6 The leg is tapered at the table saw using a tapering jig.
After drilling the round mortises, 1“ diameter at the top and 5/8“ diameter in the lower position, I used a MicroJig taper sled on the table saw to taper the legs. Now, the only thing left to do is to chamfer all of the edges of the legs at the router table. After sanding the legs, we’re ready for a trial assembly.
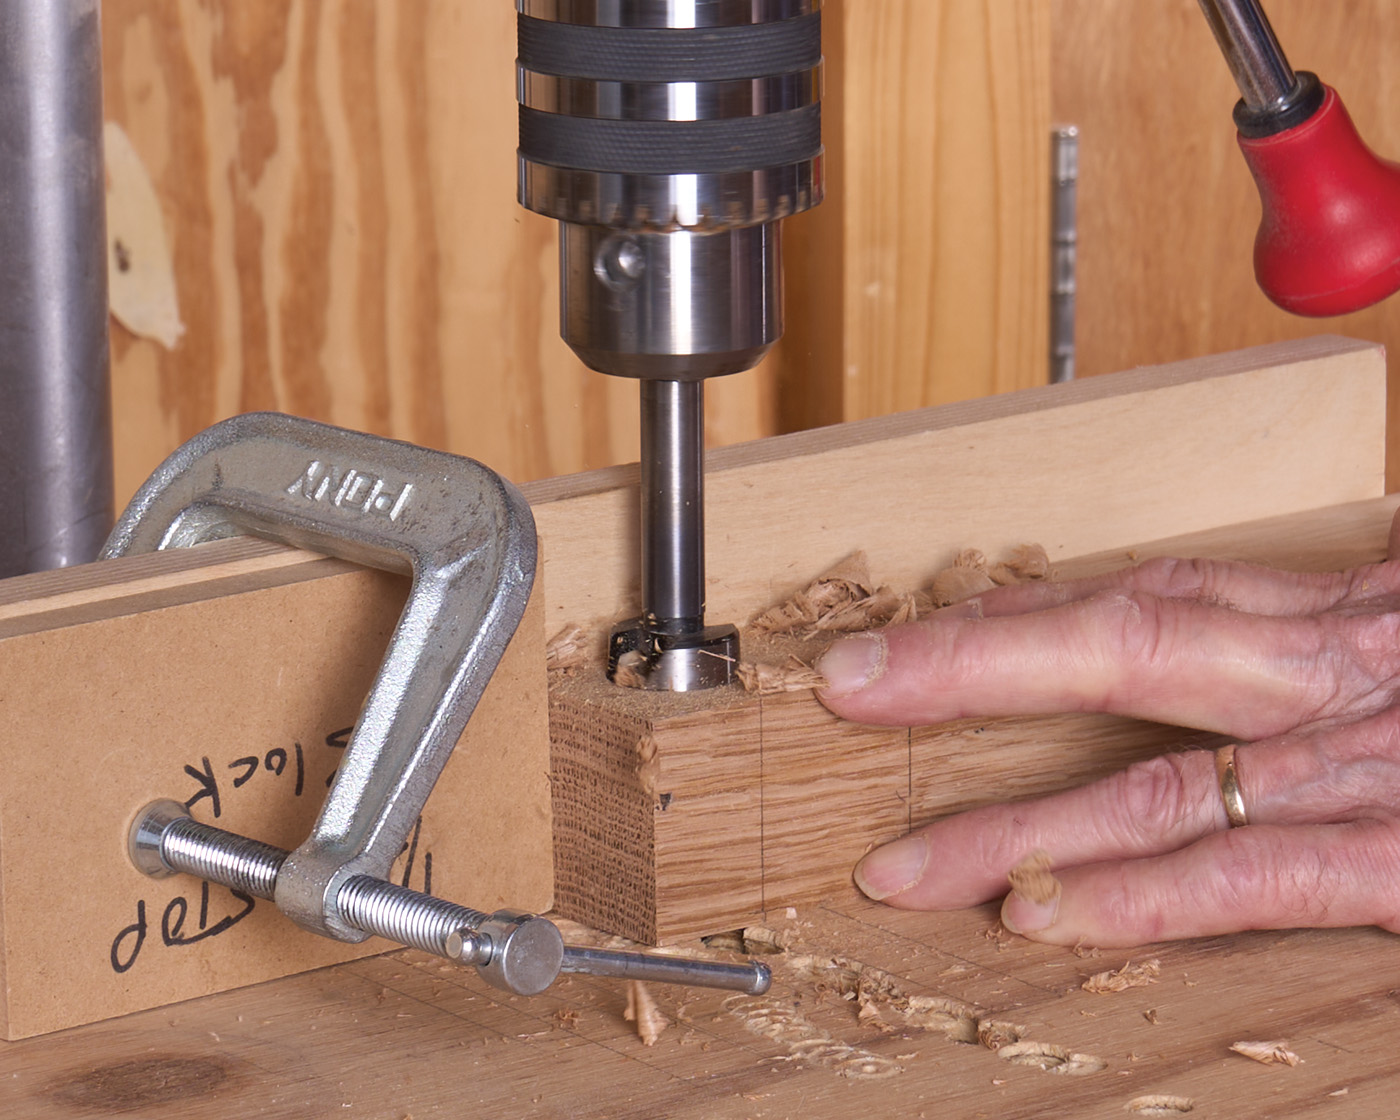
7 Drill the larger mortises at the top of the leg.
8 The mortises for the lower stretchers are smaller.
Looking at my dry fit, I decided to make things just a bit more complex and test my own thought and skills. The addition of the inside, lower stretchers was a last-minute decision. This is why I like to do dry assemblies — it’s the last opportunity for design changes. A 5/8“ mortise was drilled into each one. I used the same V-block that held the parts in the router table, and drilled the mortises. A few more stretchers and tenons (made like before) completed the look I was after.
9 Run a chamfer bit along all edges of the legs.
10 Including the top facets.
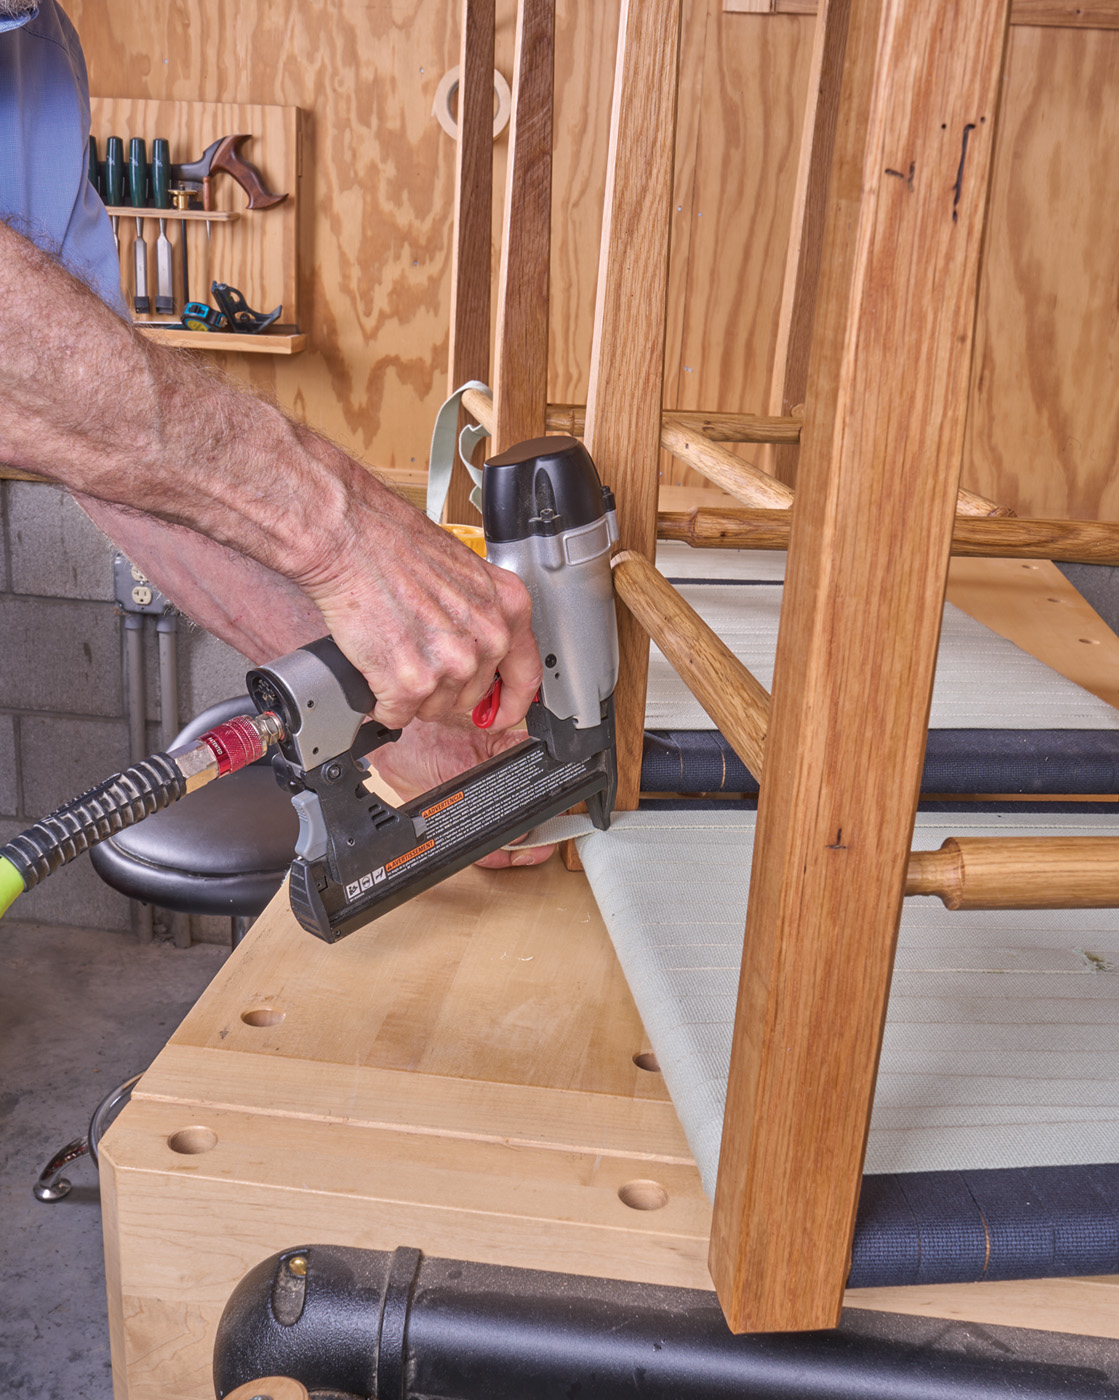
Final Assembly
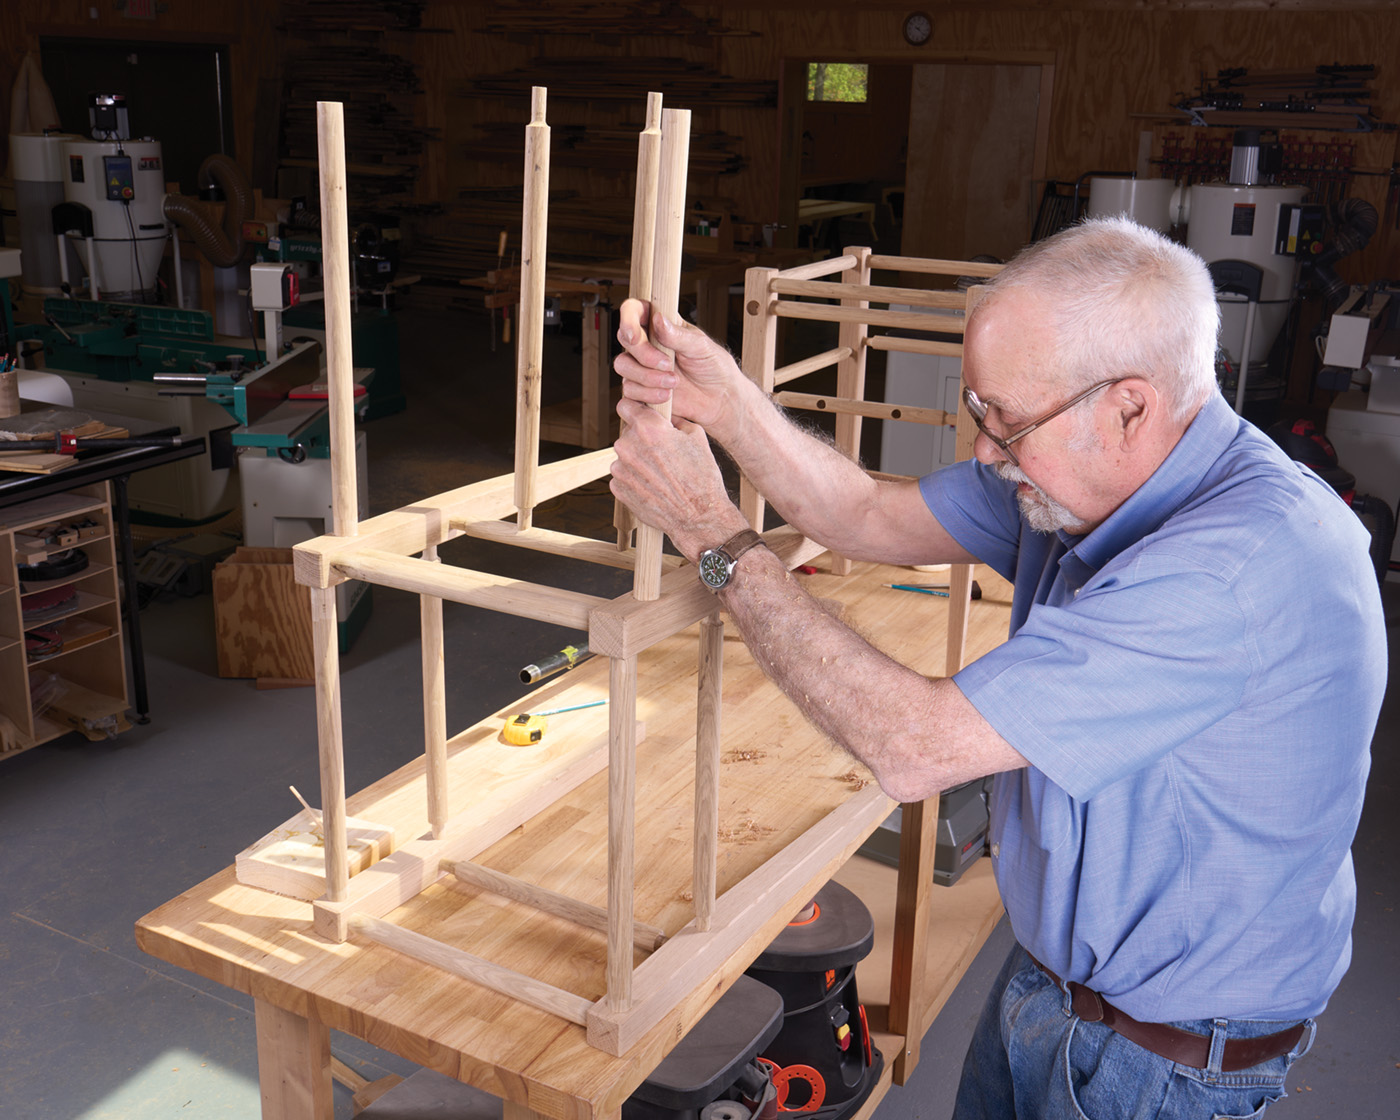
With that done, the bench was ready (after sanding) for assembly. I started by assembling the ends first. Check everything for square, but the round tenons are pretty self-squaring (as long as your lengths are accurate). Once I have two end assemblies together, it’s time to connect them. Place the assemblies on a flat surface—this ensures that they do not twist in relation to each other.
11 Glue inside of the mortises.

12 Install the top stretchers first.
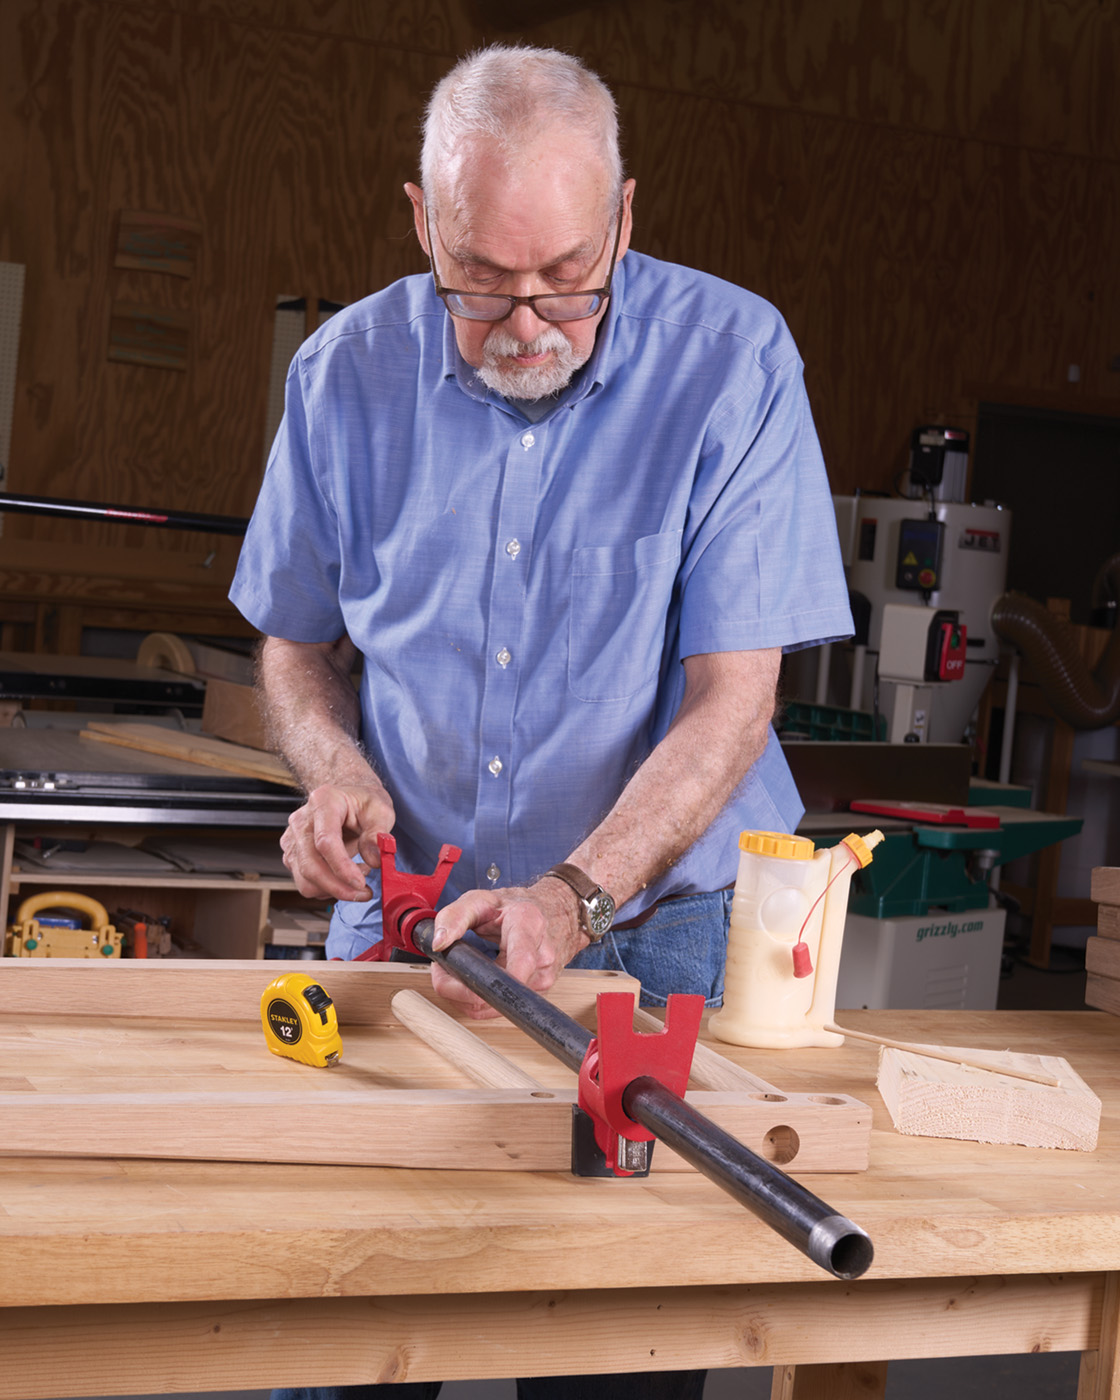
13 A pipe clamp can be a good way to make sure that the tenons are seated fully.
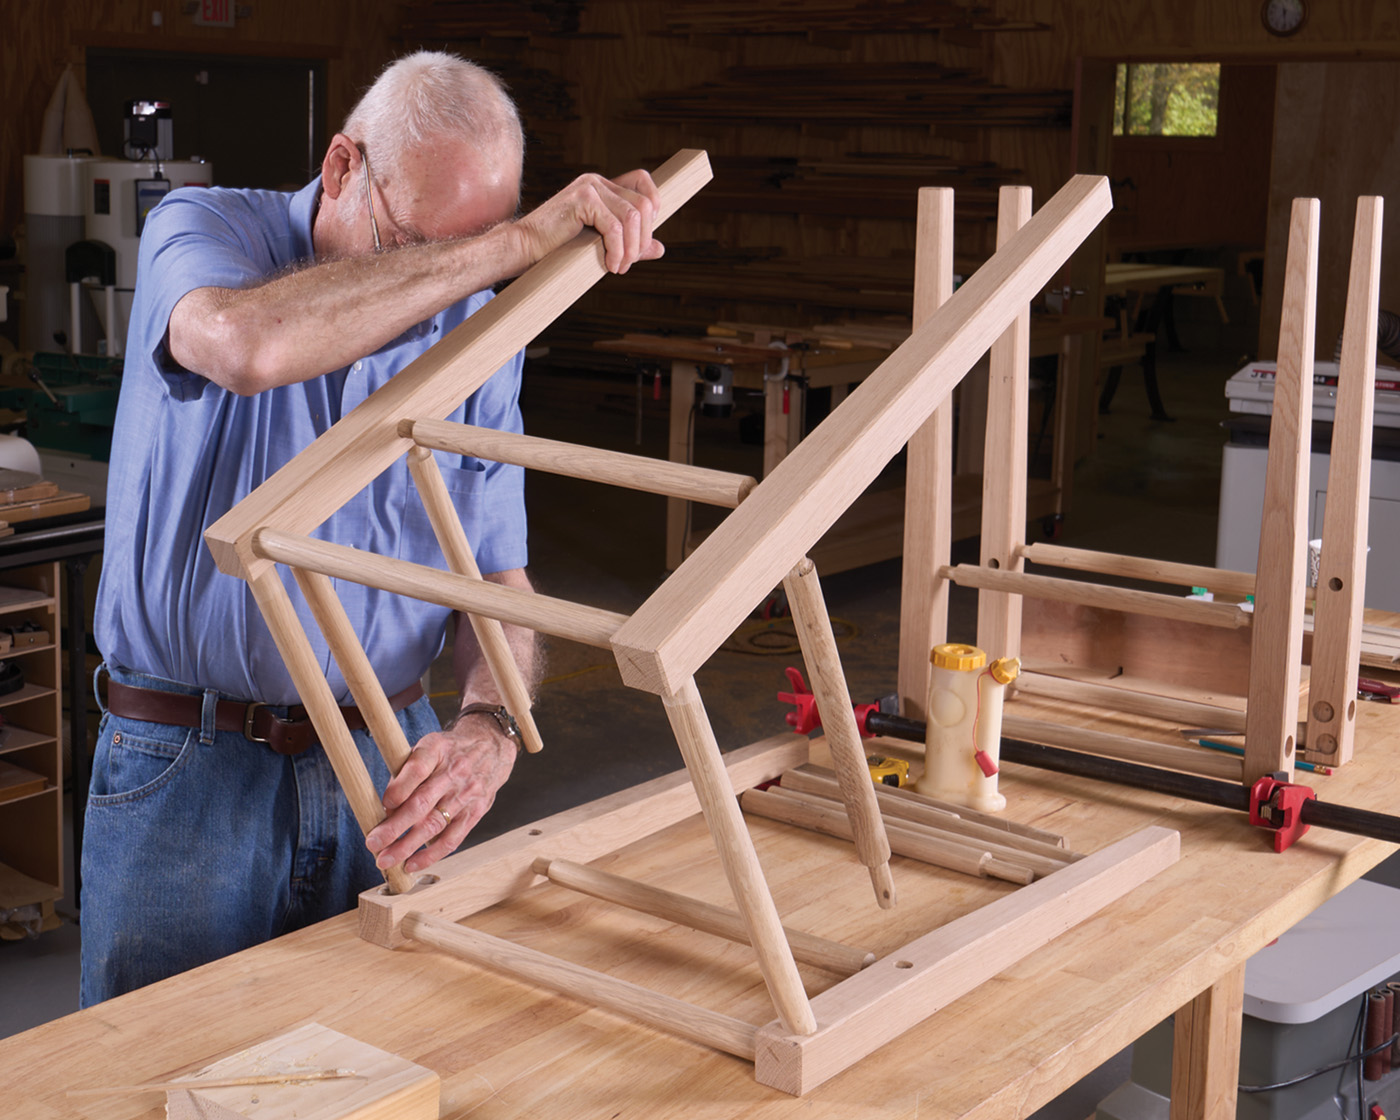
14 Assemble the ends of the bench first, individually.
15 Check everything for square, but the round spindles don’t have a whole lot of play for adjustment.
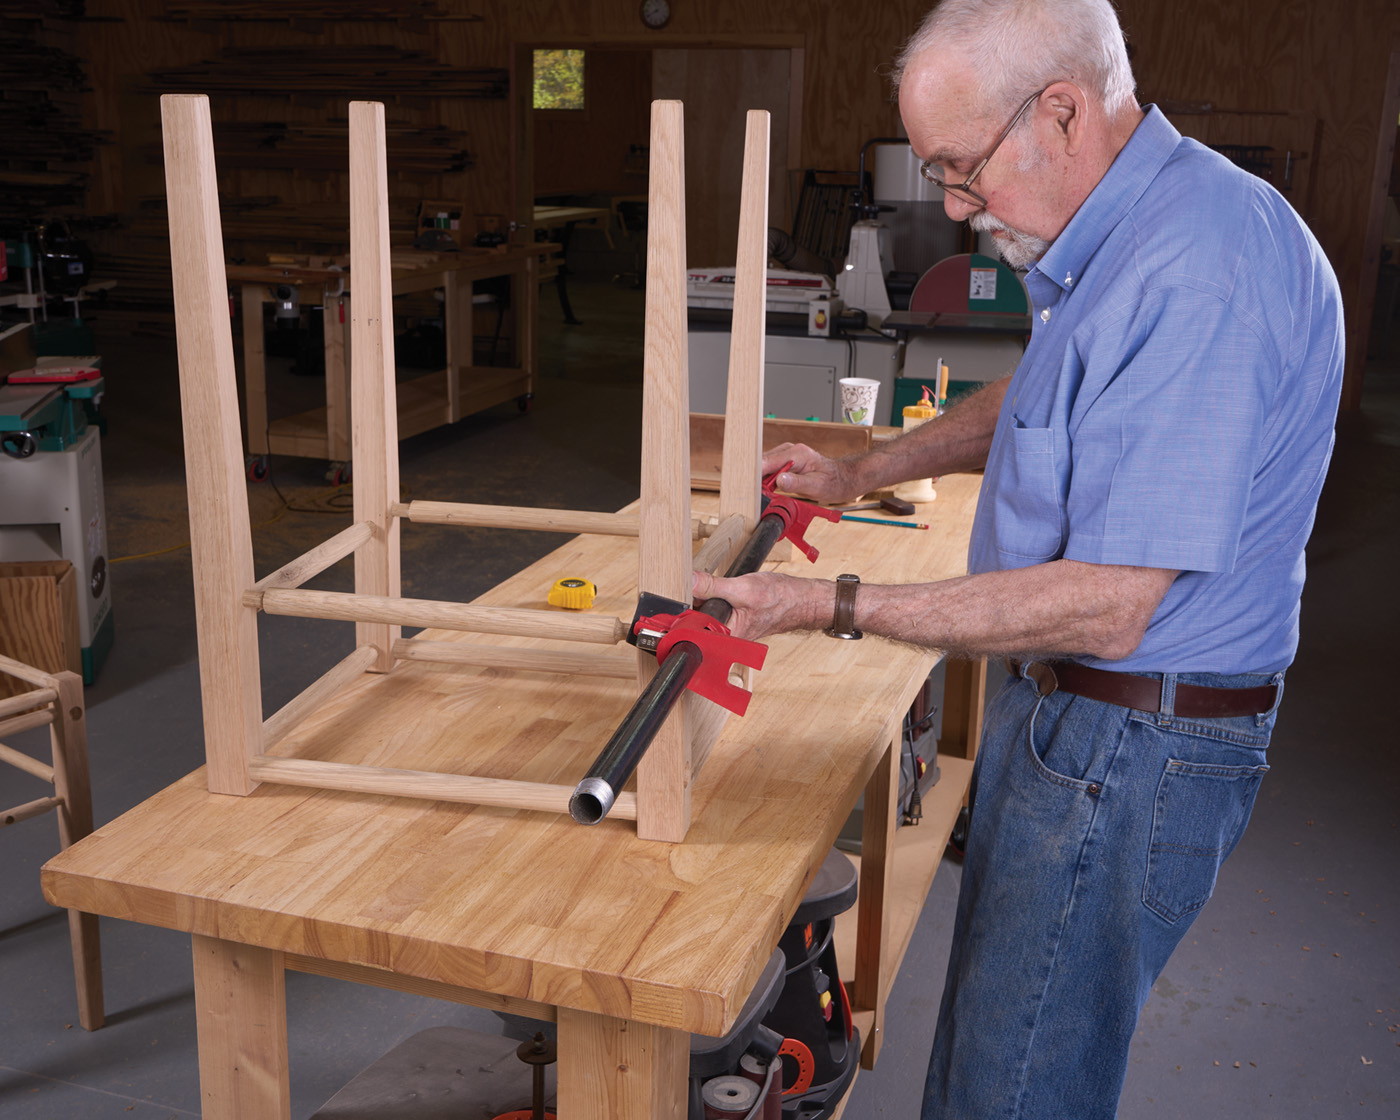
Now, you can start fitting the connecting stretchers. Once everything is assembled, apply clamps where you believe they are necessary. A few pipe clamps on critical joints is really all that is needed. Once the glue dries, you can apply finish. I applied a Danish oil finish to this one. After waiting overnight, the Shaker tape could be woven in place.
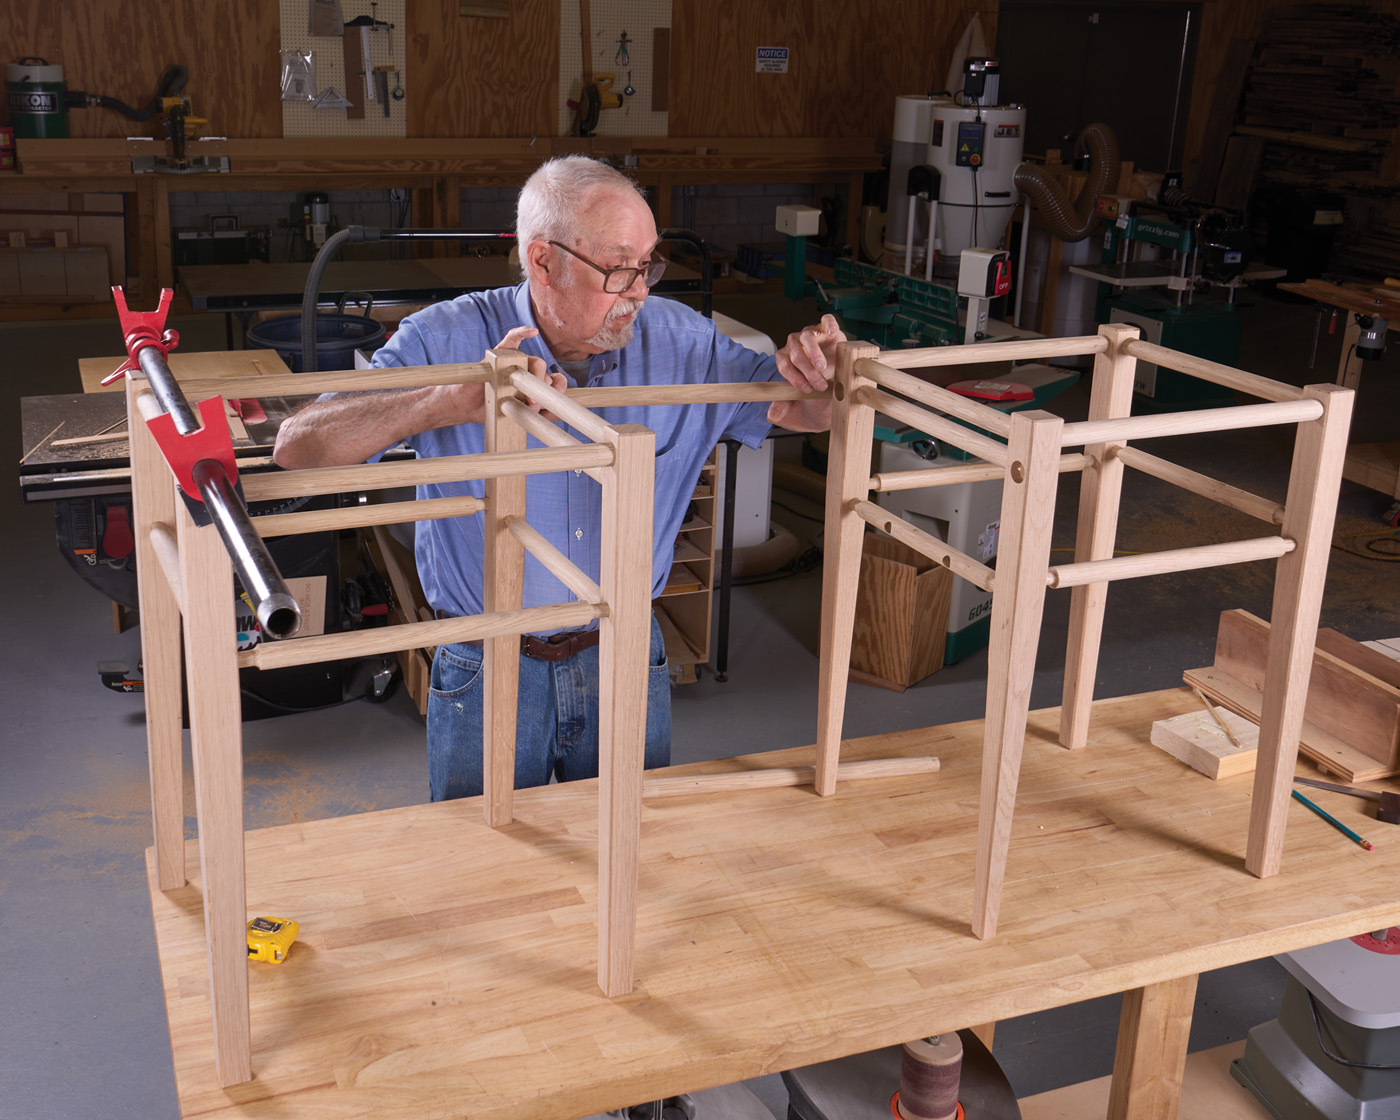
16 Set the end assemblies on a flat surface, and start to install the stretchers to connect them. Dry fit everything first.
17 Repeating the same process, apply glue into the mortises and insert the stretchers.
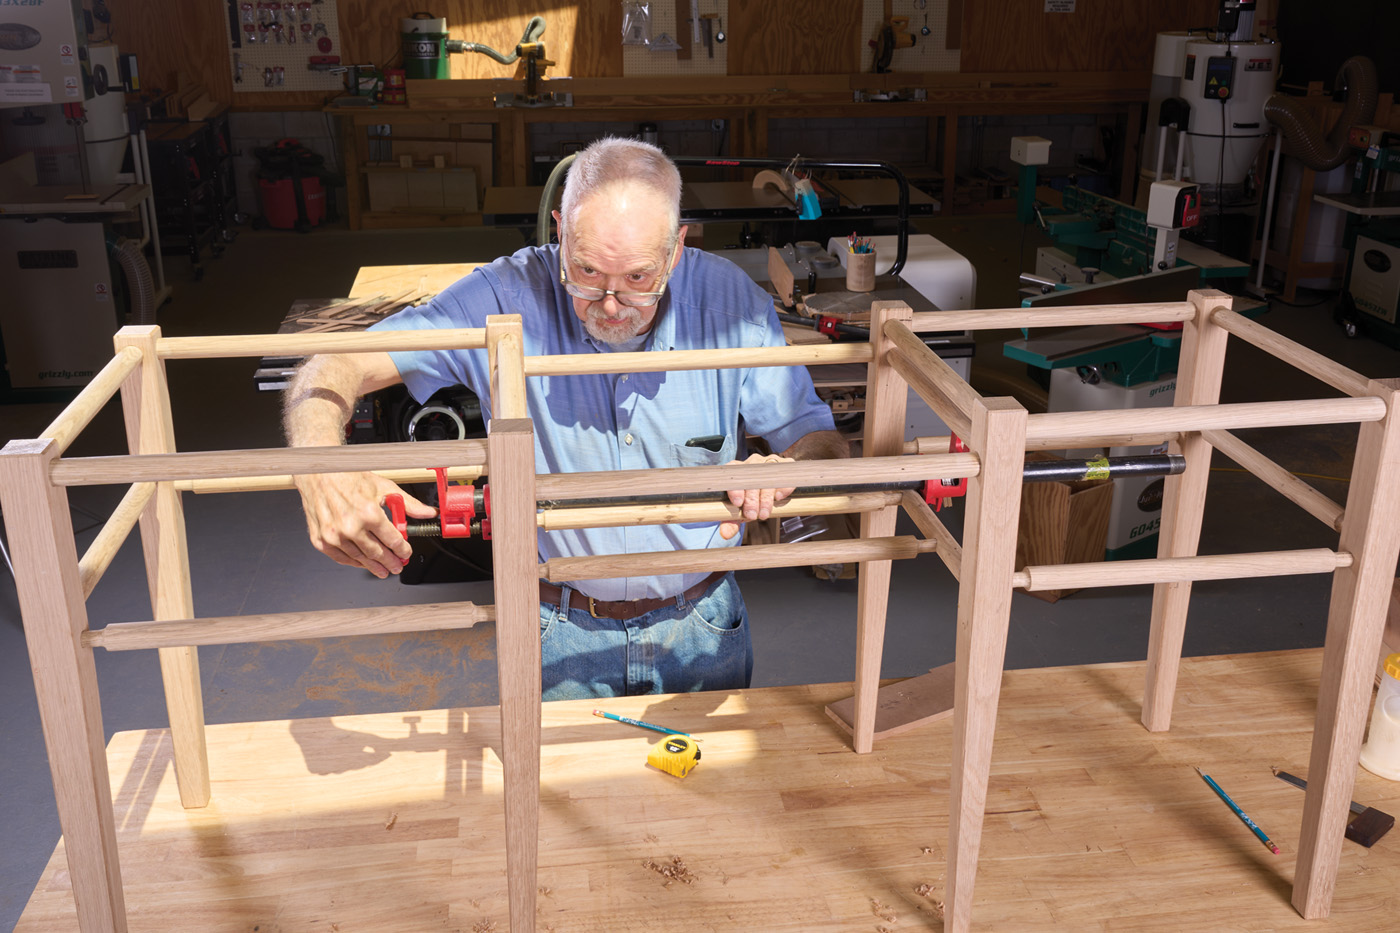
18 The biggest thing here is to make sure the ends aren’t twisted in relation to each other.
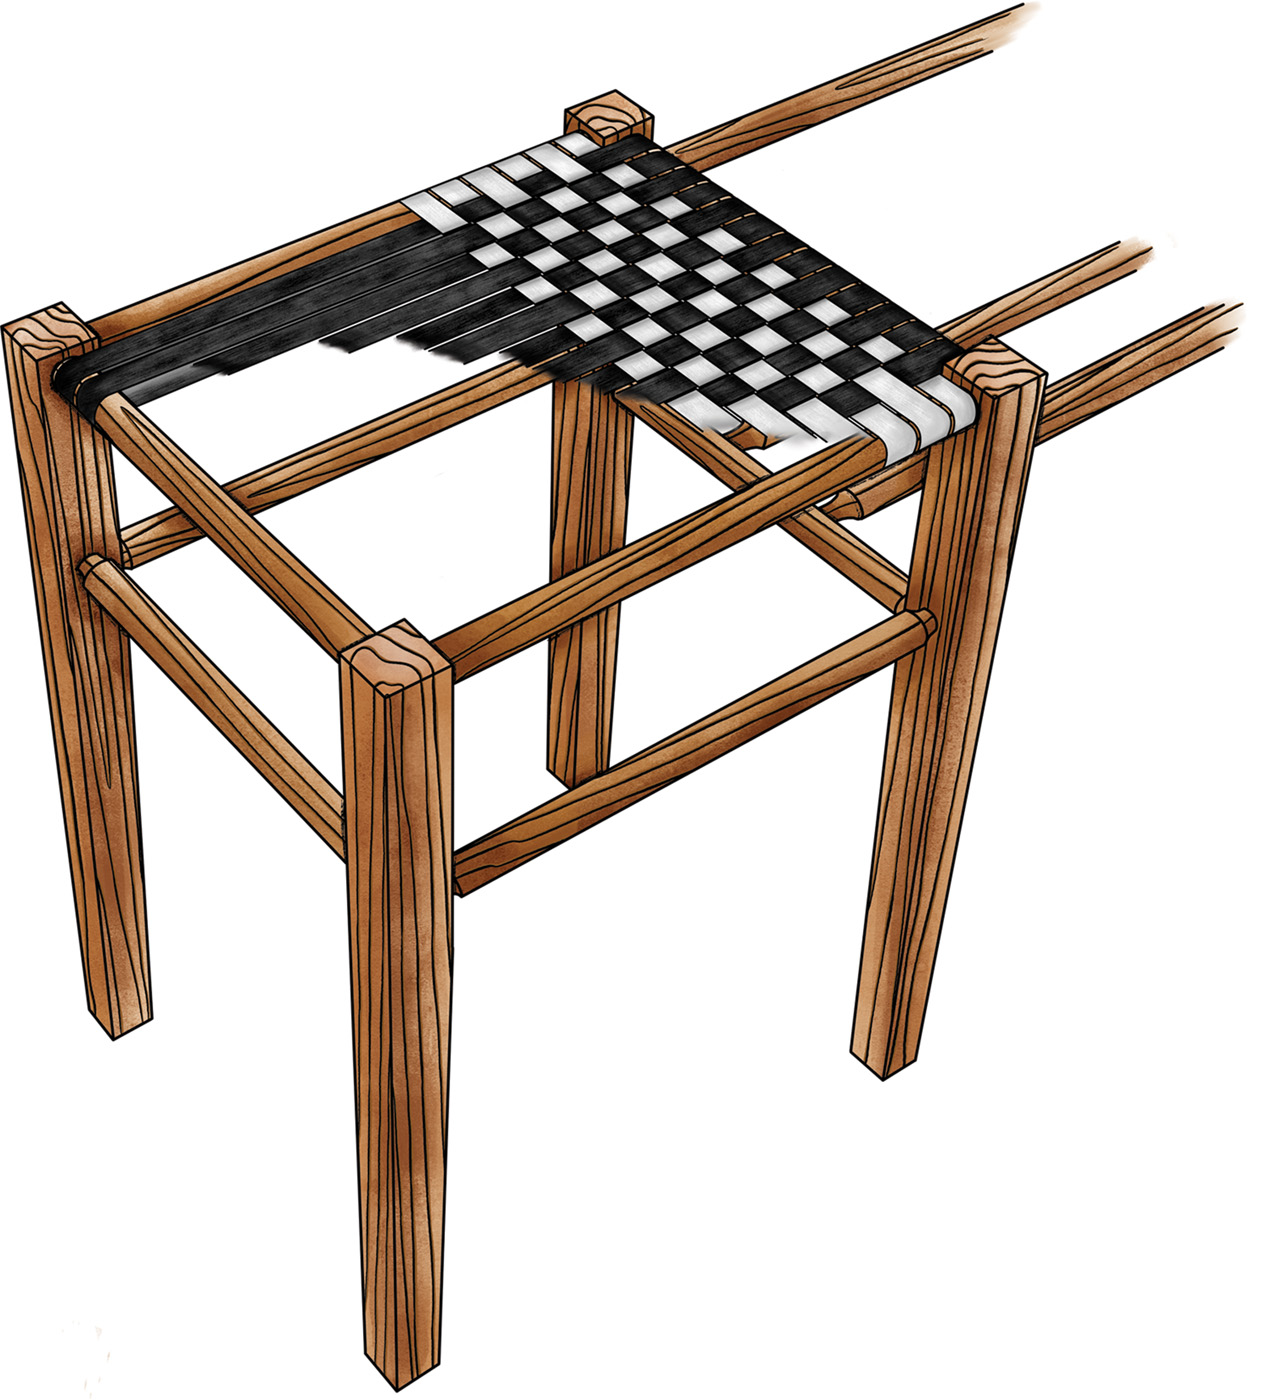
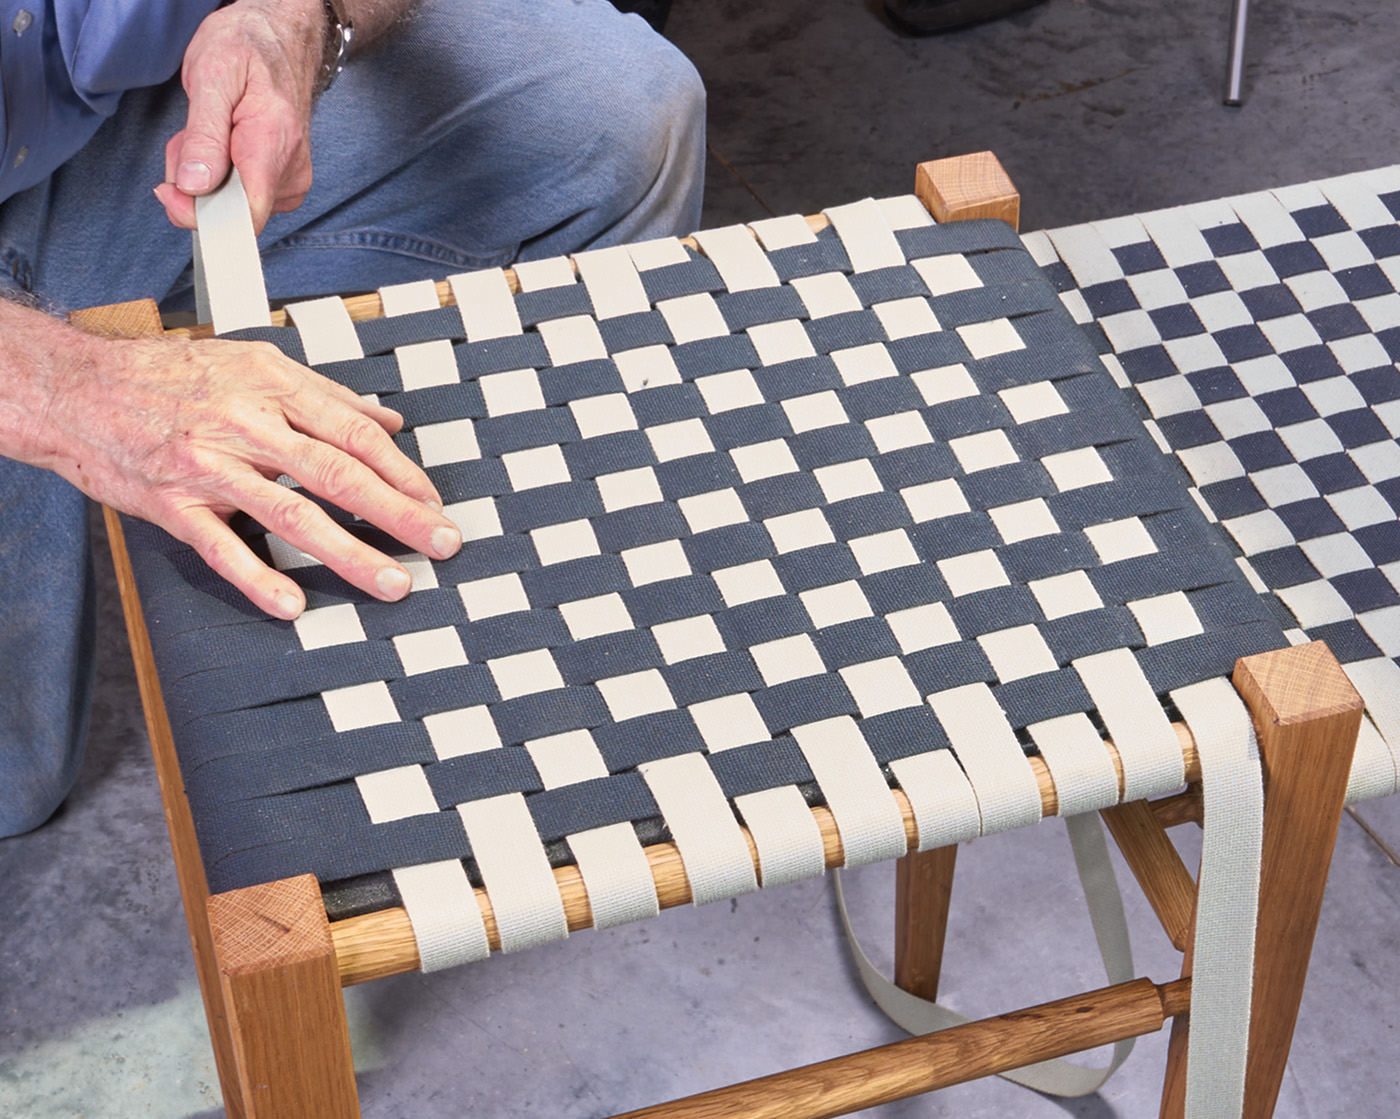
Weaving the Seat
Weaving seats is a rabbit hole. There are all types of materials and patterns. The one here is one of the most basics —cloth tape and a checkerboard pattern. I started with the black tape, wrapping it around the stretchers left to right. A pneumatic power narrow crown stapler is used to secure the ends. The tension necessary can be a guessing game — pull it too tight, the next color is hard to weave. Too loose and it looks sloppy.
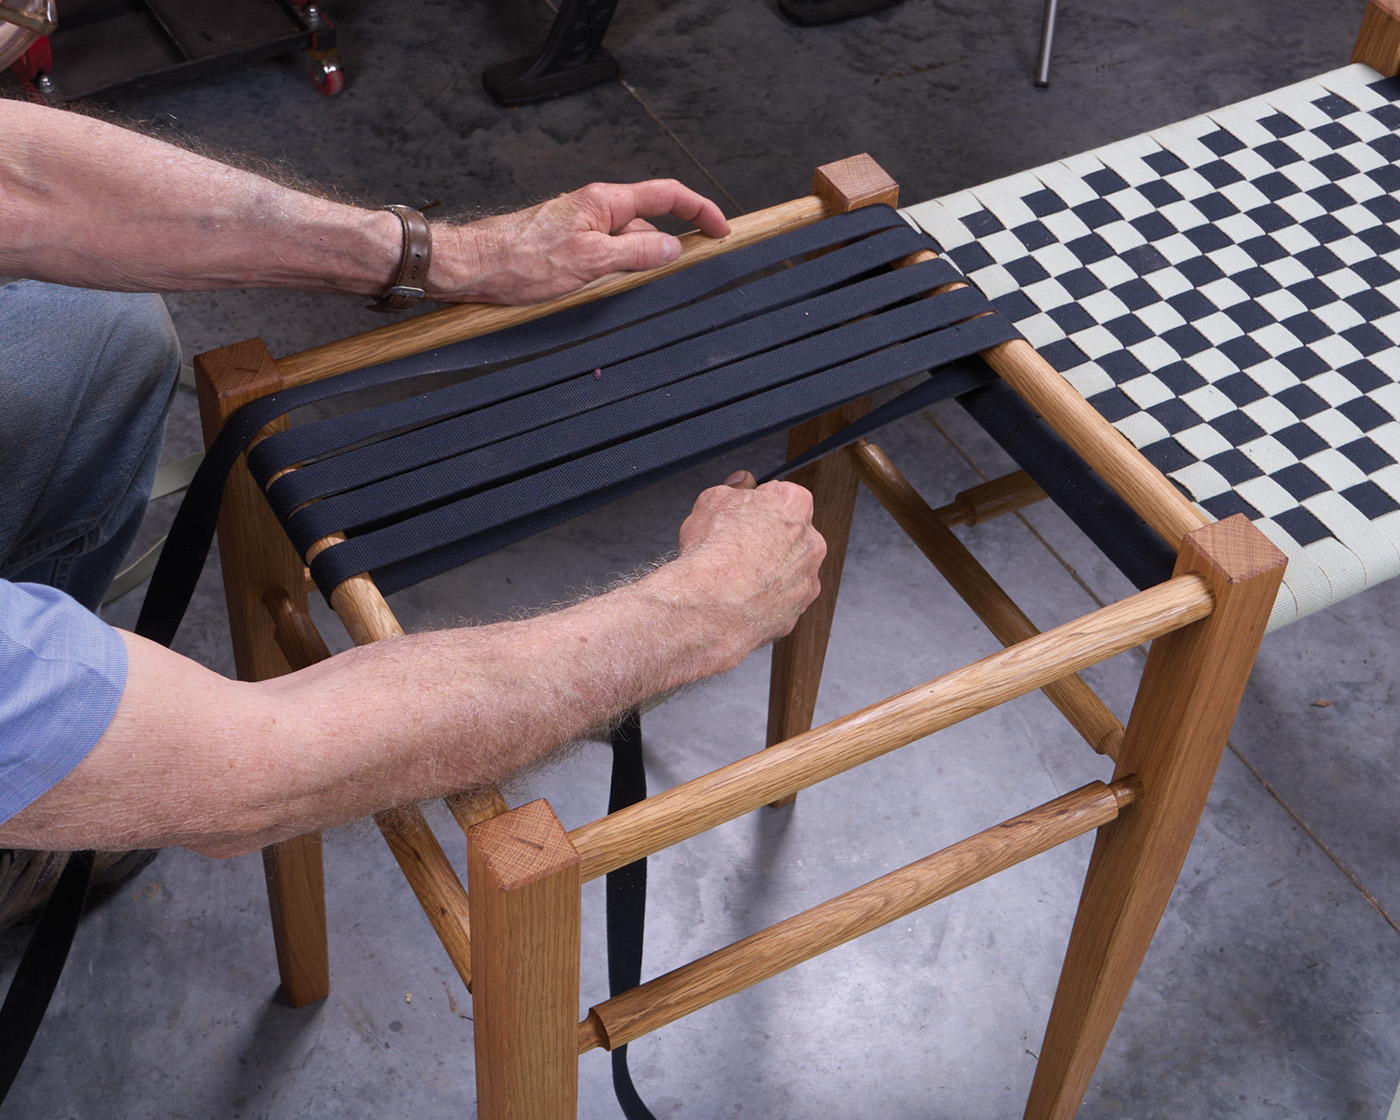
19 Start the shaker tape by wrapping your first color around the spindles.
20 Staple it in place when you reach the end.
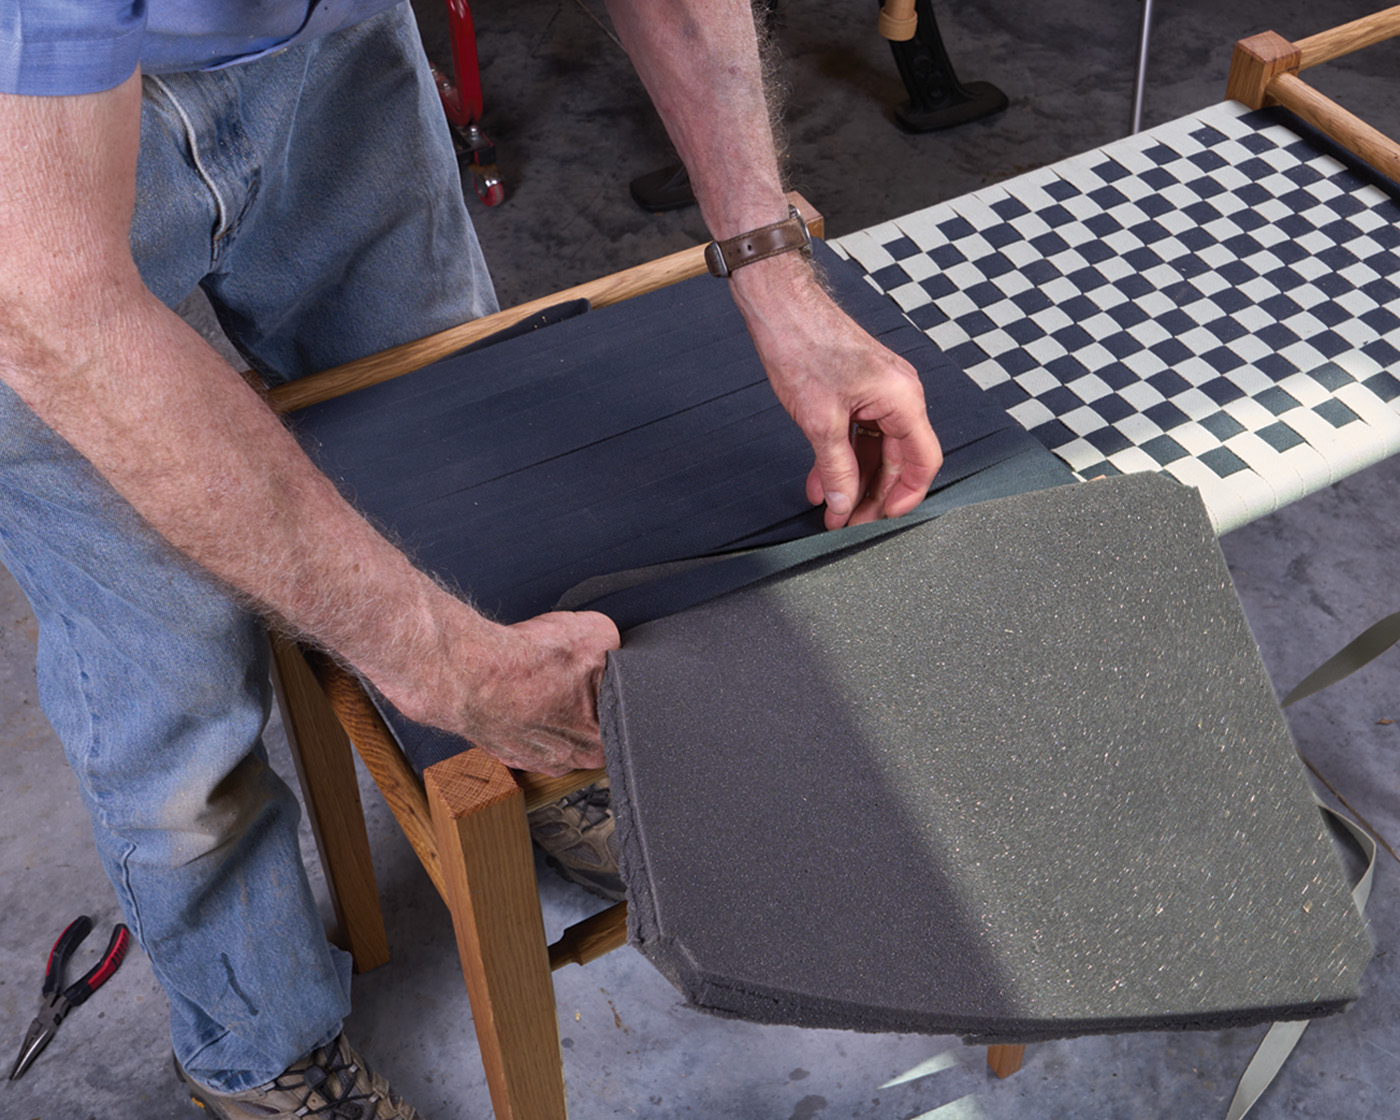
21 A thicker piece of foam can help soften the seat.
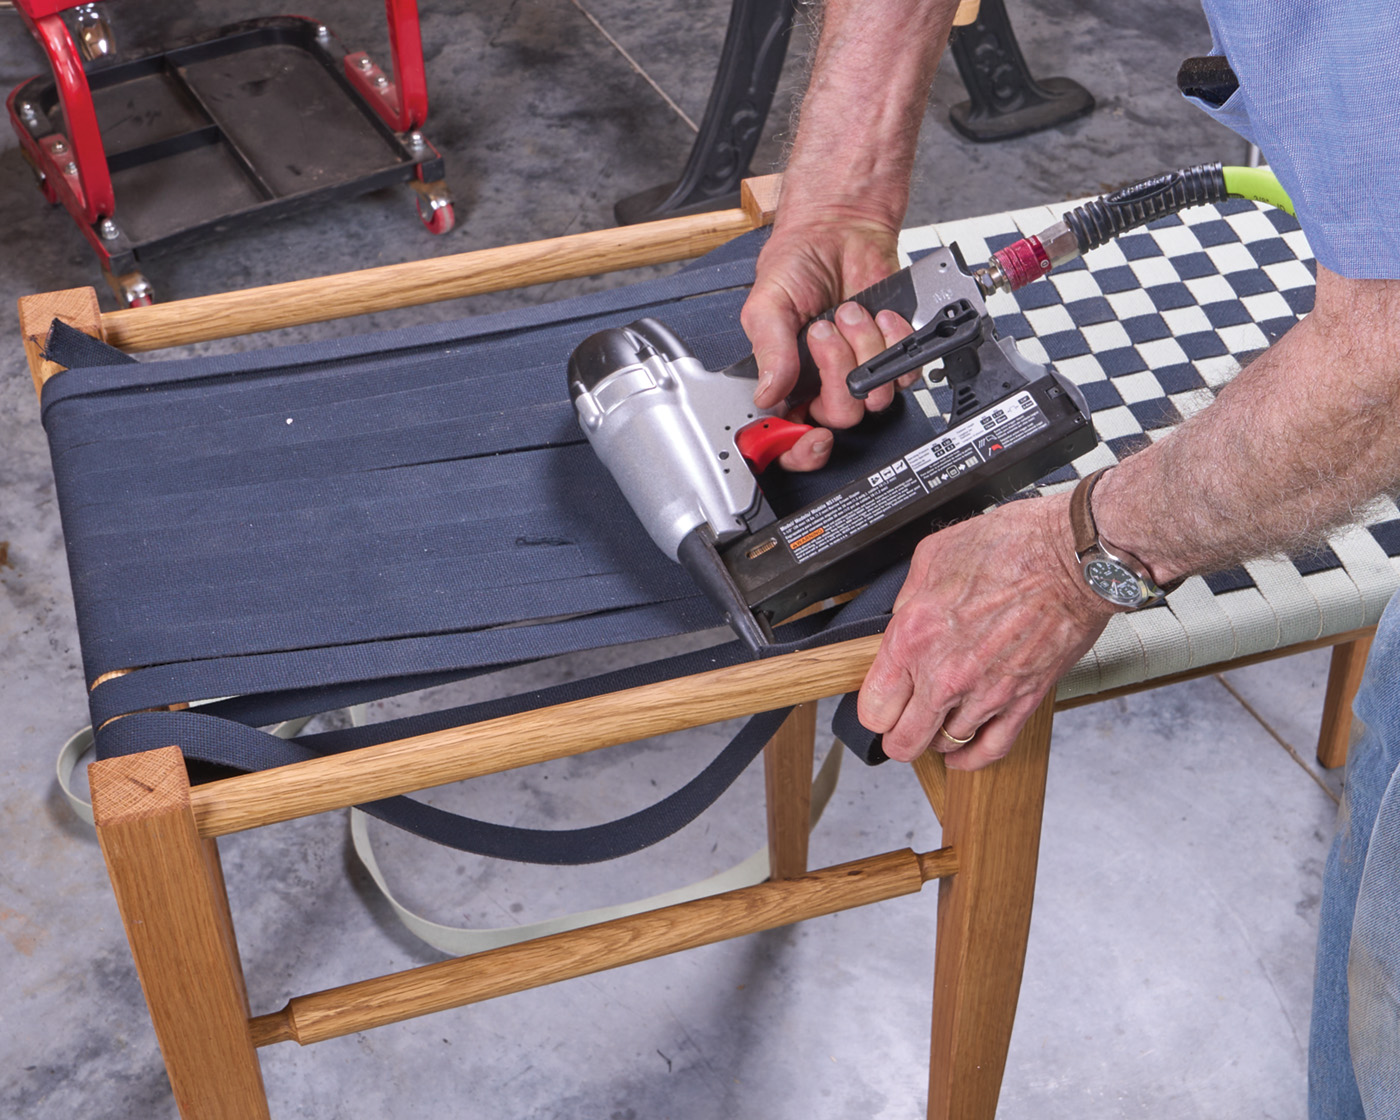
Before proceeding to add the contrasting color, I place a thick piece of black foam in between the shaker tape for added comfort. I then weaved the contrasting color throughout. This pattern is a simple over, under, over pattern. You can weave the bottom as well, if you’d like, or just leave it flat. As you get towards the end, scrunch all of the tape together for a tight look — you may be surprised that you can fit another row or two when you thought you were done. After that was complete, I used the narrow crown staple once again to secure the ends. Now, work on the next two seats before placing this bench on display in your house.
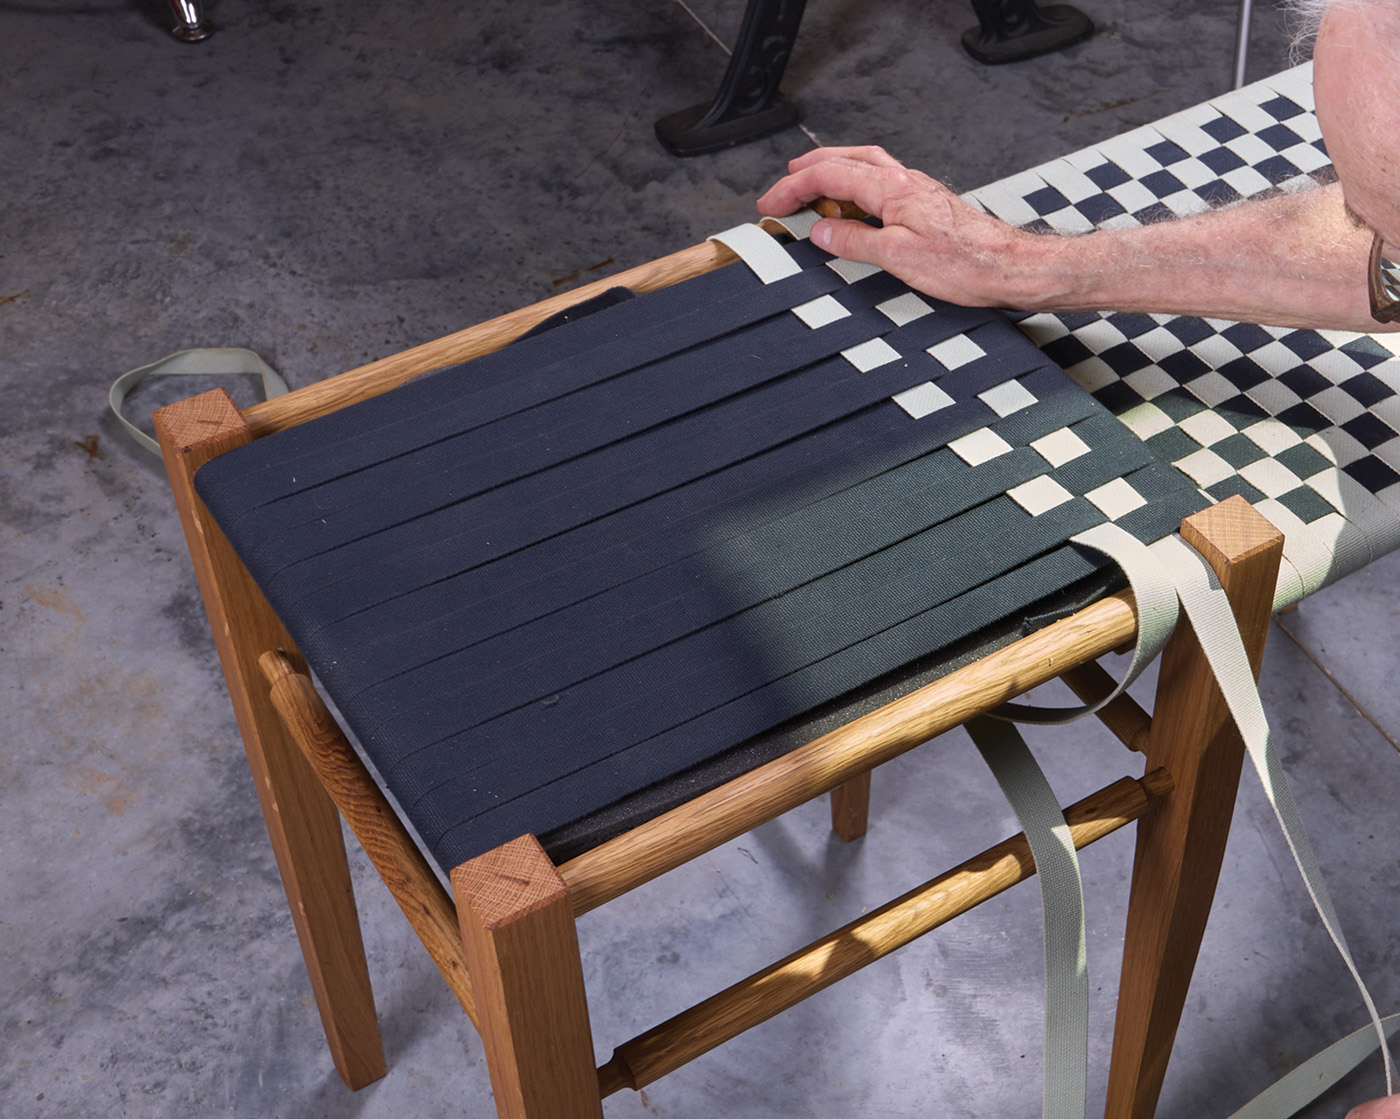
22 Start to work the contrasting color through the initial weave.
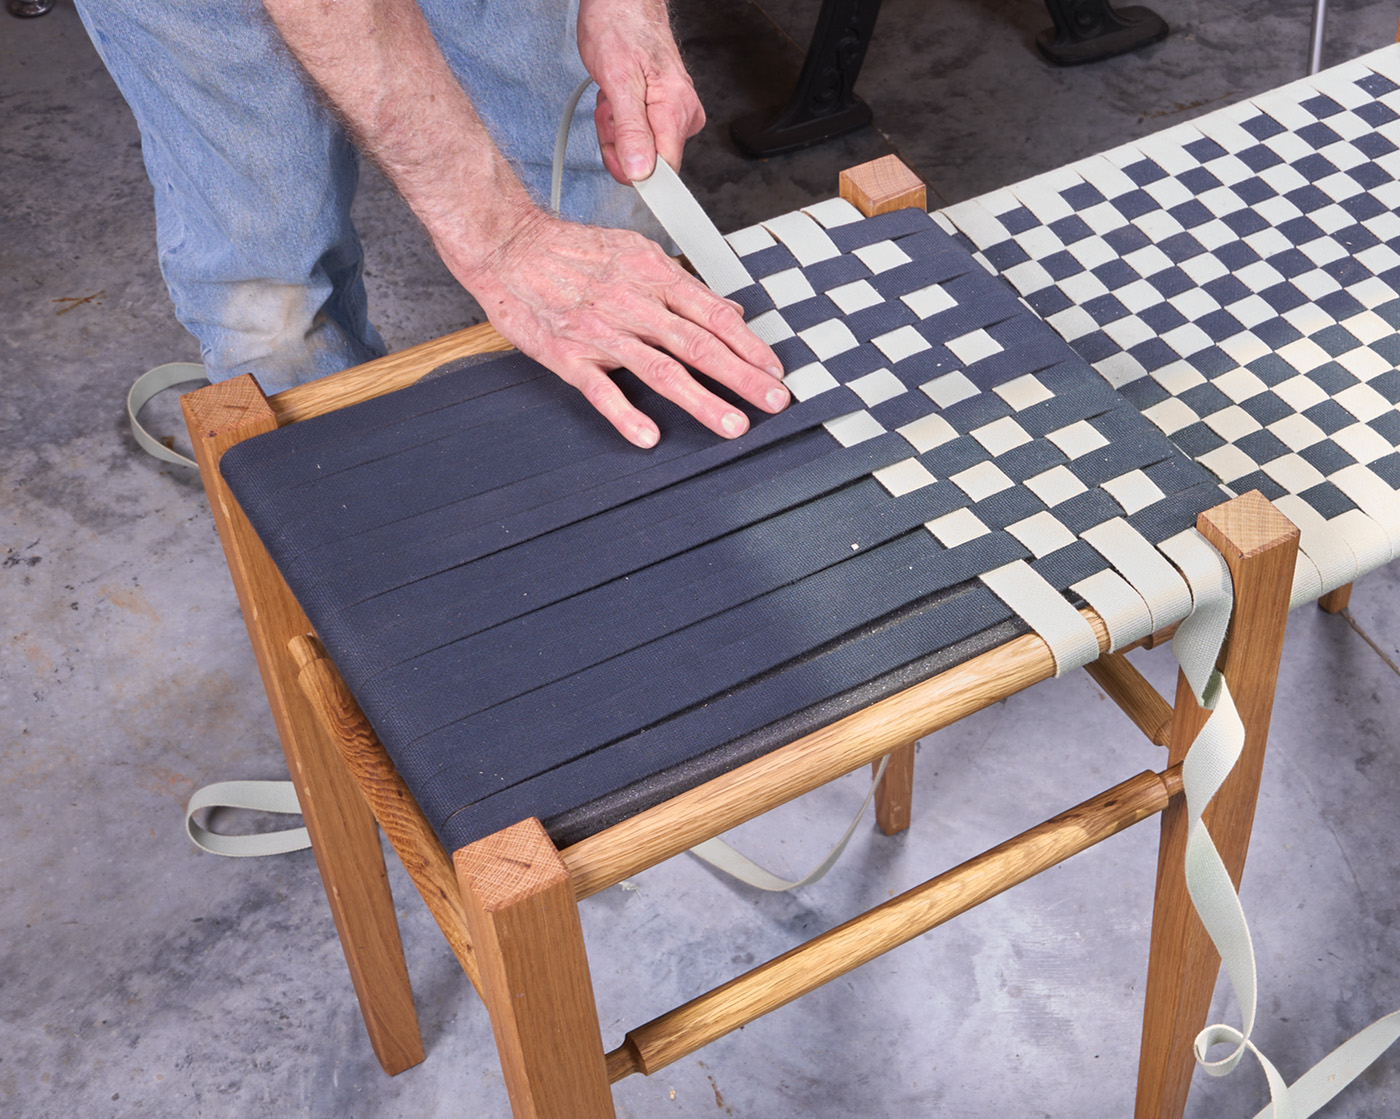
23 You’re looking to pull this as tight as you can during this step.
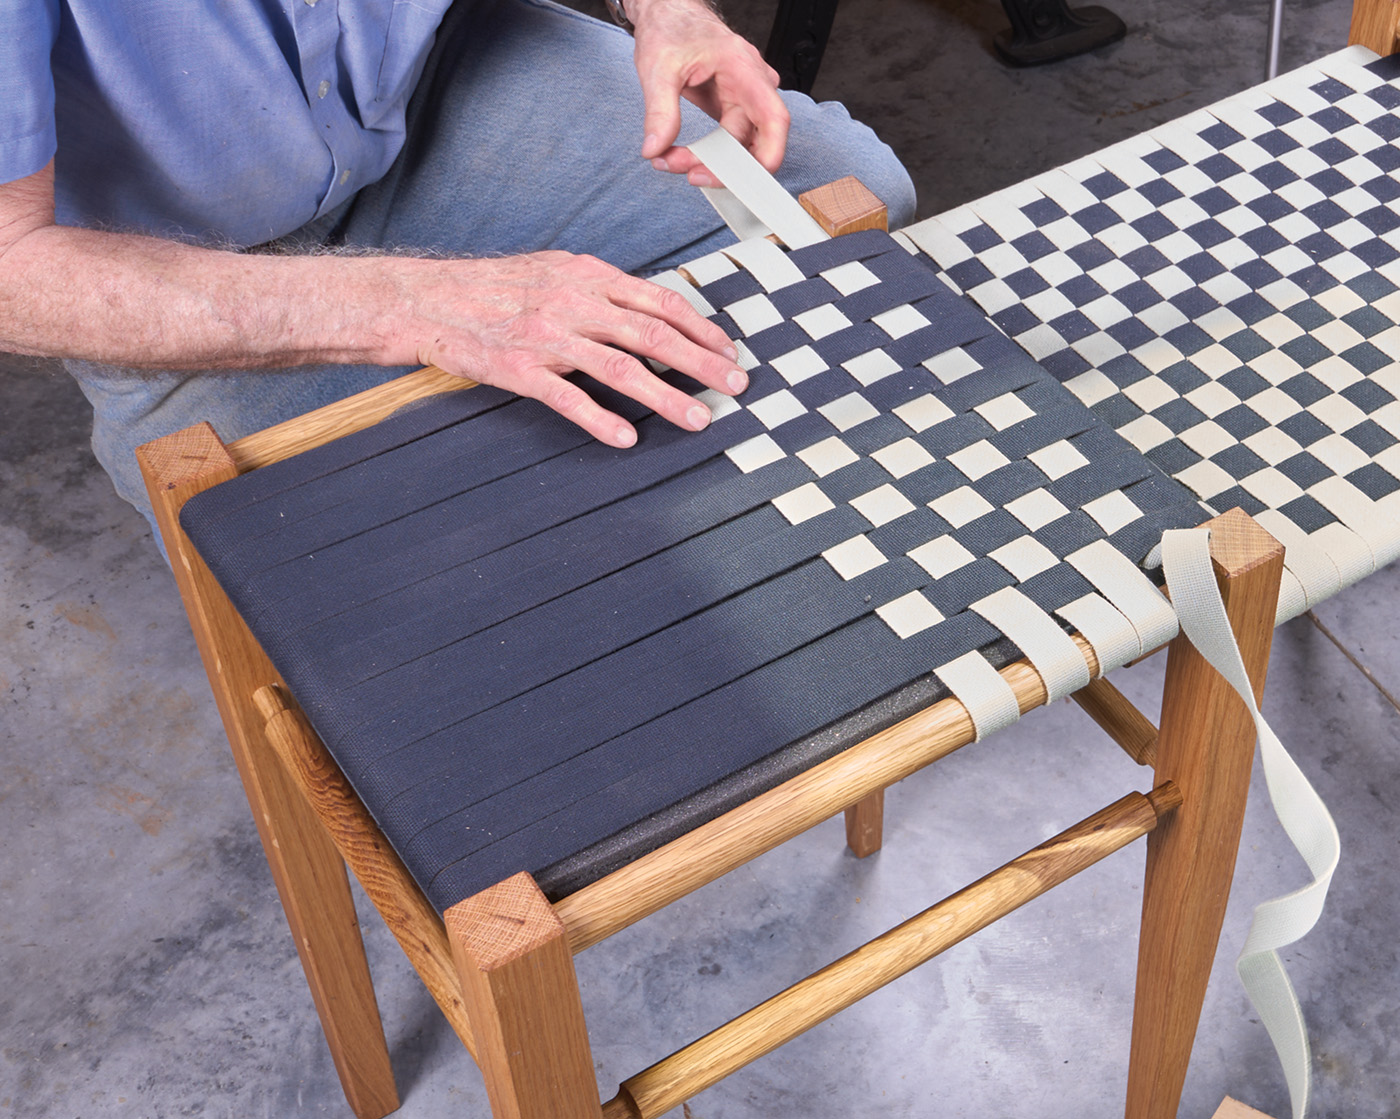
24 If you notice the initial weaves start to get tight and hard to fish the new weave through, a bent piece of coat hanger can help feed it through.
25 As you work across, slide the weaves closer together. This tightens up the weave and gives it a uniform look.
26 At the end, use a couple of narrow crown staples to complete the weaving.
Extra: Shaker Tape
Shaker tape, as the name suggests, has a history rooted in the Shaker religious community. They were known for their simple, practical, and durable designs that had a beautiful aesthetic appeal. A number of their chairs and stools had a woven seat and/or back using a homespun cloth or “tape” as it was durable, comfortable, and could be woven in various patterns. This tape was often made with linen or wool and naturally dyed using vegetables, fruits, or roots. It was later commercially machine-woven with wool or cotton.
 Calculating the Yardage Needed
Measure the front rail between the legs and depth of the project. Multiply together. If using 1“ tape, divide the resulting number by 9 and if using 5/8“ tape, divide by 5.3.
NOTE: We recommend always ordering Shaker tape in 5 yard increments, rounding up, so you don’t run short.


