We may receive a commission when you use our affiliate links. However, this does not impact our recommendations.
 Rout raised panel look-alikes in minutes.
 Rout raised panel look-alikes in minutes.
 Raised panel doors made with traditional stile and rail joinery are my first choice for cabinets. But I don’t always use them. For example, cabinets for the shop or laundry room usually don’t require fine woodworking. But that doesn’t mean they can’t have good-looking doors, especially if the doors can be made in minutes, instead of hours.
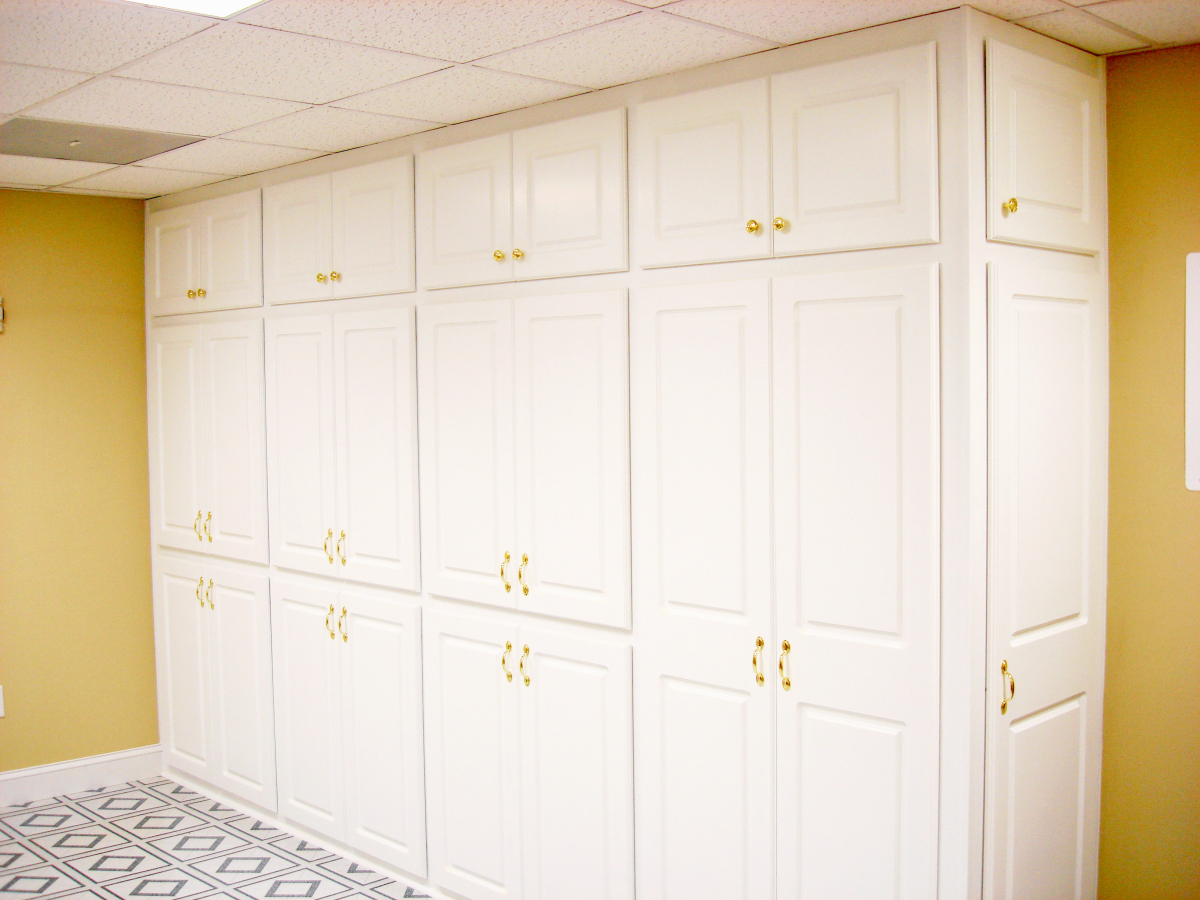
1. Because this door-making process requires no joinery, it saves an enormous amount of time on projects featuring wall-to-wall doors.
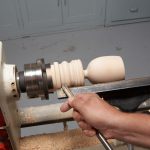
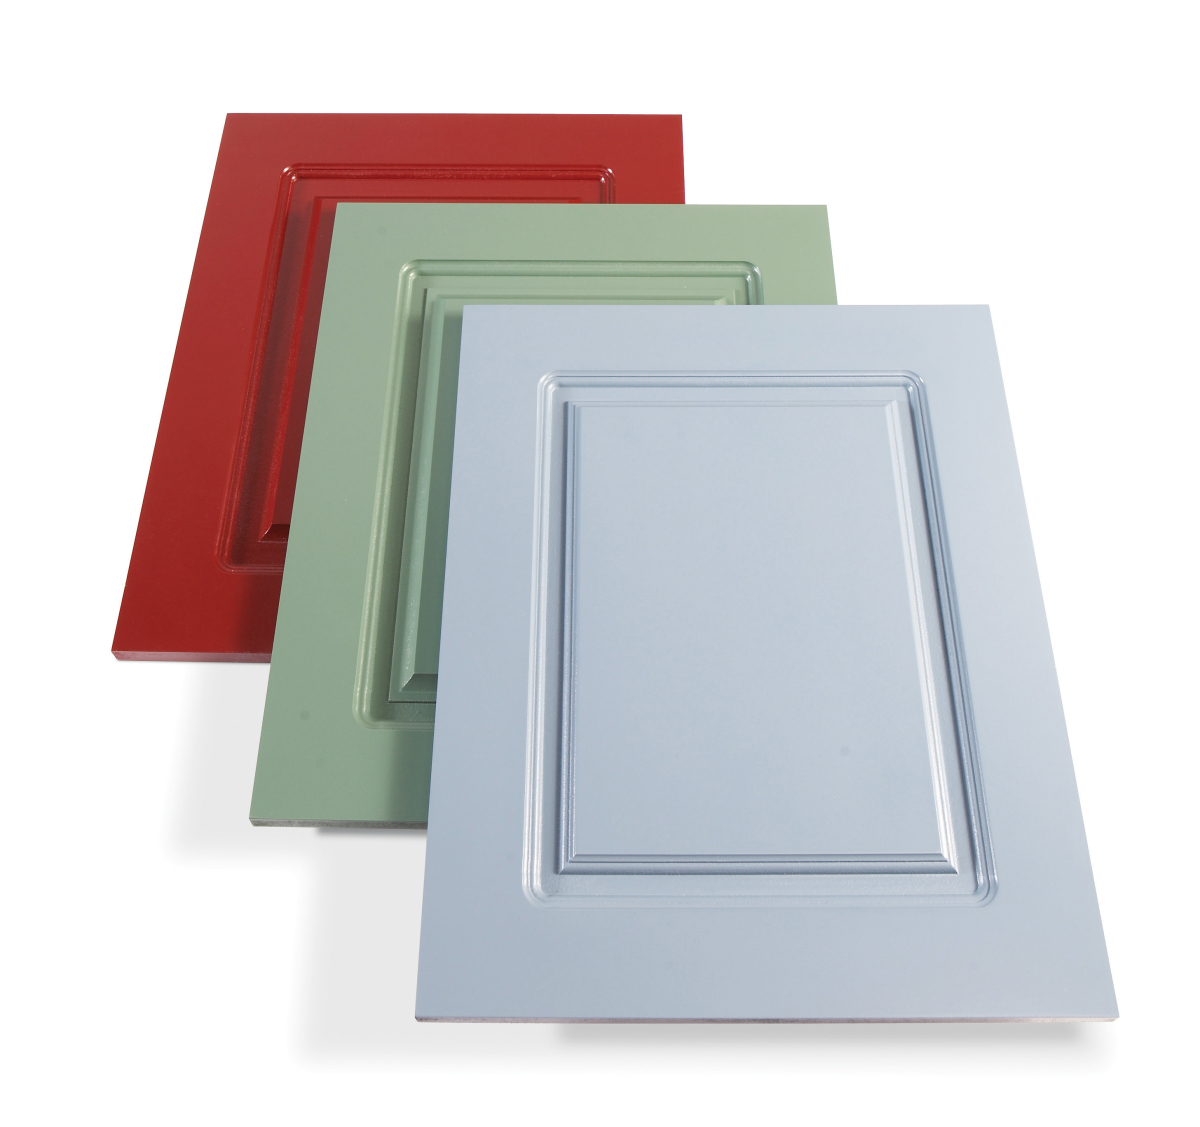
Here’s how to turn a piece of MDF into a door that mimics its traditional counterpart without going through all the traditional time-consuming steps. Making doors in multiples is a breeze with this method (Photo 1). The only caveat is that these doors must be painted—unless, of course, you’re a fool for the look of “natural” MDF.

2. (Left: Ogee profile, Right: classical profile). To make these doors, you need a plunge-grooving bit with a stile and rail-type profile and a guide bearing mounted on the shank, above the cutters. A 1-1/4″ dia. or 1-3/8″ dia. bit works best for typical cabinet doors.
The basic process requires a specialty router bit (Photo 2 and Sources), a shopmade template, and a plunge router equipped with an edge guide.
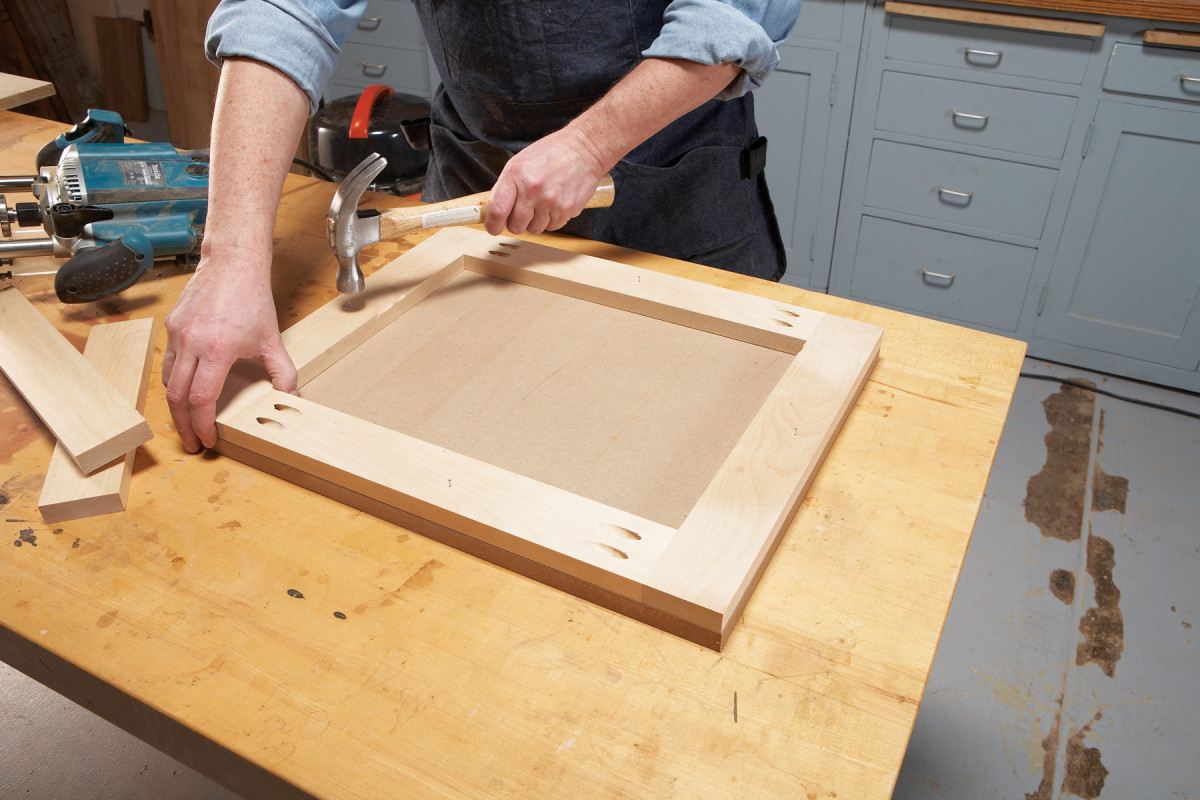
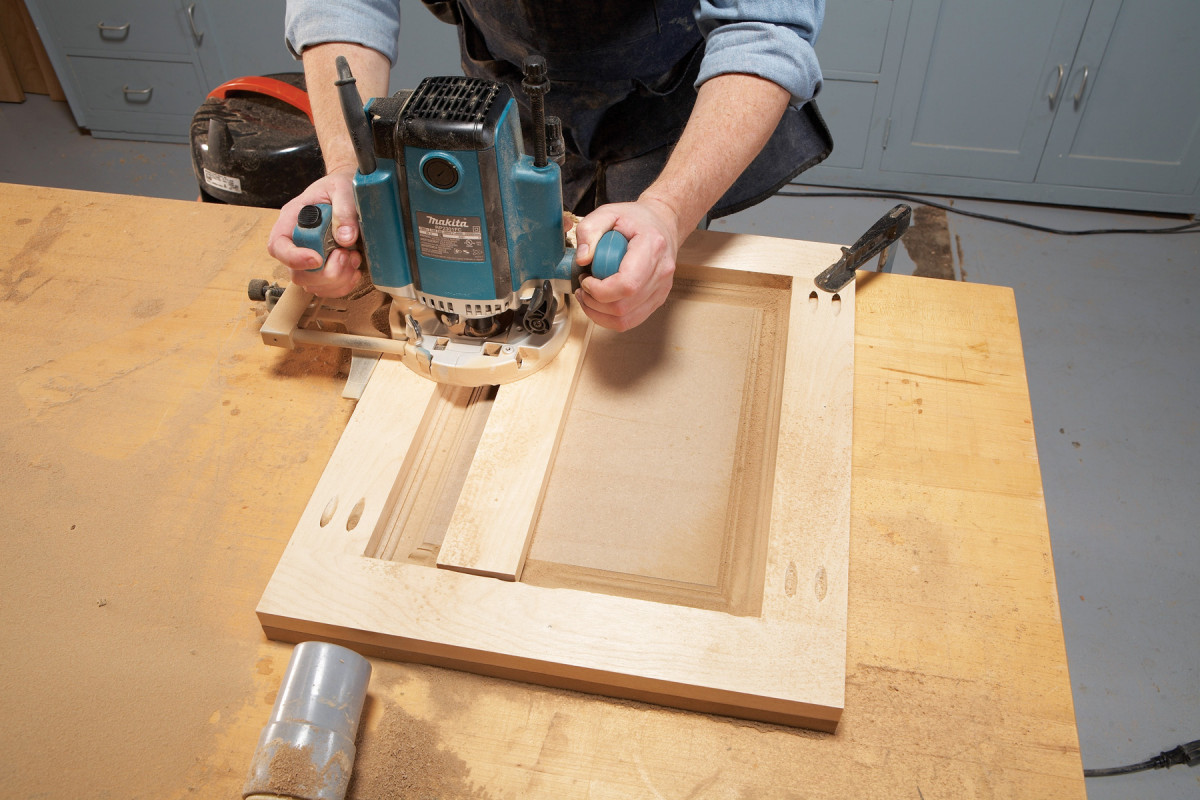
3. Attach a routing template to the door blank with finish nails. The outside dimensions of both pieces must be identical. Make sure the faces of the template’s joints are flush, so the router won’t catch. Cut additional pieces of template stock to support the router.
Start by cutting a piece of MDF to the finished size of the door. Then make a template that has the same outside dimensions. Use solid wood for the template’s stiles and rails and assemble it with pocket screws. The stiles and rails must all be the same width and the joints must all be flush. Attach the template to the door blank with 1″ finish nails (Photo 3). I pre-drill shank holes for the nails in the template.
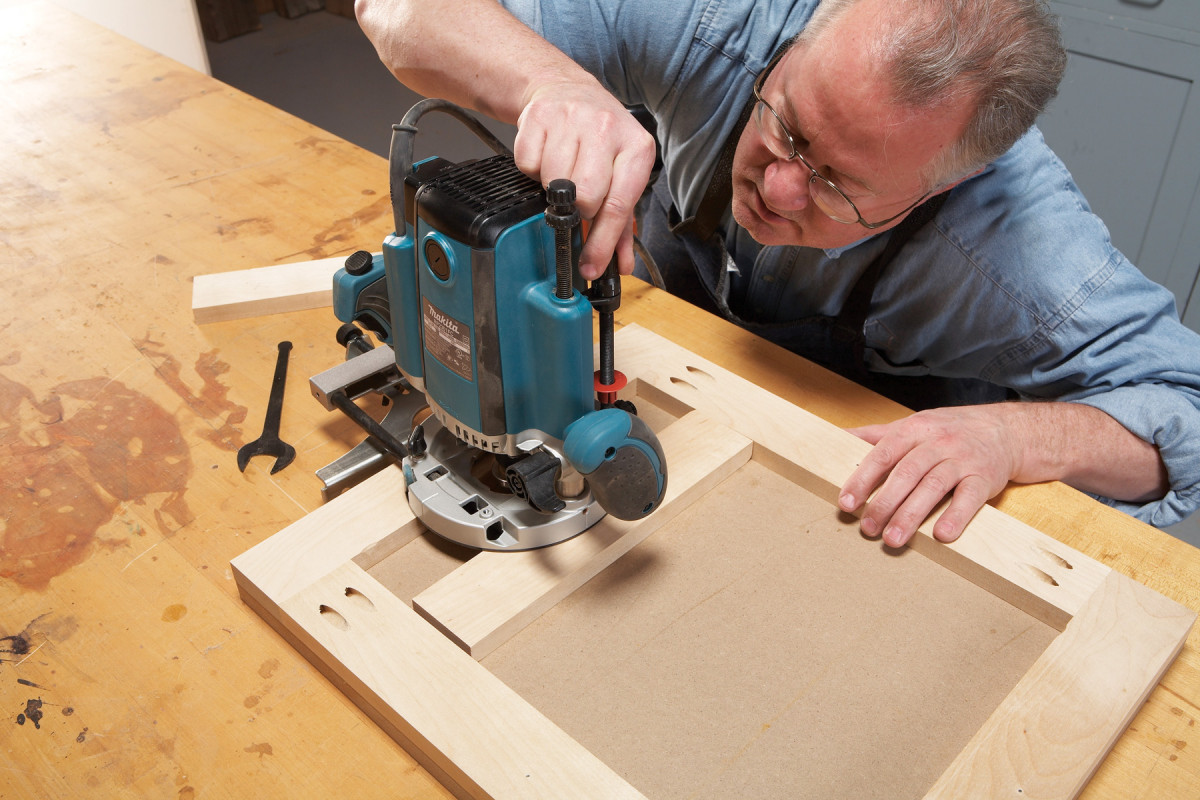
4. Set the router’s plunge depth. Place the router on the template and a support piece, so you can zero the plunge-grooving bit on the surface of the blank. Then set the plunge depth to 3/8″.
If you’re making multiple doors of different sizes, you’ll need one template for each size. My strategy is to make the largest doors first. When these doors are finished, I disassemble the template, cut the stiles and rails down to fit the next size door, and reassemble the new, smaller template.
Install the plunge-grooving bit in your router and set the plunge depth (Photo 4). Attach the router’s edge guide and adjust it (Photo 5). Leave a little play in the setup.
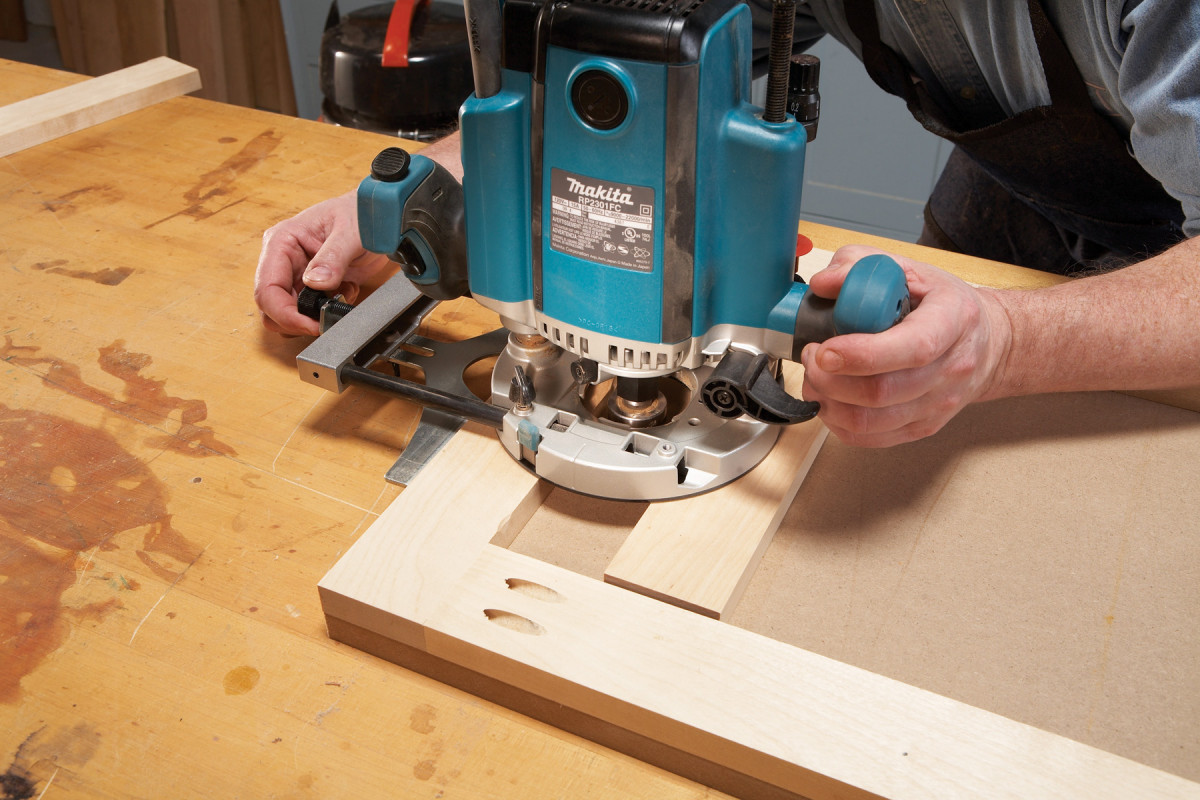
5. Set the router’s edge guide. Leave a little gap (less than 1/16″) between the bit’s bearing and the template’s inside edge. The gap keeps the bit from cutting into the template when you plunge in to start the cut.
Rout each profile in two passes (Photo 6). Make the first pass while pressing the edge guide against the template’s outside edge. Make the second pass with the bit’s bearing pressed against the template’s inside edge. This method creates a slightly wider groove, but it guarantees that both sides of the groove will be straight.
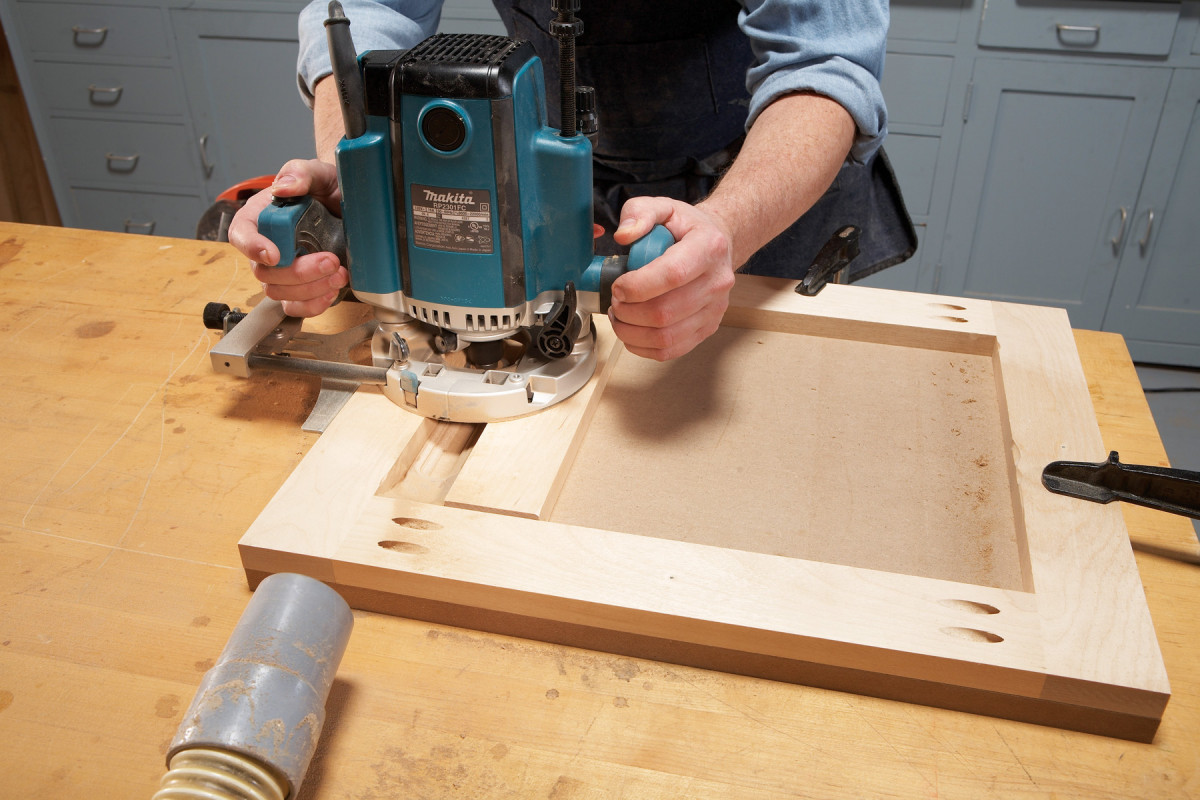
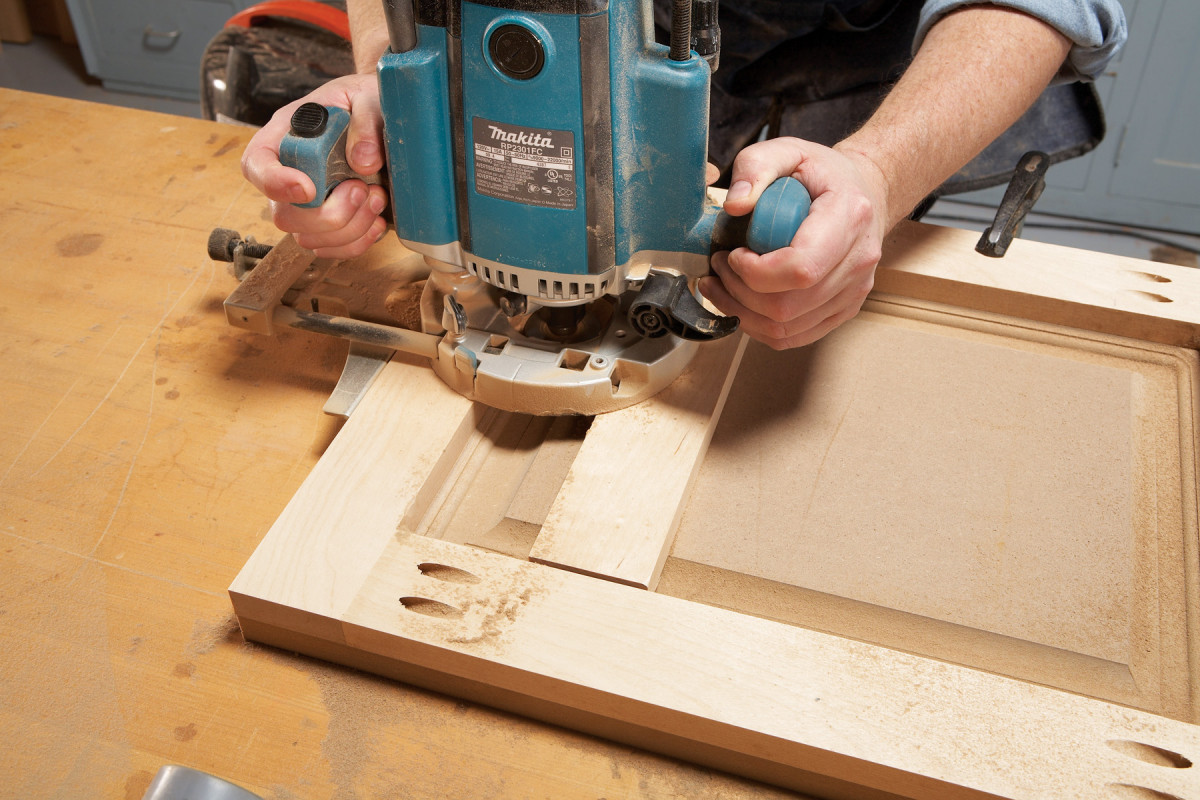
6. Rout the first profile. With the edge guide pressed against the template, plunge the bit and rout to the end. Keep the bit plunged to complete the profile. Move the router sideways, so the bit’s bearing rides against the template, and make another pass.
Routing MDF produces such copious clouds of dust that no single method of dust collection is effective. When you pull the router toward you, the dust will be directed away from you. But when you push the router away, the dust will be directed toward you. So be sure to wear eye protection and a respirator mask. Turn on your air purifier and keep a broom handy. The most effective system I’ve found is to attach the dust collection hose directly behind the router, and to remove the bulk of the material while pulling the router forward. I also make several shallow passes to complete each groove, instead of hogging out all the material at once.
7. Rotate the workpiece and reposition the support piece to rout the other three profiles. If the door is rectangular, you’ll need a second, longer support piece.
After routing the first groove, rotate the door/template assembly counterclockwise and position the support piece, so you can rout the adjacent groove. Repeat this process until all four grooves have been routed (Photo 7). Remove the template and make sure the edges and bottom of the grooves are consistent all around. If something requires a re-do, reinstall the template, using the nail holes in the door, and go again.
If you make a mistake, you don’t have to throw the door away. Instead, fill the damaged area with wood putty, let it dry, and sand it smooth. Reinstall the template and rout that section of the groove again. After the door has been painted, you’ll never see the mistake.
Sand the door after filling the nail holes with putty. Use a sanding sponge to remove any fuzz from the routed areas and a sanding block or a power sander to touch up the flat surfaces. The door is now ready for priming and painting.
8. You can rout a unique profile for the panel by using a panel profile bit (below). After routing with the stile and rail bit, install the panel bit, reset the edge guide to accommodate its larger bearing, and make a second pass around the door.
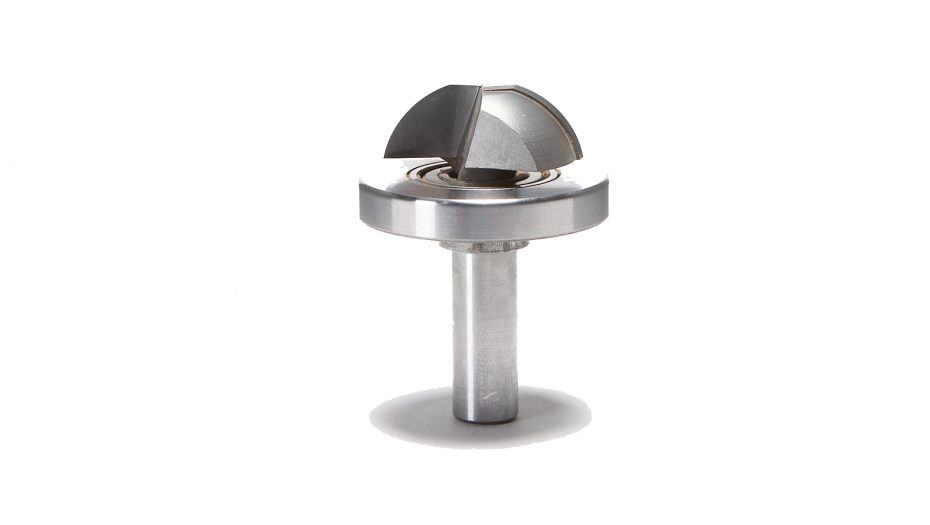
You can go several steps further, to make your faux panel doors look more authentic. Square the rounded corners. This step requires chisels and gouges. Rout a decorative edge around the door’s outside perimeter, using a profile bit. Or use a different bit-and-bearing combo to create a unique profile for the panel (Photo 8 and Sources). The routing process is identical. Just make a second pass around the template. An oversize bearing keeps this bit from cutting into the door’s stile profile.
Sources
Whiteside 1-3/8″ MDF “Stile” Profile Bit, Classical Flat Bottom, #3780
1-3/8″ Bearing (required for #3780 bit), #B17
Whiteside 1-1/4″ MDF “Stile” Profile Bit, Traditional Pattern #5620 (other patterns available)
1-1/4″ Bearing (required for #5620 bit), #B16
Whiteside 1-1/2″ MDF “Panel” Profile Bit, Cove Pattern, #5710 (other patterns available)
1-7/8″ Bearing (required for #5710 bit), # B24
Bearing Lock Collar for 1/2″ Shank (required for all Whiteside MDF profile bits)
Here are some supplies and tools we find essential in our everyday work around the shop. We may receive a commission from sales referred by our links; however, we have carefully selected these products for their usefulness and quality.