


We may receive a commission when you use our affiliate links. However, this does not impact our recommendations.

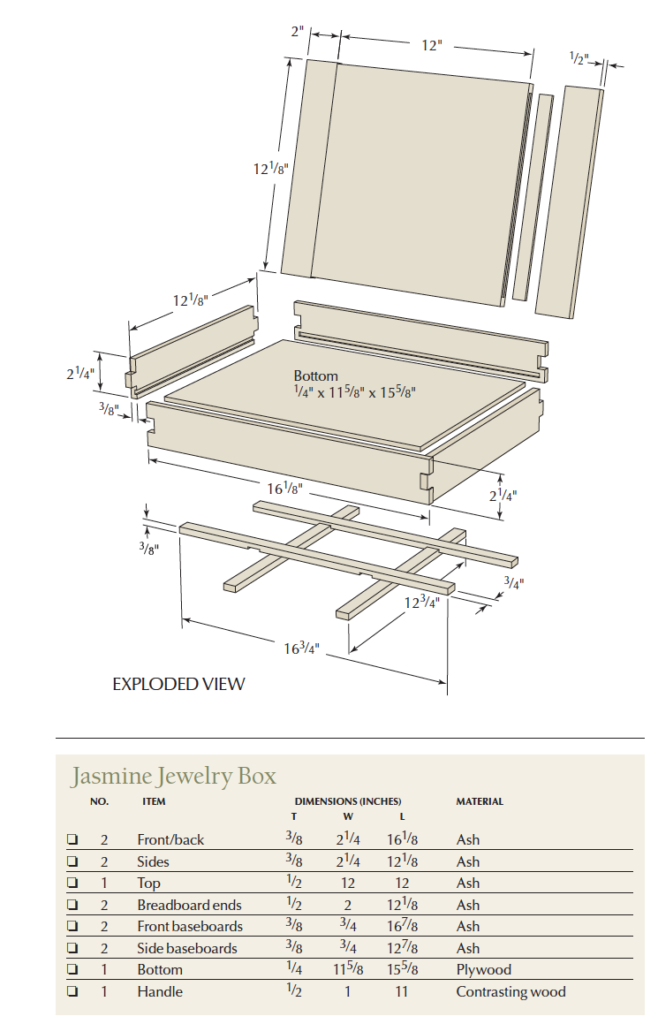
Ashtastic. This ash, finger-jointed jewelry box is simple to build with just a few tools: A band saw, chisel, handplane and router are all that’s required.
Simple tools, techniques, and joinery deliver elegant results.
It’s the stuff of arguments: Which tools in the shop are really the most important for joinery? It’s almost like arguing the top movie or the best shortstop of all time. There is no one answer that satisfies everyone (although “The Maltese Falcon” and “Ernie Banks” should). Were you to ask me, my answers would be quick but not absolute. Give me three tools: a band saw, a chisel and a router, and I can build just about anything. This jewelry box project shows how versatile these tools are.
Choose your joinery on three factors: function, economy and skill. What will the piece do? This poses the question: How strong does it need to be? There are 10 ways of building this box and all of them are good. But which one of these methods is strong enough and adds something to the design?
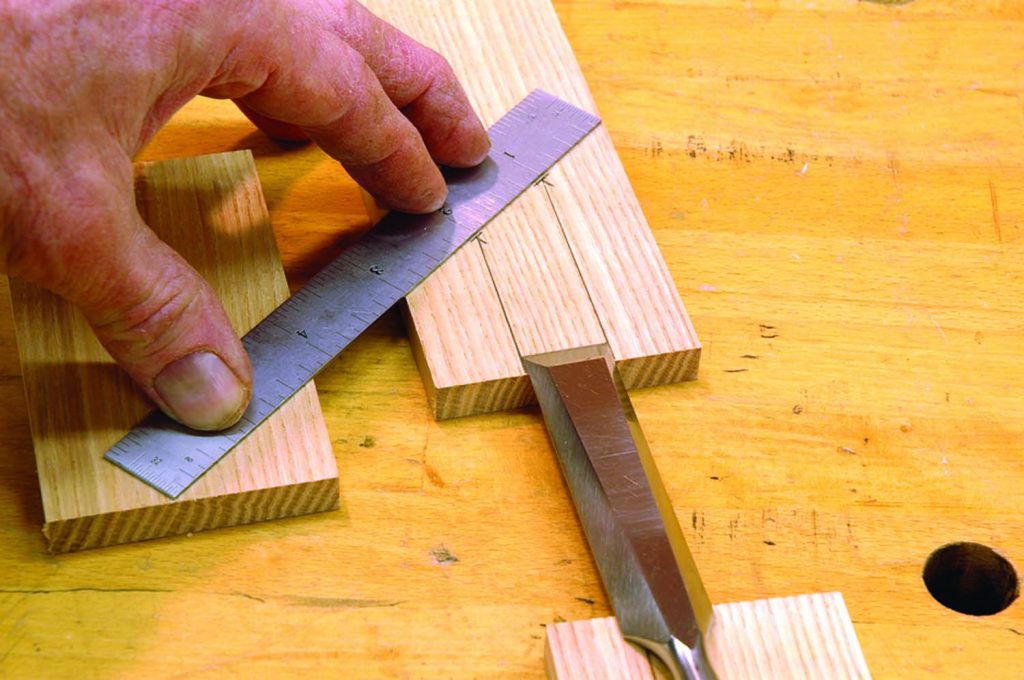
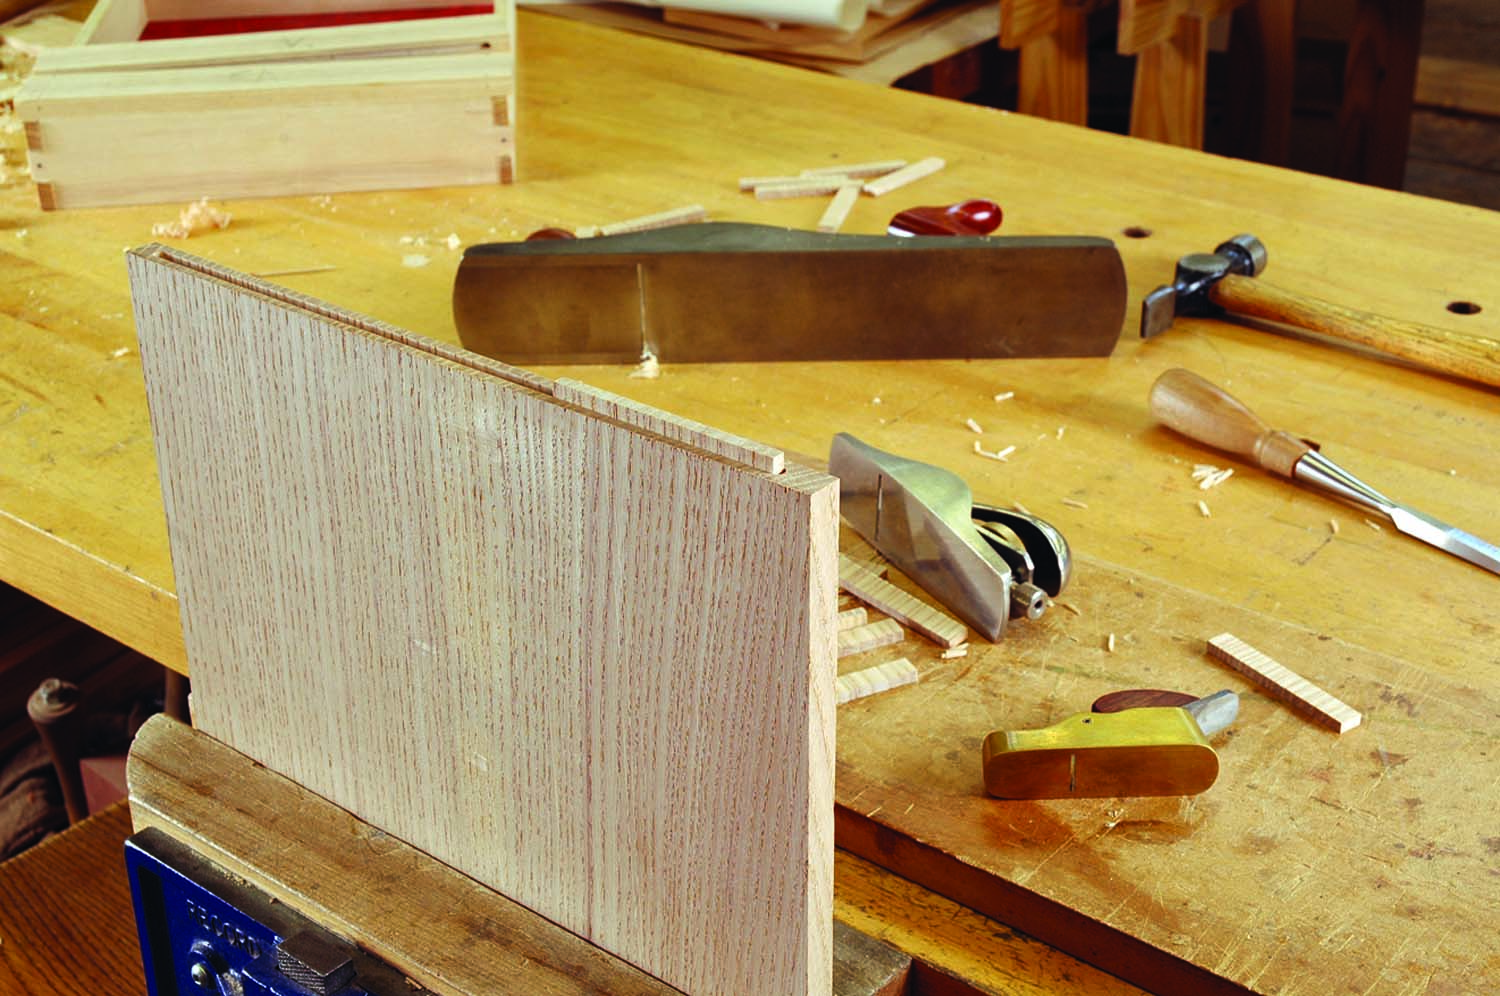
Divisible by three. To lay out your finger joints, place a ruler at the edge of your board, then angle it to the opposite edge until you have a measurement easily divisible by three – and ensure the center slot is a hair wider than the chisel you wish to use.
How quickly does it need to be made? Is this jewelry box a diversion or a Christmas or birthday present? If it’s the latter, then almost by definition it’s late. The speed at which you work will come into play. You might want to use dovetail joints but you don’t have the time to hand cut them. But you can quickly cut a finger joint that looks pretty good using the band saw.
Finally, what are you capable of doing in your shop with your tools and your skills? You might want something a lot prettier than a butt joint and you have the tools and time to do it. This finger-jointed box offers in its design strength, simplicity and symmetry in equal measures.
Finger Joints on the Band Saw
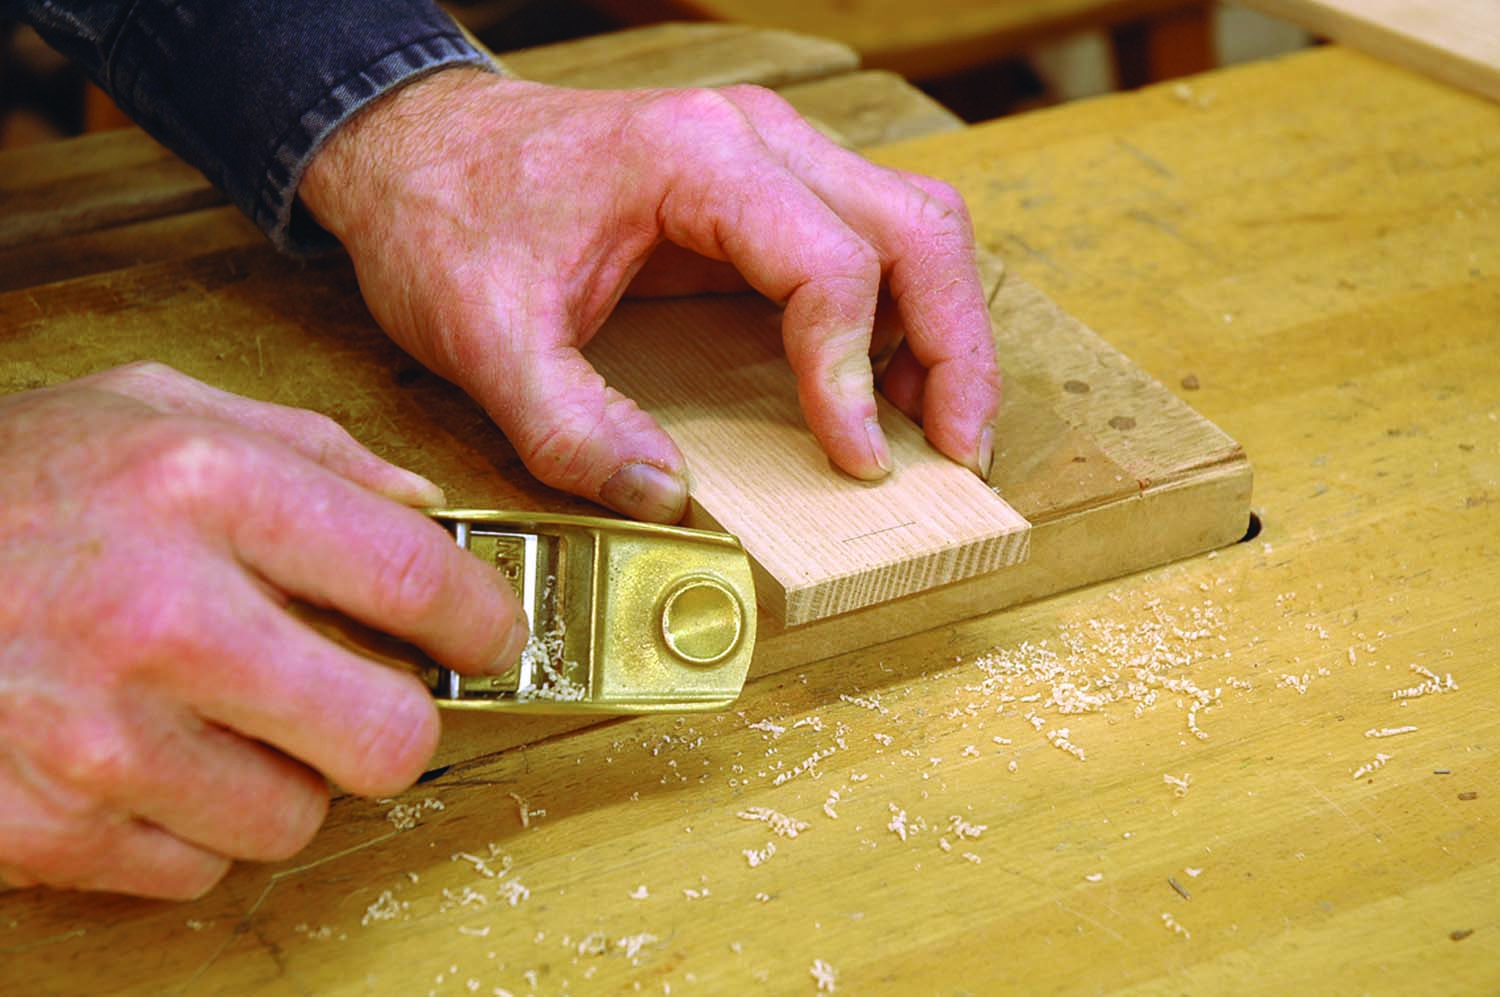
To lay out the finger joints, I divided the width of the box side into thirds. Take a ruler and put the corner of it at one edge of the board and rotate the ruler until it hits the other edge at a number easily divisible by three. Mark out your thirds and square those marks out to the end of the board. Just make certain that the width of the center slot is just a hair wider than one of your chisels.
Tight shims. You must use shims that fit tightly into your saw kerfs. If you don’t have veneer that will serve, cut shims at the band saw.
This way your chisel will enter more easily when chopping out the waste. For this box measuring 21⁄4″ high, I used a 3⁄4″ chisel and the remaining space divided up at 3⁄4″ evenly. This is not critical for the strength. What is critical is how accurately you set up to cut these joints.

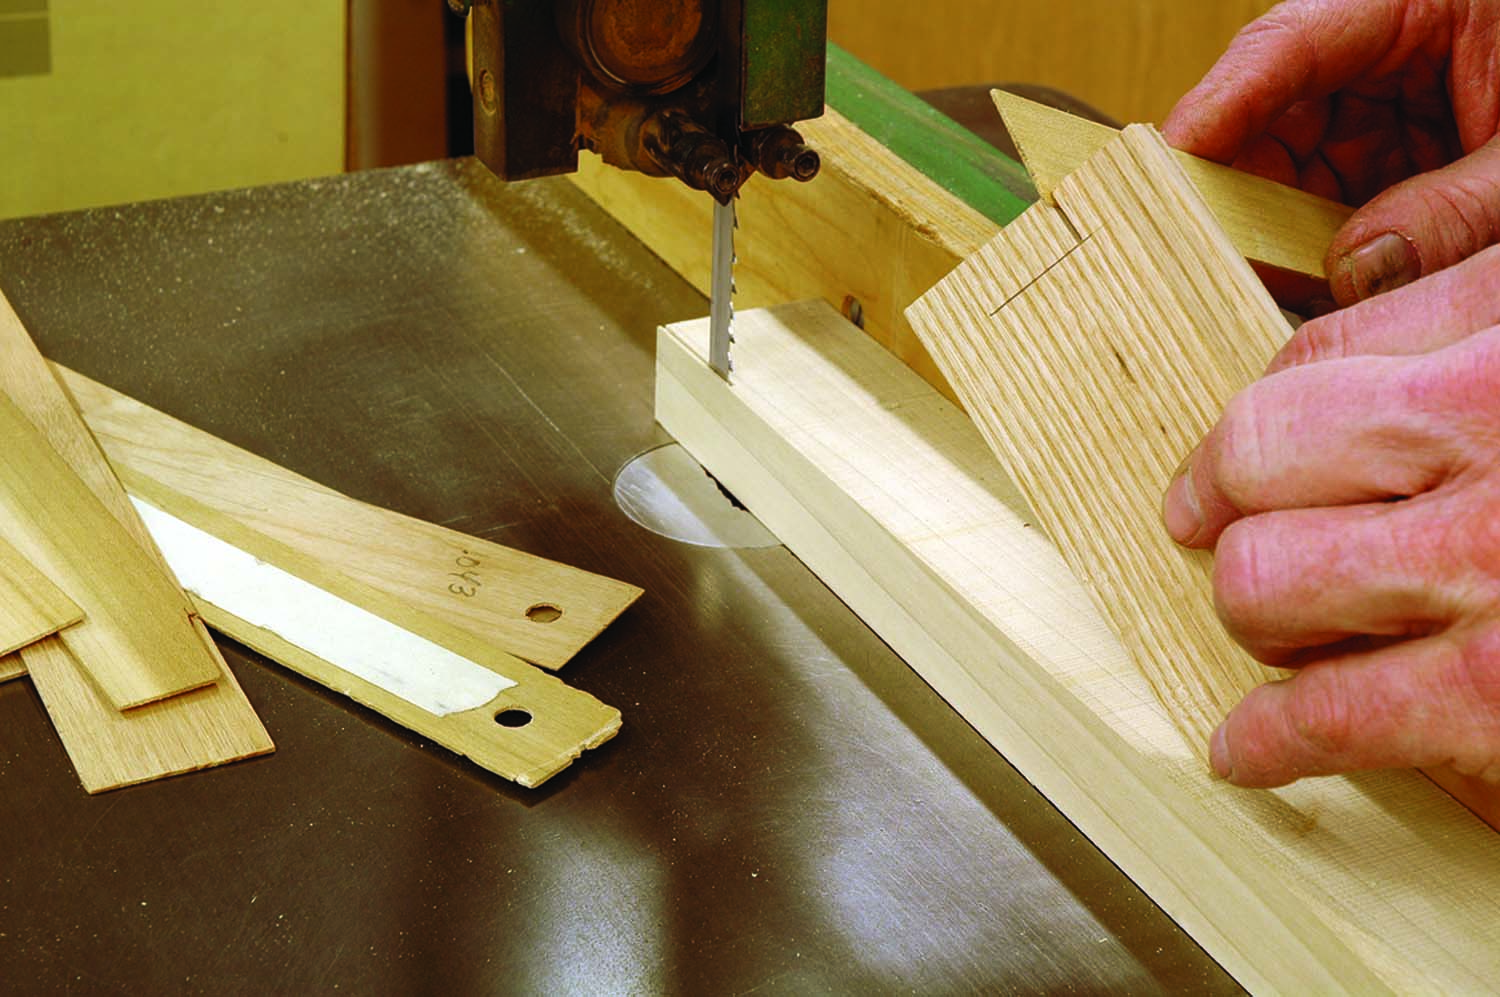
Fit test. To cut the matching part of the joint, slip the end of the shim between the fence and your stock, and make the cut with the shimmed stock held tight to the fence, then flip the board and make the second cut.
Before beginning this method, try out this band saw technique on a piece of scrap. First, all your stock has to be the same width. Triple check and adjust as needed. Next, you’ll need to make a shim that fits the width of the cut that your blade makes. This kerf will vary from blade to blade so make a practice cut in a board and try to fi nd a shim that fits well. Perhaps two pieces of veneer glued together will work. Maybe you’ll need to add a piece of masking tape to them to increase the thickness – or shave or scrape a little off the veneer instead to thin it. You may have to make your own shim by cutting it on the band saw. But however you make this shim, it has to fit the kerf tightly or the joint won’t fit.
Use a band saw blade with at least 4-6 teeth per inch to cut the joint (I use a Wood Slicer blade). Cut the center notch first. Set up your fence distance to cut the closer of the two side walls of this notch. Line it up to make a notch wide enough for your chisel and make sure to mark the baseline for your cuts on this test board at slightly less than the board’s thickness. Make the first cut up to this line. Flip the board and make the matching cut on this slot. Mark this slot as waste then check that the shim fits tightly. Adjust the shim as needed.
For the matching cut, nothing changes on the band saw except that you introduce the shim between the fence and the second board. Keep that board tight to the fence as you make the cuts and keep the shim always close to the end that’s being cut. What’s happening, of course, is that the second board is being pushed away from the fence by the width of the cut. If your shim is too loose, then so will be your joint. If it’s too tight in the kerf, then you’ll have trouble closing the joint. You can see this relationship when you hold the two boards up to one another. Once you cut away the waste, the joint should just fit snugly together with hand pressure.
Joinery Details & Fitting
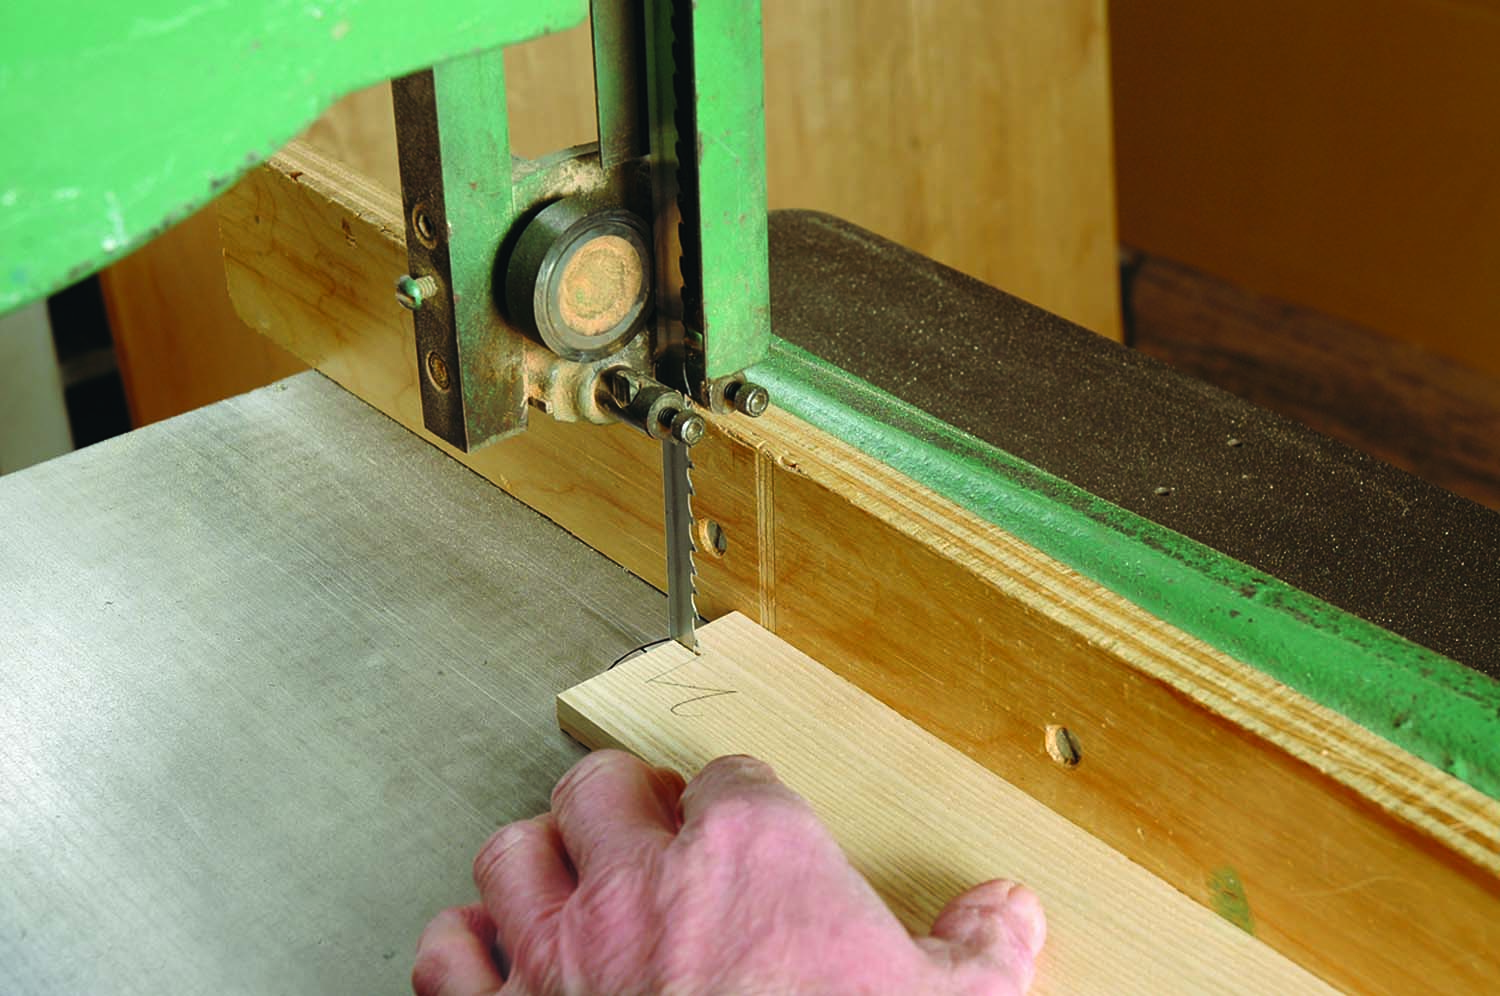
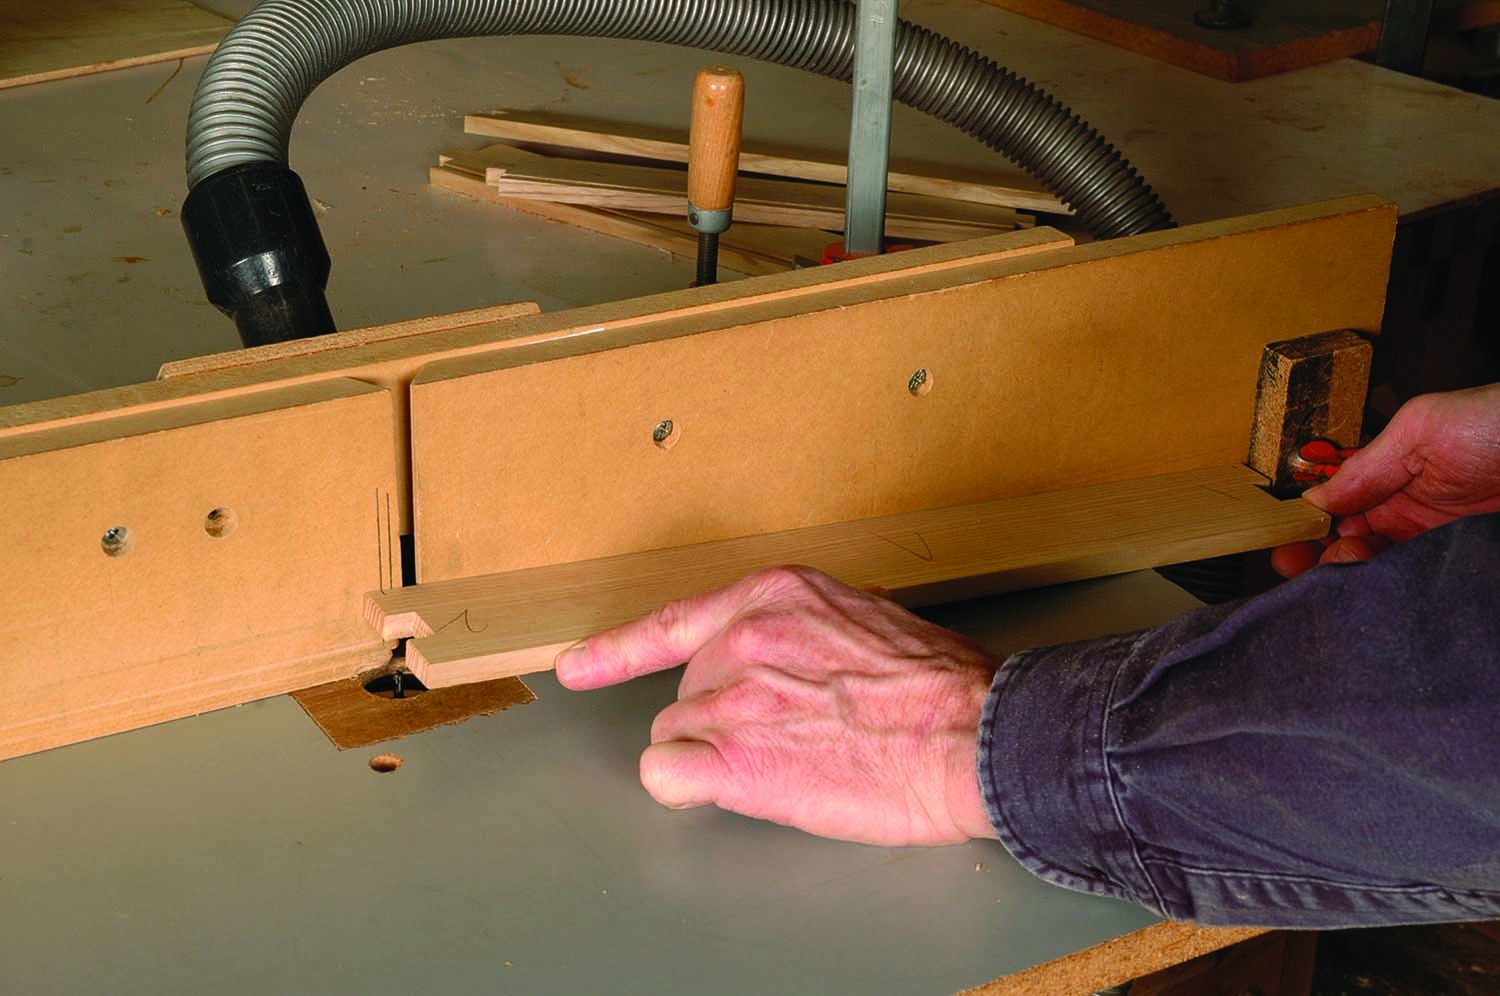
Notch test. With stock at the ready sized in width the same as your actual pieces, set your band saw fence to make the first cut for the center notch, then flip the board and cut the second side of the notch. Make sure your shims fit the slots tightly and check that your chisel will fit just inside the waste.
One of the important ways to set a project apart is to detail it. With these finger joints, I make them protrude through and chamfer their ends to call them out. Set up your marking gauge for the thickness of the stock plus 1⁄32″ to 1⁄16″ more.
Have your center slot marked out on the two long boards and mark their faces. For the end boards with the single finger in the middle, mark out the faces and the edges of the board. Next, chamfer the ends of your boards with a block plane. Then, using your block plane again (or a sander), clean up the ends of your boards. It will be simpler with less risk of tear-out to do all this work now rather than later.
With your shim the perfect size, cut out the four notches on your long boards. A simple precaution when cutting is to set up a stop on the fence to prevent going past the gauge line. Cut these center slots first, mark out the waste sections, then add the shim and make the matching cuts on the shorter boards. Mark out the waste pieces on their ends too.
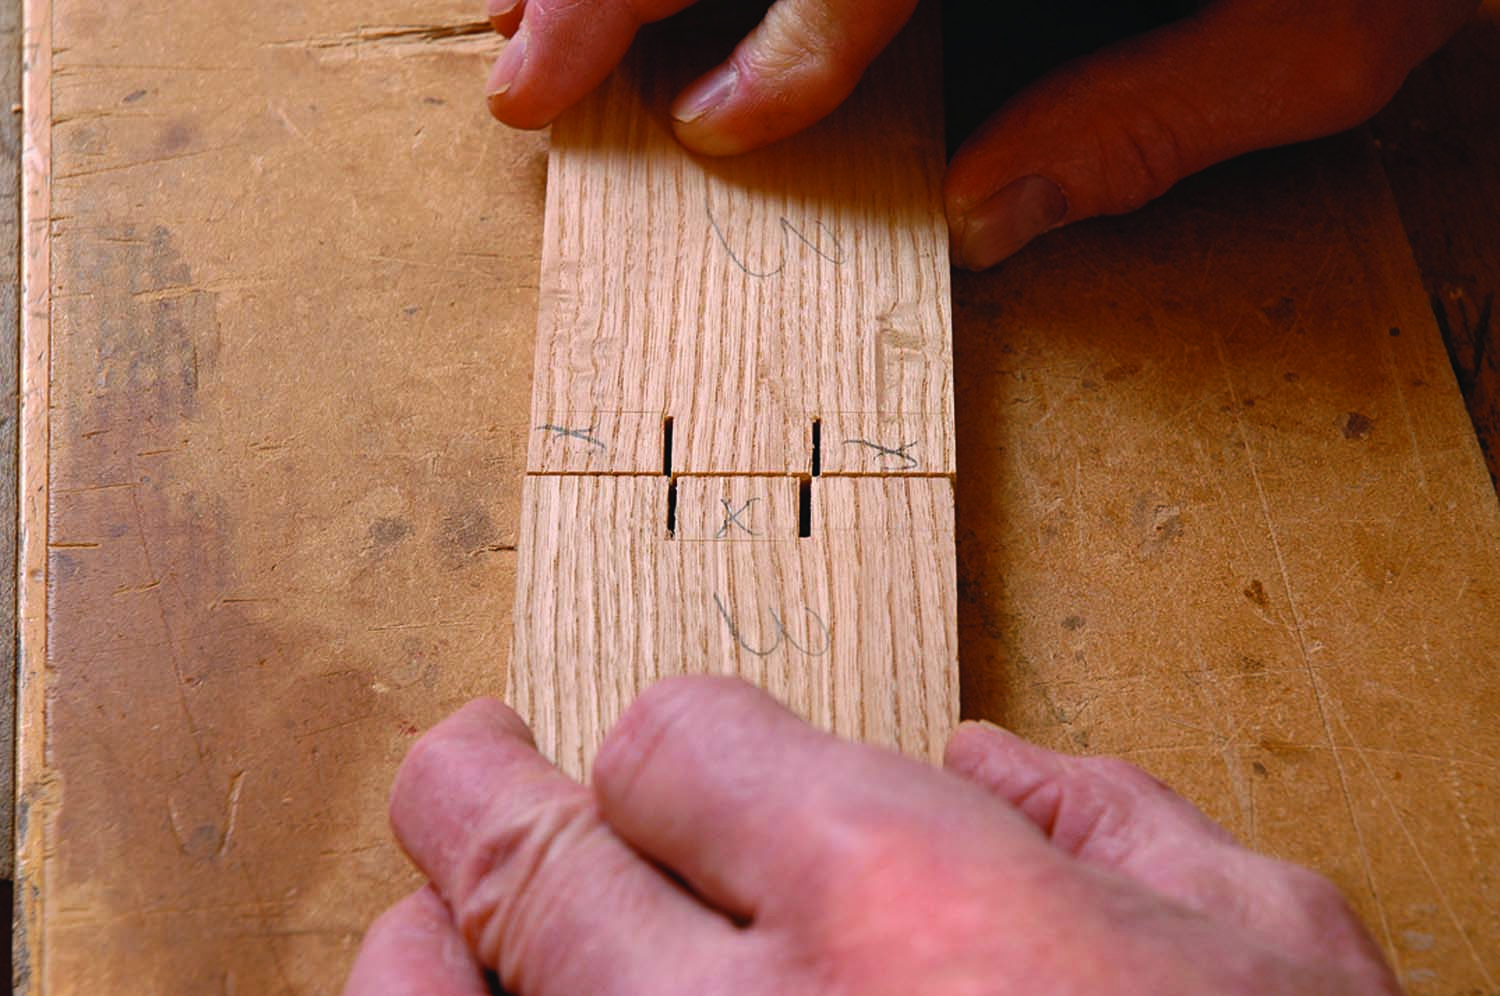
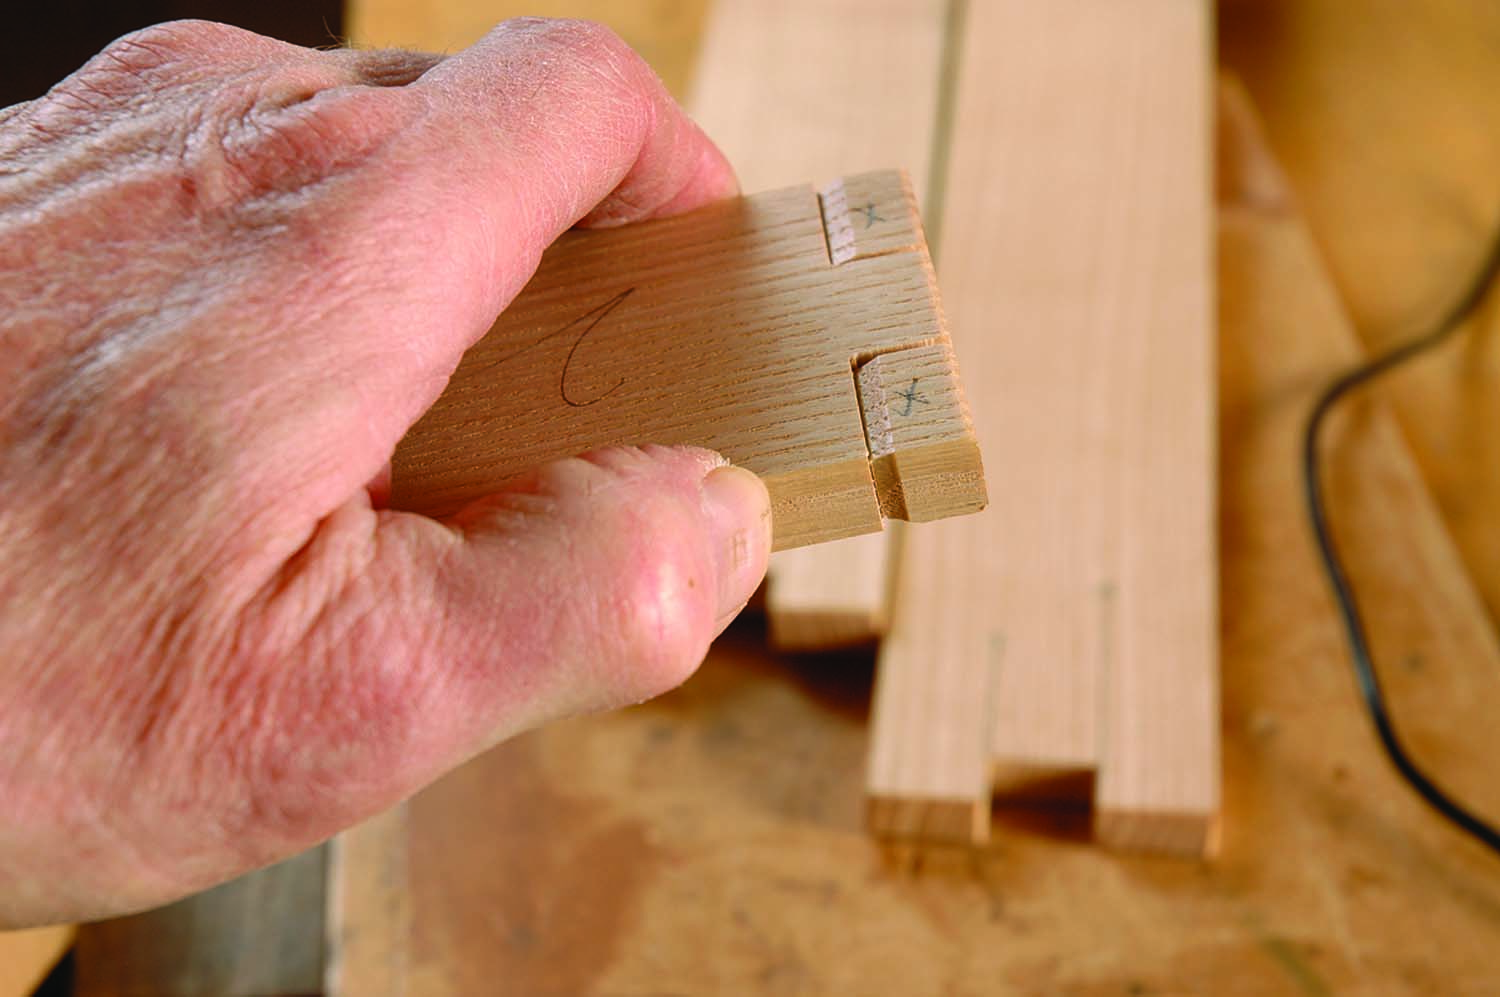
End-to-end match. If your cuts are set up and shimmed correctly, the inside edges of your kerfs should align.
Use a narrow band saw blade to remove the waste more easily in the center slot. (If all you have is a wide blade, make a series of cuts to remove it.) When you get close to the line, with a deft touch, you can nibble away the waste by moving side to side, just catching the teeth. Get as close as you can to the line then chop out the waste with your chisel. Once you get started with your cuts, you can undercut the end grain a little to make the job go faster.
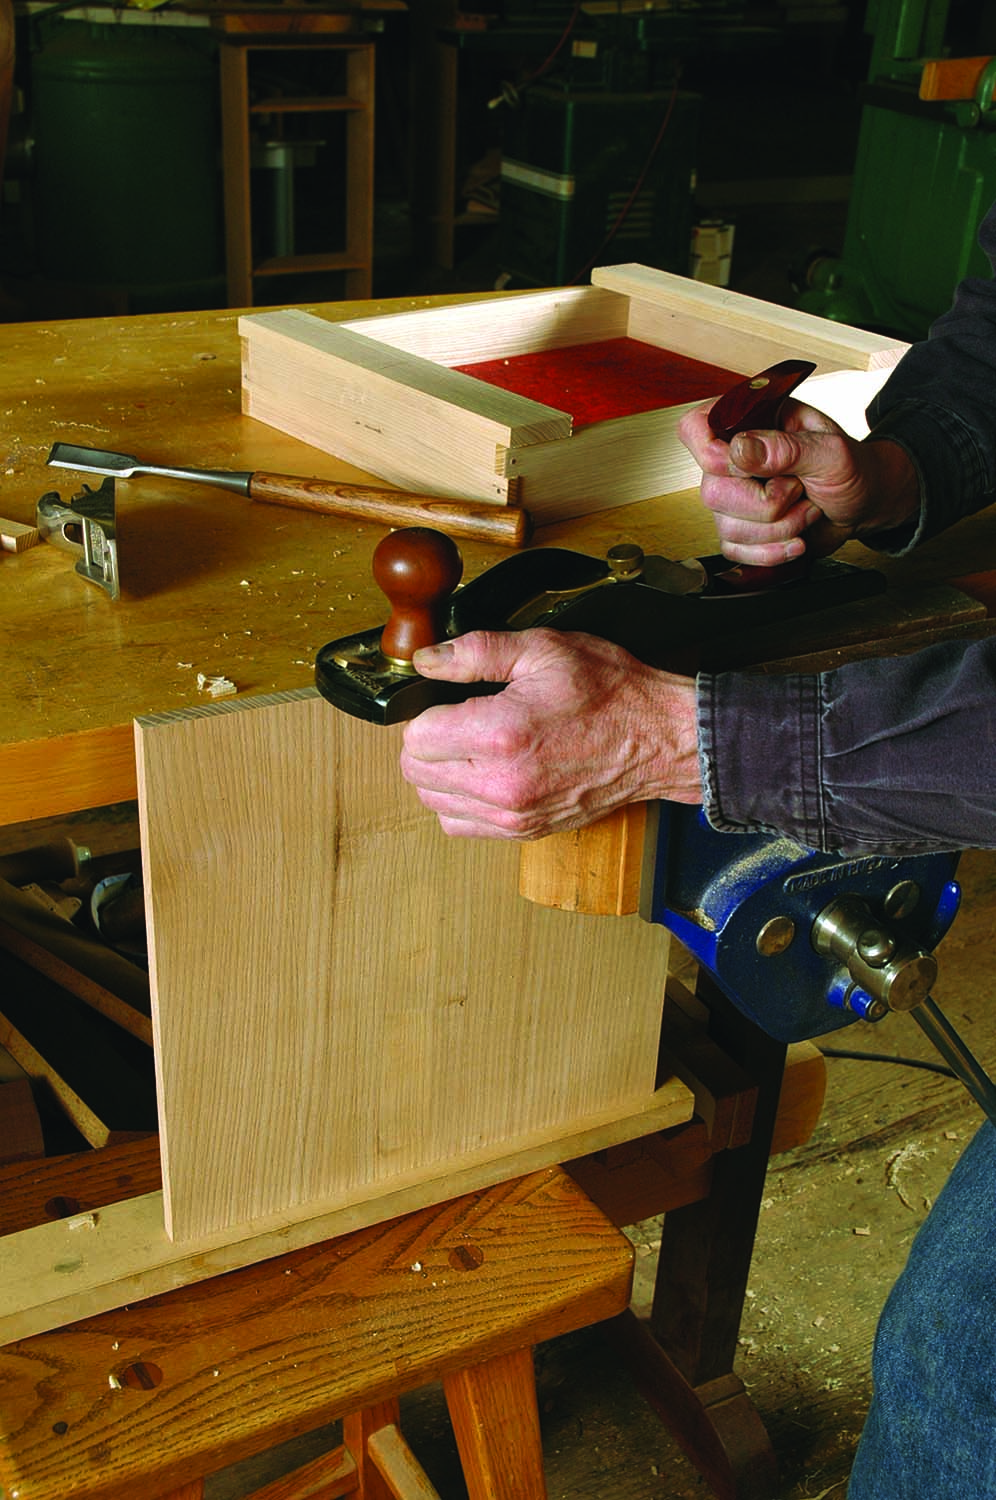
Before removing the waste on the ends, start to chop out the waste on your end slots about 1⁄16″ to 1⁄8″ deep. Chop down from both the faces and the edges of your boards to establish the plane of the end sockets. It’s easier to get these cuts established now then band saw off the waste close to the gauge lines. You can pare these end sockets fl at later for a great fit. Just be sure not to chop down too hard or your chisel will be forced off the gauge line and into the good wood. This can be visible from the edges. After chopping, clean up the box sides with a handplane and scraper to remove any working marks.
Ease the edges. Use a block plane to chamfer the ends of your stock now, before you make any cuts.
Routing for the Bottom
Establish the cut. Use your chisel to establish your cuts and help guide the band saw blade.
After fitting the joints, I lay out and cut the grooves for the bottom at my router table. I line a piece of plywood with a decorative paper for this jewelry box so I make the bottom from 1⁄4″ plywood (which of course measures something less than that). Check how thick your paper makes your plywood package before routing the grooves. Set the fence at the proper distance from the bit and set the bit height for two cuts at 3⁄32″ or one at 3⁄16″.
Stopped cuts are used on the longer pieces so I set stops on my fence to limit the travel distance of the cut. To find where the bit starts cutting, simply hold a block to the bit, rotate the bit backward by hand and mark on the fence where the block stops moving. This will be one cutting edge of the bit. Do the same for the other side. With stop marks penciled on the top of the long piece, line up the board with the marks on the fence and set your stops with a clamp.
When making a stopped cut, hold the work tight to the stop and fence then move down onto the bit. Just move the work along as you rout so you don’t burn your way to depth instead of cutting to it. It may take several passes to get to the finished depth, but once you do, make the cut until you reach the far stop. Make the through-cuts next on the shorter end boards. Then raise the bit height to the fi nal depth, finish up the through-cuts then do the stopped ones. Clean up the round ends of the stopped cuts with your chisel.
Stop(s). Establish the beginning and end of the stopped grooves for the box bottom, then clamp stop-blocks to your router fence.
Lining the Bottom
I use decorative papers often on the inside of my boxes as a pleasant surprise and contrast to the wood. At a good art store you’ll fi nd hundreds of options available and they’re usually inexpensive at $5-$10 a sheet. The adhesive I used to use to lay them down with was a binder called matte medium. It was not cheap. One day a friend of mine walked into my shop and watched me gluing down some paper. He noticed that the smell of the expensive matte medium smelled curiously like the smell of inexpensive water-based polyurethane. Oh, happy discovery. The poly works great as a paper glue.
Cut your plywood exactly to size and your paper oversize by an inch or so. Coat the plywood surface with the water-based poly then coat the underside of the paper. Lay the paper onto the plywood, stretching it out as you go to eliminate bubbles. Press it flat from the center out to the edges. Then coat the top of the paper with the poly as well.
Let the piece dry overnight and trim the excess paper with a knife. Once it’s dry, check the fi t of the bottom into your grooves being careful not to peel up the paper at the edges (you can also wrap the paper around the edges if you cut
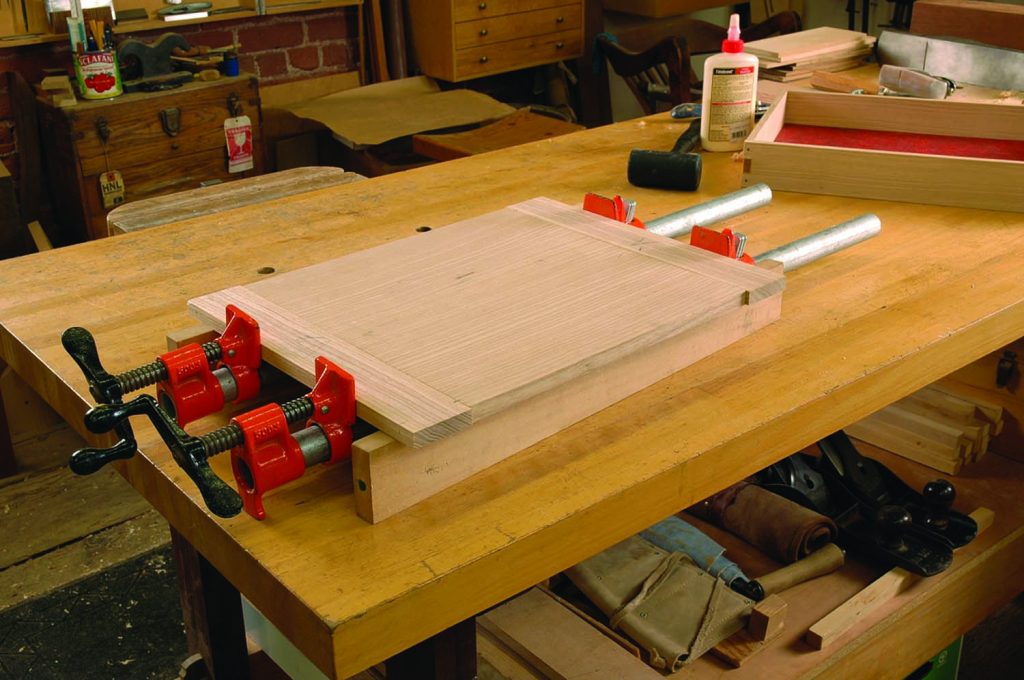
the corners carefully). Then prepare your clamps, dry-fit the box together and glue up.
Breadboard Ends for a Top
A thin 1⁄2″ top like this will cup over time without the proper restraint. (Who doesn’t need proper restraint from time to time?) A panel floating in a frame is one tried-and-true method of accomplishing this. But using a fl at panel with breadboard ends also works. These breadboard ends fit over the ends of your large panel using loose-tenon construction and a little bit of glue at the center of the panel.
Dead flat. Before you start the joinery for the breadboard ends, plane the top’s end grain so the end is dead straight.
But the key to success is the spring joint you add to them. Take the time to grain match the boards. With quartersawn ash, matching boards isn’t too hard. Hold one board on edge up to another to check their compatibility before committing to
cutting your boards to length. Plane a light spring joint on the edges of these boards before gluing them up. This will
lock them in place as you glue. Lay your boards together then fold them apart and place them in the vise. Take a few strokes with your smoothing plane until the edges are good and straight.
Loose tenons. Cut your loose tenons to length, then plane them in thickness to fit the groove you cut at the router. Remember that the grain direction of the tenons should run the same as the panel.
Before planing, take the time to tune your handplane on some scrap. Make sure it’s cutting smoothly, lightly and evenly (a good rule for all of my cuts). Coming in on a diagonal, take a few passes over the center of your boards. Just a little gap is all that’s required to give you good pressure at the ends.
Glue up your stock, let it dry overnight, then flatten the new board and square its edges and ends. Plane the end grain so it’s dead flat before beginning your joinery.
There are several methods for cutting the joint in the top and breadboard ends. The loose-tenon method works for a lid this size. It’s simple to set up for stopped cuts in all the boards at the router table. Cut the pieces to length and clean up the end grain. Mark the length for the groove and set your stops. Lower each board carefully onto the bit and make your cuts to depth. Then prep loose tenon stock. I used the offcuts from resawing my stock to thickness and passed one board through the planer to bring it close to thickness. Cut pieces to length then plane to fi t. When the panel fits snug in the breadboard ends, it’s time for the final touch.
Cutting a spring joint into the ends keeps them in tight to the panel. Come in at a diagonal to the edge and take two or three handplane passes. Check the fit again and you should now see a small gap in the middle of the panel. Center one clamp to it and see if you can’t pull it in good and tight. If you can, you’re ready to glue up.
Raise your glue-up. With thin stock, it’s best to hold the assembly up so that the workpiece is centered in your clamps’ jaws. If you skip this step, the clamping pressure could more easily twist the panel.
With a top this thin, use some shims to move the boards up higher in your clamps. This will help to prevent any twisting when applying clamping pressure. Put glue only on the center 3″ to 4″ of the grooves in the breadboard ends, and a dollop in the matching location on the panel (this is where the loose tenons will be inserted). No glue should be applied past this center section because you still have to allow for movement over time. With the spring joint and the loose tenon, you’ll get plenty of pressure and support at the edges of the panel. Clean up the panel and breadboard ends, and chamfer the ends on them to match the finger joints.
Finishing Touches
Finger joints don’t need pinning for strength, but if you like the look, adding round pins here is a nice detail. Make up pin stock at the band saw cutting just over the final diameter you want. Plane to size, then chamfer the edges with a block plane before hammering the stock through a dowel plate to size it accurately. Mark out and drill your finger joints then glue in your pins. A contrasting wood here adds a nice touch.
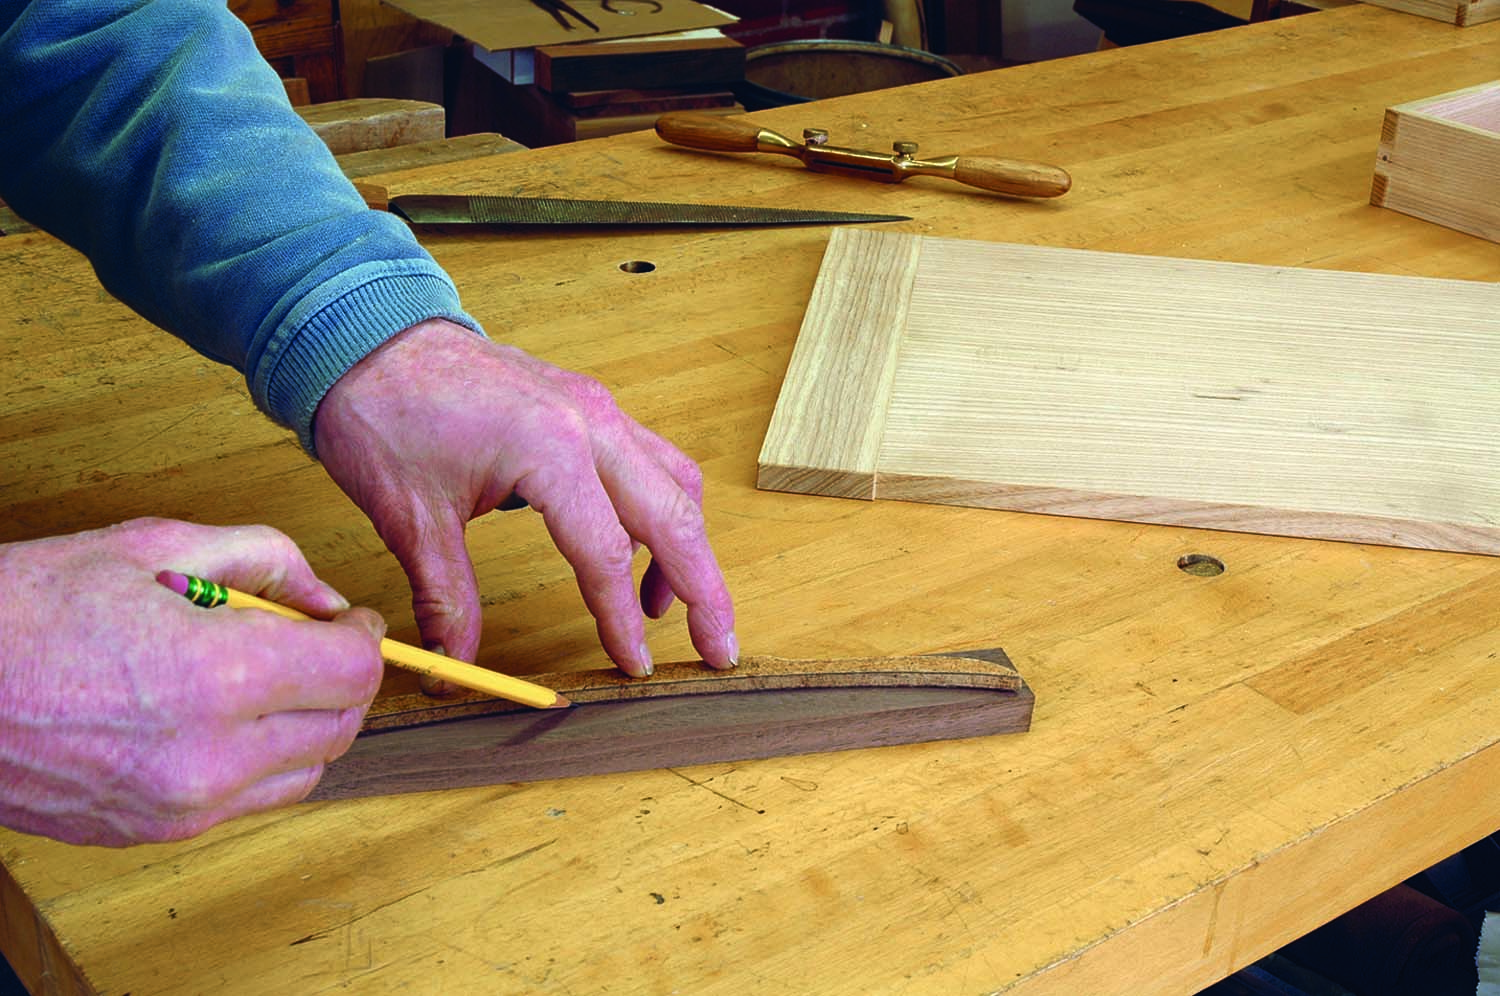
Template. Mark out the handle shape onto your blank. A template made of MDF or masonite allows for quick transfer of the shape.
After hinging the lid with simple butt hinges, add dividers to the inside. I stopped cutting dados for dividers in my box sides when I realized that a tight-fitting length worked just as well. Mill the divider stock to 1⁄4″ thickness and trim it exactly to length first. Use a plane and a shooting board to nail the fit. Put the dividers together with half-joints after you decide how you want to divide the inside compartments. Mark their positions and gauge in a line for the depth of cut. You can cut the half-joints at the band saw or by hand.
Designing handles is a job I postpone until I can look at the final piece. I first design on paper to find a shape that suits the intention of the box. Then I make up a template to guarantee that I’ll get a shape that I like. Templates are quick to make in masonite or MDF and not so precious I can’t throw one away. The other reason for using a solid material is that when I have a shape that I really like, I have the template for another handle.
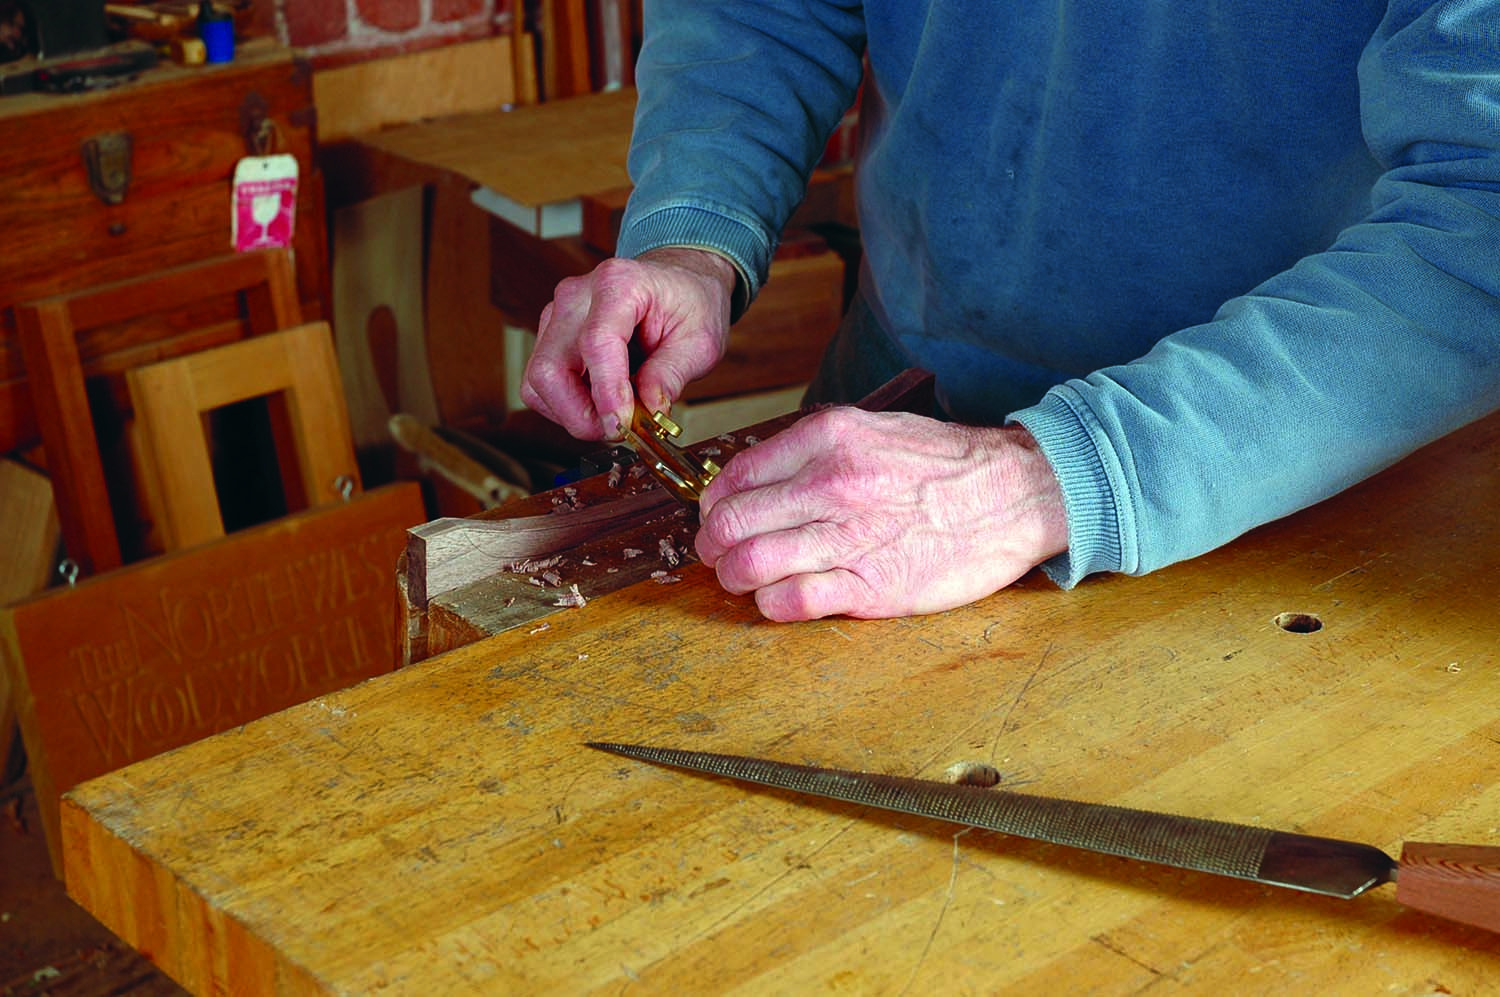
Cleanup. Clean up the first band saw cut on the handle with a spokeshave or rasp. Work downhill into the hollow to avoid tear-out.
Then I make up several options out of poplar until I find one that works. For purposes of visualizing, a black magic marker turns the poplar into ebony or walnut; blue and red make it rosewood. My final handle for this box is of walnut cut out on the band saw, then shaped and sanded to round the top edges. Cut the handle’s top edge first. That way there’s still some wood remaining and it’s easier to clamp it into the vise to clean up with your spokeshave or rasp.
If you need to work out to the end of the handle, clamp one end of it into the vise and clamp a stick onto your bench. The handle then rotates into that stick and won’t budge as you shape it.
I drilled two pin holes for small dowels into the bottom of the handle, then glued and pinned to the lid.
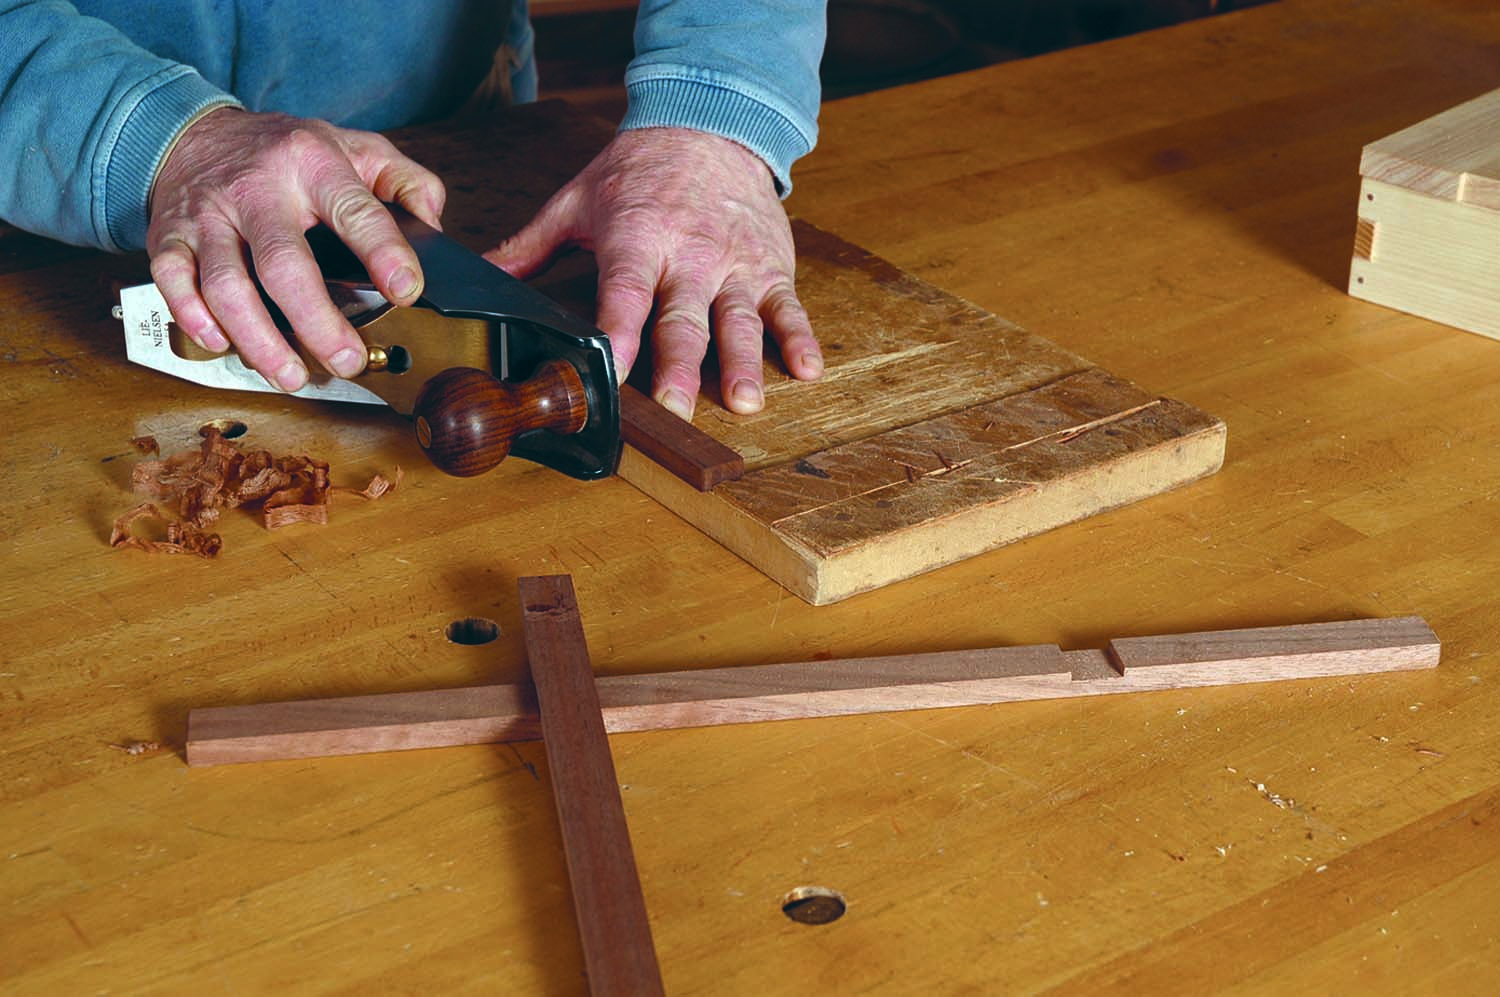
Plane to fit. Fit the base boards together using a bench plane with a bench hook or shooting board. Plane the long-grain edges of the short boards until they just fit into their notches.
The base pieces make the jewelry box appear to be floating. I notch the long boards 1⁄8″ deep to capture the shorter ones. Mark out the starting line 4-1⁄2″ in from their ends with a marking gauge. You can cut out the notches on the table saw with a crosscut sled set up with stops, or saw them by hand and use a shoulder plane to get them to depth.
I never try to make the width of the cut perfect. There are too many ways I can find to screw that up!
I cut the notch just a hair undersized in width then plane the sticks to fit together. I use my bench hook as a shooting board with a No. 4 plane and take just enough passes to get a snug fit. Mark out the short pieces with a gauge line 21⁄2″ in from their ends. This is where they’ll fit into the longer ones. Check the fit on all the pieces before gluing them up. Use just a spot of glue and clamp the pieces together. You can also run a short dowel pin through the joint to lock them in place.
Finish the inside of any box with shellac – not an oil finish. Oil finish will leave a smell inside that will last, regrettably, forever. It’s not a pleasant smell so get over your fear of shellac (if you have any), and give it a try. Thin the stuff in the can down with alcohol (or dissolve shellac fl akes at a #2-pound cut) so it’s easy to apply and add as many light coats as you want.
For a jewelry box like this, add a few drops of a pleasant essential oil such as jasmine, rose or vanilla to the shellac. This is guaranteed to make the recipient of this jewelry box barely notice how late it arrives – while you will have the satisfaction of building something that uses just a few great tools.
Video: Gary has a number of free videos on a variety of woodworking topics available on YouTube.
Blog:Read Gary’s blog.
Website: Find out more about the Northwest Woodworking Studio and classes offered.

Here are some supplies and tools we find essential in our everyday work around the shop. We may receive a commission from sales referred by our links; however, we have carefully selected these products for their usefulness and quality.


