


We may receive a commission when you use our affiliate links. However, this does not impact our recommendations.
Expose your joinery skills with this Arts & Crafts classic.
In the early 1900s, furniture maker Gustav Stickley began producing a unique style of furniture that he called “Craftsman.” At the time, the world was coming into the modern industrial age, and Stickley, among others, began to question the value of mass-produced furniture and its effect on those who made or owned it.
Victorian furniture featured many machine-made elements that sought to mimic the handwork of earlier times. In most cases these adornments detracted rather than added. Just because machines could produce intricate imitation carvings and mouldings didn’t mean that they should. Stickley decided to get back to basics.
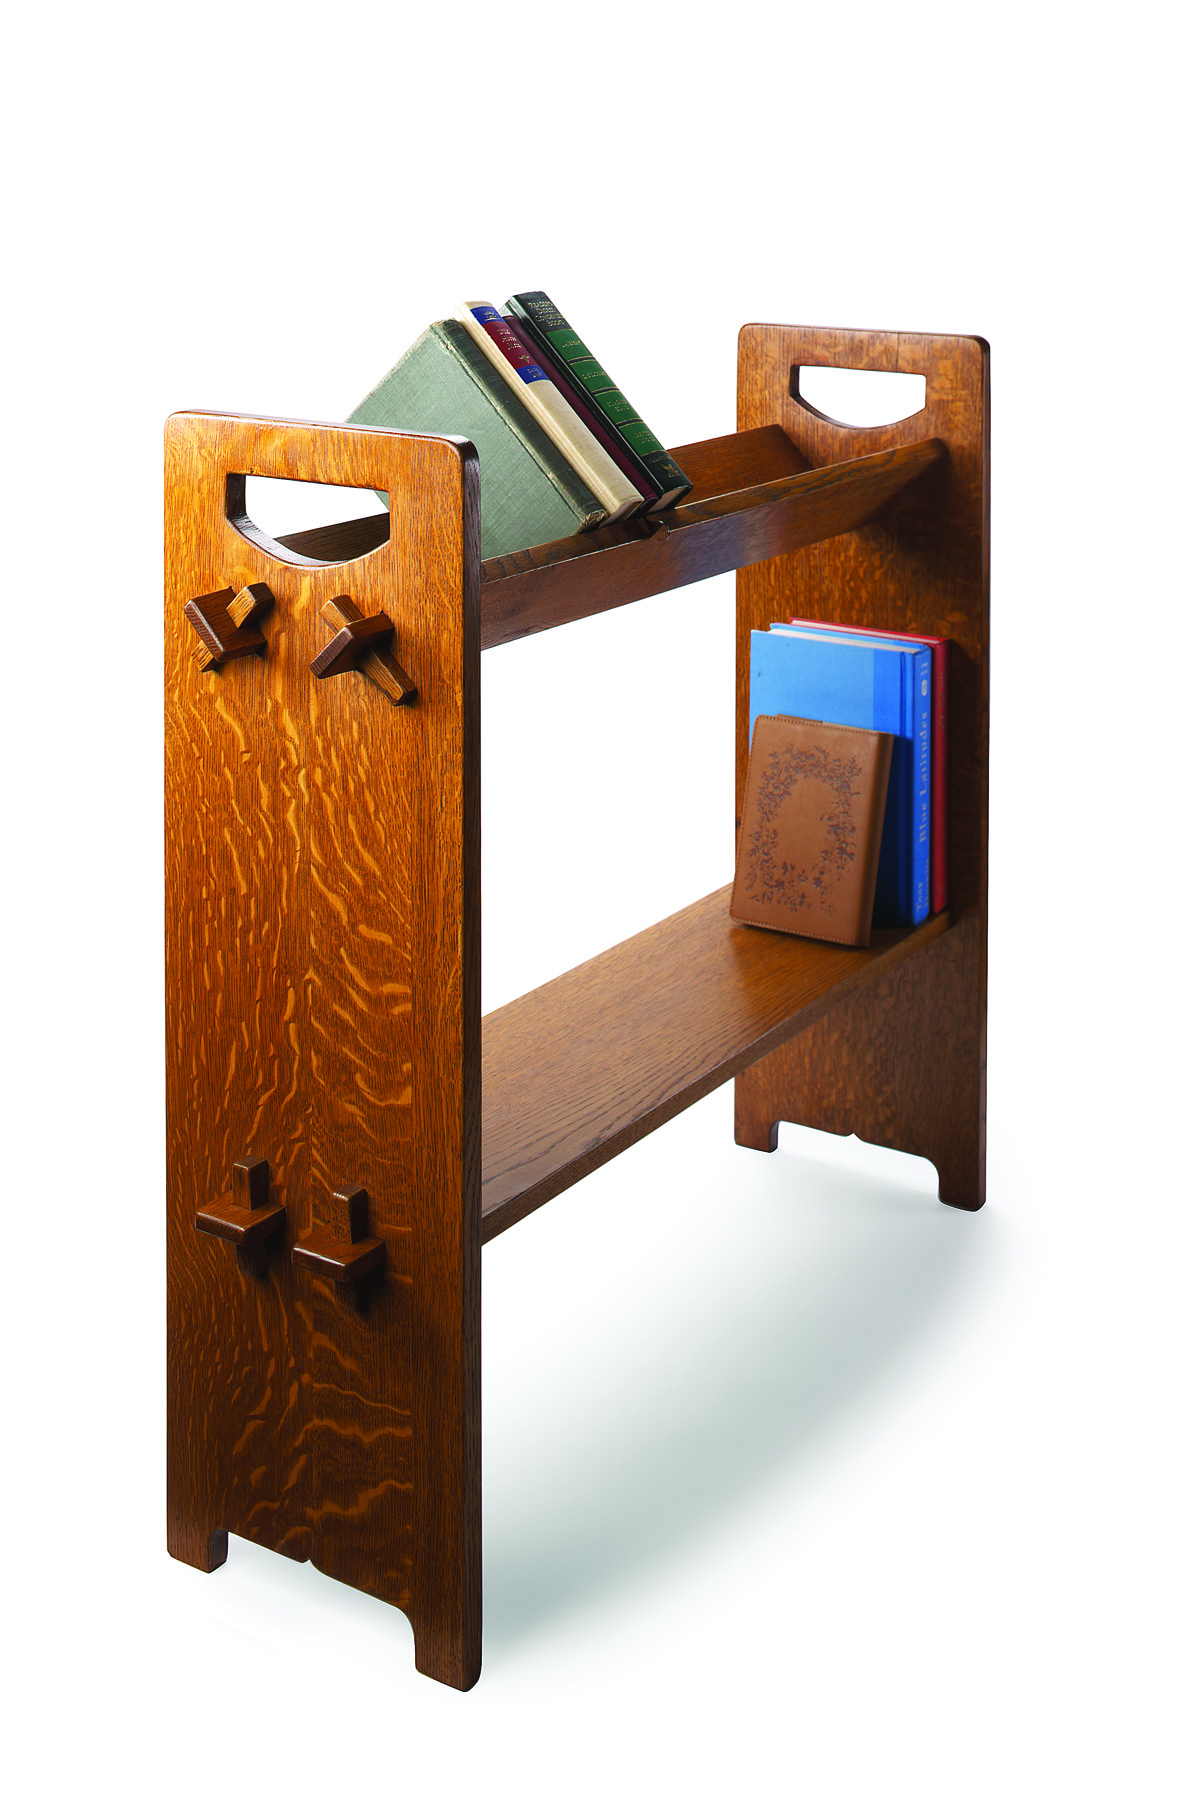
This simple book rack is a good example of the style. The joinery, along with the character of the quartersawn white oak, becomes the decoration. Function comes first, and the form is a combination of nice wood, good proportions and honest joinery.
Making this piece is like going to Craftsman boot camp. You’ll get to know the nature of the wood and how to make exposed joints. It’s not a big piece, but there are enough joints and details to provide plenty of practice.
Craftsman furniture was factory made, but Stickley’s aim was to use machines to save the workers from drudgery while providing room to display skilled workmanship. At the time, most of the machines we know today were in common use, but the subtle details that make this piece special have to be completed by hand.
We have the choice to work by hand, work by power or work with both. If we understand where each method excels – as well as where each falls short – we can master both sides and produce furniture we’re proud of, without taking forever to make it.
Precision & Productivity

 The heart of this piece is the keyed through-mortise-and-tenon joinery. There are eight of these joints to make, each with two through-mortises. One of the givens in this type of work is consistency, and the electric router, combined with the precision of a template, provides that.
I print a full-size pattern of the side profiles and joint locations, and attach the prints to a piece of 1⁄2“-thick Baltic birch plywood with spray adhesive. These patterns are available online in PDF format. You could do all of the layout by hand, but using the pattern is faster and more accurate.
I use a straightedge and an X-Acto knife to mark the lines of the mortises from the pattern. Then I remove the pattern, drill a 7⁄16“-diameter hole at each mortise location and place double-sided tape over the lines. That allows me to place small pieces of plywood along the lines. The adhesive is pressure-sensitive, so I smack the pieces with a mallet to fix them in position.
With the pattern pieces in place, I use a 3⁄8” bearing-guided flush-trim bit to cut the openings exactly on the layout lines. After routing, I peel off the pattern pieces and remove the residue left by the tape with lacquer thinner.
The router makes straight and parallel edges, but leaves round corners that must be squared with a chisel. To make the D-shaped handle opening at the top of the pattern I drill a hole at both ends of the top edge, and cut the curve with a jigsaw. The edges of this opening are then cleaned up with a rasp.
Why bother cleaning up the corners of the template when the router will also leave round corners on the workpiece? The router does a good job of making straight edges, but can tear out the solid wood. I score the grain on the work with a knife and a chisel to prevent that.
I cut the sides to finished size and then make a rough cut with the jigsaw at the top opening to lessen the load on the router and bit. Then I clamp the template to the side, and clamp both to an open-ended box on my bench. This holds the work at a comfortable height and I run the router around the inside perimeter of each opening.
Make the Template

Don’t cut, assemble. Small pieces of plywood, attached with double-sided tape, will be added to surround the opening.

Cut above. Routing around the pieces cuts the template exactly like the drawing.
Chisel Time
After the noise and flying chips of routing, cleaning up the corners with a chisel and float is a nice change of pace. I hone a fresh edge on a wide chisel, and place the flat back face on the long routed edge. Then I rotate the chisel down and into the corner to begin the squaring process. This keeps the chisel from drifting past the layout lines as I make the cuts.
I alternate cuts with a chisel that matches the width of the mortise and the wide chisel until the corners are complete. All of this takes place with the outside face of the side facing up. Any tear-out or chips will be hidden by the shoulder of the tenoned shelf. A flat float is used to put the finishing touches on the mortises.
Cut the Mortises

Score first. Prevent tear-out by scoring around the openings before cutting with the router.

Saw first, then trim. Cut close to the lines with a jigsaw and use the router to trim the opening at the top.

Swing it. Press the back of the chisel against the mortise wall, then rotate the edge down to the corner to maintain a straight edge.
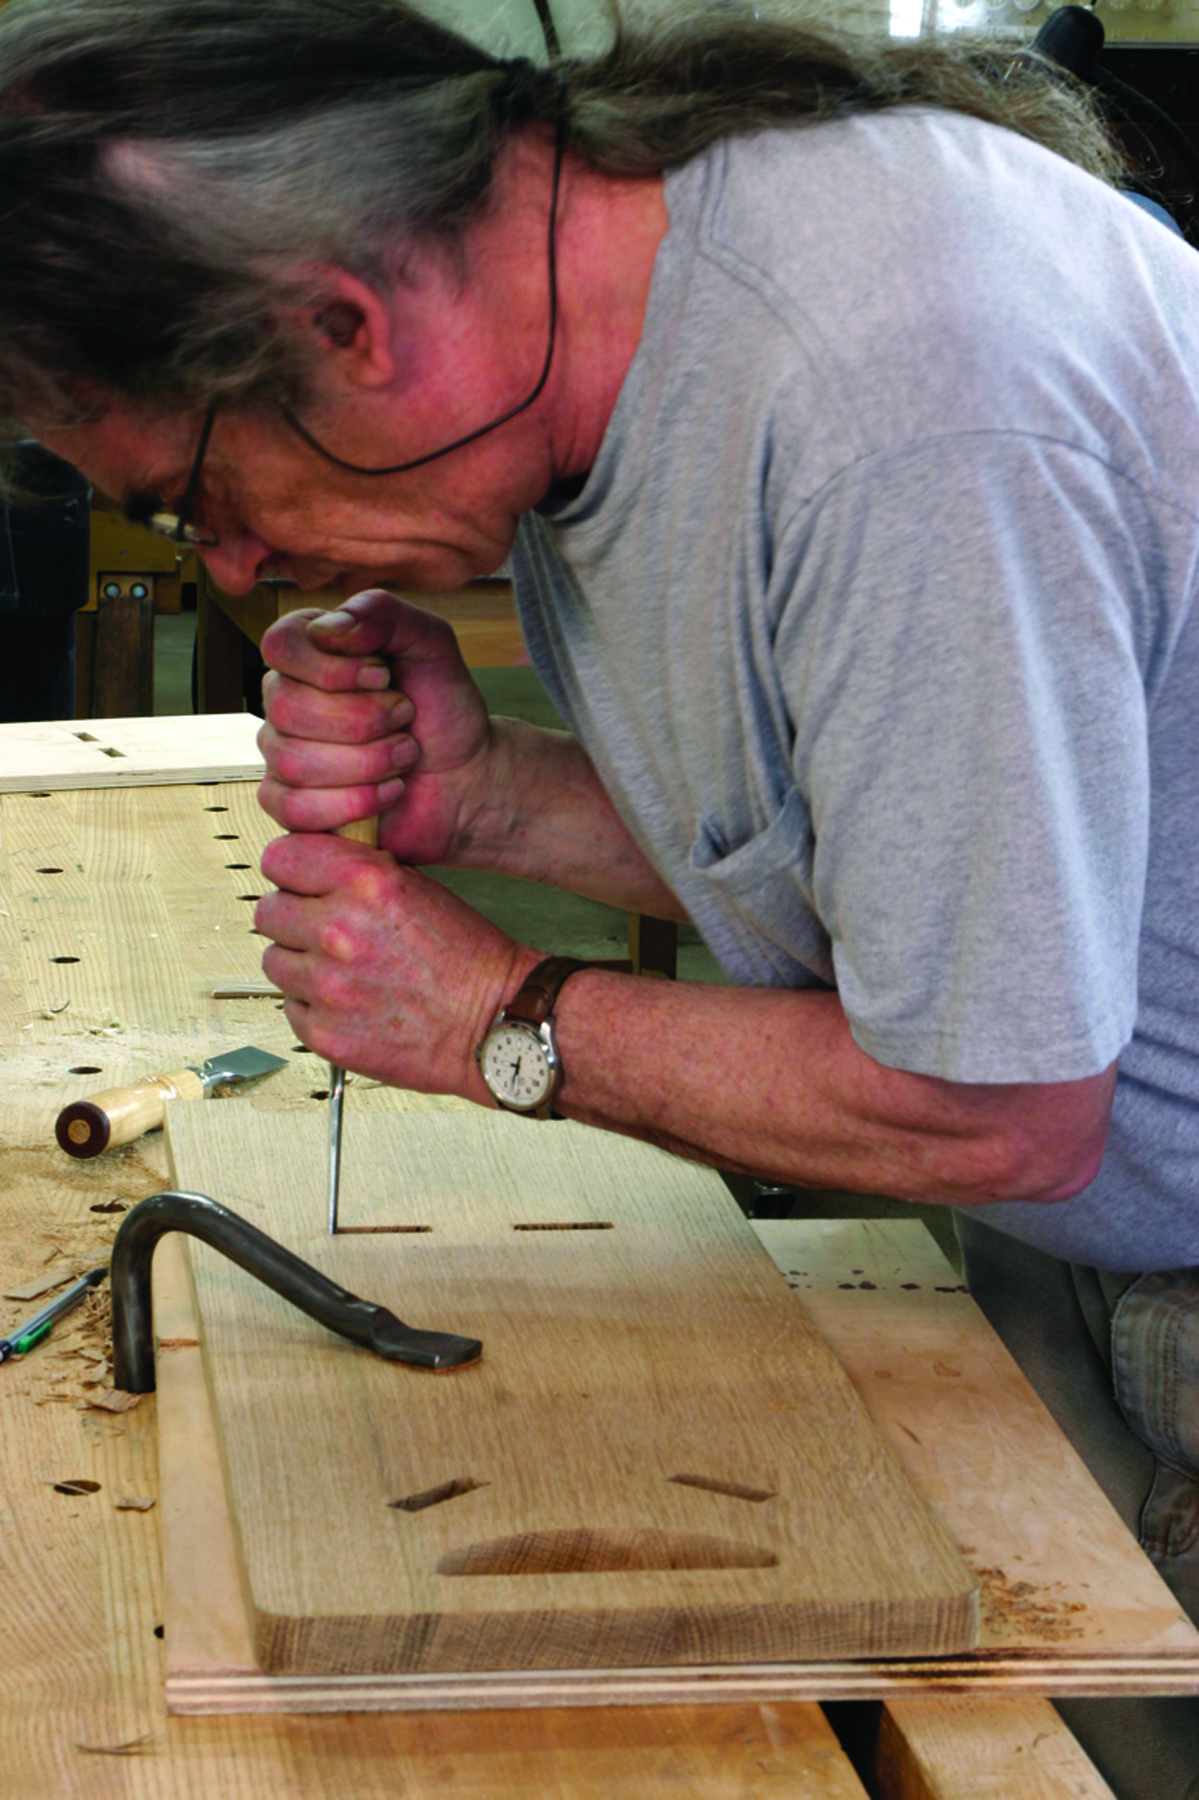
On top. Positioning your shoulder over the chisel allows you to use your body weight to pare the end of the mortise.
All in a Row
After cutting the three shelves to finished size, I place them beside each other on the bench and mark all of the shoulders at once using a large square. This ensures that the distance between the shoulders is consistent. Then I take a smaller square with a metal rule and knife in the shoulder lines all around each piece.
In theory, the mortises are all exactly 1⁄2” wide, but in reality there will be some variation. I place the end of one of the narrow shelves next to a mortise to gauge the width directly from one part to the other. I set the shelf end on one long edge and mark where the other edge of the mortise hits.
I set my marking gauge by eye to the middle of the distance from the pencil mark to the edge of the shelf. I then mark with the gauge from opposite faces of the shelf, and make any needed adjustments until the tenon layout matches the mortise. When I have the setting right, I mark around the ends of the tenons with the gauge.
This seems like extra work, but the cut layout lines won’t rub off, and they help to prevent tear-out as the tenons are cut and fitted. The layout marks will be the visible edges when the joint is finished. Tenons look simple, but there are several cuts to be made.
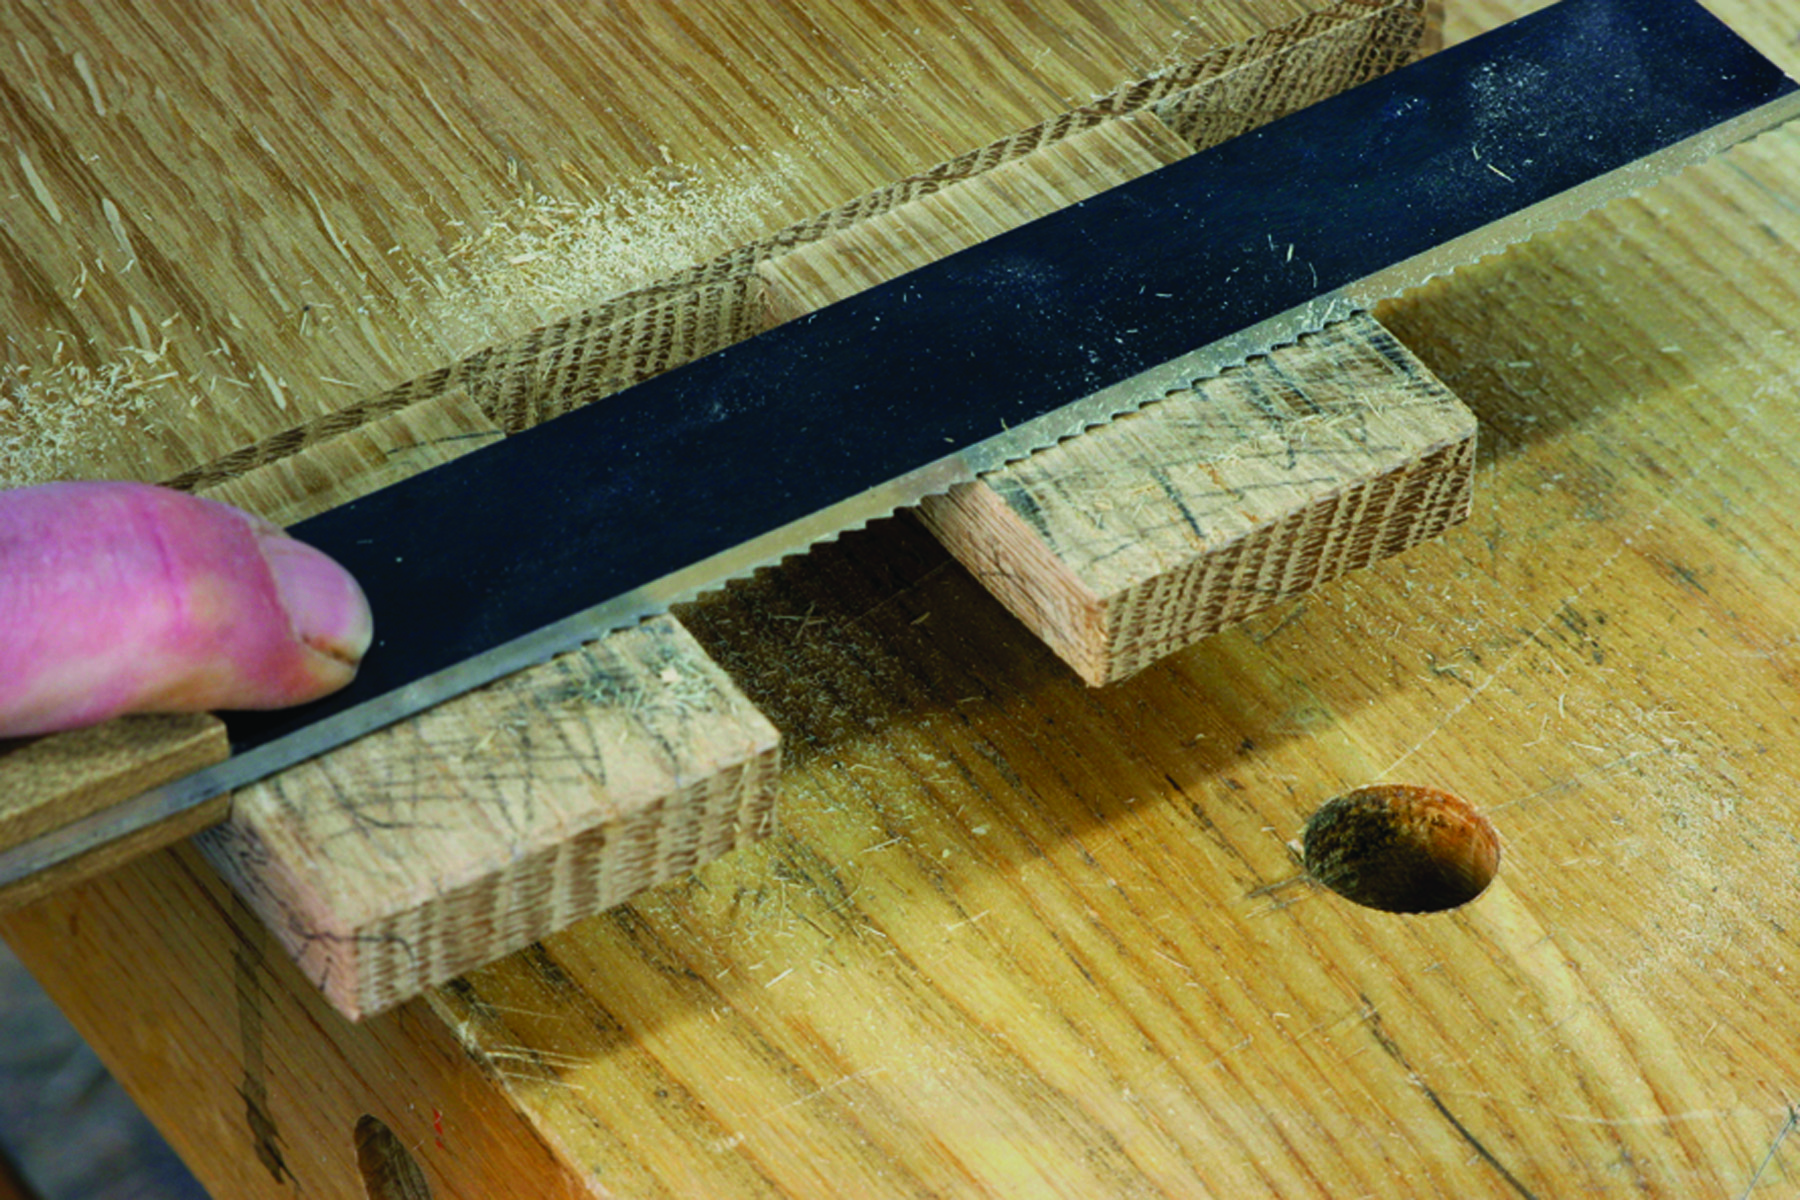
I cut the shoulders with a backsaw. The shoulders are only about 1⁄8” deep, and a fine-toothed saw leaves a nice, clean edge. There are a several ways to make the cheek cuts, and on the narrow shelves the cheeks could be cut on the band saw.
The cheeks on the lower shelf are too wide for a small band saw, so I remove the material with a straight bit on the router table. This leaves a consistent flat surface across the wide board. These tenons need to fit neatly, but one of the challenges is that the last cut is the visible surface in the finished piece. I rout close, but fine-tune the fit by hand.
Mark out the Tenon

On your mark. Use the mortise to determine the exact thickness of the tenon.

Get set. Set the gauge to half the distance between the pencil line and the edge.

Check & go. Mark from both sides to center the tenon and adjust until the parts match.
A Different Rout
I begin the setup by raising the top of the bit to the bottom of the layout lines on the ends of the shelves. There is some trial and error here, so it is best to begin with a fat tenon, then make minor adjustments until the machined corner of the tenon will just fit in a mortise. Adjustments to the cut are tiny, because the cuts are made on both sides of the piece. The difference is twice the amount of the height adjustment.
I set my combination square to the distance from the end of the tenon to the shoulder, then use the square to set the router table fence. I’ve already made the finished shoulder cut, so I set the router bit to just meet the saw kerf. The first pass is made with the end of the board against the fence. I use a wide backing board to push the material across the bit and move the board out with each pass.
When the cheeks are the proper thickness, I place the end of each shelf on end next to its mortise. I mark all the joints with a lumber crayon so that I keep the arrangement of the parts the same as I fit each joint. I mark the end cuts with a pencil, then use the combination square to carry those lines back to the shoulder.
I make the tenon end cuts for the narrow shelves with a band saw, and stop just before the blade reaches the edge of the shoulder.
On the wide shelf, material between the two tenons must be removed. I make a rough cut at the band saw, and aim wide on these cuts so that when I remove the band-saw marks I don’t end up beyond the layout lines. I set a guide bearing on a flush-trim bit in the router to ride on the pre-cut edge of the shoulder and use the router to clean up the junk between the tenons back to the shoulder line.
Cut the Tenon

Rise to the challenge. Set the cutter to the bottom of the layout line.

Got your back. Use a wide block to move the narrow shelves across the router bit.

Now you know. Aim for a snug fit by testing a corner of the tenon in the mortise after routing the cheeks.

From the source. Mark the ends of the tenons directly from the mortises.

Stop in time. Cut the end of the tenon, but stop just short of your shoulder line.
Fit to be Fit
In a perfect world, the tenons would slide neatly into the mortises at this point, and I would move on to the next step. In real life, however, it isn’t that easy. There needs to be a slight amount of clearance to assemble the joint, but not so much as to leave a visible gap on the outside. The prudent course is to make the tenon just a bit big, then reduce its size in controlled, small amounts.

Ease in. Bevel both the ends of the tenons and the edges of the mortises for fitting.
Before fitting the joints, I take a chisel and bevel both the ends of the tenons, and the inside edges of the mortises. This makes it easier to slide the tenons in, and it prevents the hard edges of the tenons from breaking the edges of the mortises as they exit.
Off the top. The pencil marks indicate the high spots. Remove them with a float, then test the fit again.
I start with the narrow top shelves with the single tenons, and I push the piece in as far as I can. I remove the tenon and look for dents or shiny spots that indicate where material needs to be removed. It’s easier to remove material from the tenon, and depending on how much needs to be removed I will use a chisel, shoulder plane or a float.
Before the second attempt at fitting, I take a soft pencil and make hatch marks on the tenon. Then I shove the pieces back together. The pencil marks smear on the high spots, and I’ll work on those with the float. The mortises shouldn’t need any work, but sometimes there will be a bump on the inside walls that has to be removed, so I always take a good look at both parts of the joint.
It’s tempting to break out the mallet and start pounding away, but it is safer to work on the joints with hand pressure only. Banging can split the side piece, especially if it has been glued up from narrower pieces and is weak near the opening at the top.
The lower shelf is worked the same way, but it is trickier to fit both tenons at the same time. Each round of fitting and trimming requires some detective work to find out exactly what is keeping the joint from going home. When all the tenons have been fit, the shelves should fit snug and square.
Mortises, Take Two
I lay out the secondary mortises by marking the outside of the upright on the tenon. Then I set my combination square to leave a 5⁄8” opening when marked from each side. Then I make a mark 9⁄16” away from the upright, parallel to the first mark.
The mortise is initially cut at 5⁄8“ square, with the inner edge set 1⁄16” behind the outer face of the upright. This ensures that the wedge holds the joint tight, no matter what kind of swelling or shrinking may take place over time. The mortise can be cut with one pass of a 5⁄8” hollow-mortise chisel, or four passes with a 3⁄8“ chisel.
Cut a piece of scrap to match the height of the shoulder so that the tenon isn’t hanging in space at the mortise machine. Set the fence of the machine to the exposed outer end of the mortise and make the cuts. Reset the fence to cut the back edges. The outer edge of the mortise is angled by hand to match the angle of the wedge.
I don’t worry about the angle; I make a sloping cut that starts 1⁄16” away from the layout line. I mark the line, then press my chisel against the wall of the mortise and swing the edge down to the corner. Then I stand facing the tenon, put the edge of the chisel on the line and angle it back by sighting down the back of the chisel to the edge of the mortise below.
After tidying up the edges of the small mortises, I cut 5⁄8“-square pieces a few inches longer than needed for the wedges. I carry the layout lines from the mortise to an edge of the tenons, and mark the slope on each wedge from the marks on the tenon. I make the angled cuts on the band saw, then remove the saw marks with a few swipes of a block plane.
The wedges are seated by tapping them gently with a mallet. The sound changes when they are tight. If you hit the wedges too hard, it’s easy to break out the end of the tenon. Should that happen, the broken piece can be glued back in place.
When the wedges fit nicely, I mark an equal distance above and below the tenon, and cut them to length. I make a discrete mark on both the wedge and the inside of the mortise so the wedges will go back in the same holes to which they were fit.
Install the Wedge

Back it up. A thin piece of scrap under the tenon provides support when making the second mortise.

Angle by eye. Use a chisel to taper the end of the mortise for the wedge.

Just behind. The square end of the mortise lies behind the face of the side to allow the wedge to seat tightly.
After Everything Fits
After completing the joinery, the book rack is taken apart for finishing. All the parts are exposed, and need to have the edges eased and surfaces smoothed. The curved portions of the cutout at the top and the scroll at the bottom of the sides are smoothed with rasps.

Fit first. Leave the wedges long until they fit nicely in the mortises, then mark and cut them to length.
I put a slight bevel on the edges of the shelves and sides using a block plane for the long edges and a fine rasp for the curved parts. I remove any mill marks from the faces of the boards with a smooth plane. The ends of the tenons and the wedges are also eased, starting where these pieces exit their mortises. The chamfers on these edges gradually increase the farther away they get from adjacent surfaces.

Fit first. Leave the wedges long until they fit nicely in the mortises, then mark and cut them to length.
Original pieces were ammonia-fumed, then shellacked. I used a combination of oil stain, walnut Danish Oil and shellac for a similar look.
Article: Learn to create an authentic-looking finish with modern materials.
Patterns: Download Full-size Patterns for the Book Rack sides


