We may receive a commission when you use our affiliate links. However, this does not impact our recommendations.

Notched and nailed joints add visual interest to this simple project.
This form is typically called a Shaker silverware tray – but it comes in handy for ferrying all sorts of things hither and yon.
I got lucky at the big box store in finding some perfectly straight, flat and clear 1⁄2″-thick white pine with a bird’s-eye-like pitch-pocket pattern.
At my home center, thin stock is available in nothing longer than 3′ lengths. So to be sure I’d have plenty of that pretty “bird’s-eye” for all my parts, I picked up three 3′-long and two 2′-long 1⁄2″ x 6″ boards.
A design note: The dovetailed piece that inspired this version (which can be found in the October 2007 issue of Popular Woodworking Magazine, or read here) has half-pins at the bottom (and top) of the ends, which helps to support the sides as you lift. And for the notched construction shown here, it would arguably be a bit stronger to have the joints reversed so that notches on the ends support the front and back when you pick up the box.
 But reversing the notches would mean two more shoulder cuts to bring the box ends flush with the outside faces of the front and back – technically, you would be cutting one box joint by hand at each corner (and a box joint is typically a machine joint). Those additional shoulders would make the pieces harder to fit well, and for our first handsaw cuts in the I Can Do That column, I elected to keep it simple. Besides, I’m not planning to put anything heavy in the piece; the nails will hold it together just fine.
You could also choose to simply reverse the joints and inset the ends so as to avoid a box joint – but I don’t think that looks as clean (you’ll find a bonus SketchUp drawing at the bottom of this article for this approach).
Whichever approach you choose, the size of the workpieces remains constant; only the joint layout changes.
First Cuts
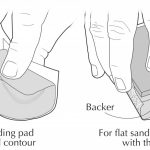
Pinch for precision. Just shy of your cutline, pinch with your fingers to form a guide for the cut. Slight changes in finger pressure will micro-adjust where the sawplate falls.
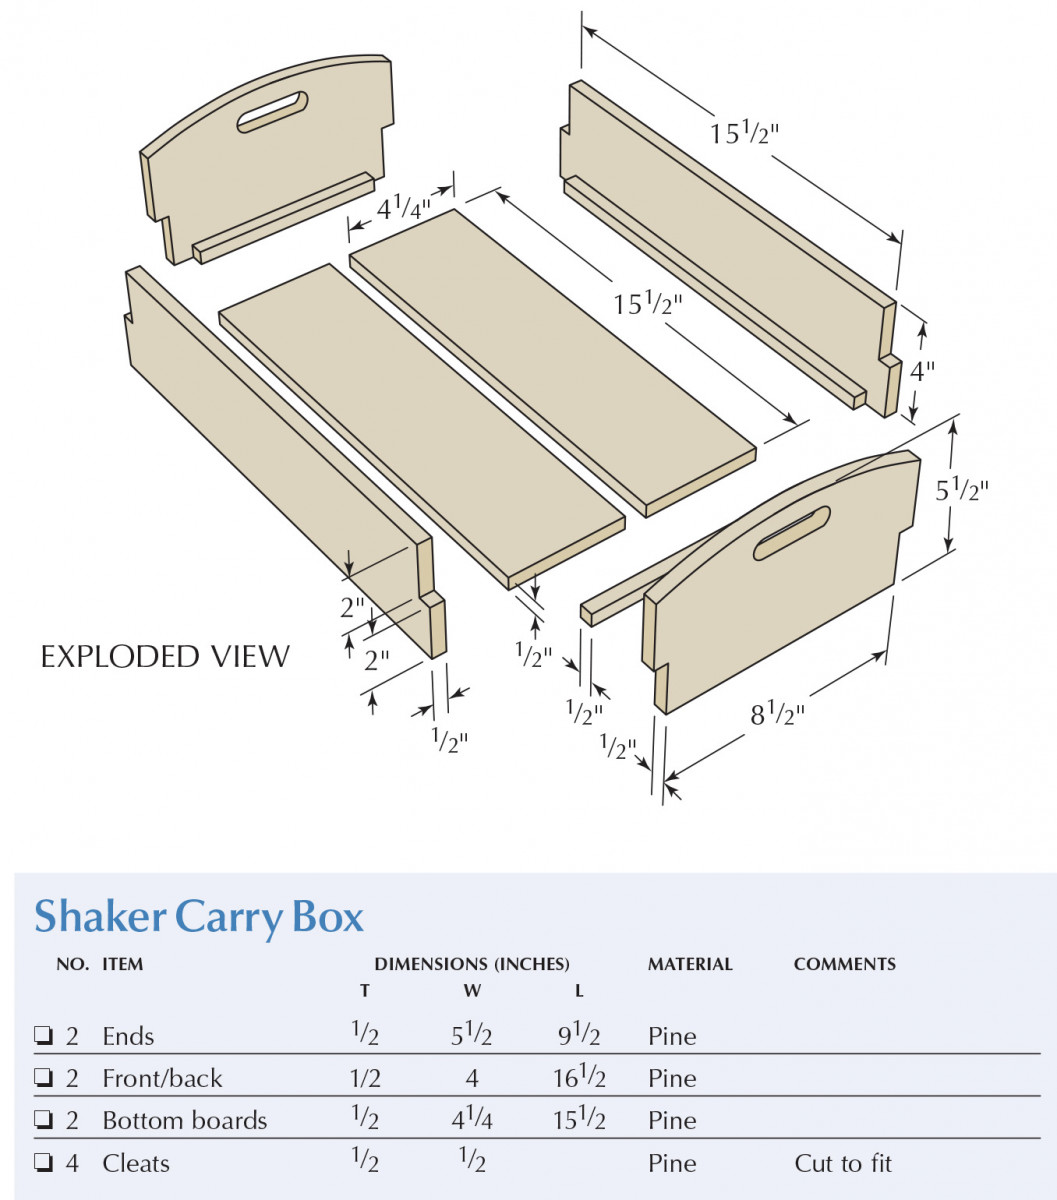
The ends are 51⁄2″ wide – which is the actual width of 6″-wide dimensional lumber – so those two pieces need only be cut to their final 91⁄2″ lengths, which I did at the miter saw.
The front and back are 161⁄2″ long but only 4″ wide. So before cutting them to length, mark out the cutline and use a jigsaw to cut them to width. If you have a little practice under your belt, you don’t really need to set up a straightedge for this rip cut. Yes, you need the cut to be straight – but you can arrange the factory edge at the top and turn your cut to the bottom (and of course, you can quickly clean up your cut if necessary using a block plane). Now cut the front and back to length.
Joinery Layout
Set your adjustable square to 1⁄2″ – or for more precise work, set it to the actual thickness of your wood. Put your wood face-down (or up) on your Workmate, then set the square’s stock on the wood and drop the rule down over the edge of your workpiece until it meets the table surface. Then tighten the thumbscrew to lock the rule in place.
Using that setting and a pencil, mark (or scribe with an X-Acto knife) a layout line on both faces and the top and bottom edges of both end pieces and the front and back. This is more easily accomplished with a marking gauge if you have one.
The notched cutouts are all 2″ x 1⁄2″. Reset your adjustable square for 2″, then on each workpiece, mark a line from your first layout line to the edge of the piece on both faces, and across the end. It doesn’t matter off which long edge you register the square for the front and back; the layout line is at the centerline of the board. On the end pieces, register off the bottom edge.
Time to Saw
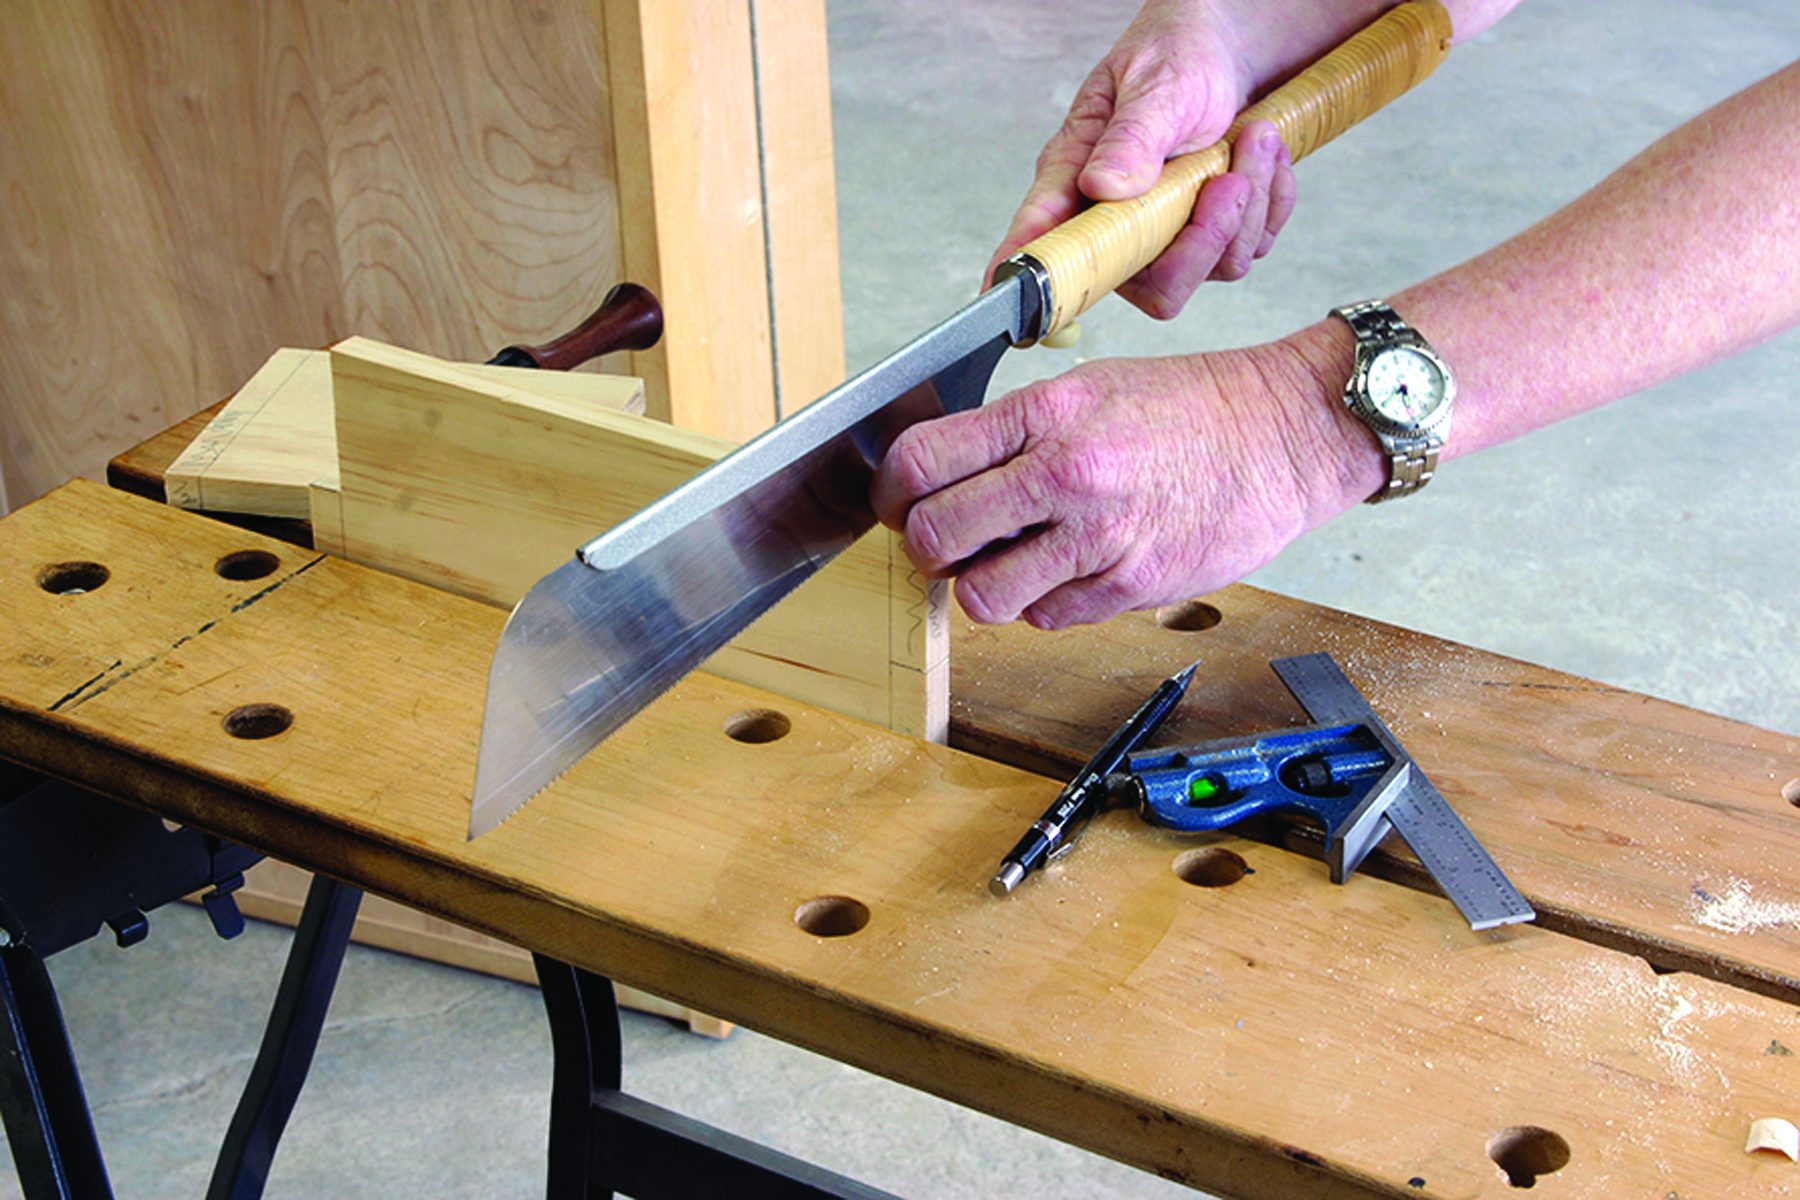
We recommend a dozuki as your first handsaw, in large part because you can get a decent one at the home center. This Japanese saw cuts on the pull stroke, and the one in our kit has a back that stops short of the end of the sawplate, as you can see in the picture on the previous page. That’s important, because the 2″-deep shoulder cuts can’t be made if you don’t have 2″ of sawplate under the back – and this saw doesn’t. So as I finish each long cut, I nibble away my cutline with the toe of the blade.
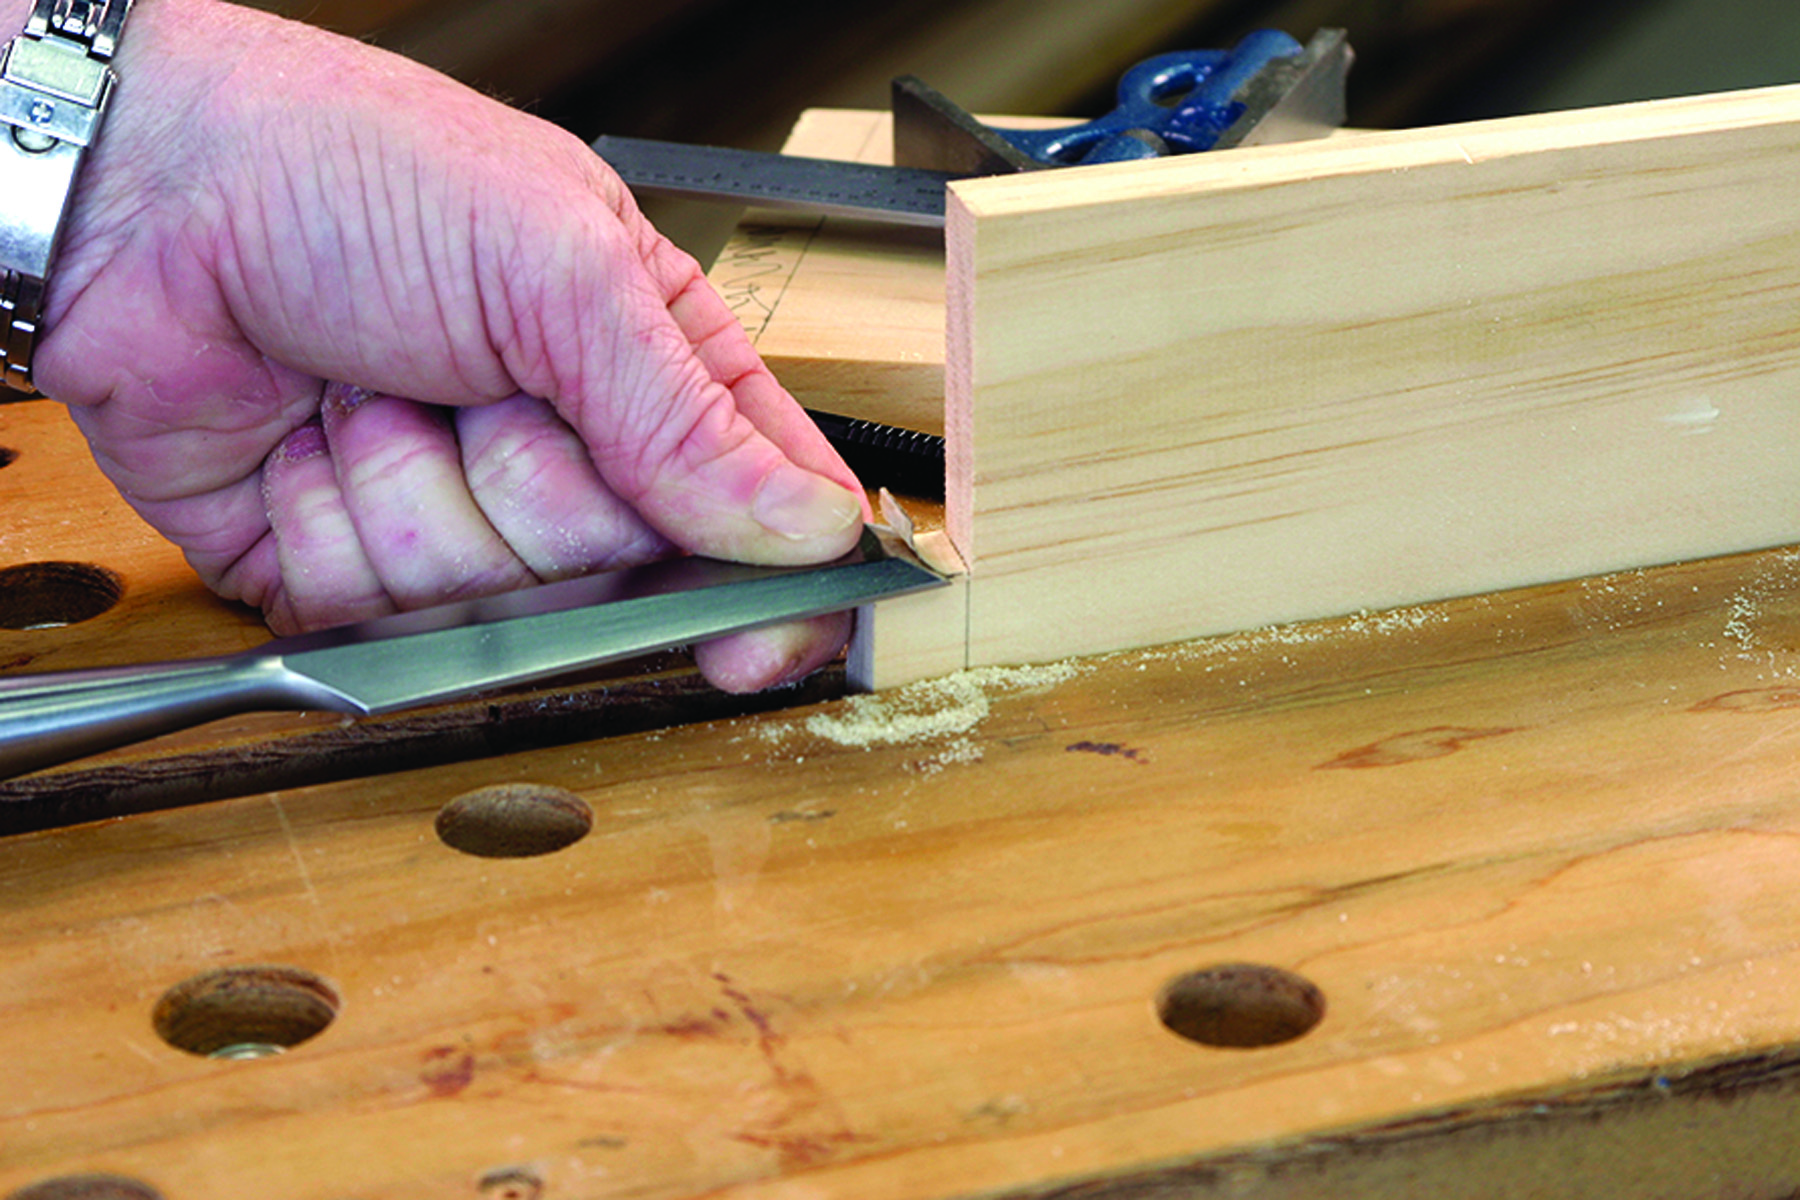
Trim for precision. Hold your chisel at 90° to the work and gently pare toward the shoulder to create a flat mating surface for your joint. If you need to pare the end-grain surface, take lighter cuts – and use a sharp chisel.
To make these cuts, pinch across the work with your off-hand using the pads of your fingers to align the sawplate with your cutline. With your index finger extended toward the end of the saw, grasp the handle just enough to keep it from flying out of your grasp.
To start the cut, “hover” just barely on the work and pull the saw toward you. Align your body so that you can pull the saw straight back (and push it forward) using your shoulder to supply a locomotive-like motion. Saw straight down to your baseline, then make the shorter cut – and on to the next one.
After all your notches are cut, dry-fit the pieces to ensure that you’ve sawn the mating surfaces on each one flat and straight. If necessary clean up your cuts with a sharp chisel.
Once your joints are fit, lay out the curve across the top and the handle holes on the two end pieces. Cut the top curves with a jigsaw. Then drill a hole inside the handle waste on each end piece, into which you can insert your jigsaw blade, then cut those, too. If clean-up is required, use a rasp, file and/or sandpaper.
Hammer Time
It’s almost time to nail everything together. But first, cut cleats to fit inside the joined pieces, and glue and clamp them in place aligned with the bottom edge of both sides and the front and back. The notches make it easy to properly align the workpieces while you clamp them square. Drill two pilot holes through the long grain and into the end grain of each joint, then sink 5d finish nails to secure it together. Rip your bottom boards and cut them to length then drop them in place. A coat or two of clear Watco, and you’re done.
Download the PDF of this article for the drawing and cutlist:Shaker Carry Box
Article: For step-by-step instruction on building a more advanced version (it’s dovetailed) of a Shaker Silverware Tray, click here.
Plan: Download SketchUp models for version one and version two of the “Shaker Carry Box.”
Editor’s note: This article originally appeared as I Can Do That: Shaker Carry Box in the October 2012 issue of Popular Woodworking.
Here are some supplies and tools we find essential in our everyday work around the shop. We may receive a commission from sales referred by our links; however, we have carefully selected these products for their usefulness and quality.