


We may receive a commission when you use our affiliate links. However, this does not impact our recommendations.
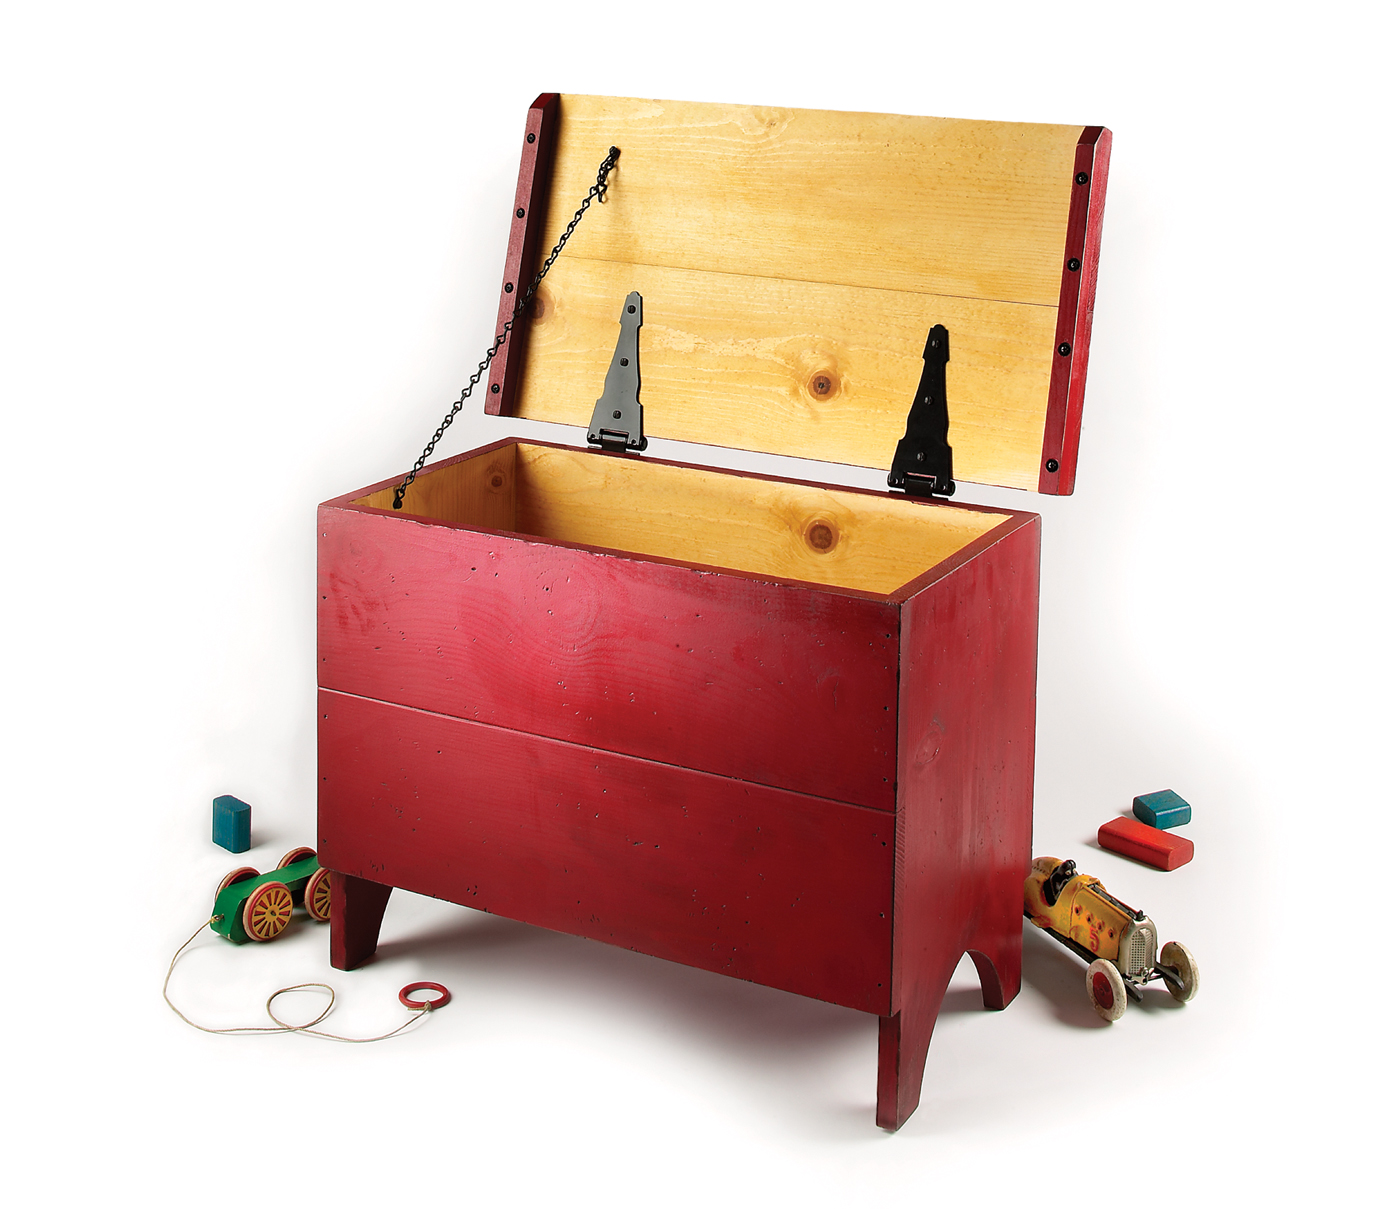 Nails, glue and a nice long day in the shop are all it takes to make this country chest.
This rustic hinged-lid box is a design traditionally used as a basic tool chest, but I thought a scaled-down version would make a great chest for stashing toys (with the addition of a safety hinge) or extra grocery bags in the kitchen. It is adapted from a chest shown in John A. and Joyce C. Nelson’s “The Big Book of Weekend Woodworking” (Lark Books).
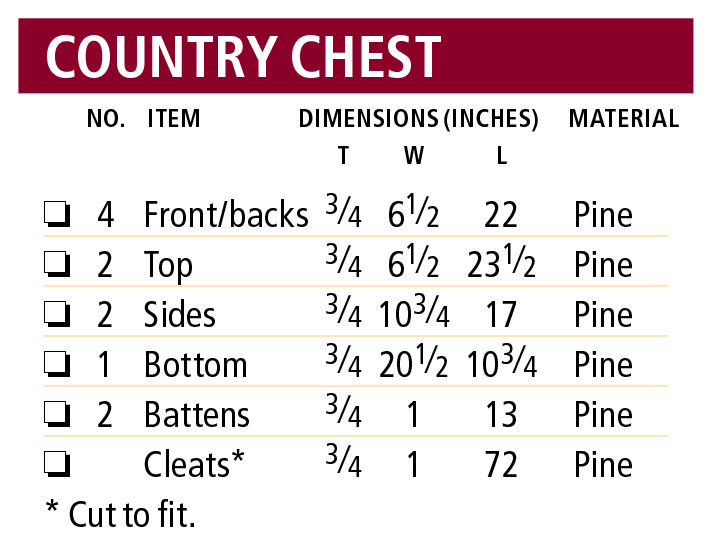
Cutlist and Diagrams
A Trip to the Home Center
A trip to the home center is the beginning of every “I Can Do That” project, and there I assessed every #2 pine 1×12 in stock. Because I’d decided to paint the chest, I wasn’t concerned with the grain as much as getting the straightest, flattest boards. While two 8′-long boards would have been enough to construct the chest, I purchased an extra, just in case. I also bought a quart of red paint, 6″ strap hinges and a box of 4d finish nails. Even with the extra wood, the materials cost was but $75.
Rough Cut the Pieces
The top and front are the most visible pieces, so I marked these first and rough cut them to length (with a couple inches to spare) using the miter saw. I then selected the next-clearest areas for the sides, then two boards for the back, and finally the bottom. Offcuts were set aside for the battens and cleats.
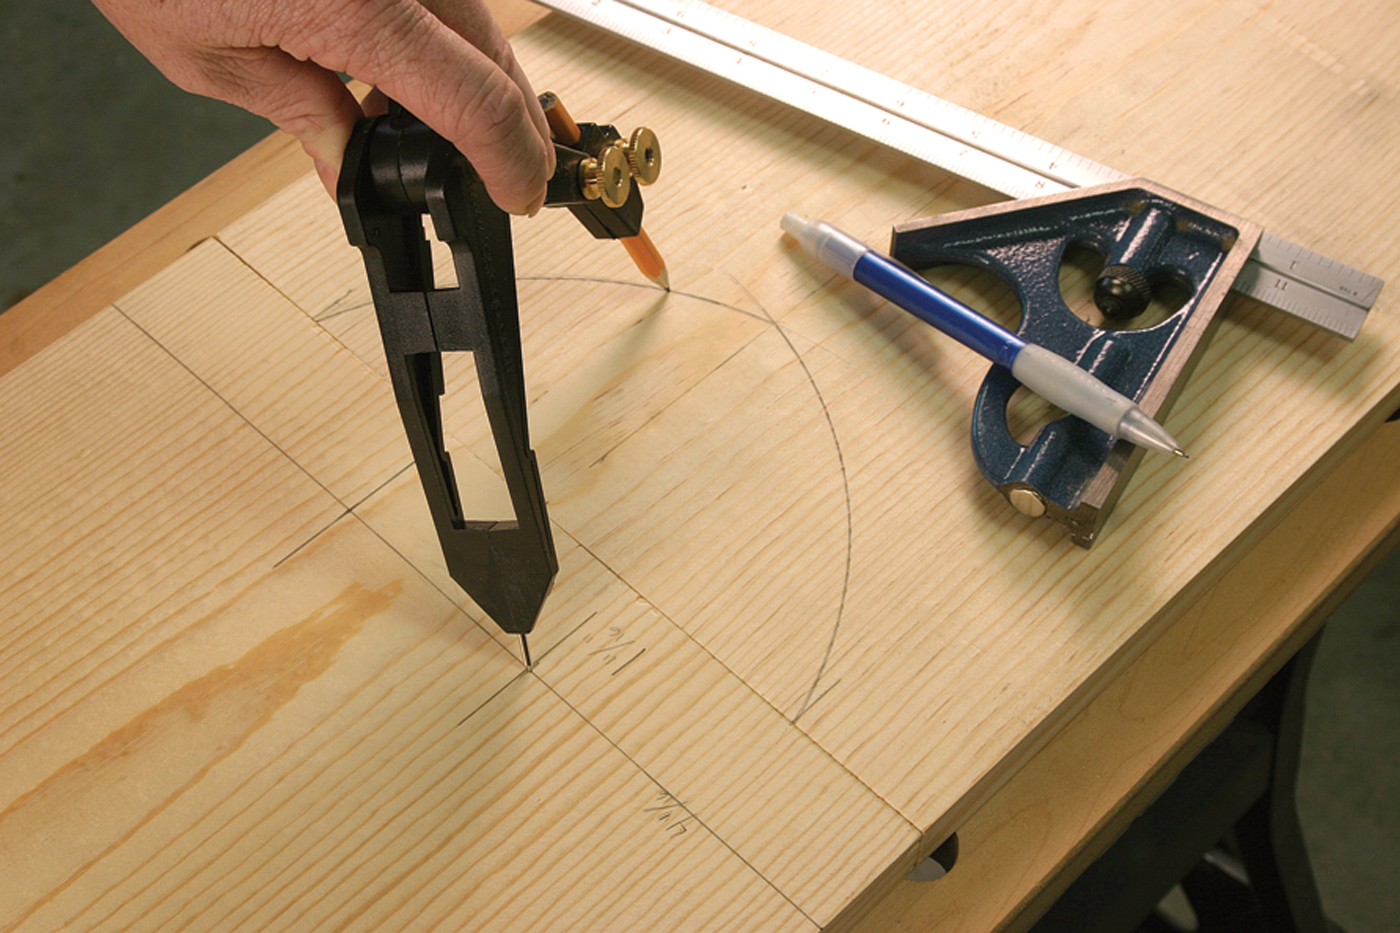
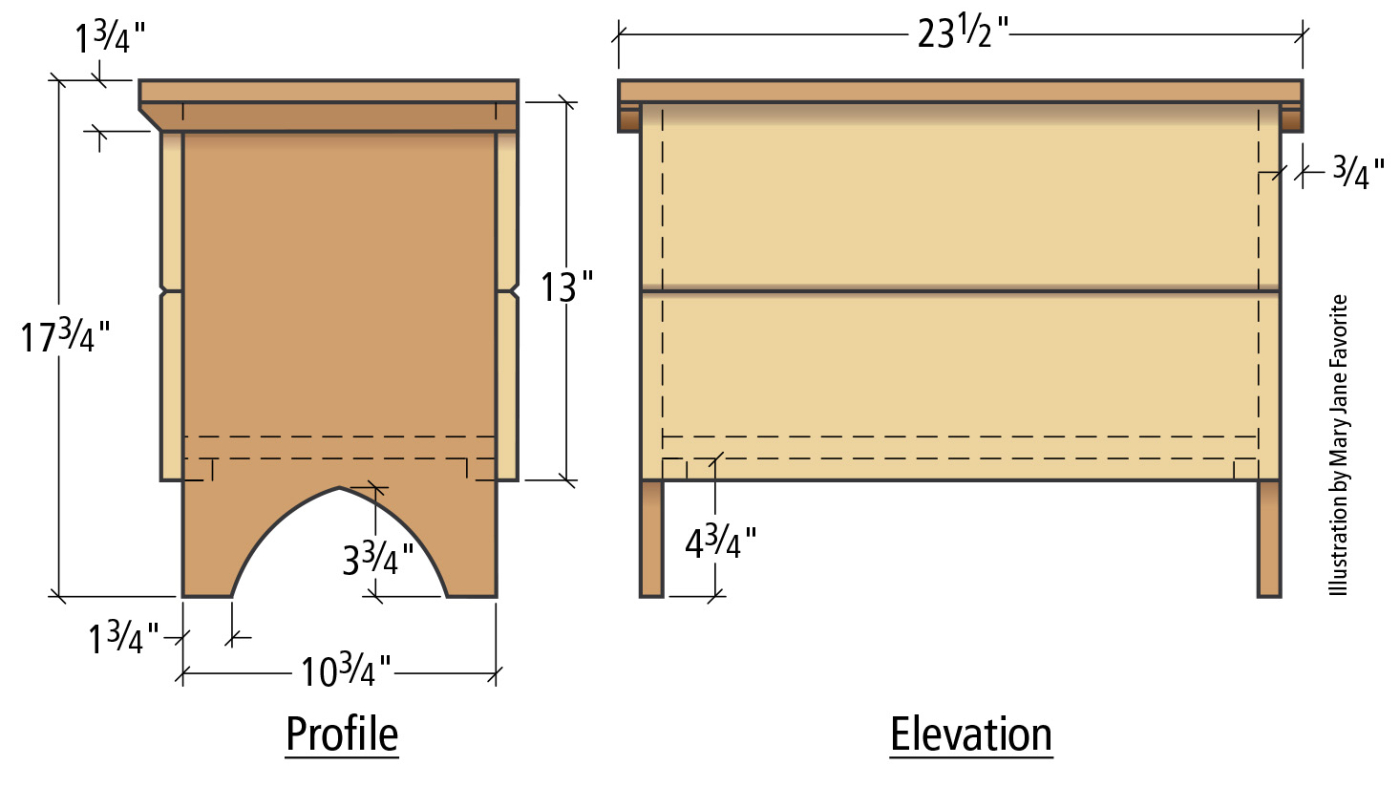
Mark a horizontal line 11-1⁄16″ from the bottom of each piece, then measure in 4-1⁄16″ from each of the four sides and mark the intersecting points. These are the four points on which you’ll place the point of your compass to mark the arches.
Lay Out the Arches
Arched cutouts on the sides dress up the piece a bit. To lay them out, first mark a line on each piece 11-1⁄16” up from the bottom, then measure in 4-1⁄16” from each long edge on both pieces and mark the intersections. Then butt the sides against one another (feet to feet), set the compass to make a 5-1⁄4” radius, then place the point on each mark and draw arcs on the opposite piece. The two arcs on each piece will intersect at the center of your board, forming the arch apex. Cut out each arch with your jigsaw, then clamp the sides together and clean them up using a rasp and sandpaper.
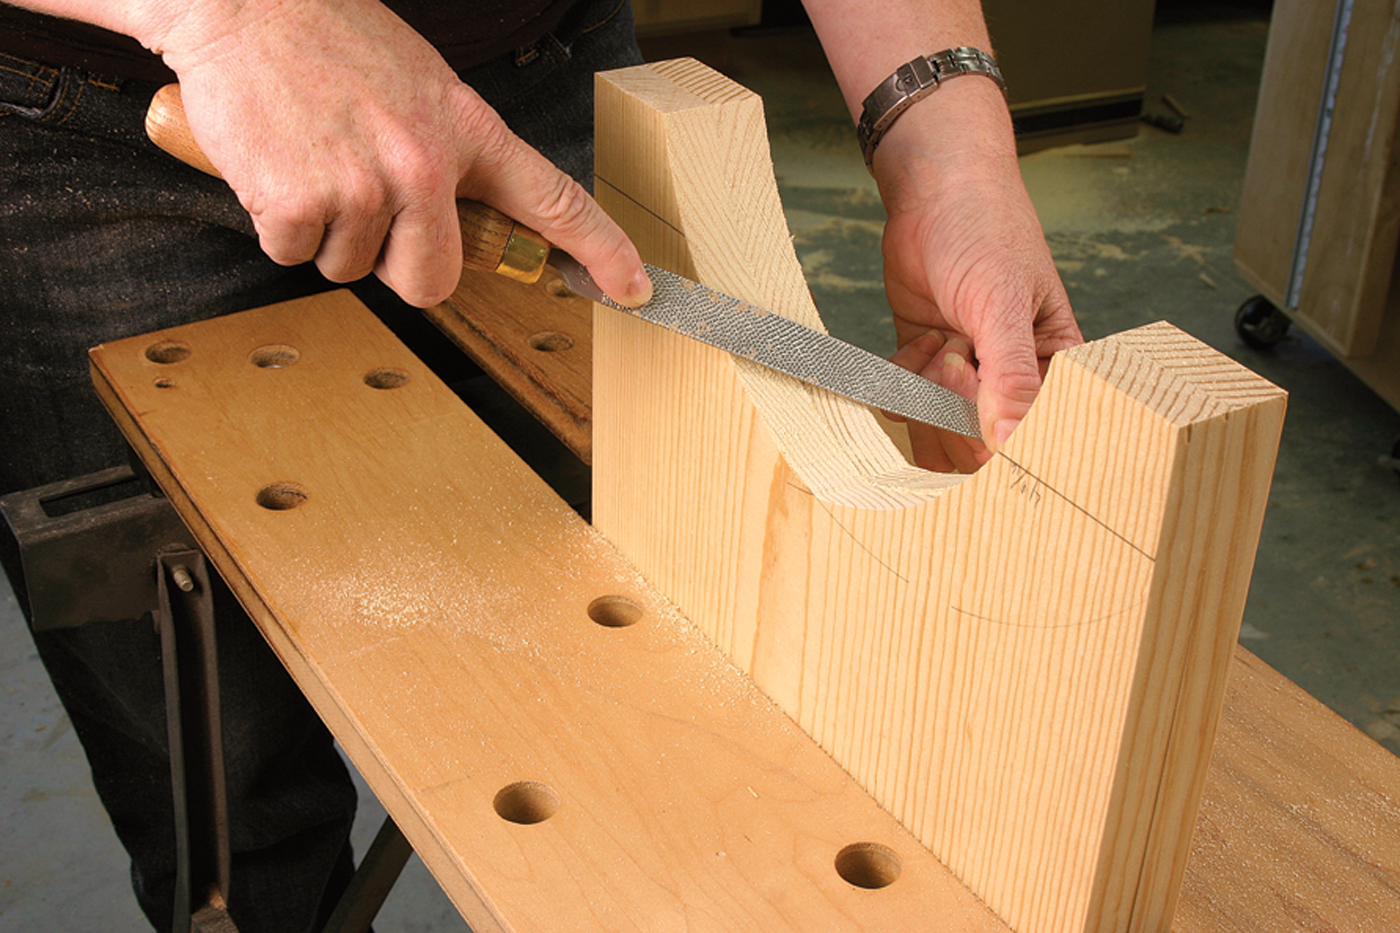
Clamp the sides together and use a rasp and sandpaper to clean up the arches. Don’t worry if they don’t match perfectly; because there’s 22″ between them on the finished chest, minor differences won’t be noticeable.
Chamfered Panels
Because the top, front and back of the chest are 13″ wide and a 1×12 is narrower than that, you have to rip two boards to 6-1⁄2” wide to make each panel. It’s nigh on impossible to cut a glue-ready edge with a jigsaw, so to help disguise any resulting gaps at the seam, I used my block plane to chamfer the adjoining edges.
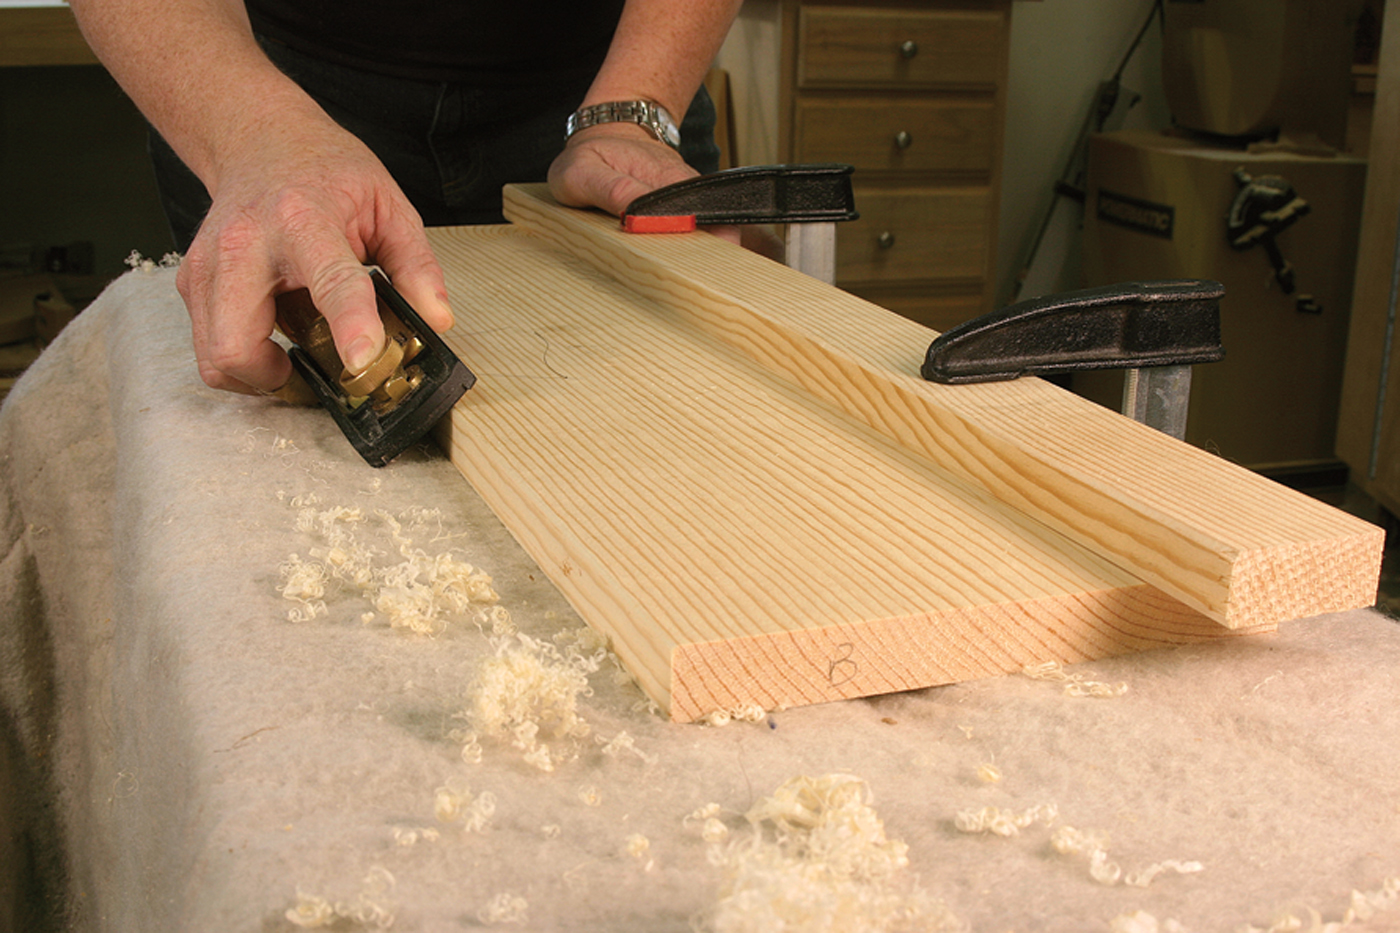
Hold your plane at a 45° angle to the edge of the board, and shave down the length until you’re satisfied with the chamfer. The goal is to draw attention to the “seam,” so make sure the chamfer is big enough so that paint doesn’t overwhelm it.
Now you’re ready to assemble the box. Glue and clamp the back boards in place on the sides and drill three 1⁄8” pilot holes in each board. Drive 4d finish nails into the holes, then repeat this process for the front boards. Leave the nails proud of the surface to avoid dinging the boards with your hammer, then use a nail set to drive them 1⁄16” below the surface.

After drilling pilot holes, drive 4d nails and leave them a little proud of the surface.
Top & Bottom
To make the battens, cut two 1″ x 13″ pieces from your offcuts, trim the front edge at 45° but leave a 1⁄4” flat at the top. To make the top, screw the top pieces to the battens. First snug the two top pieces together on your bench, and lay the battens across either end. Drill countersunk clearance and pilot holes, then attach the battens with #8 x 11⁄2” wood screws.
To make the bottom, first cut your cleats to size and nail them around the inside bottom edge of the chest. Now cut the bottom a hair wider than necessary and use your block plane to trim it to fit. Drop the bottom in place, hang the work over the edge of the Workmate so the cleats are supported, then nail the bottom to the cleats from the inside.
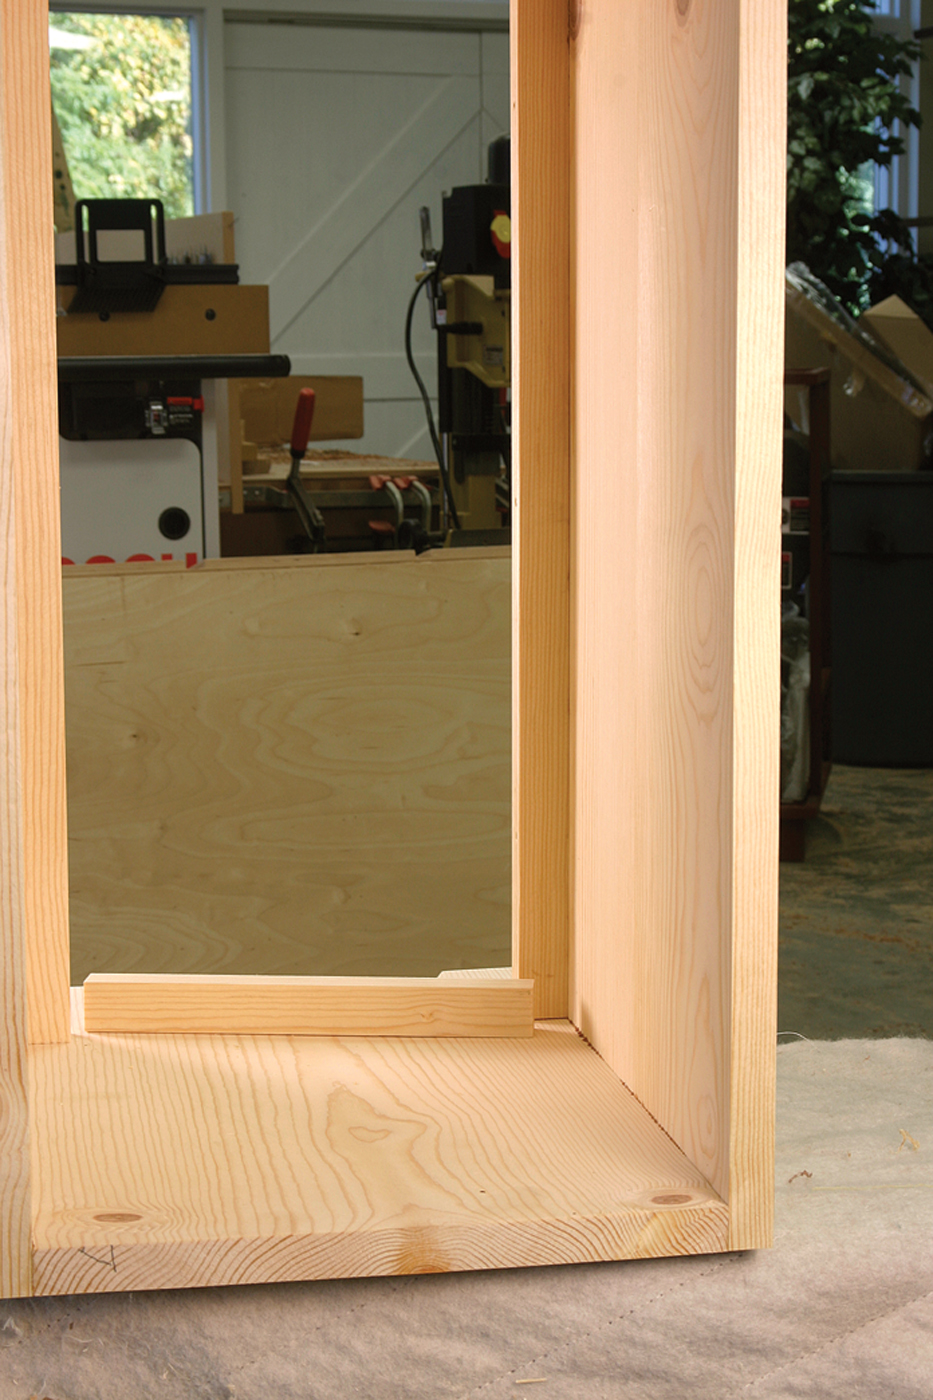
Cut the front and back cleats to size first, then snug the end cleats between them.
Woodworking Therapy
Sand to #120 grit and apply two coats of bright red paint to the outside and a coat of amber shellac to the interior to seal it. After the paint dries, grab a ring of keys and beat the you-know-what out of the box until you get a lot of lovely dings. Take a rasp to the edges, and for good measure, grab your hammer by the head and use the handle end to whomp the top edge a few times. Once the piece looks distressed (and you feel de-stressed) apply a coat of any dark gel stain over the entire thing. Work the stain into the dings, dents and raw edges. Wipe it off, and voilá – a century of age in just minutes. After the stain is completely dry, apply a coat of paste wax.
The Finishing Touches
To attach the strap hinges, measure in 4″ from the battens on the top, mark the holes with an awl, and drill pilot holes for the screws. The screws that came with the hinges were too long, so we used some we had on hand. You can color the heads black with a Sharpie if you want everything to match. I also attached a length of chain, leaving a few extra loops so the open angle of the top can be easily adjusted.


