We may receive a commission when you use our affiliate links. However, this does not impact our recommendations.

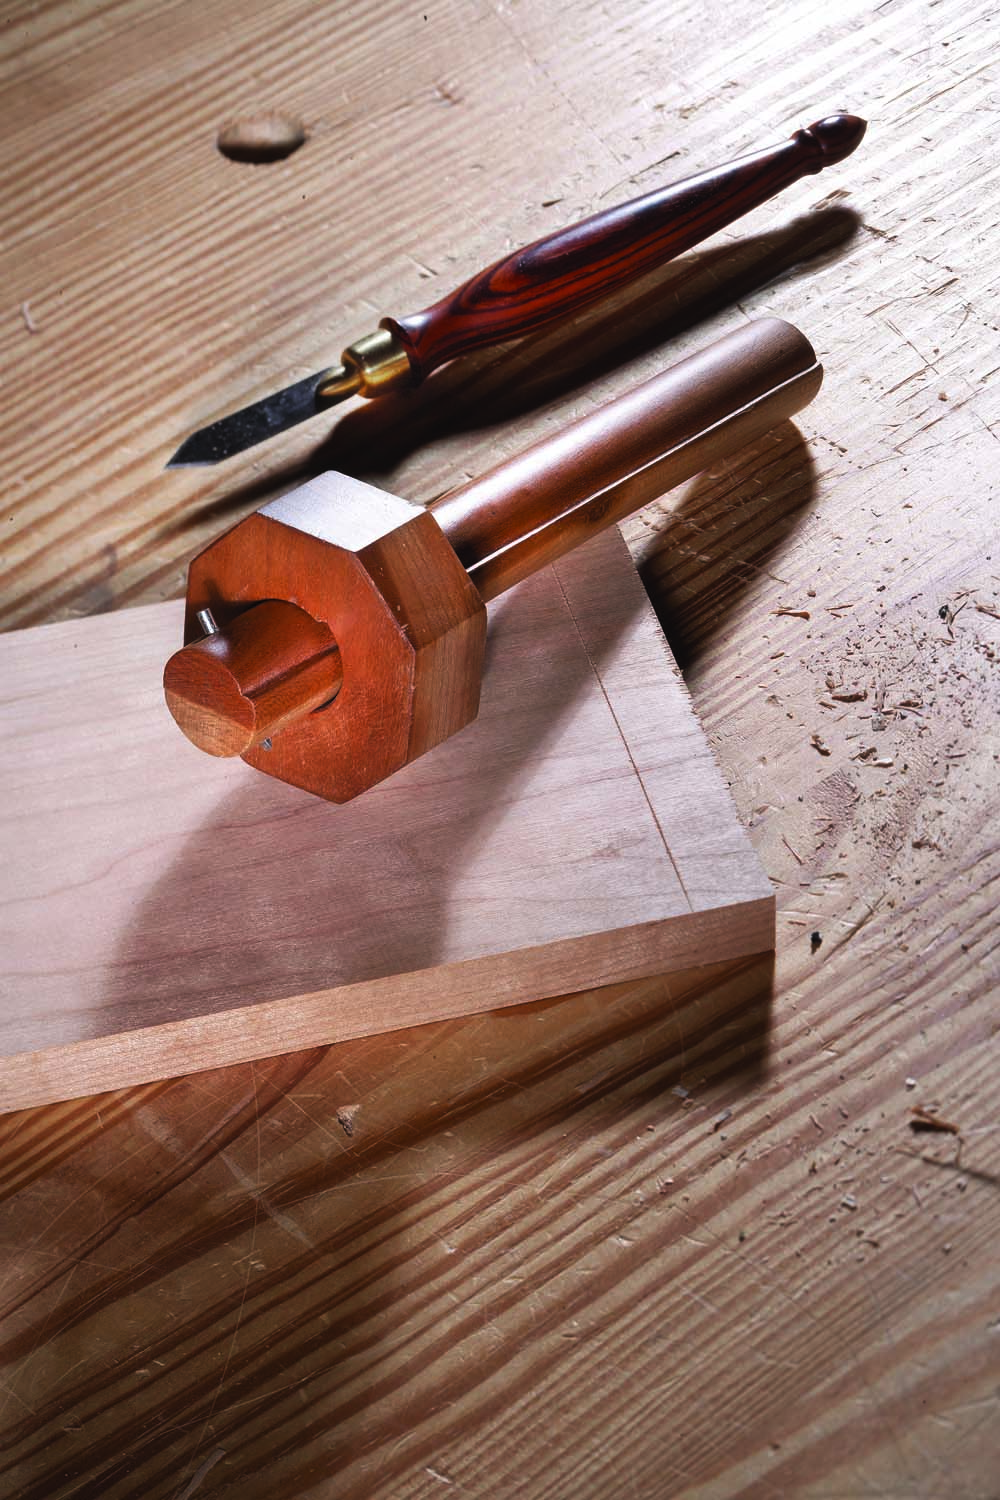
A marking star. This shop-made marking gauge is a copy of the cam-shaped-bar gauge the Star Tool Co. sold in the late 19th century. It’s simple to make, and helps you use up those scraps you’ve been hoarding.
On April 21, 1868, the United States Patent Office issued Patent Number 76,884 to Wessel Brodhead for an improvement to the field of carpenters’ marking gauges. Brodhead developed a tool that used a simple, elegant method for securing the bar to the head or fence of a marking gauge. Instead of the more common thumbscrew or wedge systems, this gauge took advantage of a cam-shaped bar that needed only a slight twist to lock itself to the fence.
Brodhead’s idea became a reality when the Star Tool Co. of Middletown, Conn., began manufacturing this style of gauge in 1872. Though the company was only in existence from 1872 to 1881, the gauge must have been a popular item as a fair number of them have survived. According to advertisements from Star Tool, it produced marking gauges, cutting gauges, mortise gauges and panel gauges that used this securing system. The basic grade of tool was made of beech with premium-grade tools offered in mahogany, boxwood and rosewood.
While these gauges are available on the antique tool market, they are sometimes hard to find, and good examples can be pricey. Because of this, I decided to reproduce a twist-lock gauge for my shop. I have since made examples of three of the styles of gauges that were produced by Star Tool.

 A Weekend Project
 A Weekend Project
Making one of these marking gauges is a fun, short project that can be accomplished in a couple evenings or during a weekend. Because the construction doesn’t require a large amount of material, you can use a stable wood from your cut-off bin or buy something exotic for little cost.
Begin by making the bar. The largest diameter of the bar on the Star originals is 3⁄4“, and the length for the marking and cutting gauges is 8 1⁄2“.
Rough out the bar stock to a 7⁄8“-square cross section at least 20” long. I find that the longer length makes it easier to deal with the stock when making the eccentric shape. (This also allows you to make a second gauge with little additional effort.)
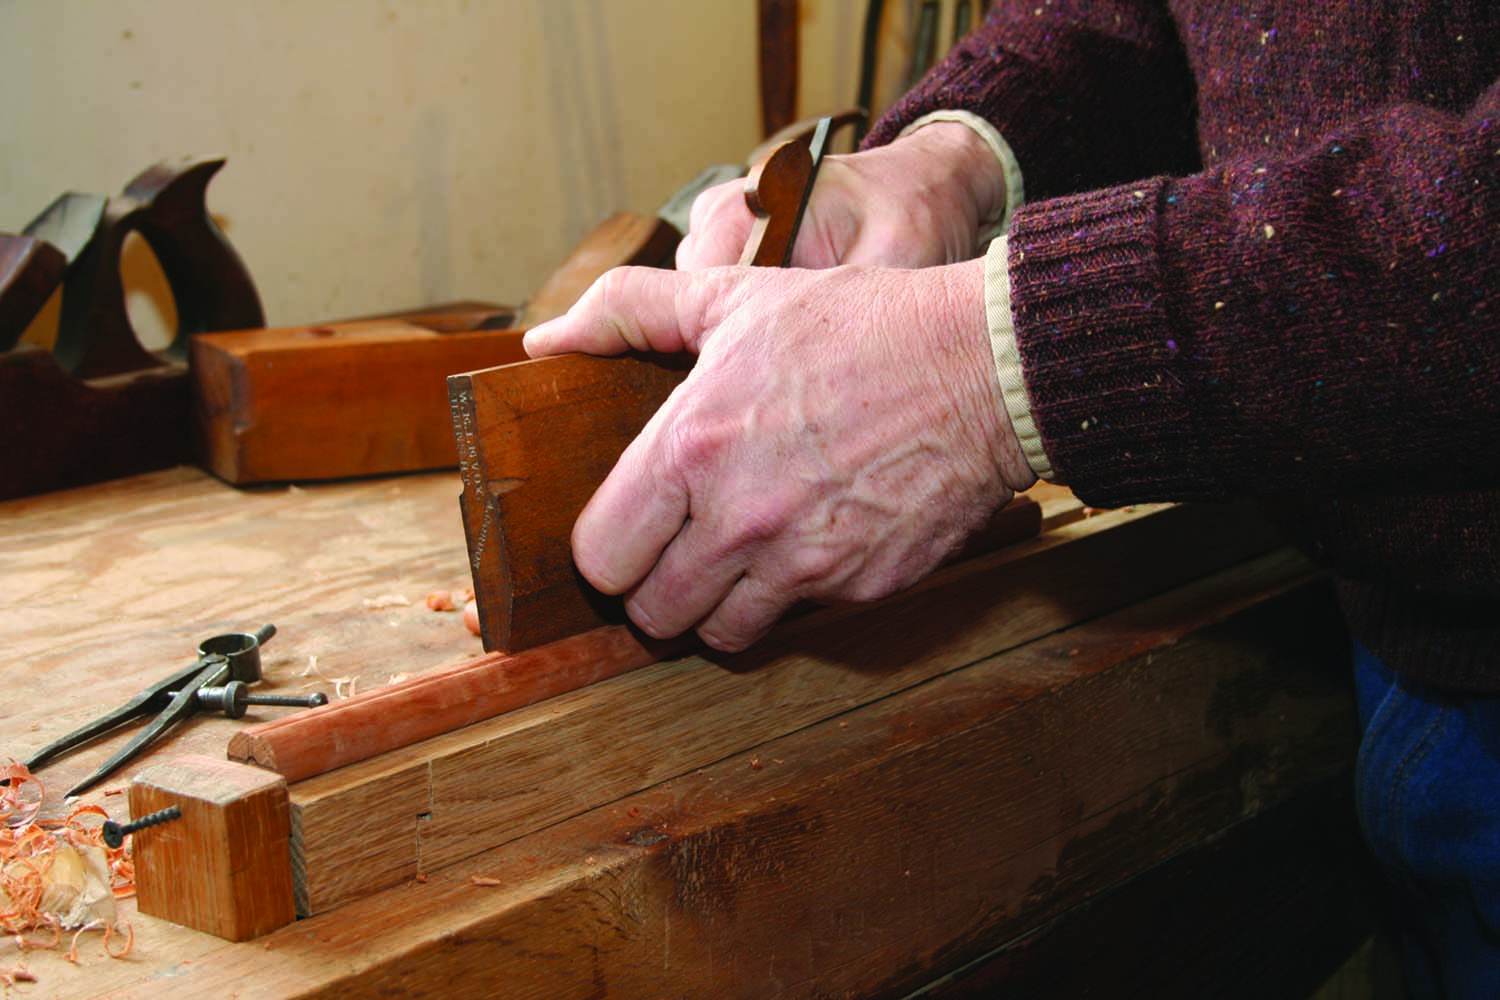
Octagon. Begin by making the bar stock. You can turn it round to 3⁄4″ on a lathe, or use a spokeshave to make an octagon, then true it with a 3⁄8″ hollow plane to 3⁄4″ diameter. Or, use a length of dowel.
To make the stock round, it can be turned on a lathe down to 3⁄4“. Or you can first make an octagon with a spokeshave, then true the piece from end to end using a 3⁄8” hollow plane to ensure that it is straight and 3⁄4” in diameter.
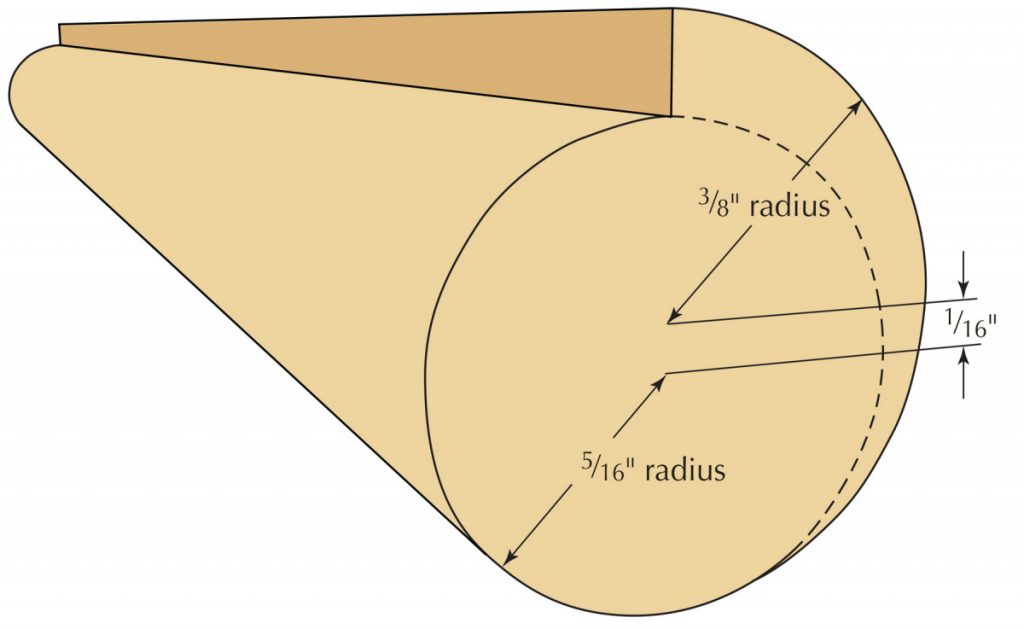
The final step for making the bar is to make the round section into the desired cam shape. I do this by first making a line along the length of the bar at 12 o’clock with a marking knife, then marking both ends with a semicircle drawn with a compass. The radius of the circle is 5⁄16“, and the center of the circle is lowered from the center of the stock approximately 1⁄16“.
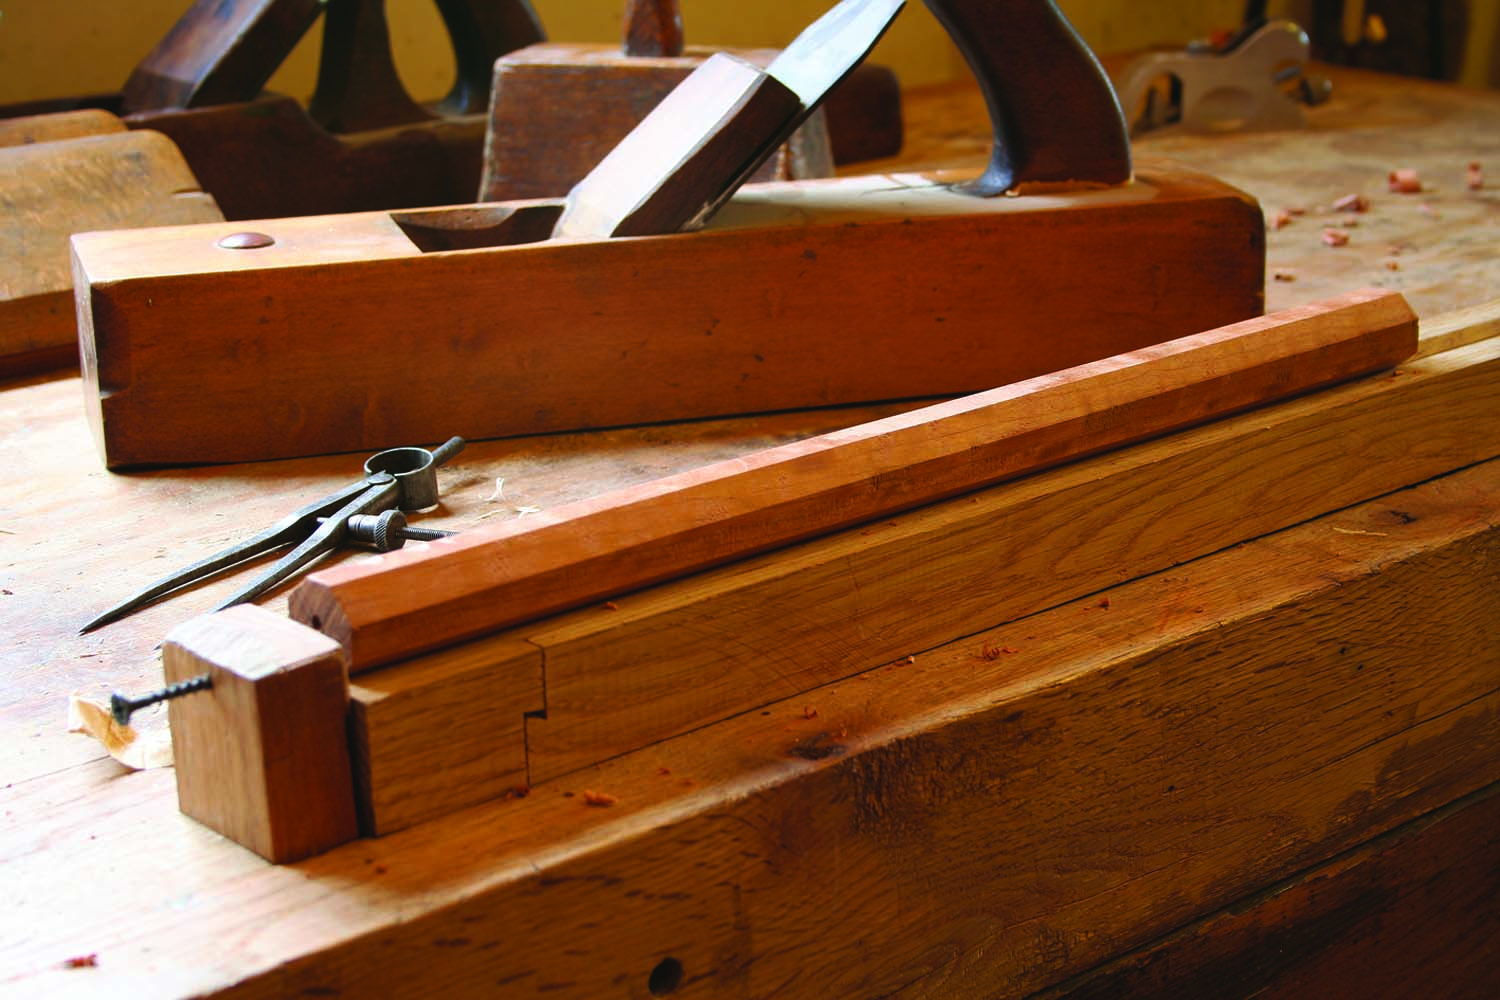
Fair curve. After paring away the bulk with a chisel, use a shoulder plane and 3⁄8″ hollow to fair the curve and create the locking shoulder.
The resulting circle will blend in with the circumference of the stock between 3 o’clock and 6 o’clock. The original patent drawing illustrates this fairly well. Carefully pare away the bulk of the material outside of the smaller circle between 6 o’clock and 12 o’clock with a chisel. Use a shoulder plane and 3⁄8” hollow to fair the curve down to the circular lines on the ends.
Make the Head
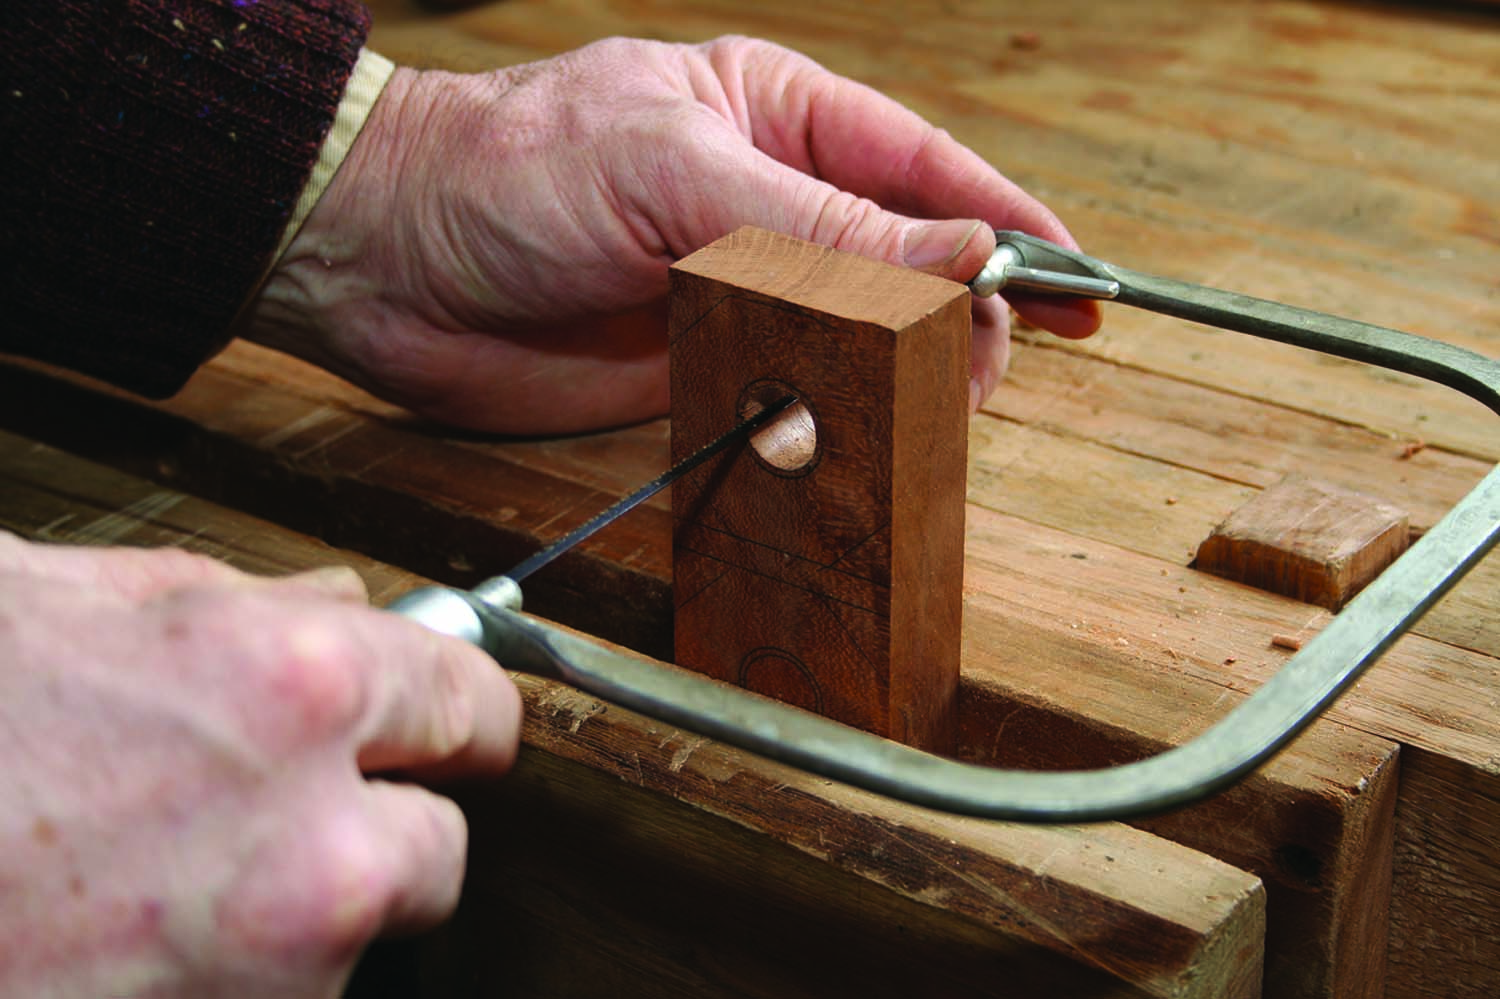
Cope. With a coping saw, make a kerf from 12 o’clock in your drilled hole outward to the marked circle.
On the original Star Tool marking gauges, the head was an octagon, 7⁄8” thick and 2″ from face to face. I make these by milling stock 7⁄8” x 21⁄8” x 6″. This allows you to clamp the piece easily while working on it and again facilitates making a second gauge.
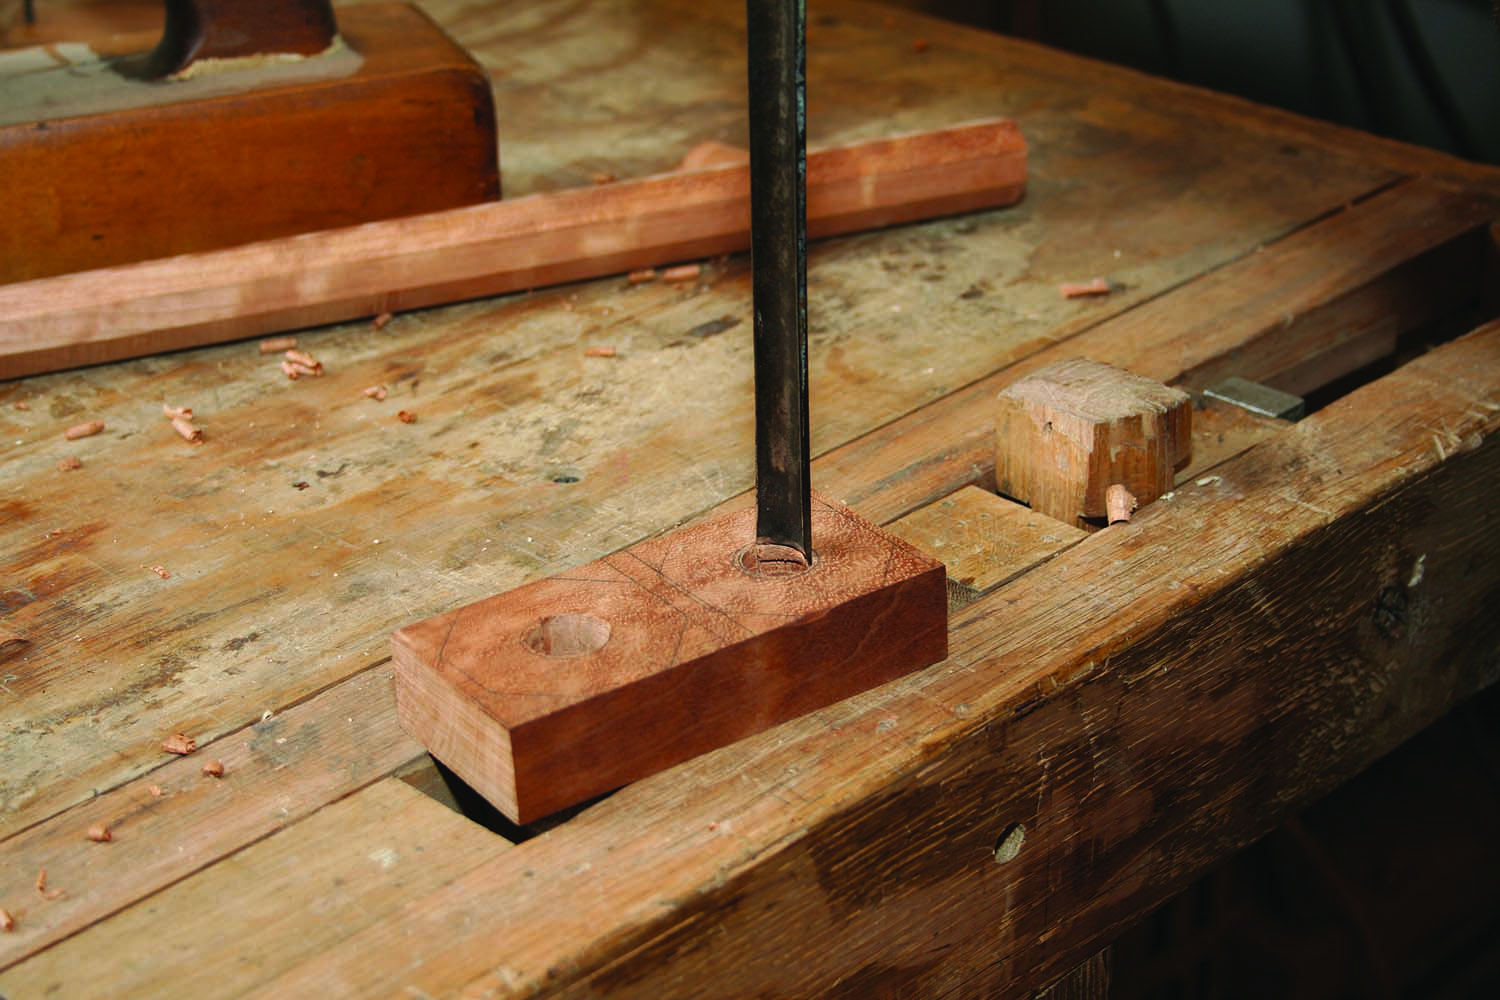
Gouge. Use an out-cannel gouge to create a fair curve from the smaller to the larger circle, to cut the shoulder that locks on the shaft.
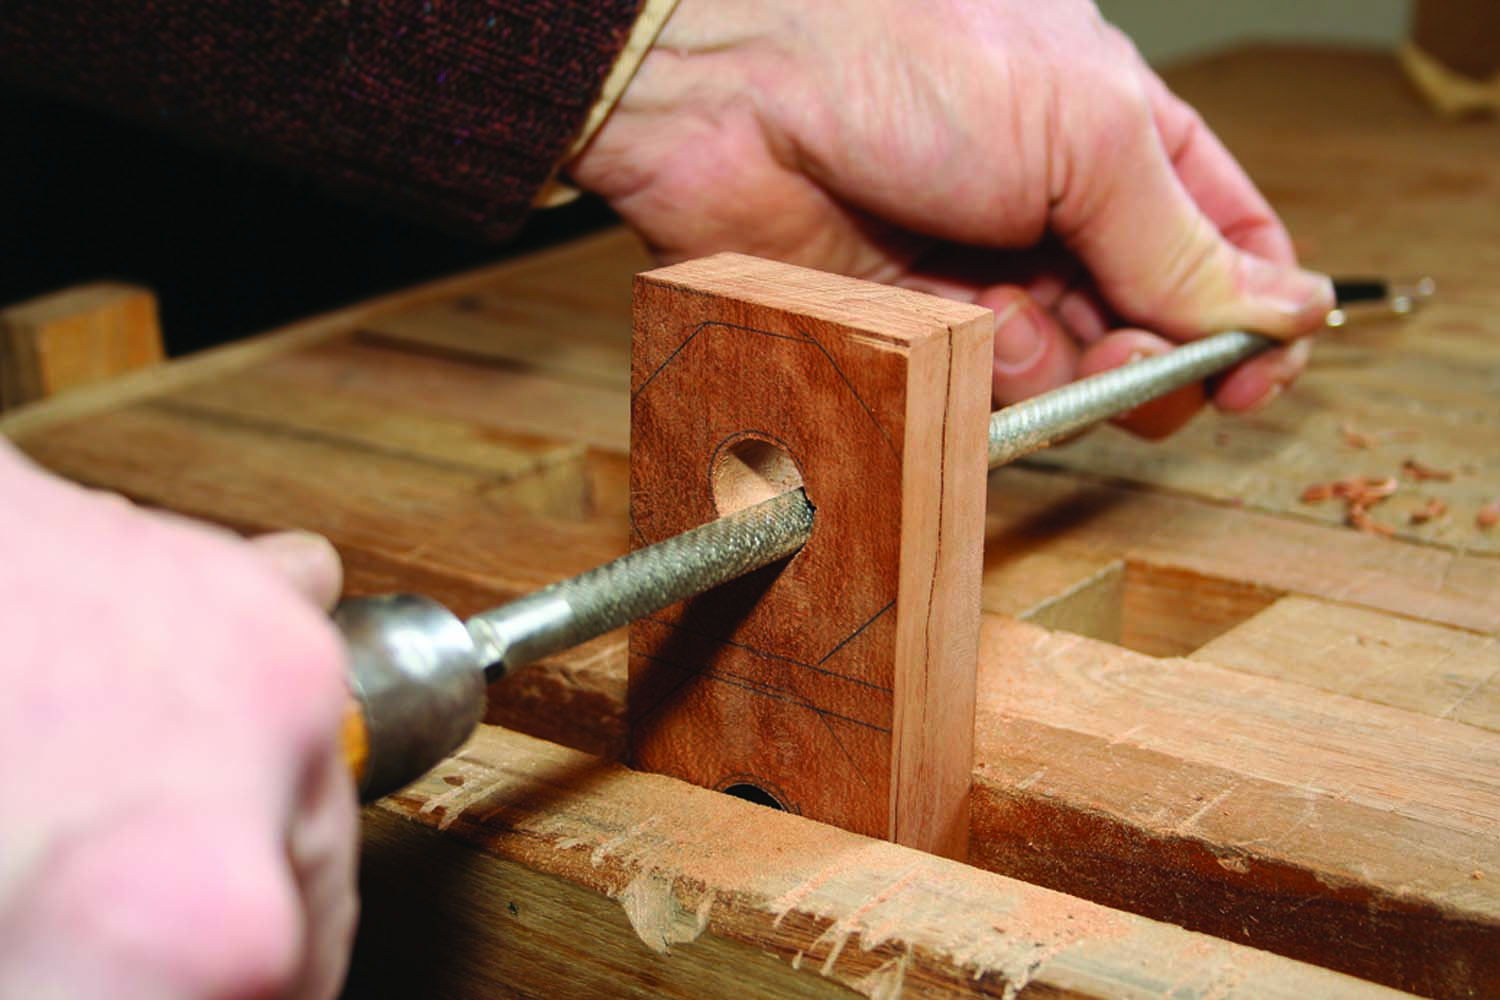
Smooth. Use a smooth-cut round file to smooth the interior of the gauge head so it rides smoothly on the shaft.
Draw two 2″ octagons on the stock and locate their centers. Draw a 3⁄4“-diameter circle with the same center as the octagon. Drill an 11⁄16” hole centered 1⁄16” below the center of the octagon. It is important that this hole is perpendicular to the face. Using a coping , saw a kerf at 12 o’clock from the drilled hole to the drawn circle. Using an appropriately sized out-cannel gouge, remove the material inside of the drawn circle between 6 o’clock and 12 o’clock (or left of the center). To avoid blowout on the opposite face, work from both sides of the head but remember that on the second side you will be working between 12 o’clock and 6 o’clock (or right of the center). This process is actually much more straightforward than it sounds. Using a smooth-cut round file, fit the bar to the head so it slides smoothly from one end of the bar to the other.
Finally, cut out the perimeter of the octagon. Because these are fairly small, use a method that you feel can be accomplished safely. I use a miter box and miter saw, but a scroll saw or backsaw also should result in a successful outcome.
Cutter Installation
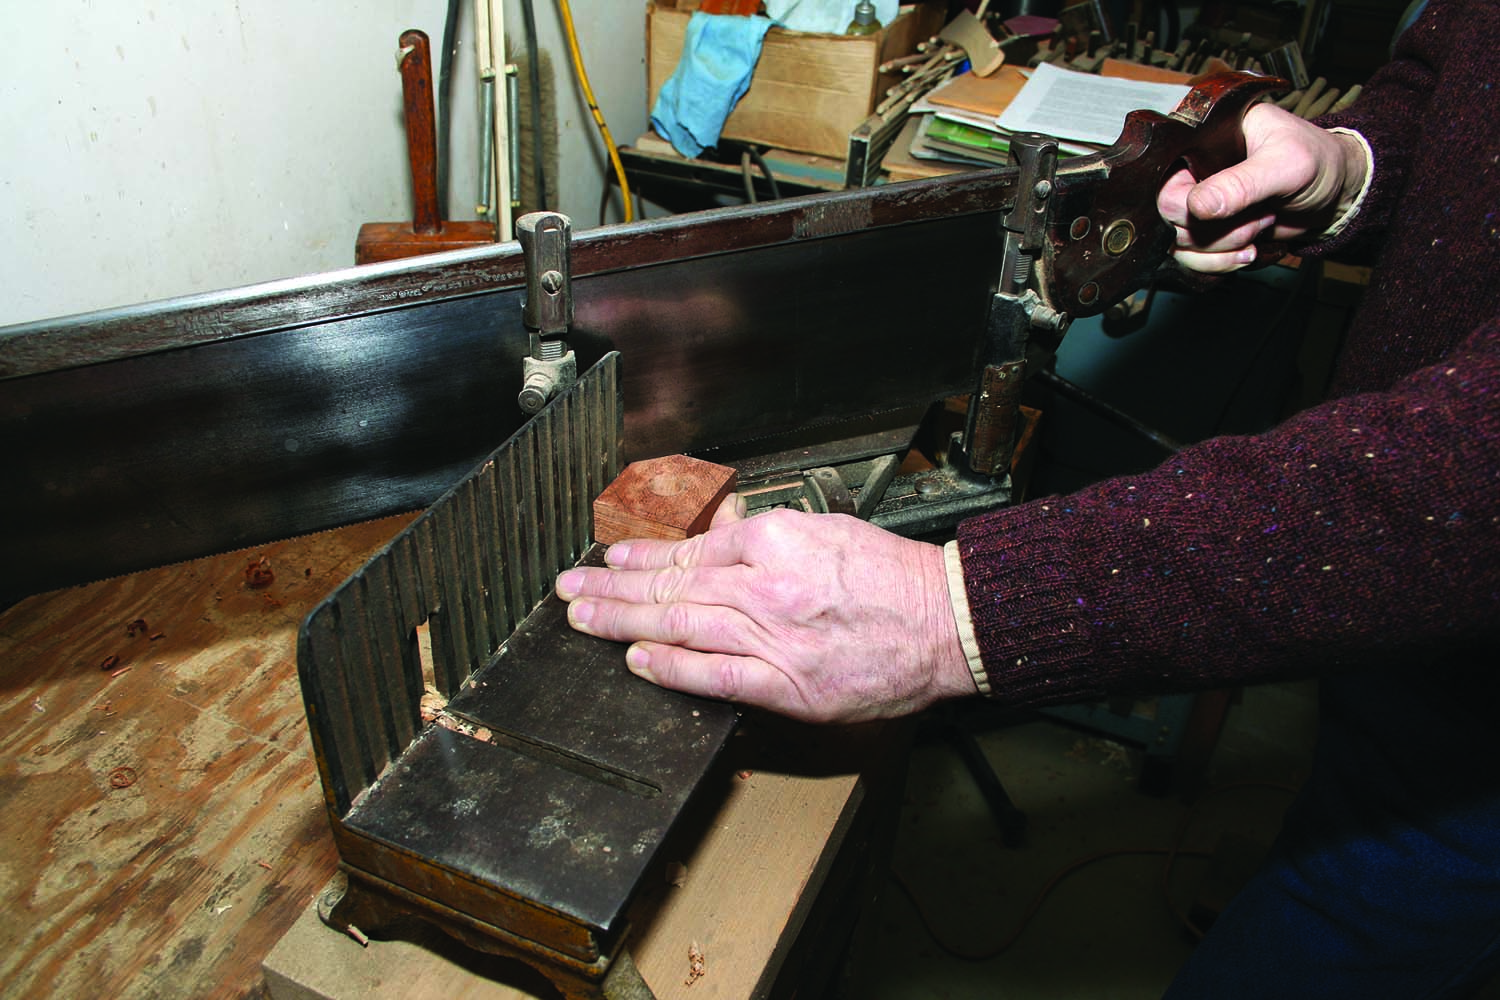
Perimiter. I use a miter box and saw to safely and accurately cut out the head, but a scrollsaw or backsaw also would work.
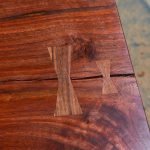
The last part of the process is to install the point or cutter into the shaft of the marking gauge. With the bar locked in place, draw a vertical line on one end of the gauge. For a marking gauge, I make the point from a broken 1⁄8” or so drill bit sharpened to my preferred profile with a file.
Using the vertical line on the end of the gauge as a guide, drill a slightly undersized hole 1⁄4” from the end of the bar and insert the point. For a cutting gauge, I make the cutter 1⁄4” wide out of a piece of tool steel, old hack saw or similar blade, grinding it to the appropriate size and shape (1⁄4” x 11⁄4” with a slightly cambered cutting edge). I then make a wedge with a 10° bevel out of 1⁄4” square stock.
To make the mortise for the cutter and the wedge, drill a 1⁄4” hole in the bar using the vertical line as a guide then square the hole with a 1⁄4” chisel. Fit the wedge and cutter by inserting both into the mortise from the top and observing the gap between the side of the mortise and the wedge on the bottom. Use the 1⁄4” chisel to pare this amount of material from the top of the mortise at a 10° angle.
Finish the gauge using your preferred finish for tools. I like to give these tools several coats of boiled linseed oil, sanding with #400-grit to #600-grit wet-and-dry sandpaper just after applying the oil. After the oil is completely dry, I apply several coats of paste wax.
Here are some supplies and tools we find essential in our everyday work around the shop. We may receive a commission from sales referred by our links; however, we have carefully selected these products for their usefulness and quality.