


We may receive a commission when you use our affiliate links. However, this does not impact our recommendations.

A Hands-On Sailing Project in 2×4
A wooden boat is one of the most inspiring projects a child can build. It’s an object of grace and adventure, deeply symmetrical yet full of creative variation. And in the woodworking shop, it’s the perfect teaching tool: shaping a boat invites the use of saws, gouges, rasps, chisels, and sandpaper. It encourages precision, spatial reasoning, and an appreciation for craftsmanship.
Part 2 • Part 3 • Part 4 • Part 5
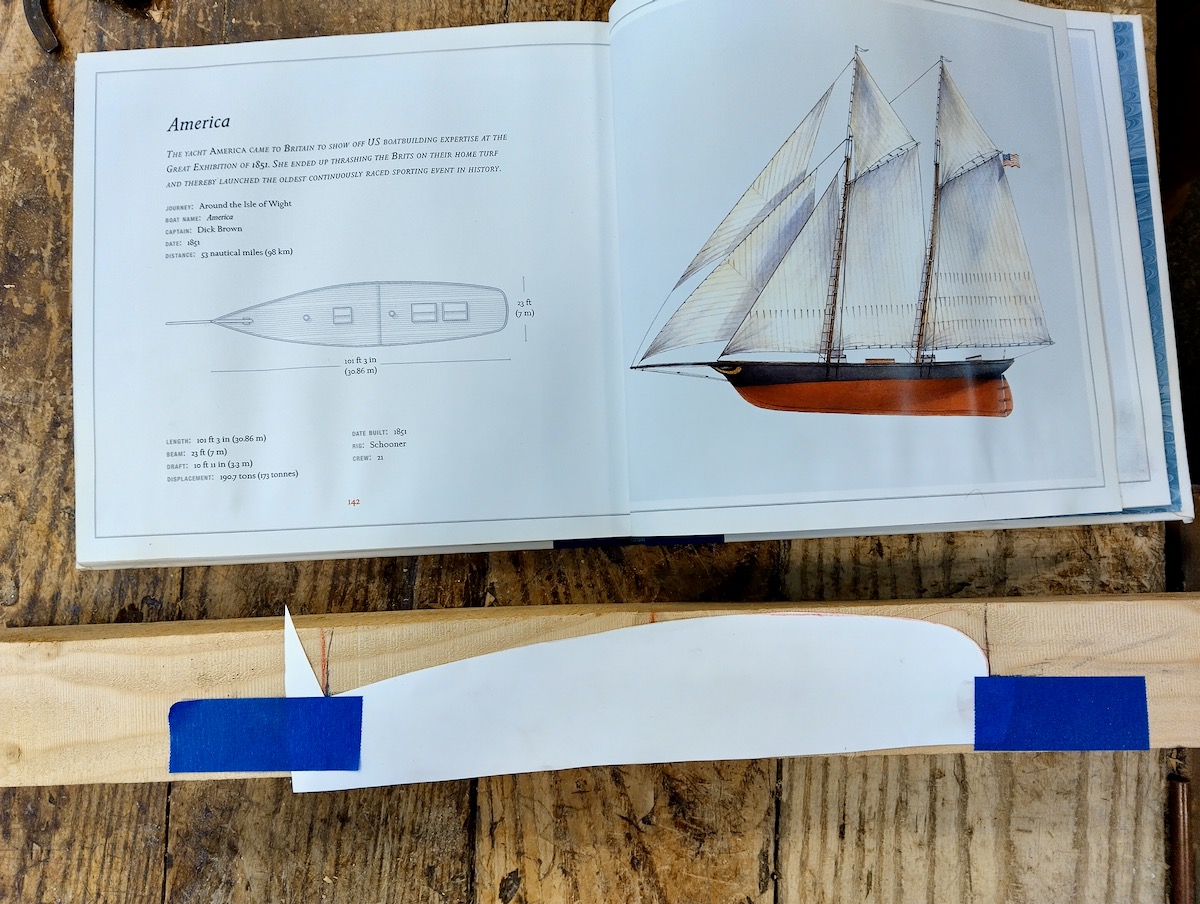
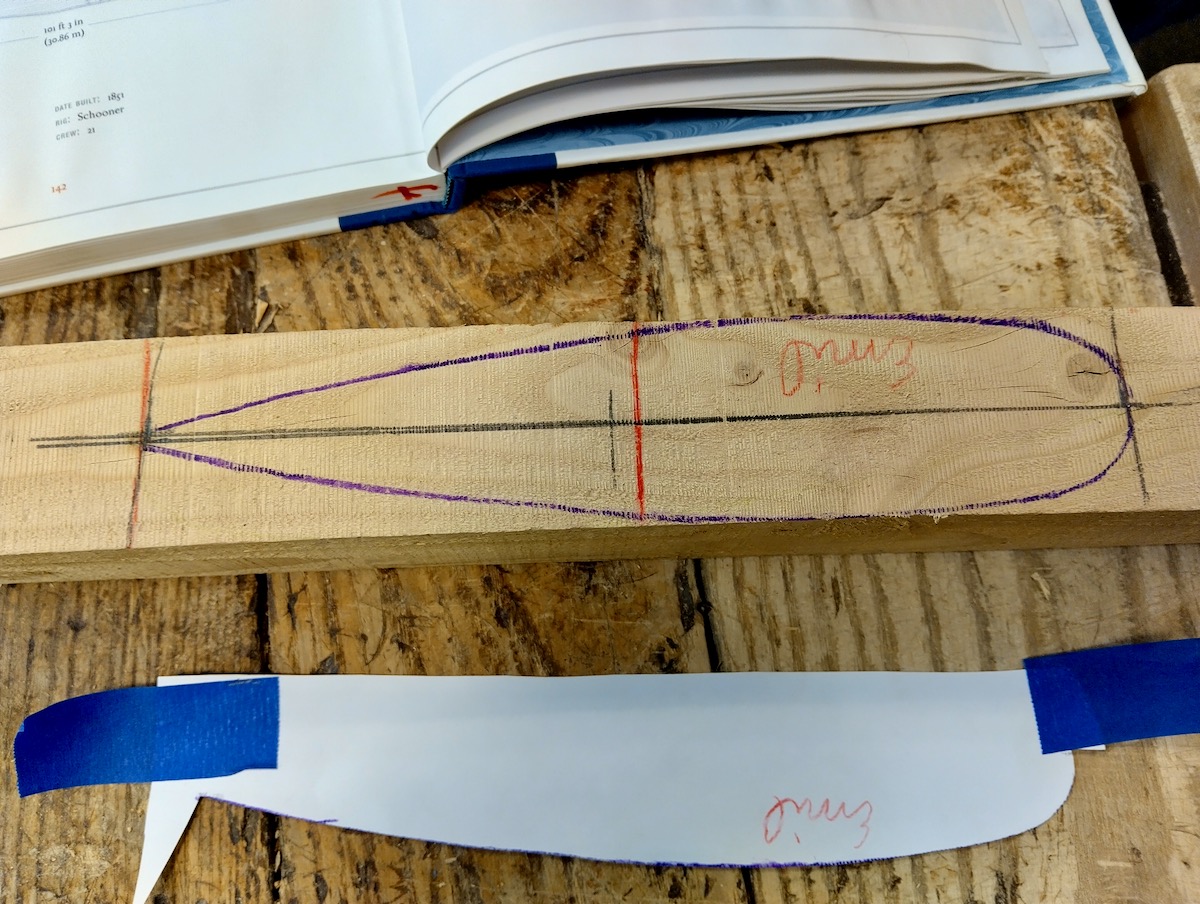
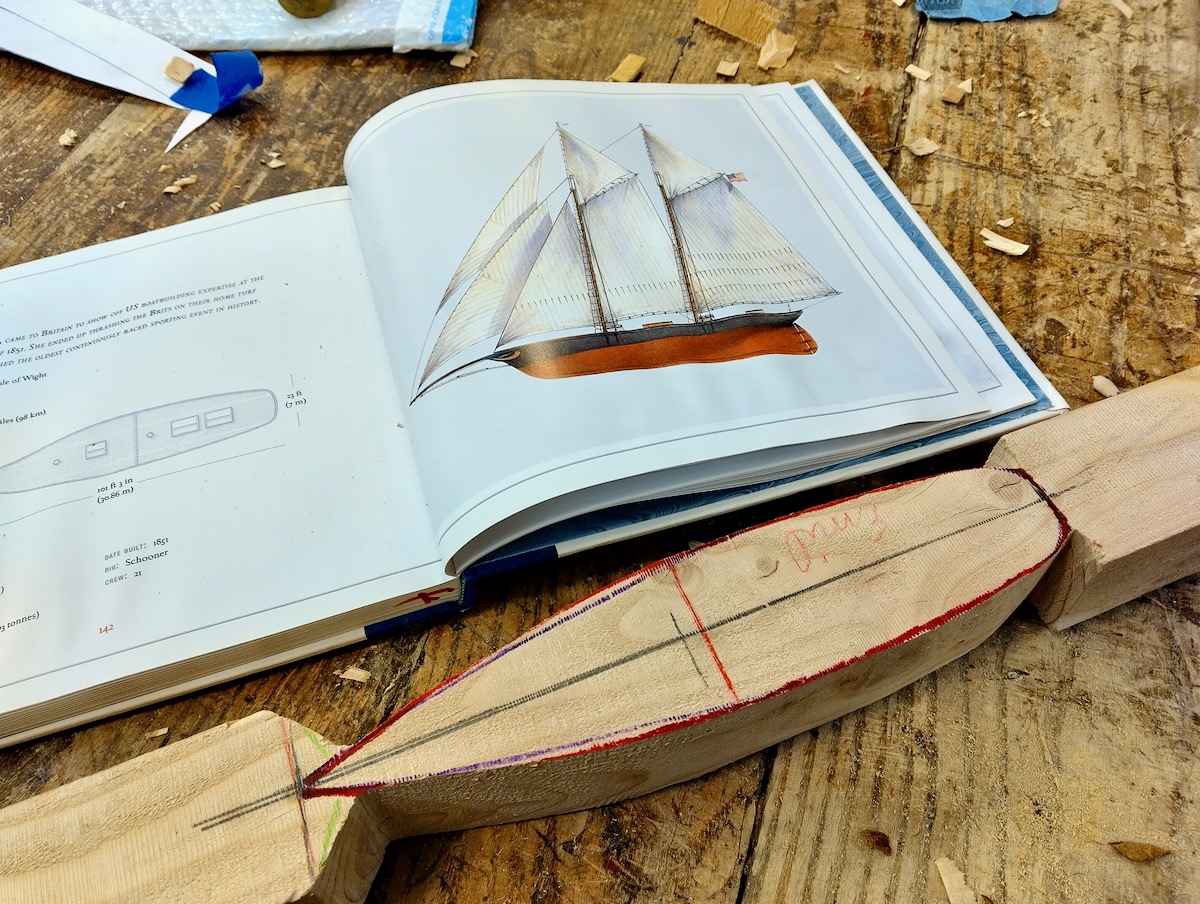
Each year, in my woodworking classes, I guide a few of my 4th-grade—and occasionally 5th-grade—students through the process of building a small sailboat from a solid block of wood. Our model designs are based on classic sailboat forms, and we begin with inspiration. On the shop bookshelf is a beautifully illustrated reference (Notable Boats: Small Craft, Many Adventures) filled with stories of small boats that accomplished big things—breaking records, surviving epic journeys, or standing out for their beauty. The book includes plan views (top decks), elevations (side profiles), and sometimes cross-sections of the hull—images that help students understand how boats are structured and what makes them seaworthy.
Designing the Deck
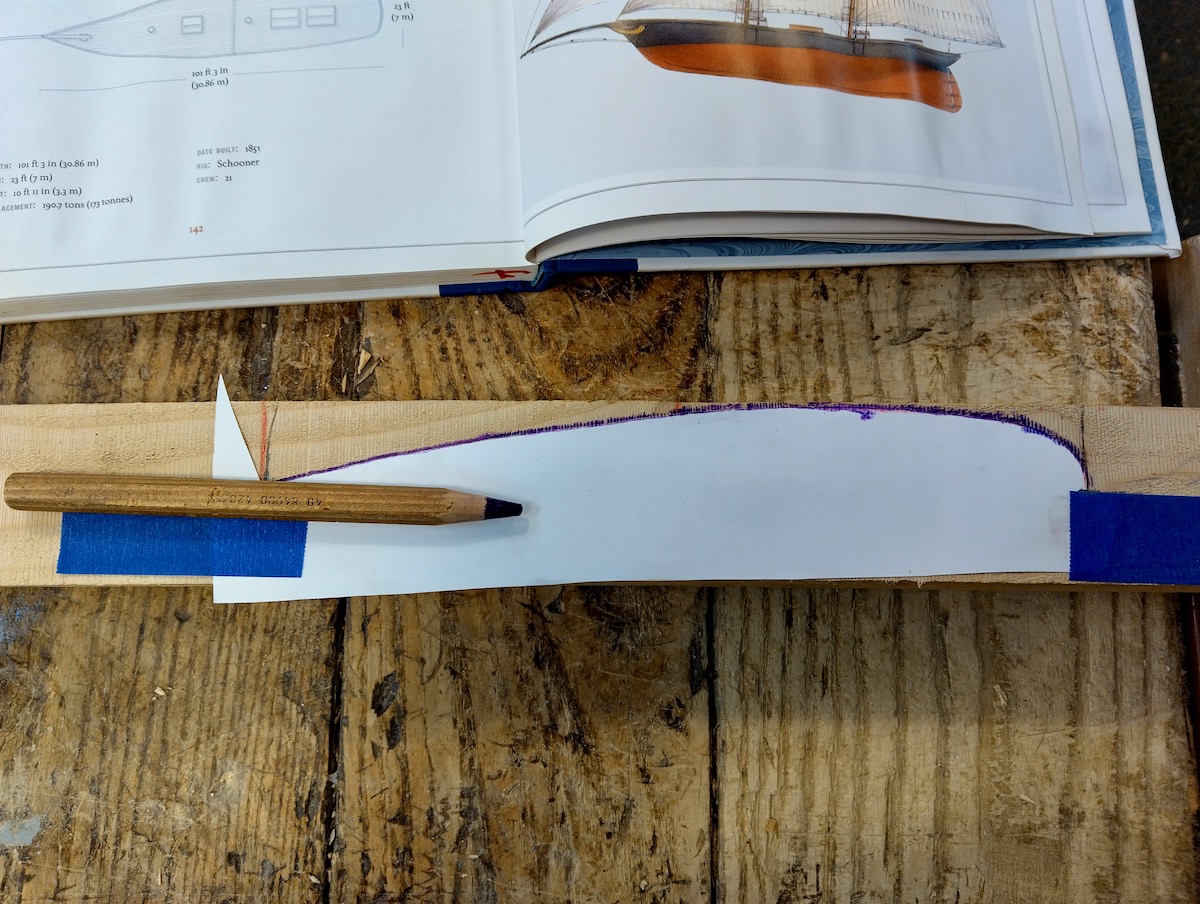
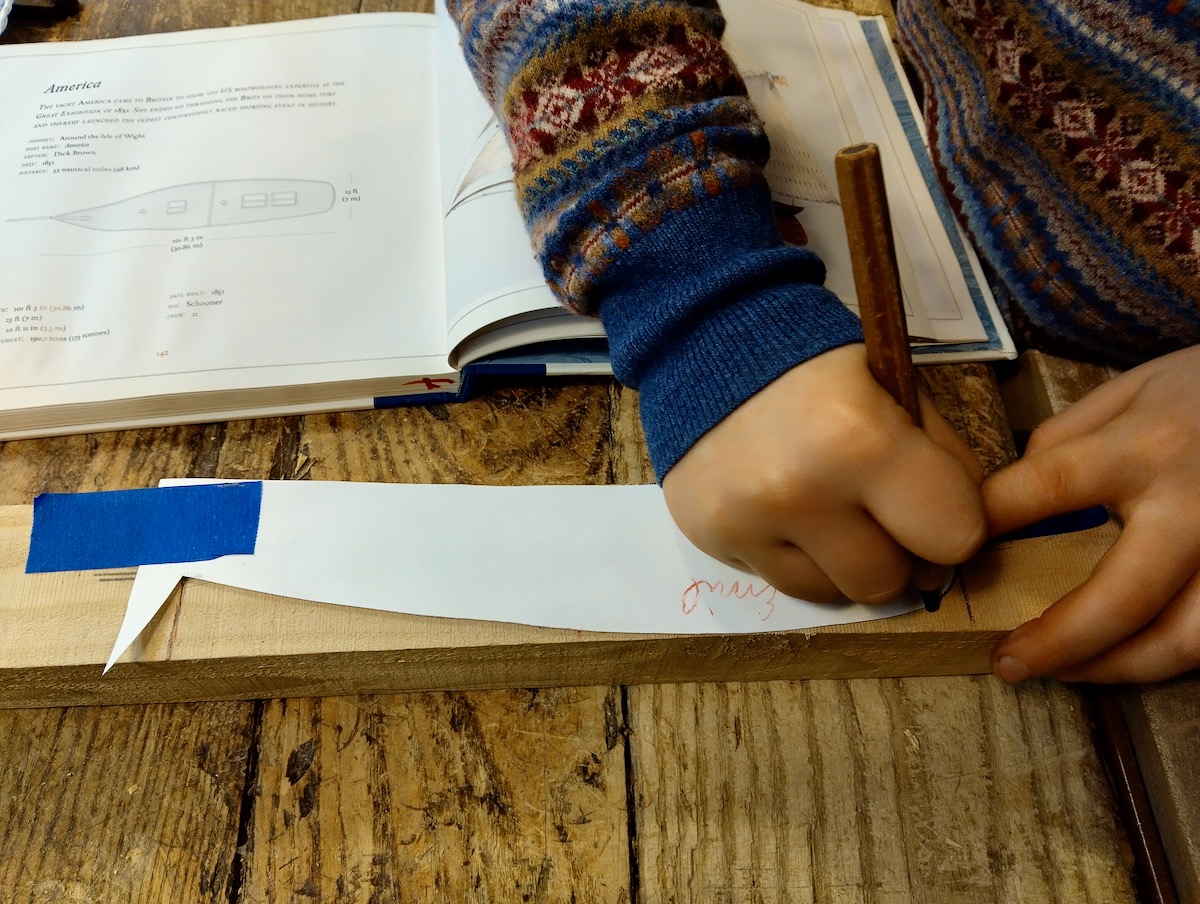
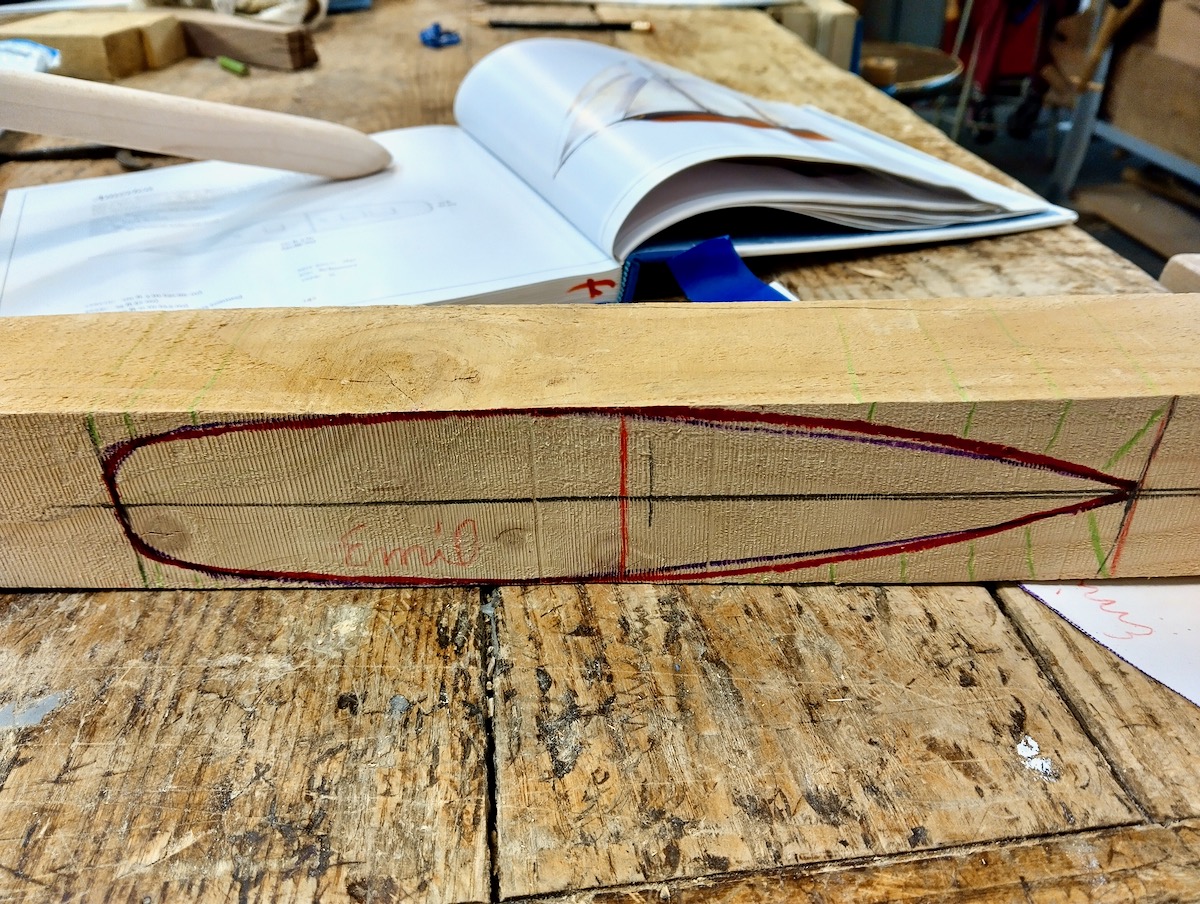
We begin by having the student sketch one half of the boat’s deck (top view) on paper. Once satisfied with the shape, they cut a cardboard template of that half. This template is then used to transfer the design symmetrically to a piece of softwood—usually a 2×4 or 2×2, depending on the scale of the build.
Before tracing the outline, we mark a centerline down the face of the blank. The student places the template along this centerline, traces one half, then flips it along the axis to complete the mirrored deck shape. At this point, we also extend the bow and stern slightly beyond the traced deck outline—this extra material will come in handy for shaping the hull’s curves later.
Shaping the Hull
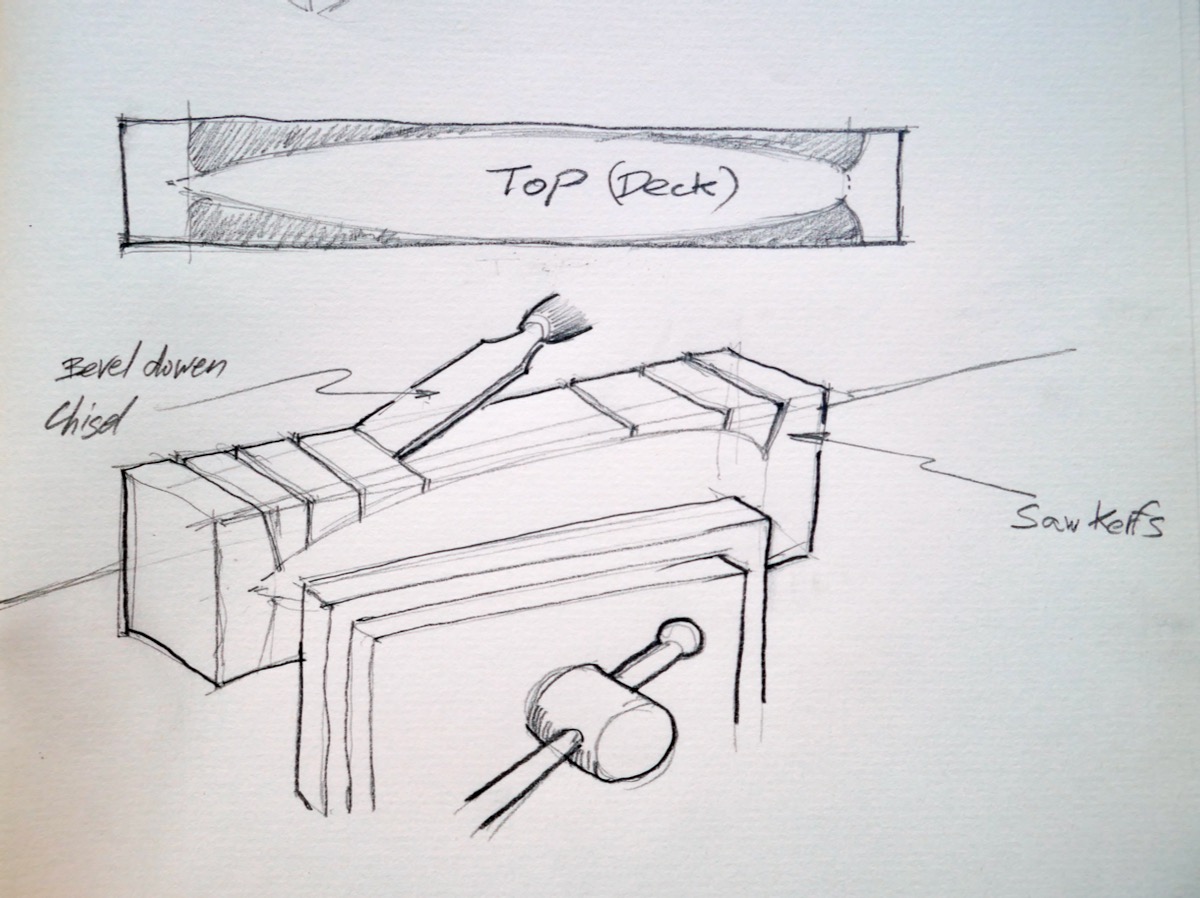
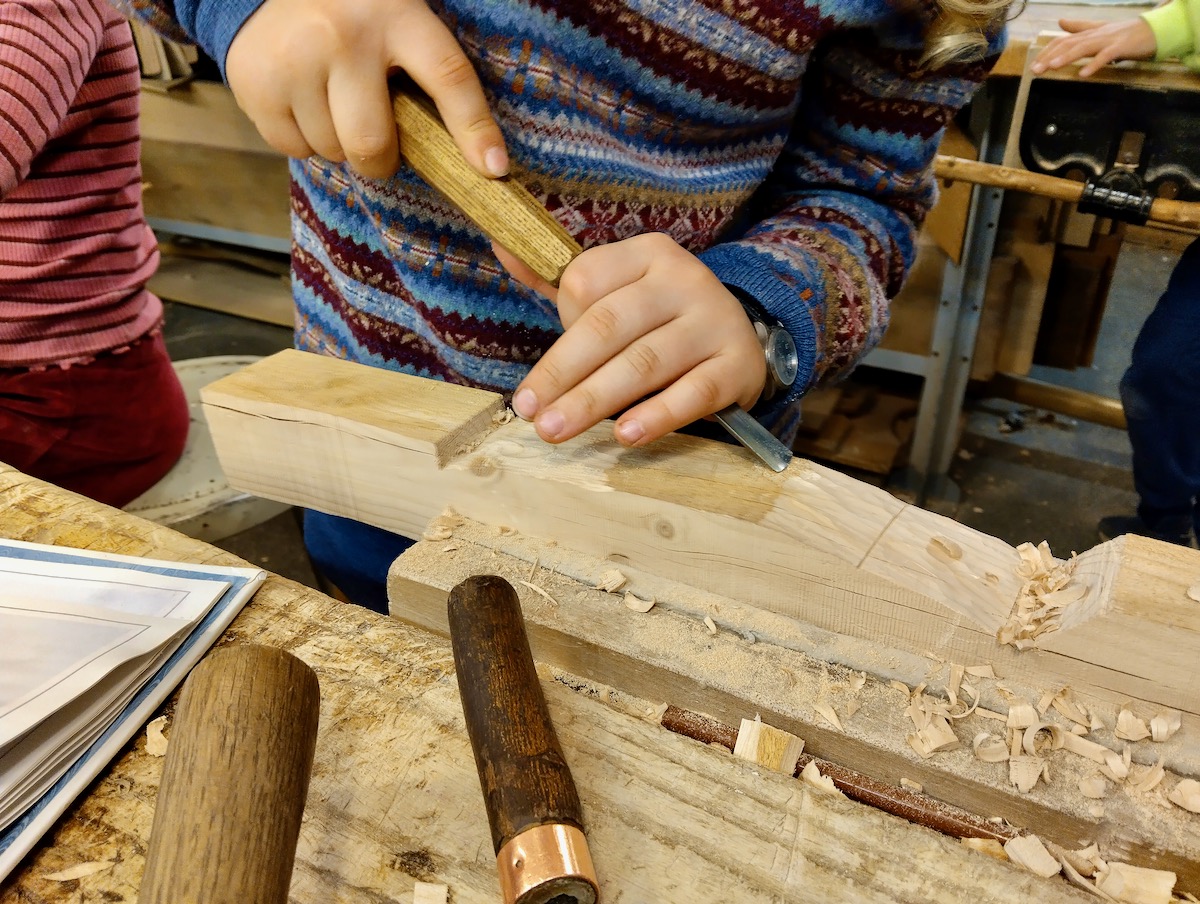
With the plan view drawn, we move on to rough shaping. The student secures the blank in a vise and uses a hand saw to make a series of vertical kerfs from the edge of the blank down toward the traced deck line. These relief cuts make it easier to remove waste wood without splitting.
Before we begin gouging to remove the access wood around the hull, we mark the kerf lines and, using a saw, cut them down.
Next, using a flat gouge (#2 or #3) or a wide chisel held bevel-down, the student begins carving away the material between the kerfs, gradually forming the hull’s contours. This is a patient process, and it’s where the boat really starts to take shape. After roughing out the form, rasps and files refine the surface, bringing smoothness and symmetry to the hull sides.
This project can be easily adapted by parents, grandparents, or mentors looking to introduce young hands to the joy of shaping wood. The process is creative and deeply satisfying—and best of all, it gives children an opportunity to use real tools and develop real skills.
In the next installment, I’ll demonstrate how we remove material to form the hull’s elevation, round the corners, and carve the boat’s elegant shape.


