


We may receive a commission when you use our affiliate links. However, this does not impact our recommendations.

If you don’t own a big European style table saw or a large miter saw, and need to crosscut wide lumber at 90 degrees you will probably like my newly-built CCS (Cross-Cutting Square).
This jig is easy to build and use. You can clamp it to your lumber or hold it down tightly with one hand. The key to its success is building it square.

Here is how I built mine.
You will need a piece of thin plywood, and two battens (short pieces of wood that has two parallel, straight edges).

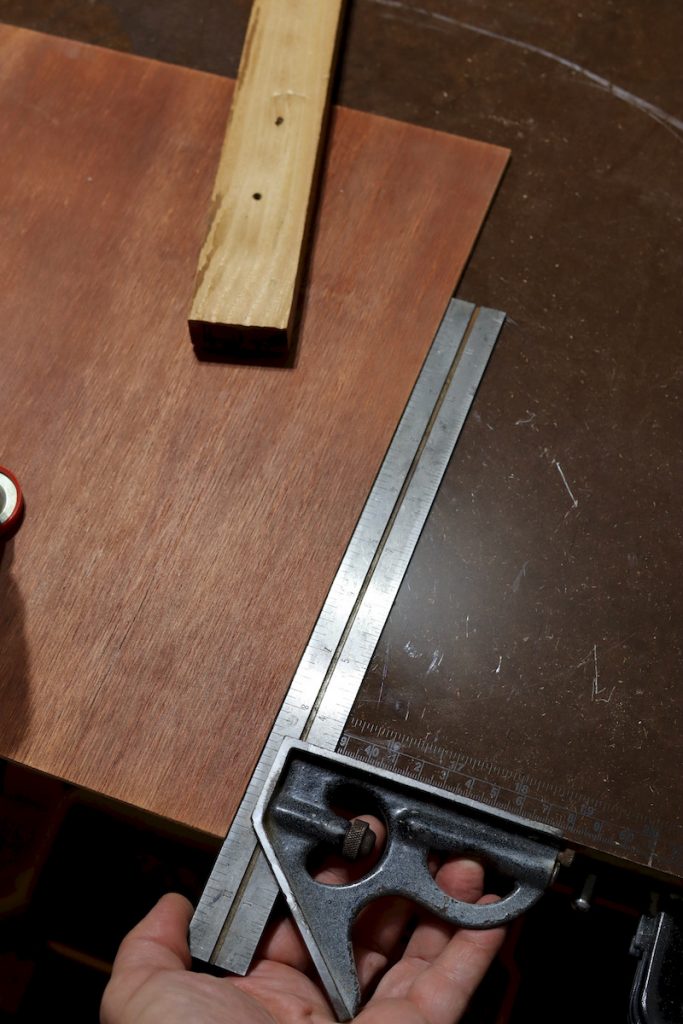
- Grab the plywood and make sure that at least two of its ages are right-angled, true, and straight.
- Clamp the plywood piece over the edge of a true and straight-edged workbench or another trustable table. Use a square to make sure that the plywood wing that protrudes over the bench is at a right angle. Make sure that the other wing of the plywood is extended away from the bench to accommodate the gluing of the ledge batten under it. Once everything is aligned perfectly tighten the clamp to prevent the plywood from wandering around.
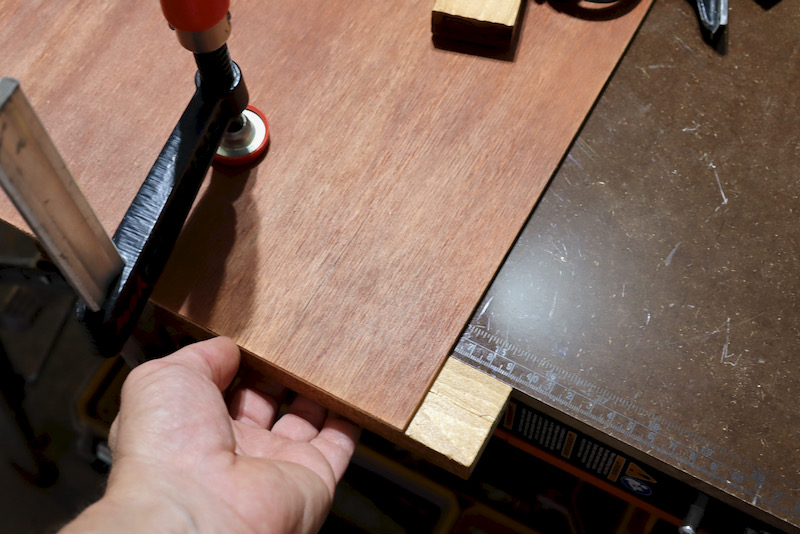
- Glue a batten flush with the straight edge of the bench (and the plywood) to form a ledge.

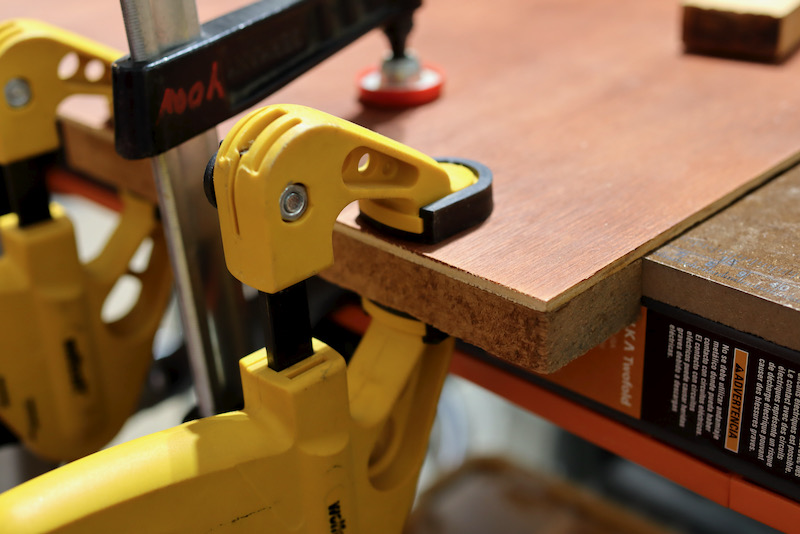
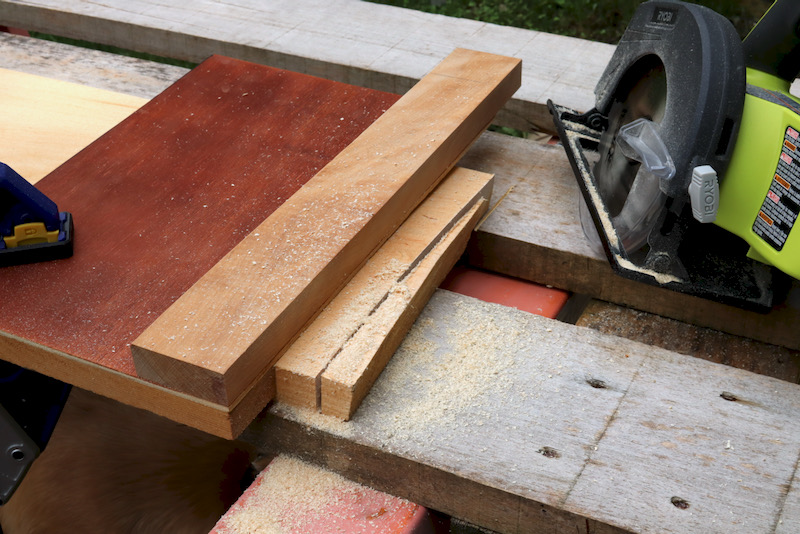
- After the glue has dried drill through the corner of the 1st batten and the corner of the plywood.


- Alight the 2nd batten flush with the right-angle plywood edge and clamp it temporarily. Screw it over that corner using the 1st screw.
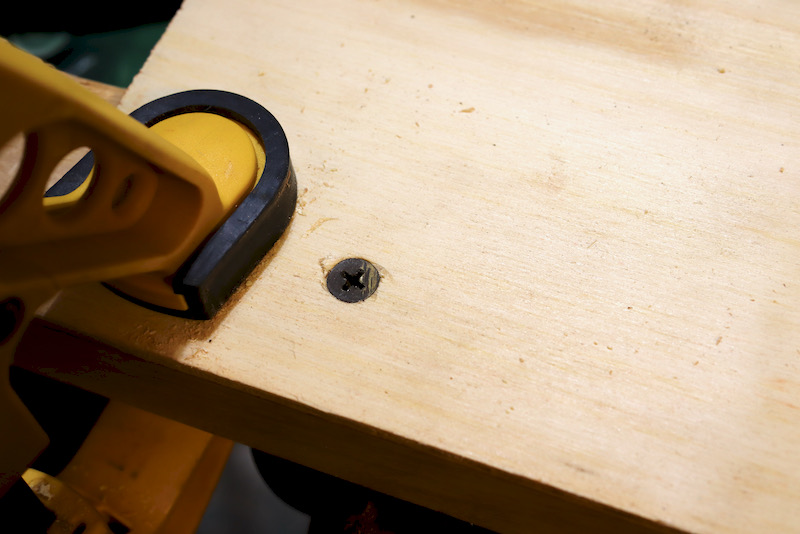
- Drill a second hole through the corner of the plywood and screw the batten’s top edge to it using the 2nd screw. Again, make sure that the edge of the batten is flush with the plywood edge.

Now you are ready to use the jig.
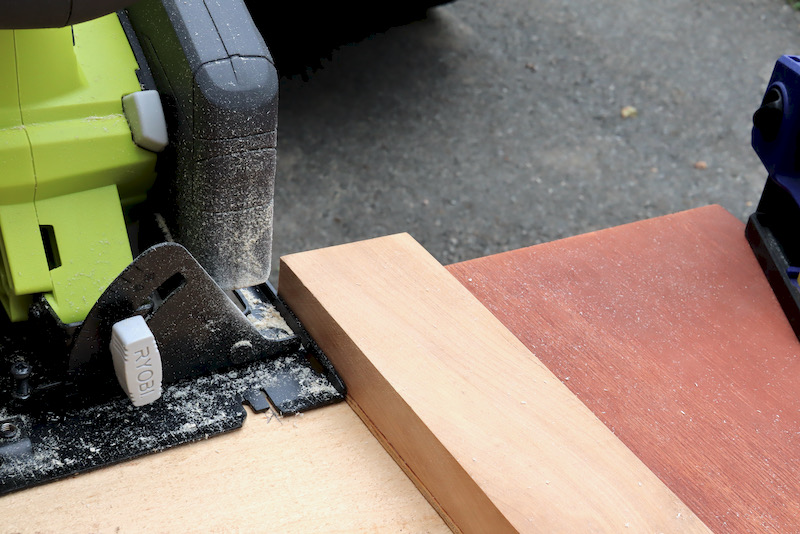
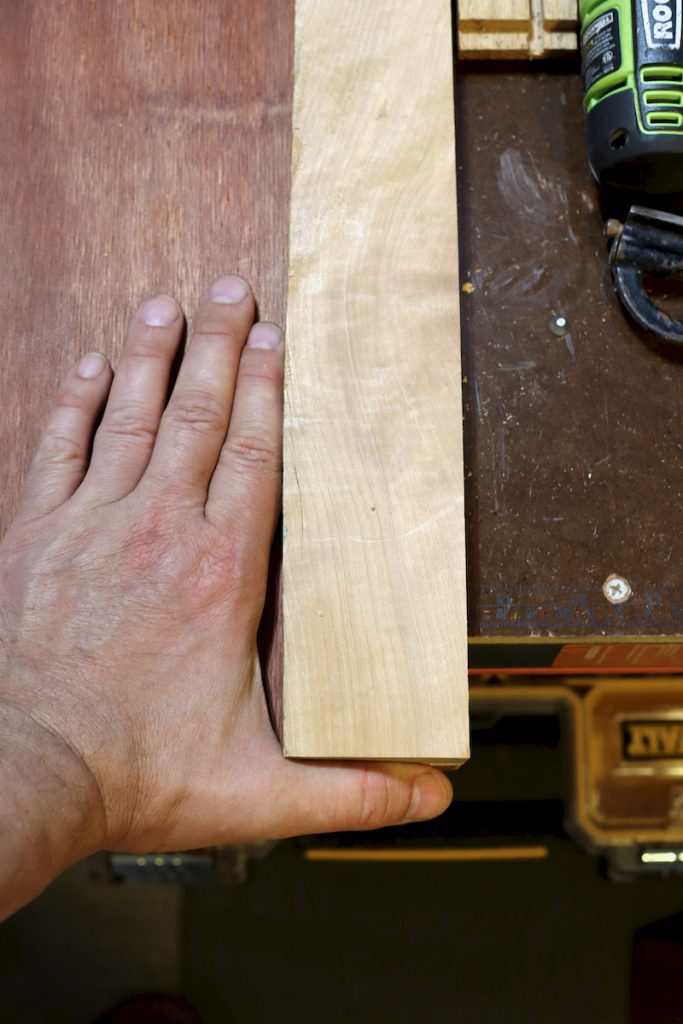
When using the CCS make sure that the ledge batten (the one under the plywood) is flush with the edge of your lumber. I prefer to clamp the jig but you can also hold it by hand. 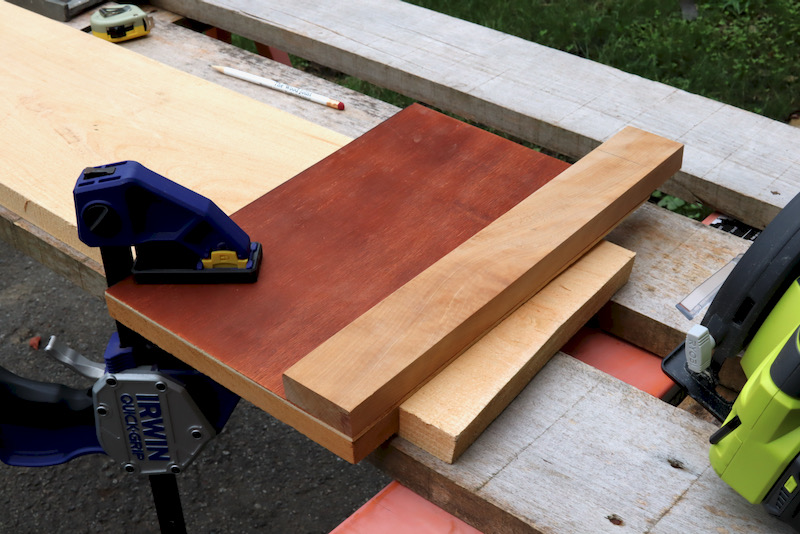
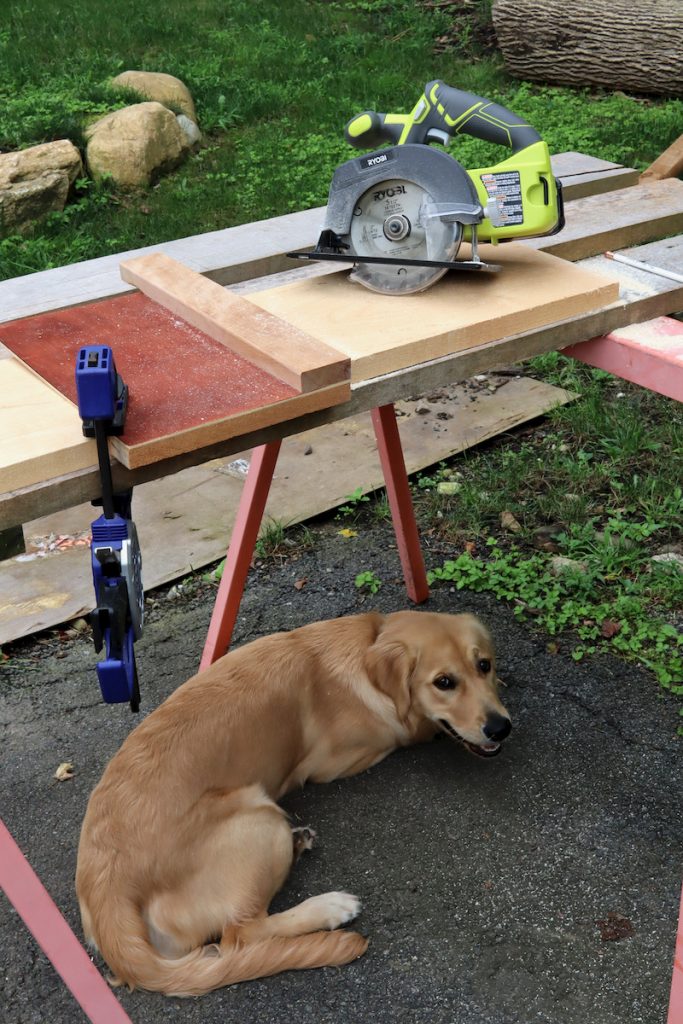
Here I cross-cut the crooked end of the lumber.
When clamping your CCS to the board verify that your circular saw’s blade and your cutting mark are aligned.


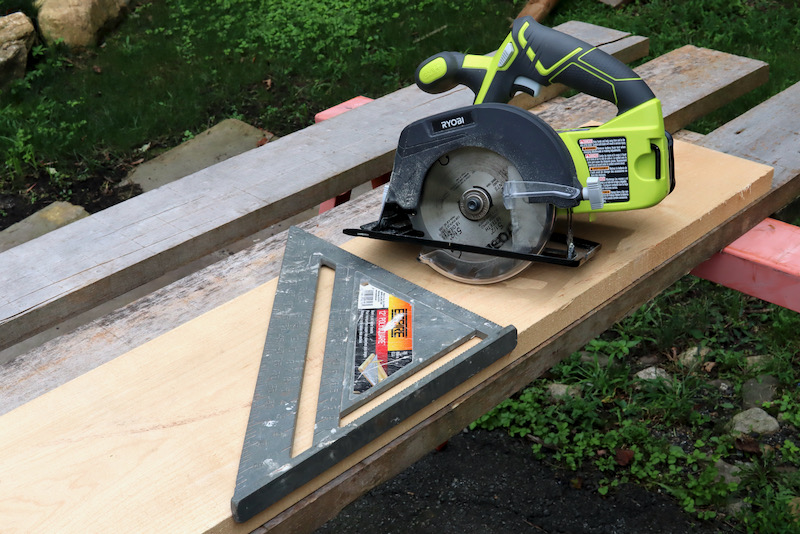
After marking the location of your intended cut move the jig away from the mark to a distance that equals the width between the edge of the saw’s plate and the blade. Most saws have a divot that indicates the location of the blade on the plate. In fact, you can actually cut a strip of wood that equals that width and use it for positioning the saw before clamping the jig down.
I believe that this jig is better and safer than using a plastic square. And speaking about safety, make sure that the 2nd or right angle batten is wide enough to protect your thumb during the cross-cutting.
Lastly, please meet Willow, the new edition to our family and the perfect shop dog. She is always interested in what I build and is ok with the commotion of both shop and tools.
Here are some supplies and tools we find essential in our everyday work around the shop. We may receive a commission from sales referred by our links; however, we have carefully selected these products for their usefulness and quality.


There are many ways. The cross cut guide described here is a variation of using a speed square to guide a circular saw. The shortcoming of this approach is that there is a space between the edge of the guide and the saw blade. This complicates getting an accurate cut.
Another approach is to make your own track saw system. The cross cut guide consists of a base, a hook, and a fence. If you flip the base around and move the hook to the other end, you can run your saw across the guide, cutting the guide parallel to the fence. The advantage of this approach is that the edge of the “track” will match any cut that you make with the track. Line the edge of the “track” with the line you want to cut—much easier to get an accurate cut.
Thanks for the comment. Can you please share some images or a link so we can get a visual view of a device like the one you mentioned?
Best,
YL
With regard to building a crosscut guide for a circular saw – may I suggest that the bottom cleat (used against the part being cut) be kept long beyond your saw’s offset so that when first used that cleat is cut exactly where future cuts will be made. Secondly, if the upper cleat (that the saw rides against) is faced with aluminum wear will be minimized. Also keep in mind not to make the upper cleat too thick – being under the saw motor limits the depth of cut. Thirdly, as the upper cleat has parallel edges and square to the lower cleat, if again the width of the thin plywood is left long, then, it too could be used as an exact-cut guide with the added benefit of protecting the project part’s from scratching by the saw’s sole plate.
Hi Mike,
Thanks for your suggestions. I like all your ideas and I think that the first one is an absolute improvement upon my jig.
Thanks again.
Best
Yoav
To @yoavlieberman and @lonniebird:
Just realized the log milling post was Lonnie Bird. Read it right before this one from Yoav. Guess I better hurry with the shop before the remainder of my feeble mind goes! LOL!
To @yoavlieberman:
Guess every shop needs a good dog for inspiration. Funny how we seem to choose similar dogs! Here’s the inspiration for the name of my woodworking venture — long in the dreaming but finally getting off the ground as I enter my “third career”. Well, looks like I can’t insert the photos in this post. Too bad. But you probably get the idea from the name and my handle on this site — LogDog. And yes, there was a yellow collie and Lab mix named Log who was the inspiration.
Enjoyed the post on milling your own lumber from logs. I’ve been doing that on the farm for about ten years now in anticipation of this day. Made some mistakes in prepping the logs and lumber for drying, but still many board feet of live-edge slabs and boards to work with in the coming years.
The first shop dog that I met was Peper. He was Studio furniture maker Mitch’s Ryreson dog. An amazing companion to his owner and to all the people who frequented the shop. Willow has just begun her journey as a shop dog but I am sure she will live up to all our expectations, including those of the late Peper.