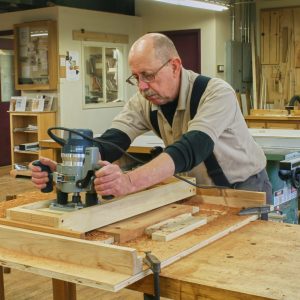
| SCARY. That’s what most woodworkers
think about raising panels with a router. The idea
of that big hunk of sharpened steel spinning around
near your fingers is frightening. But what are the options?
Raising panels by hand is time consuming and raising them
on the tablesaw is just as scary. Give your router a chance. I’ll show you three different fixtures
designed to tame those scary bits. When properly set up
and used, they will make panel raising with your router safe
and easy. Instead of feeling scared, you’ll feel confident.
T Those Big Bits
There are two types of panel-raising router bits (below). Either
the panel is laid flat on the work surface and fed past a horizontally
oriented bit, or the panel is tipped on its edge and fed
past a vertically oriented bit. Each type has advantages. Because they are fitted with a bearing, horizontal bits can
raise panels with either straight or curved edges. If you want to raise arched-top panels, a horizontal
bit is your only choice. The bit’s massive
cutting surfaces and weight require a
powerful router and its large diameter
requires one with variable-speed capability.
The combination of a horizontal bit
with a 3-hp, variable-speed router is
hard to beat. The bit gives you versatility
and the router lets you adjust the
speed for the best cut. However, these
bits are costly—$85 to $145—and if
you don’t own a compatible router, the
total expense could be prohibitive. If straight-edged panels are all you
anticipate making, vertical bits will serve
you well. Because of their vertical orientation, they are smaller in diameter
than their cousins, so they’re less expensive
and require a less powerful router to
operate. Variable-speed control is less
of an issue, as the smaller bits (1-in.
diameter) can be used with single-speed,
high-rpm routers. The key to being comfortable using
either of these bits is to protect yourself
from them. Two accessories listed in the
“Four Rules for Safe Operation,” at right,
help you do just that. Featherboards do
double duty. They protect against kickback
and also effectively block the bit
and keep your fingers out of harm’s way.
Push blocks keep a firm grip on the
workpiece and protect your hands in
more ways than one. Keeping them away
from the bit is obvious, but you’ll find
that gripping the push blocks is much
less fatiguing for your hands than holding
and manipulating the panel without
them. Use these tools without fail—
you’ll be glad you did. The Box Fence: Safe Housing
for Horizontal Bits
This fixture, consisting of a box and a
base, surrounds a horizontal bit. It is
derived from fixtures Lonnie Bird used
when raising panels on his shaper (AW
#34 and #72). The box has an adjustable
faceboard at its front to bear on the
panel, a polycarbonate top for visibility,
and a dust collection port at its rear. The box is attached to a split base.
Aligned with the bit’s pilot bearing, the
front half of this base acts as a fence for
straight-edged panels (Photo 1). Remove
the front half of the base, add the pivotpoint
block, and the fixture accommodates
curved-edge panels, or other operations
run off the pilot bearing (Photo 2). This fixture is effective because it
offers versatility, excellent visibility, and
great protection. If you can justify the
expense of the horizontal bit and 3-hp.,
variable- speed router, read no further. A Safe Fence
for Vertical Bits
Safely using the vertical bit requires a
fence with a tall face. This idea has been
around for a long time, and is usually
associated with the tablesaw. This fixture
is the easiest of the three to build. Its face
is 10-in. tall, high enough to support
most panels (Photo 3 and inset). It must
be firmly supported and built square so
that it clamps perpendicular to the router
table. The key to making this fixture work
safely is a featherboard mounted on a
block so that it presses the panel against
the fence above the cut of the bit. It is
positioned over the bit and clamped
securely to the table. When used with a push block, this
fixture keeps your hands clear and eases
the job of running panels on edge.
Unfortunately, using it makes you stand
in a twisted position, and that’s a big
shortcoming. With extensive use, this
fixture can be tiring. Make Vertical Bits
Work Horizontally
If you’re set on using vertical bits, consider
mounting the router horizontally on
the end of your tablesaw. Then you can
lay the panels flat and raise them without
contorting your body. This idea was
incorporated as part of “The Ultimate
Router Fence” (AW #37) and explained
in detail in Bill Hylton’s book “Router
Magic.” The fixture is complex and will
take time to build, but its benefits will be
noticeable if you have large panels or a
large number of panels to raise. Although
shown dedicated to a tablesaw, it could
be adapted to a router table as well. This fixture consists of a piece of plywood
fastened perpendicular to the saw
and an arm, housing the router, fastened
to it. The arm pivots to raise the router
and bit into position (Photo 5) and,
when locked, acts as a bearing fence for
the panel (Photo 4). Again, a blockmounted
featherboard must be employed
to bear on the panel beyond the top of
the bit’s cut. Positioned over the bit and
clamped to the pivot arm, the featherboard
effectively blocks your hands while
guarding against kickback. Once built, this fixture is effective because, with the panels on their faces
and gravity as your ally, you can
address them straight-on. Push blocks
work great with this set-up. You will find this fixture useful for
any other operation where you would
normally run the workpiece on its
edge: Wide molding profiles or tenons,
for example. Types of Panel-Raising Router Bits 

Fig. A: The Box Fence 
Fig. B: The Tall Fence 
Fig. C: Pivot Arm Router Table 
| | Click any image to view a larger version. 
1. The box fence keeps your
fingers well away from the
router bit, and has an adjustable faceboard
to hold the panel tight against the
table.The box makes dust collection very
effective and visibility through its polycarbonate
top is excellent. 
2. For arched panels, the front half of the
base is removed, allowing
you to swing the work
past the bit. A pivot-point
block, attached to the
infeed side of the box,
keeps the panel from kicking
back when you feed it
into the bit.The fixture is
positioned to locate the
pivot point close to the bit. 
3. The high face on this fence provides
ample support for panels. Its hardwood top
surface is smooth and splinter-free. Dust collection is
effective because of the point-of-discharge port.The
fence swivels on a threaded lock knob on its infeed
end, and when used with a clamped block on the
other end, makes minor adjustments easy. (Inset photo) A tall fence, a featherboard,
and a push block help
to advance a panel, tipped on
its edge, past the vertical bit. 
4. This fixture mounts to
your tablesaw or other
flat surface. It allows you
to place the panel on its
face, making it easy to control.
The featherboard keeps
the panel from kicking back
and blocks your hands from
the bit. 
5. Height adjustment is precise: One complete
turn of the knob moves the bit one-sixteenth
of an inch. Make test cuts on scrap stock to
dial in the exact position.A white line painted on
the edge of the knob serves as a reference point. |


