


We may receive a commission when you use our affiliate links. However, this does not impact our recommendations.
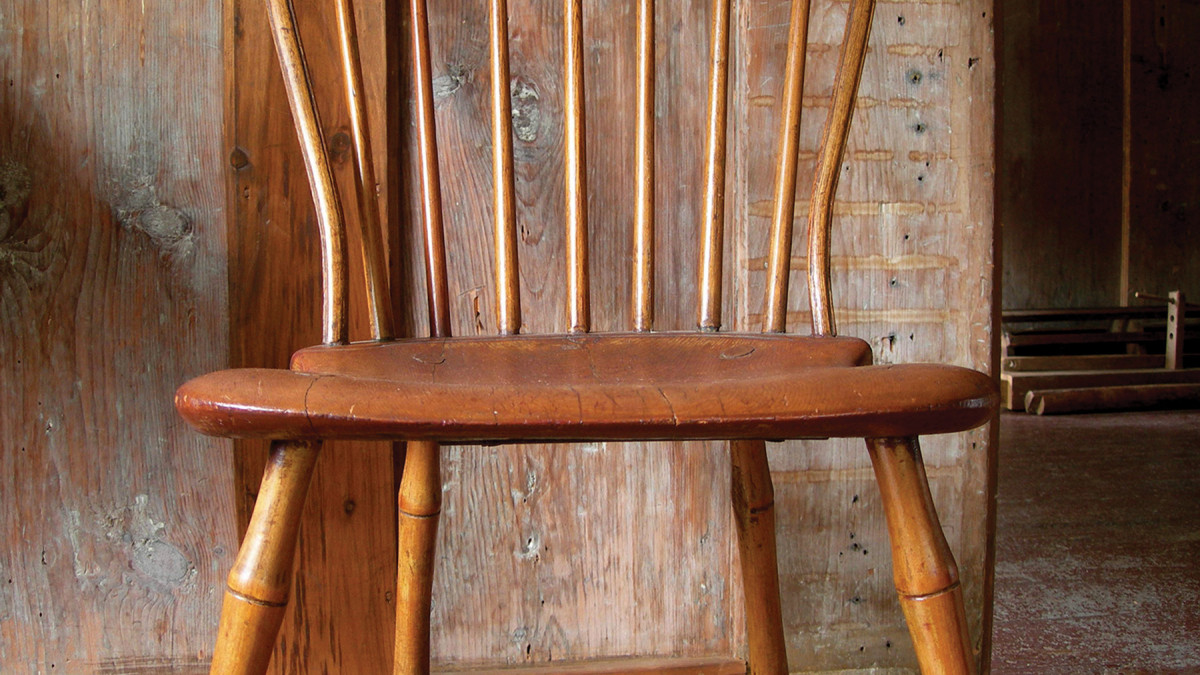
Mixed species. The parts on a typical Windsor chair come from different species of trees (in this case, pine for the seat, ash for the spindles and maple for the legs). Yet the parts can harmonize and look as if they grew that way.
Minor adjustments typically beat a hatchet job.
I knew a guy who didn’t shave or cut his hair for 12 months at a time. On day 365 he looked like the wild man from Borneo. On day 366 (or day 1 of the next cycle), he would show up at work shaven and shiny like Mr. Clean. It always gave me a jolt, even though I’d seen the routine year after year.
Most barbers will tell you that a haircut works best when it doesn’t shout; a small adjustment usually beats a hatchet job. The idea of small adjustments spills over into design. Often the difference between something that’s just OK and a design that sparkles is found in the way all the parts seem to knit together.
The fine-tuning that goes on as we refine an idea can be some of the most challenging (as well as the most rewarding) part of design. It’s easy to second-guess and feel as if you’re stumbling about, trying to breath life into something that won’t budge. The problem is, making those tweaks can be baffling even for an experienced builder. Here are a few tips to help you approach this with more confidence and better results.
Does This Finger Look Fat?
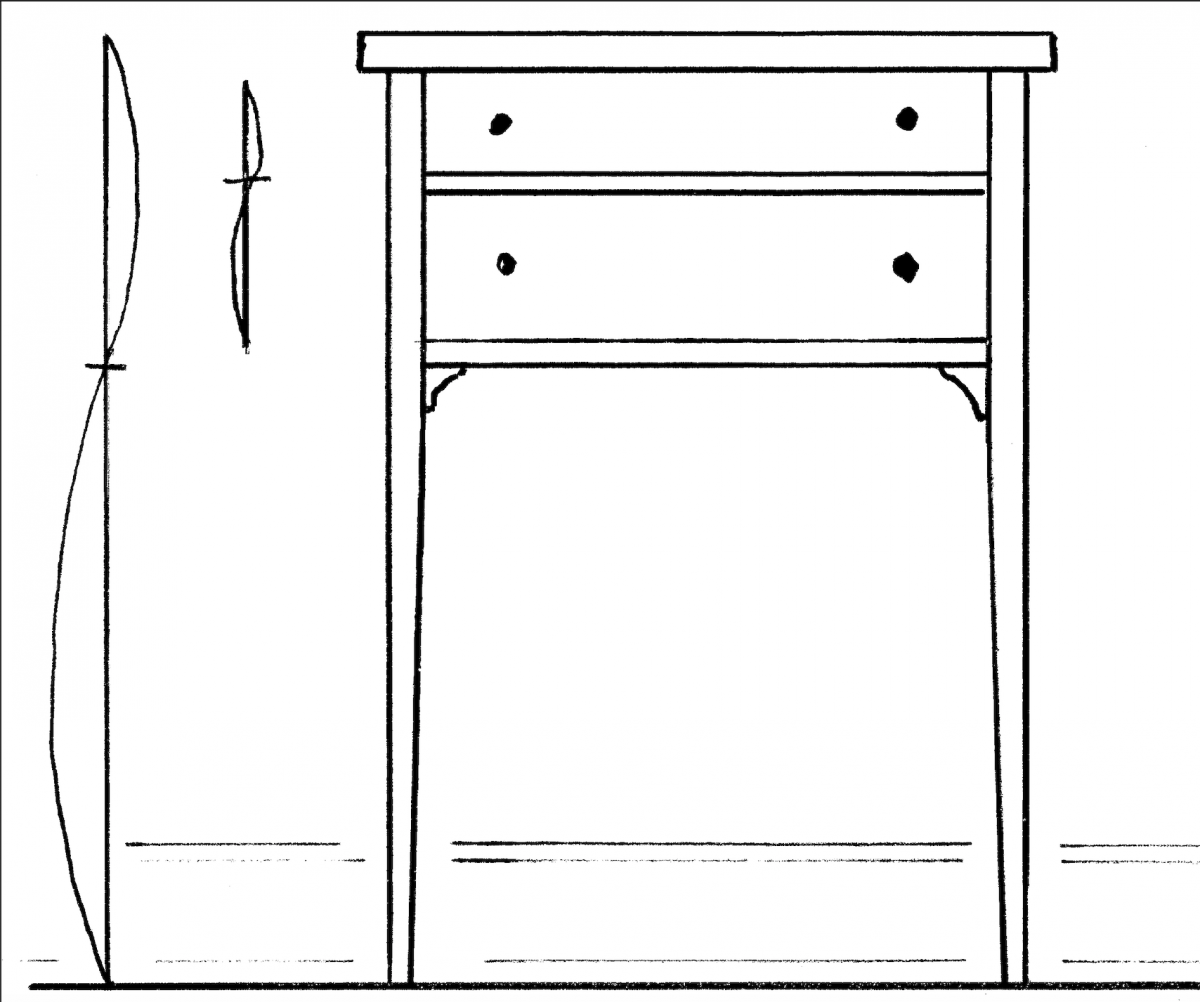
Major interactions. Small-scale proportional drawings let us begin to see how the major parts play together – or not.
The process of fine-tuning goes in circles. Depending on the design it can move through multiple stages, each calling for a round of adjustments.
My own process goes something like this. After initial rough thumbnail sketches, I begin working up small-scale proportional drawings of the elevation and side view. These drawings capture the overall form and work out how the major parts relate to one another. As those parts are defined, the first round of fine-tuning begins.
The simplest way to understand fine-tuning is to look at your hand. Your fingers and thumb all relate to each other like, well, they grew that way. If any one of your digits were longer or fatter or skinnier than the others, it would stand out. This brings me to another important part of fine-tuning a design. When you think something needs a nudge, how do you know what to compare it to? That stretcher connecting those legs seems awkward, but how do you gauge whether you’re going in the right direction? Just remember that if your thumb is “off,” you don’t compare it with your kneecap or your ear. It’s the parts close by that help determine what’s amiss. Think of a design as something that grew organically.
The same goes for any small part on a furniture design. Try to focus on how each part relates to the components next to it. This will help a lot, especially when you get close to the sweet spot or accidentally shoot past and need to back off.
This doesn’t mean that I don’t step back and make an overall judgment (part of that pattern of circling in on a design), just that fine adjustments need to agree with the neighborhood.
This process is circular because once you adjust one part, you might need to revisit the neighboring parts and re-tweak them.
The process repeats with each step as you move up to a small-scale isometric drawing to get a better vision of the design. Each drawing step means another round of adjustments. Smaller drawings give way to larger-scale or even life-sized drawings – and possibly mock-ups.
These drawings lead up to the actual build where fine-tuning plays an important role (see “Insight from the Bone Pile” below). These steps should help you get a clearer vision of how an idea is coming together, and each may beg for multiple rounds of small adjustments. Each round zeros in on that sweet spot.
Just a Skosh
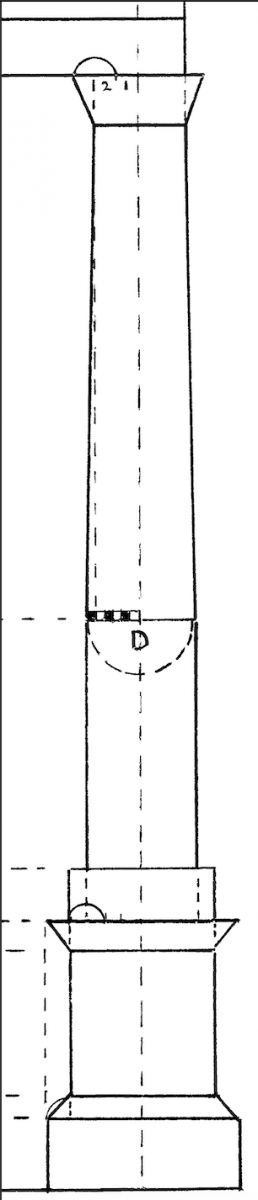
Gentle slimming. Stone columns taper ever so slightly as they rise. The diameter at the top is one-sixth narrower than at the base – just enough to give the eye a foothold.
I used to marvel at how talented designers talked about this fine-tuning process. They’d say things like, “I just bumped the width of these door stiles by 3⁄16” and it finally came together,” or, “I shaved down this chair spindle by just a tad and that brought it to life,” or “I bumped this curve ever so slightly until it started to sing.”
This sort of sounds like magic. How do you know how much to bump something? Small increments on a ruler seem like arbitrary guesses. Is there a better way that takes out some of the stabbing in the dark?
Thankfully, our ancestors had a practical approach to fine-tuning. They understood that the ideal adjustment is big enough to let us see a visual change, yet not too drastic. This isn’t an arbitrary dimension from a ruler, but rather a proportion. Instead of bumping something by a dimension, it’s helpful to look at what you want to adjust and push it in proportion to itself or something nearby.
Traditional artisans used a “go-to” proportion that’s handy for sneaking up on a sweet spot – gently bumping something higher, shorter, fatter, slimmer. It turns out one-sixth was often used because it’s not drastic but also not so small that it’s difficult to judge.
For example, the top and bottom pads on a bracket foot might seem too large in relation to the whole foot, making it look heavy. Simply use dividers to step off the height of the lower pad into six equal parts and reduce the height by one-sixth. If it’s not enough, step it off again and reduce by one-sixth again. You’ll quickly reach a point where it’s too much and you can back up. Note in the example at left that I also adjusted the height of the upper pad. It’s half the height of the lower pad. Using this approach also forces you to pay attention to the internal proportions in a design and how they relate to other parts close by.
Coming Into Your Own
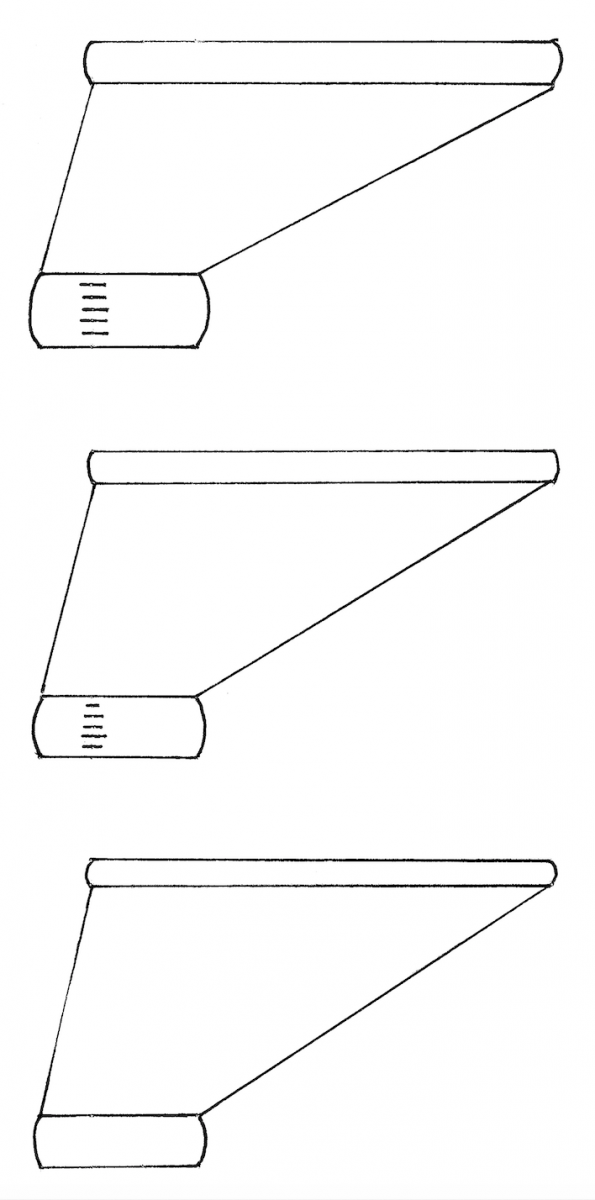
Bump that foot. Step off the height of the lower pad into six parts and adjust it shorter. Which looks best to your eye?
Admittedly, there are no recipes or formulas to ensure that you will always be able to hone in on perfection. But by adjusting with proportions you’ll begin to train your eye to see how each part knits together with others. When you reach that place, you know you’ve made real progress as a designer. There’s nothing quite like that moment when you hit the right note and the design begins to sing.
Extra: Insight from the Bone Pile
Some of the most exciting archeological discoveries in the last several decades have come from the scrap heaps in ancient stone quarries. It turns out builders of temples in antiquity did a large amount of cutting and carving at the quarry to reduce the weight of the material in transport. Frequently, these nearly finished parts were discarded because of internal flaws in the stone. Those scrap parts contain gold for the archeologist, chock-full of layout lines and mark- ings designating where the part was to be used. In some cases they’ve been able to match up rejects to the finished building still in existence.
Here’s where it gets really interesting: Often the final part on the actual building is slightly modified compared to the one pulled from the bone pile. This leads to speculation that ancient builders did a lot of fine-tuning right on site as the buildings went up.
Sound familiar? Regardless of how sweet our drawings appear, there’s no substitute for making adjustments on the fly as we build.

The eyes have it. Making adjustments on-site or at the workbench is important. Let your eye be the final judge.
Here are some supplies and tools we find essential in our everyday work around the shop. We may receive a commission from sales referred by our links; however, we have carefully selected these products for their usefulness and quality.


