We may receive a commission when you use our affiliate links. However, this does not impact our recommendations.
Cooking wood in your kitchen can produce results that rival specialty kilns.
Luthiers have long used roasted or tempered wood in stringed instruments because the roasting process pre-stresses the wood and caramelizes the sugars, sealing the pores and rendering them more resistant to moisture. While these properties are beneficial for guitars and violins, it occurred to me that roasting could be advantageous in other applications.
Roasted maple also takes on a toasty, chestnut color that enhances the figure. Could I get similar results in a standard oven? Everyone seems to be roasting their own coffee and cocoa beans lately, so why not try to roast some maple?
Trial & Error
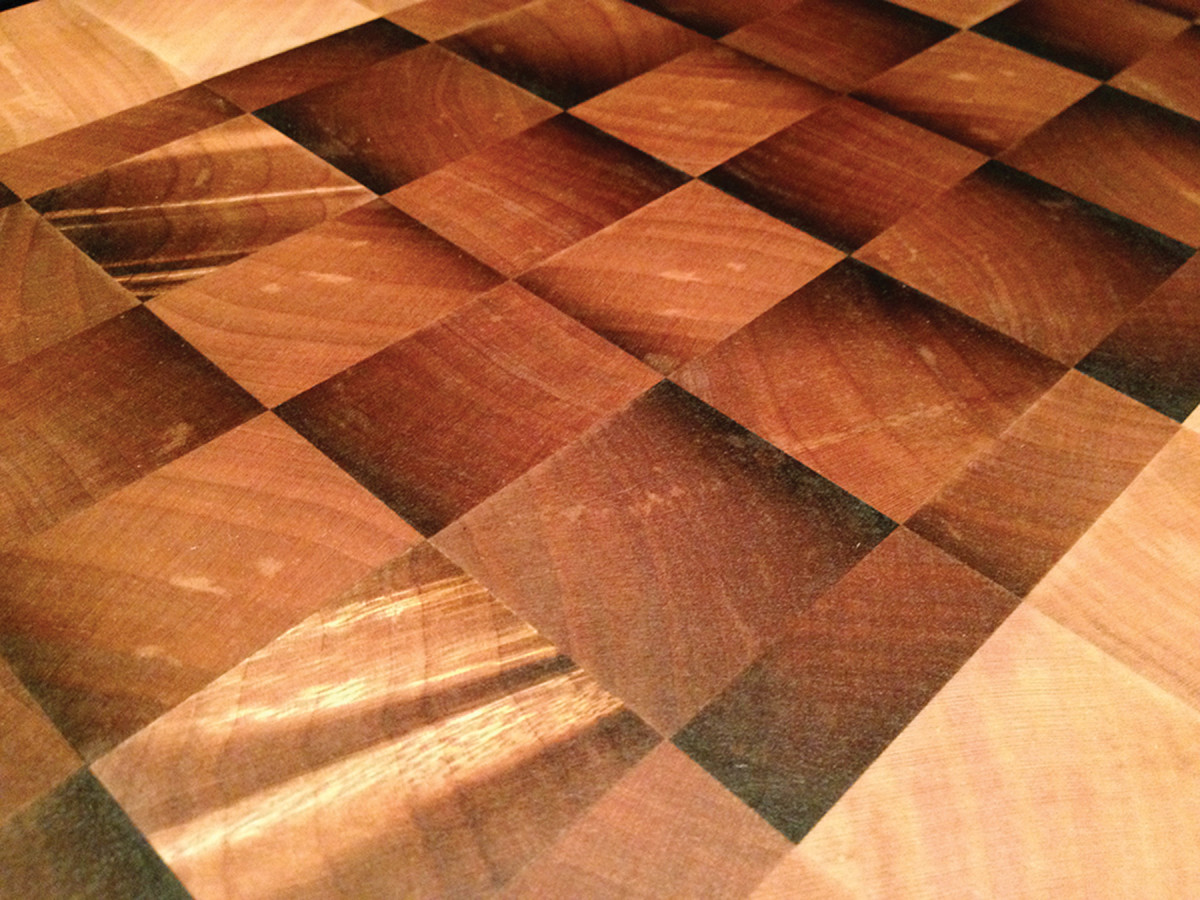
Heat treatment. Maple from the same tree may as well be a different species after roasting. Roasting brings out gold and red hues that make the wood seem to glow.
When I first became intrigued by roasting, I looked into sources of roasted wood and found it available at specialty wood suppliers that cater to luthiers. The process seemed mysterious: They roast the wood in special vacuum-sealed kilns at 360° Fahrenheit (F).
I had some nice maple, so I experimented. I heated my kitchen oven to 360° F, put in a few pieces of maple and let them cook for several hours.
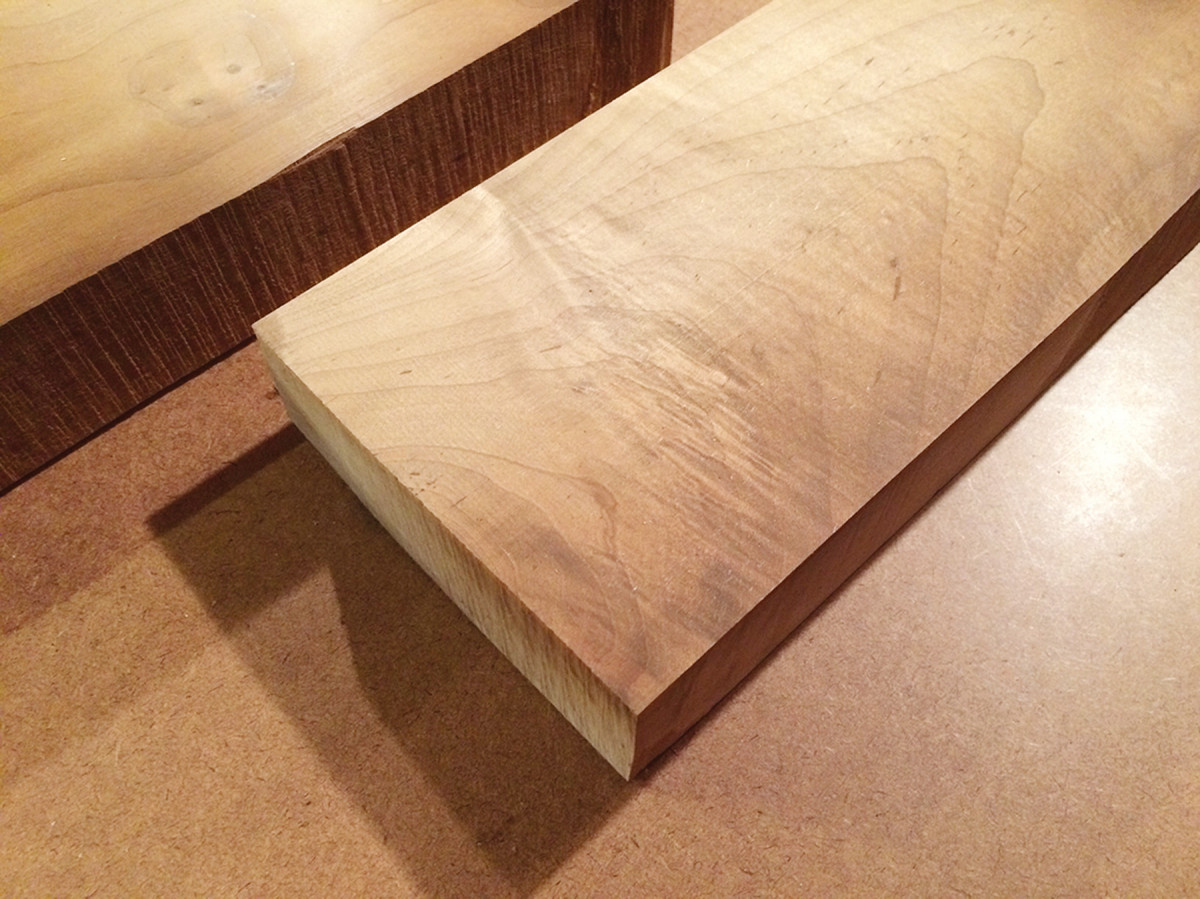
The wood became dark and toasty in some places, but a washed-out gray in others. I thought my experiment had failed and set the wood aside.
Once the wood cooled and acclimated for a few days, I started playing around with it and was surprised at how the wood had changed. It smelled like maple syrup, especially when I cut into it. But more important, the surface felt as smooth as marble.
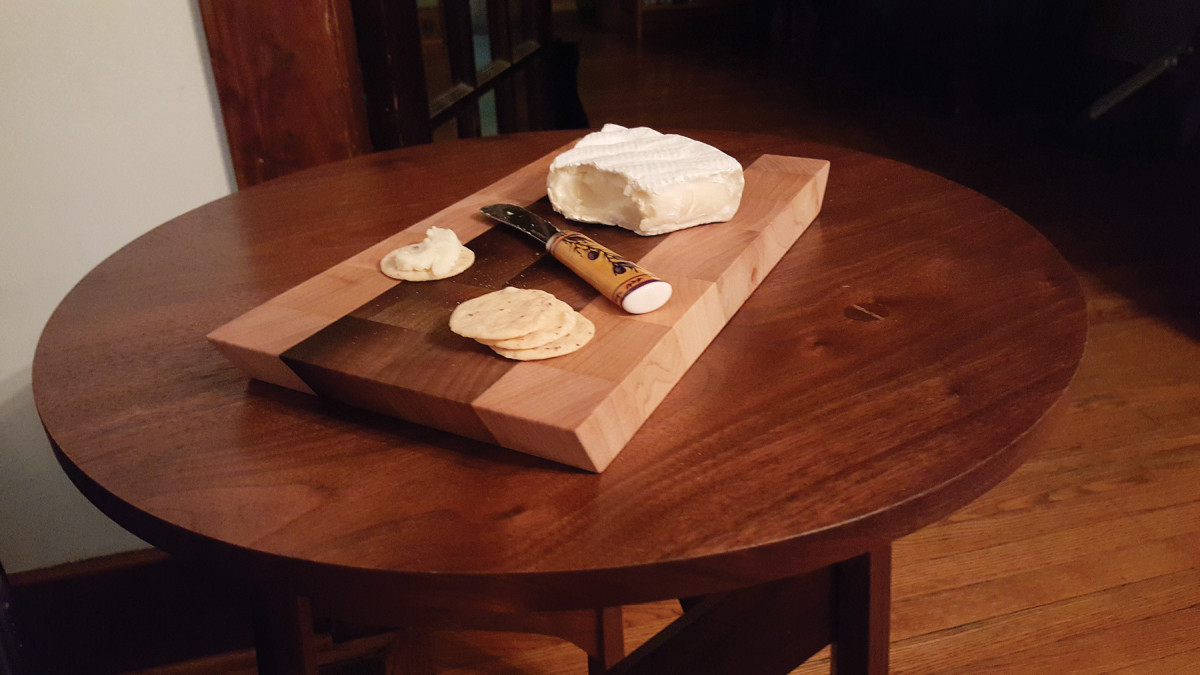
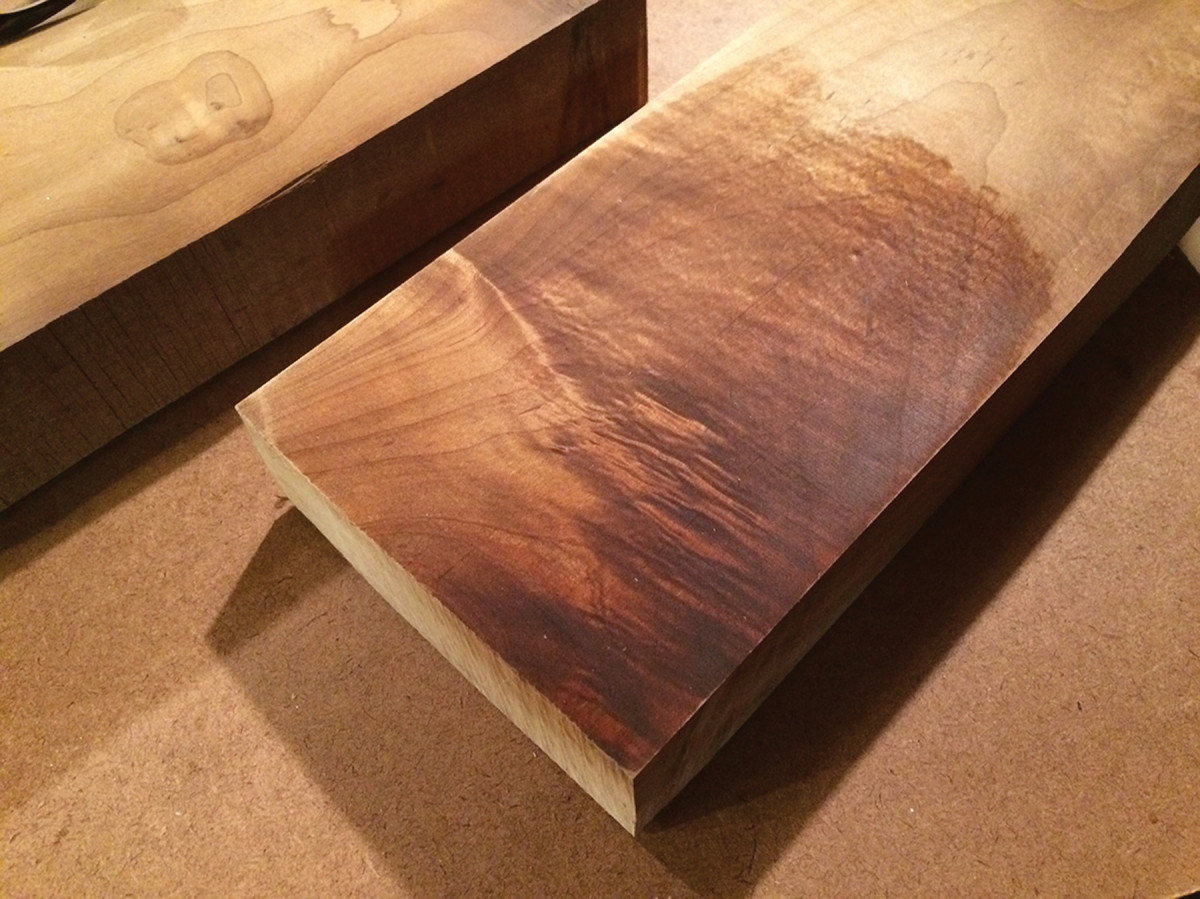
I made a couple of cutting boards with it and was thrilled to see a rich, deep, chestnut color with a bit of red in it when I applied oil. Compared to untoasted maple from the same tree, it looked like a different species.
The Sweet Spot
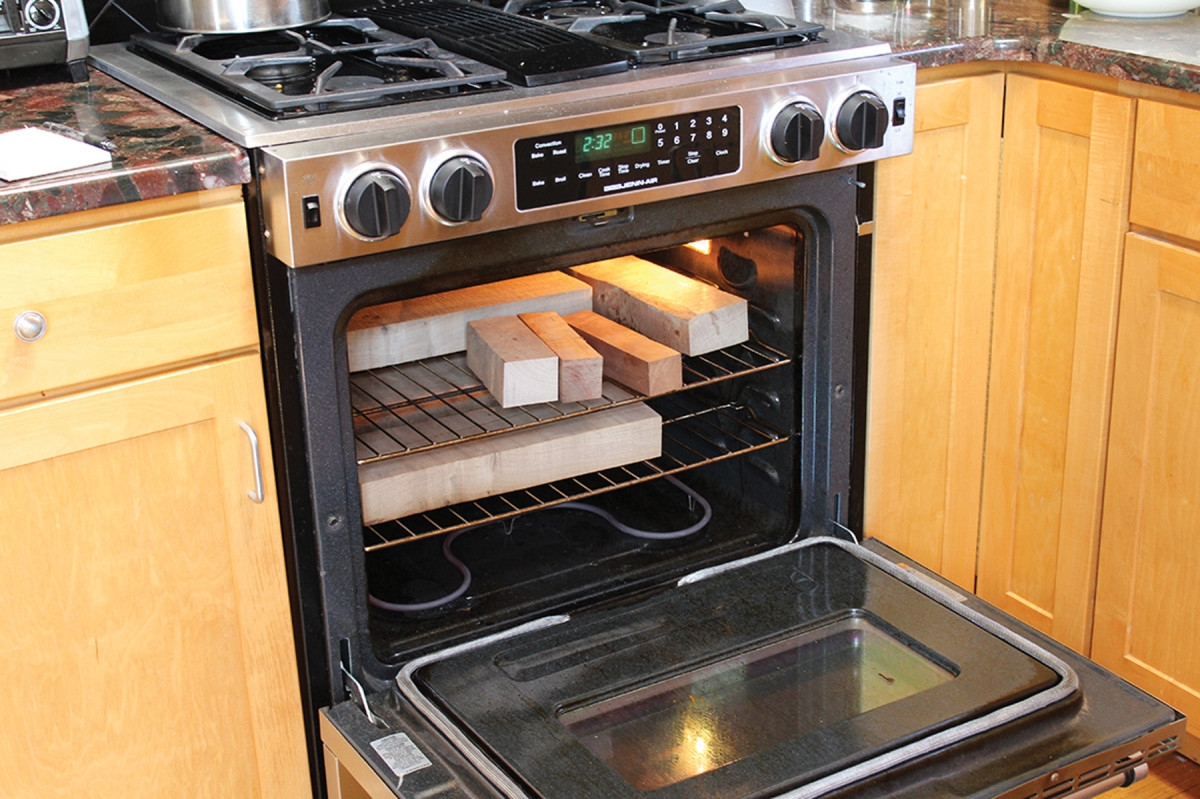
Feel the heat. Bake at 360° Fahrenheit for four hours. Serve. Enjoy.
Back in the kitchen, I experimented with different temperatures and roasting times. At 325° F, there was no noticeable effect on the wood, even after a few hours.
Reveal the riches. A quick wipe with a wet rag reveals how the rich color brought out by the roasting enhances the figure of the wood.
 With the temperature at 360° F, I experimented with two, three, four and five-hour cooking times. There was no noticeable effect after three hours; the wood turned more black and gray after five hours. The sweet spot, at least in my tests, seems to be 360° F for four hours.
I tried roasting cherry, walnut and ash as well. The ash didn’t change very much. The walnut became darker but not significantly so. The cherry changed the most dramatically of these other woods and has the most promise. I’ll be doing more experiments with cherry in the future.
An Ounce of Prevention
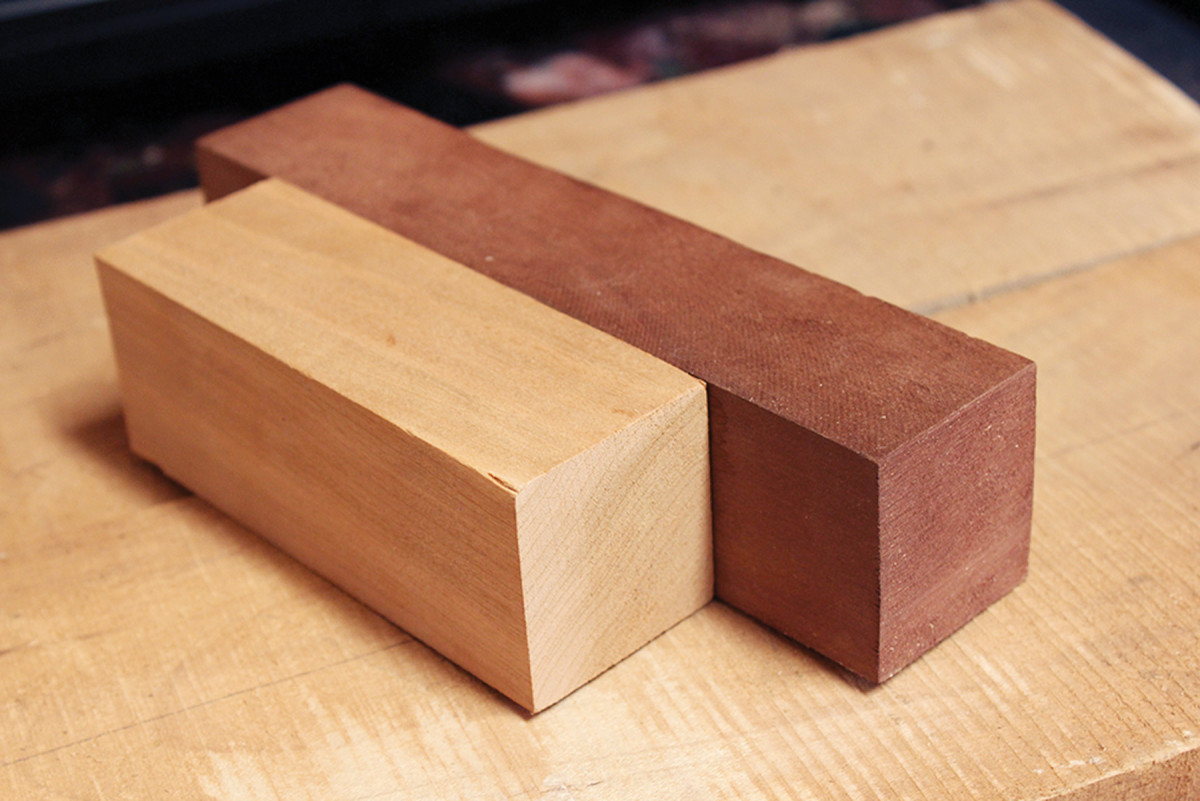
The dark side beckons. The color of cherry darkens considerably with roasting, as seen in these two pieces cut from the same stock.
I was concerned whether putting wood in an oven was a smart idea in the first place, so I did some research into autoignition temperatures for wood.
While research is difficult to compare because of different conditions and samples, in the end I consulted “Fundamentals of Fire Protection for the Safety Professional,” by Lon H. Ferguson, CSP, and Christopher A. Janicak, CSP, ARM (2005, Government Institutes), which indicated “The average ignition temperature of wood is about 392° Celsius” (738° F).
Even with that knowledge, I kept a fire extinguisher handy just in case, and checked the wood at least once per hour. But it seems more dangerous – at least if I’m doing the cooking – to roast a turkey than to roast wood.
Fair warning: The wood does put off some smoke after four hours or so, but the regular oven fan vented it so well I didn’t see any smoke in the room unless I opened the oven.
If you’d like to try roasting your own wood, here are some tips:
■ Prepare the wood. I made sure to remove any paint or glue from the wood to avoid releasing any toxic fumes, and I planed away any whispy areas on the surface. I also cut the wood far larger than my desired final dimensions to allow for warping and shrinking.
■ Think about timing. Once the oven came up to temperature, I noted the time and listed out the next four hours. This will help you keep track and avoid roasting the wood for too short or too long a time.
■ Turn the wood (or not). When I wanted an even color distribution, I turned the wood a quarter-turn each hour. Leaving it on the same side the full time will make the side facing the heating element a bit darker, which can have an interesting effect on the color.
■ Remove the wood. I used oven mitts to retrieve the pieces and placed them on top of the oven to cool. Wood is a poor conductor of heat, but it will be hot to the touch for 30 minutes to an hour after being removed from the heat. After roasting, I let the wood acclimate to my shop for several days at least.
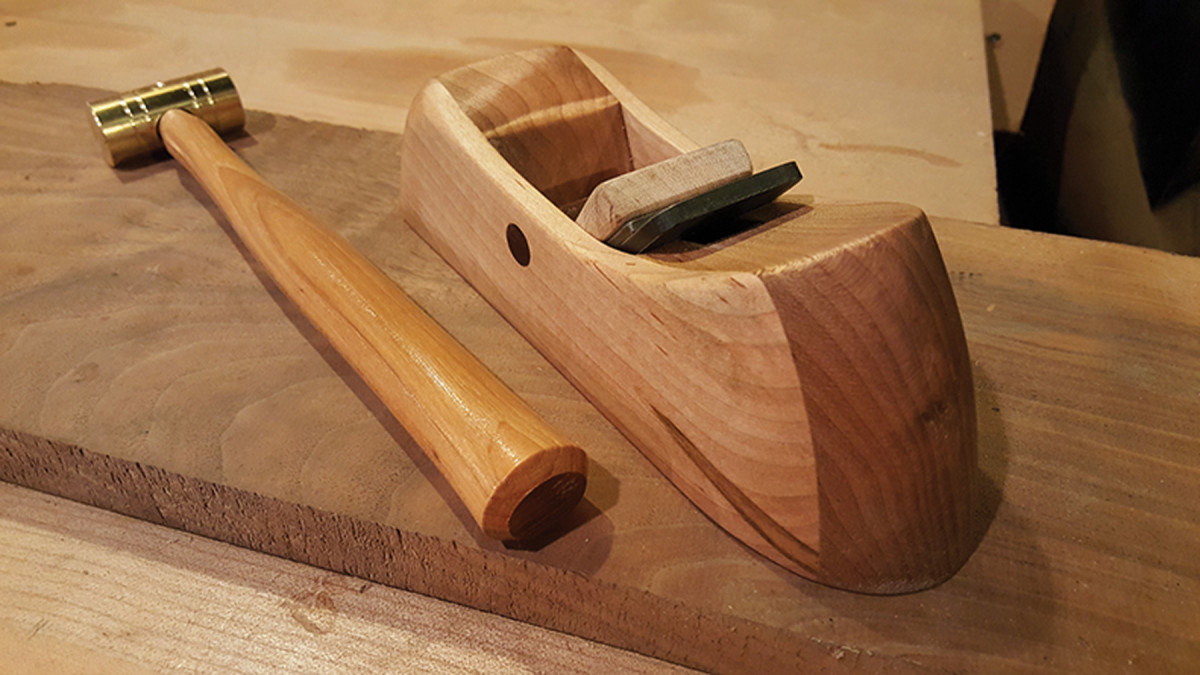
A tasty morsel. This Krenov-style smooth plane is made with roasted and raw maple from the same tree.
Whether you need wood to be especially stable or moisture resistant, or you just want to produce an interesting color, roasting wood is easily doable at home. Aside from cutting boards and planes, possible applications include wedges for through-tenons, butterfly keys, inlays or anything else where you want to achieve a contrast. You are really only limited to the size of wood you can fit in your oven.
Experiment for yourself with different species, dimensions and cooking times. It’s a fun technique to try – even if you just want your house to smell like maple syrup for a few days.
Here are some supplies and tools we find essential in our everyday work around the shop. We may receive a commission from sales referred by our links; however, we have carefully selected these products for their usefulness and quality.