We may receive a commission when you use our affiliate links. However, this does not impact our recommendations.
 I previously wrote about several types of hinges commonly in use and described various techniques for installing them. For the second article in this series, here are five hinges with more specialized uses.
95° Stop Hinges
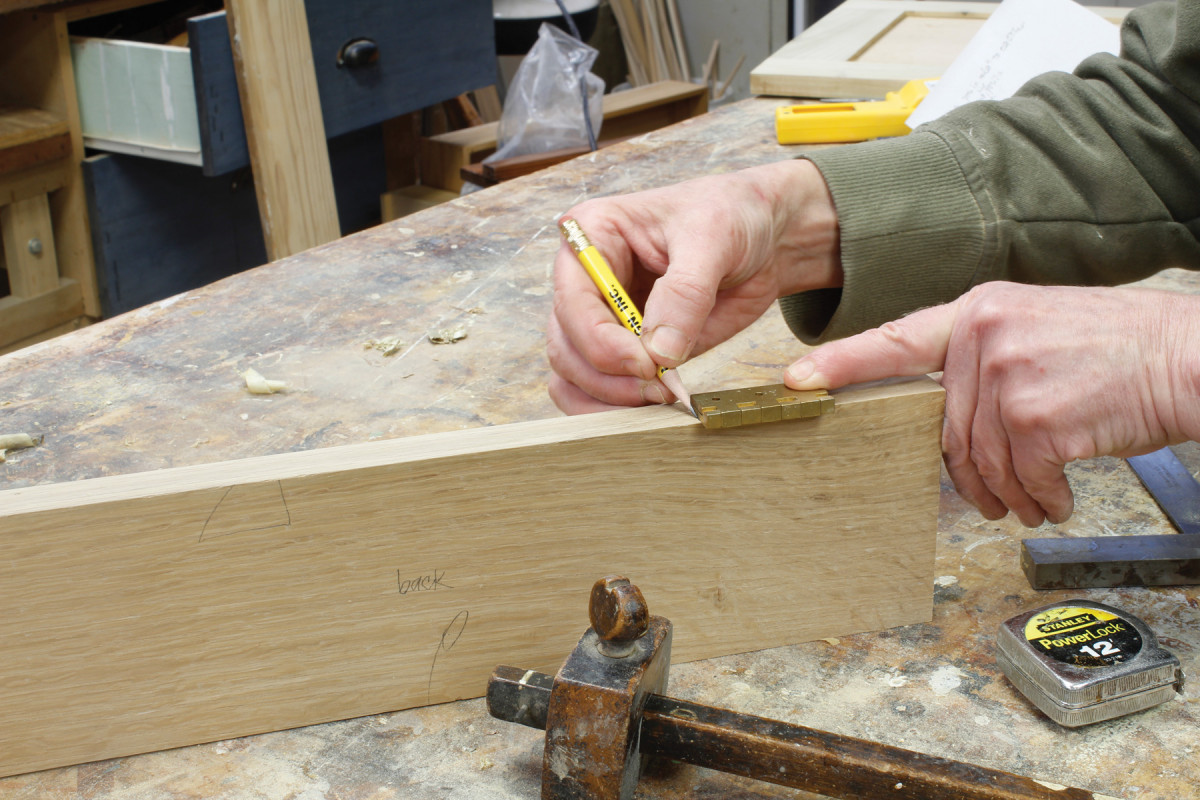
On your marks. Mark the end of each outside hinge. If using three hinges, mark the center- line and mark one end of the hinge by measuring to the left or right from that centerline.
Stop hinges are an excellent choice for box or chest lids in cases where you want to avoid extraneous hardware, such as stays. Precision-engineered, they will hold a lid securely open at 95°. You can use these hinges on chests with lids that overhang at the ends and front, but for the simplest installation, the lid should be flush with the case’s back.
Start by marking the back and lid for foolproof identification. It’s important to keep these parts oriented consistently. Next, lay out the position of each hinge on the top edge of the back. Depending on the length of the lid you may be fine with two hinges; longer lids should have three. These hinges will be mortised into both parts – the chest and the lid – very much as you would mortise a traditional butt hinge. You can start with the mortises on either part, as you prefer. In this example I started with the piece that would be the back of the chest.
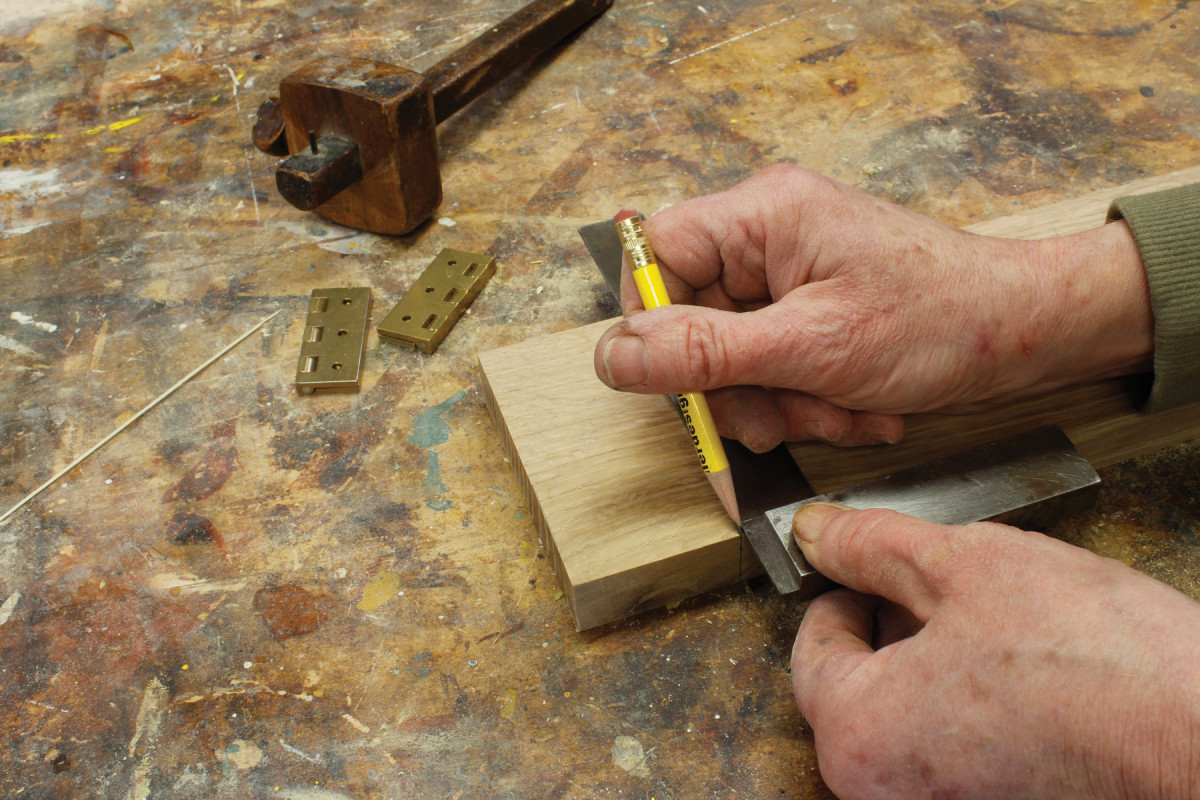
Crisp end. To determine the other end of each hinge mortise, set a hinge hard up against the first mark and trace the other end with a sharp pencil. You may also use a marking knife. In either case, you will scribe the line with a knife before chopping the mortise.

Width first. Set one marking gauge to the width of the hinge leaf, then mark the leaf width between the end lines.
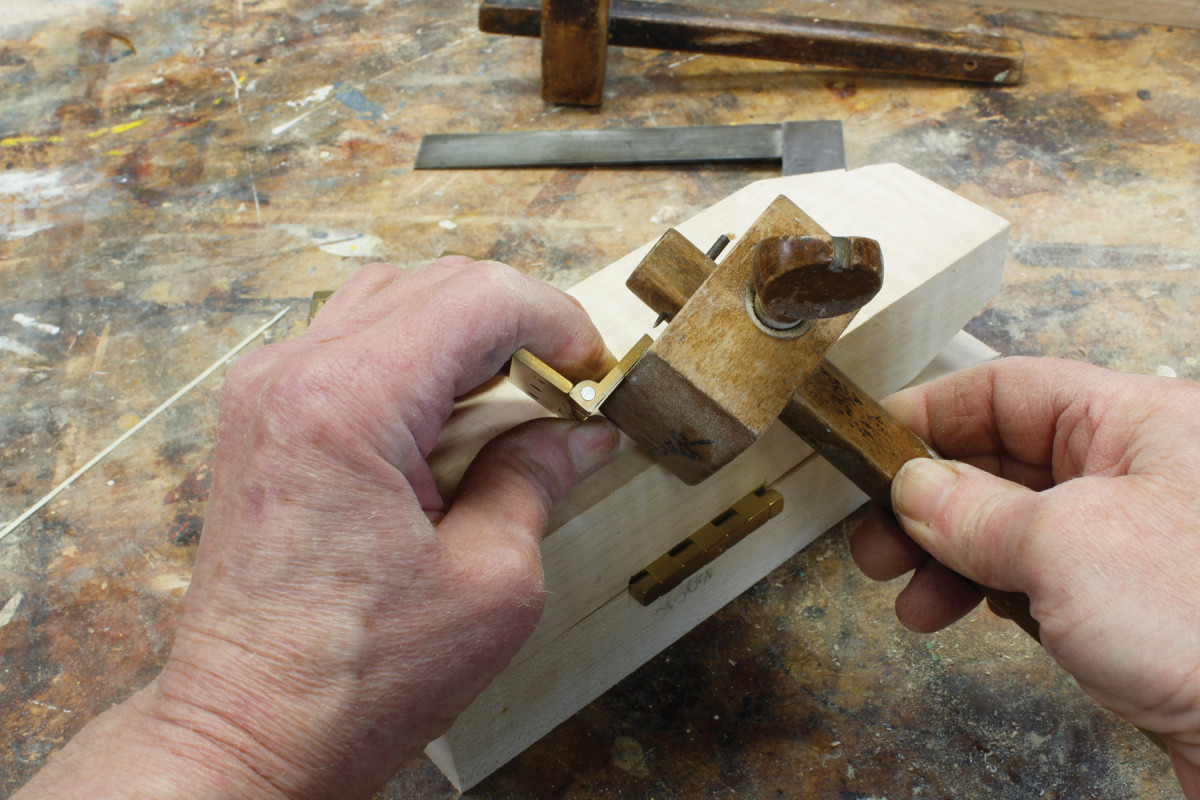
Thickness second. Set the second marking gauge to the thickness of one leaf, then gauge the leaf thickness onto the back of the chest.
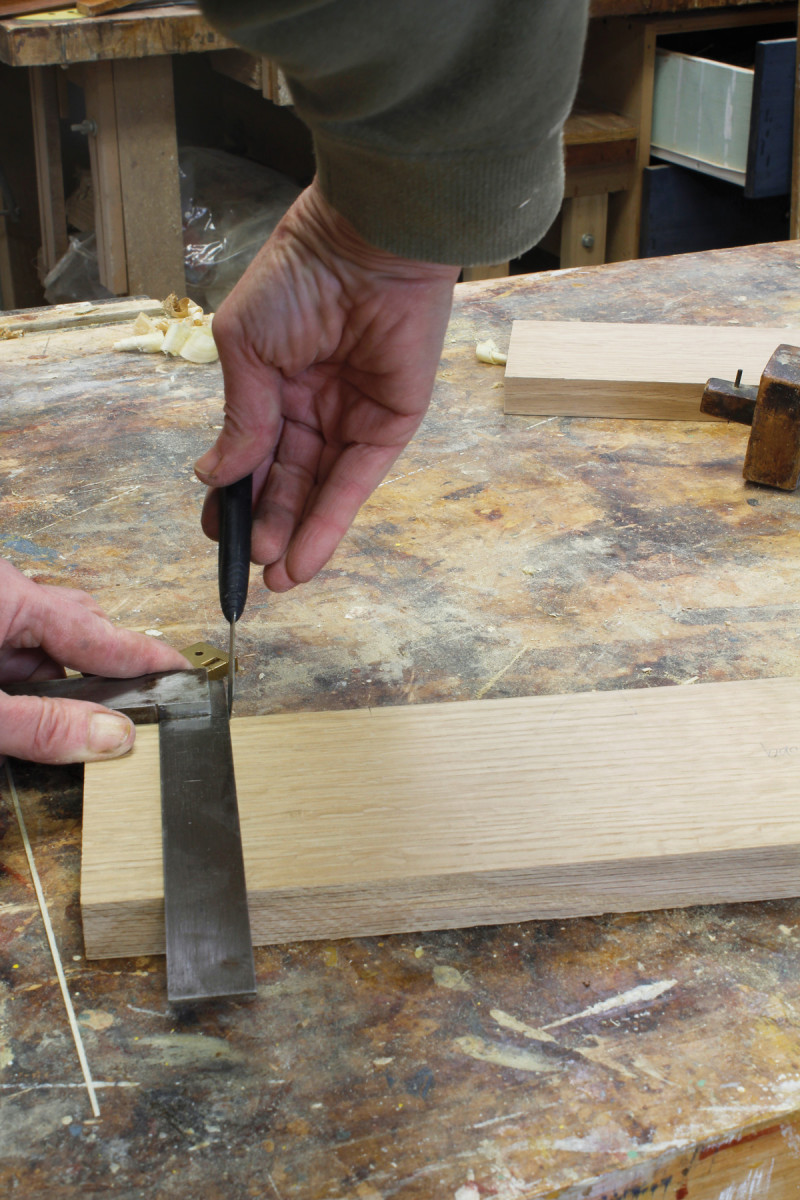
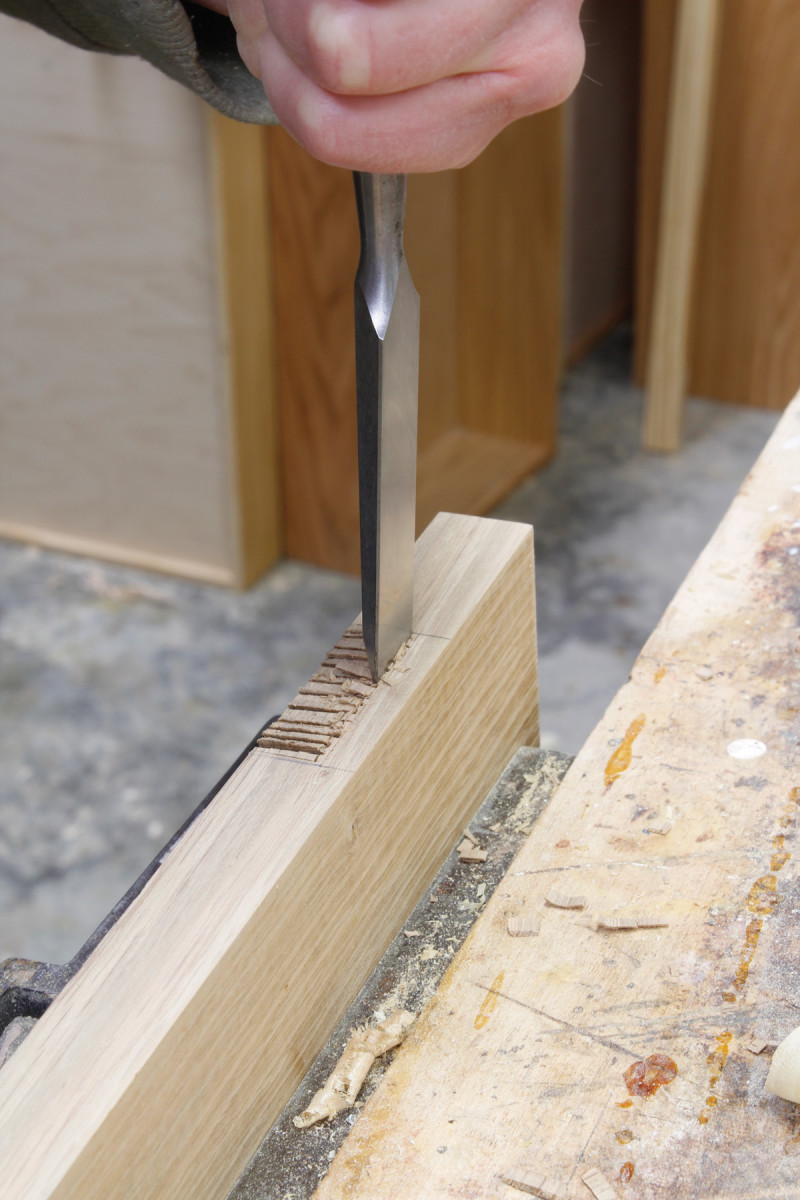
Last step. Use a marking knife to score the fibers from the top edge of the chest down to the leaf thickness line. Make a series of cuts with a chisel and mallet, staying shy of the leaf thickness line. The point of this step is to break up the grain, making the material easier to remove. Stay away from the ends of the mortise. Don’t go down to the gauge line yet.
It’s useful to have two marking gauges for the mortise layout. With stop hinges, at least 50 percent of the barrel must remain proud for the hinge to operate. For this example, I left the entire barrel proud, because I like the look.
Stand up. After you have removed most of the loose material, hold your chisel vertically toward the back of the mortise (the inside of the box’s back) but still shy of the leaf width line, and tap gently with the mallet to divide the main part of the mortise from the back edge. This will help you avoid marring the back edge as you continue to remove waste.
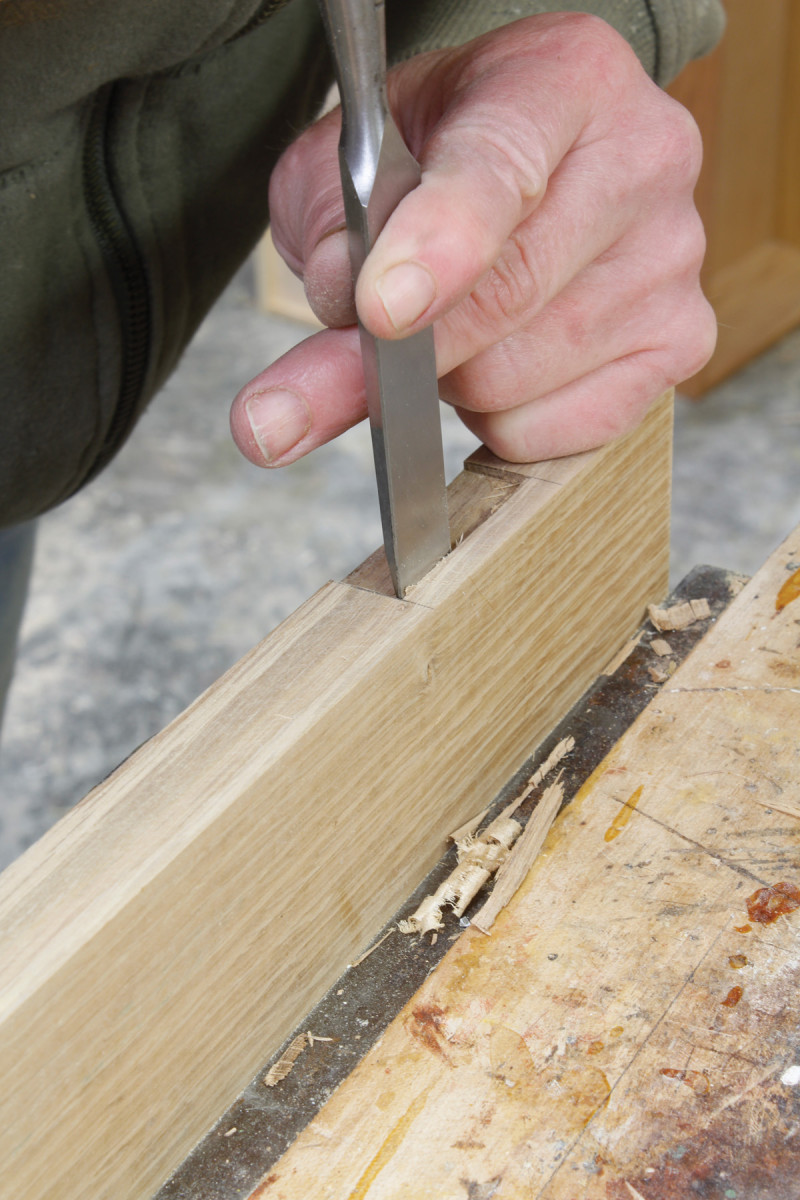
Nice pare. Don’t chop to the gauge lines; pare, to maximize precision. Do the same to cleanup the ends of the mortise, finishing at your knife marks. Insert the hinge to check the fit. Trim away more waste as necessary.
Chop the mortises in the top edge of the chest. When you have removed all but the thinnest slice of waste near the gauge lines, pare out the corners, holding your chisel vertically.
With the hinge fitted in the first mortise, transfer the hinge positions to the lid and repeat the same series of steps.
Rattail Hinges
Rattail hinges are ideal for reproductions of Early American furniture. Then again, with their distant echo of European hardware, they’re so striking that they can also lend themselves to other imaginative applications.
When designing your cabinet, keep the following points in mind: First, these hinges are handed – i.e., they are made for left- or right-handed installation. They also come in inset or offset (half-overlay) versions. Order accordingly.
Second, make sure that the face frame stiles are wide enough to accommodate the width of the “tail” section of the hinge. Lay the hinge on a piece of paper or scrap and measure the width from the end of the tail to the opposite edge of the eye (the ring that will hold the rat’s tail), which will be closest to the opening in the frame. Make sure you have a little on each side to keep the hinge from appearing squeezed into a too-small space.
Finally, the face frame should protrude into the door opening, not be flush with its edge, so you’ll be able to thread a nut onto the eye bolt to fasten it in place.
After you have completed the basic fitting of the door, shim it in its opening and start by laying out the positions of the hinges. There are no fast rules about this with rattail hinges; the vertical position on the door can be based on your preference.
Once you have determined the vertical position for both hinges, mark the center point of the eye and square with a pencil line across the stile. The distance of the eye from the edge of the face frame is also largely a matter of preference. Some people put them 1⁄2” from the face frame’s inside edge, others less. I installed mine at 5⁄16“.
Now set a marking gauge to the vertical center of the eye (in my case this was 5⁄16“) and mark the intersection with the line indicating the vertical position. This will be the center of the hole for the eye bolt.
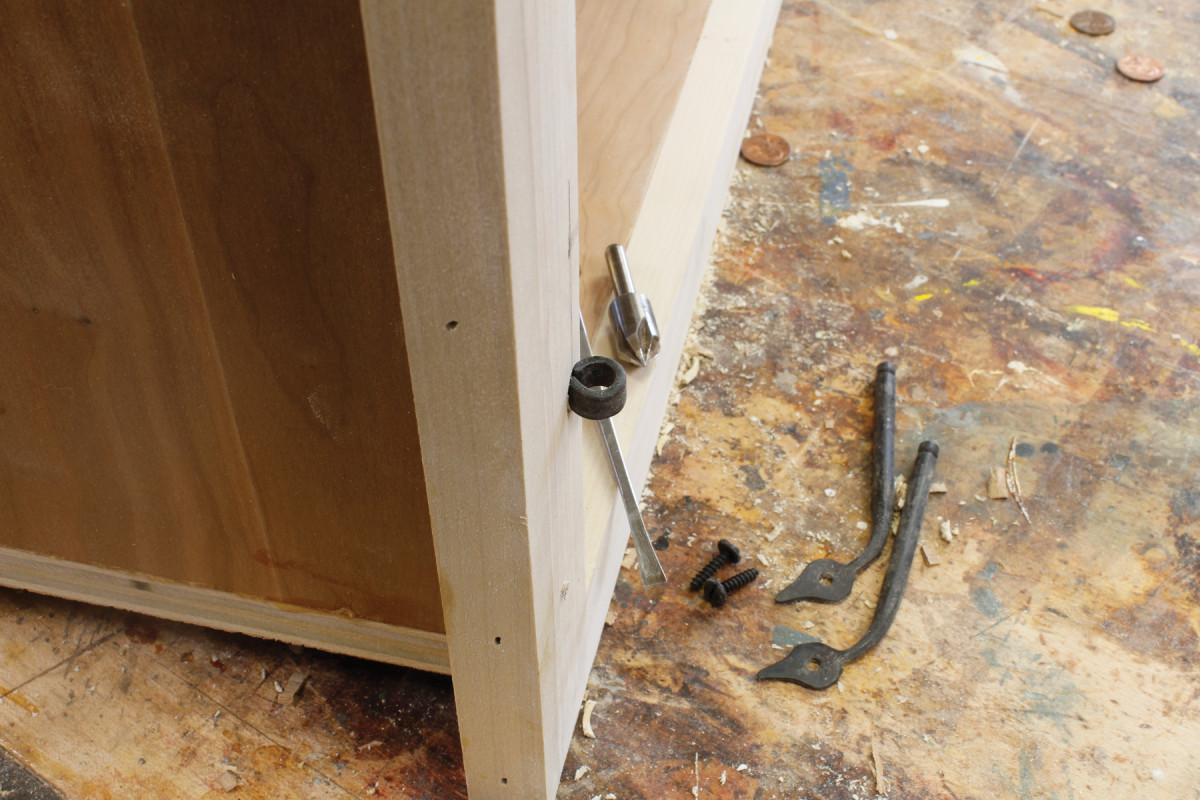
Drill the Hole for the Eye Bolt
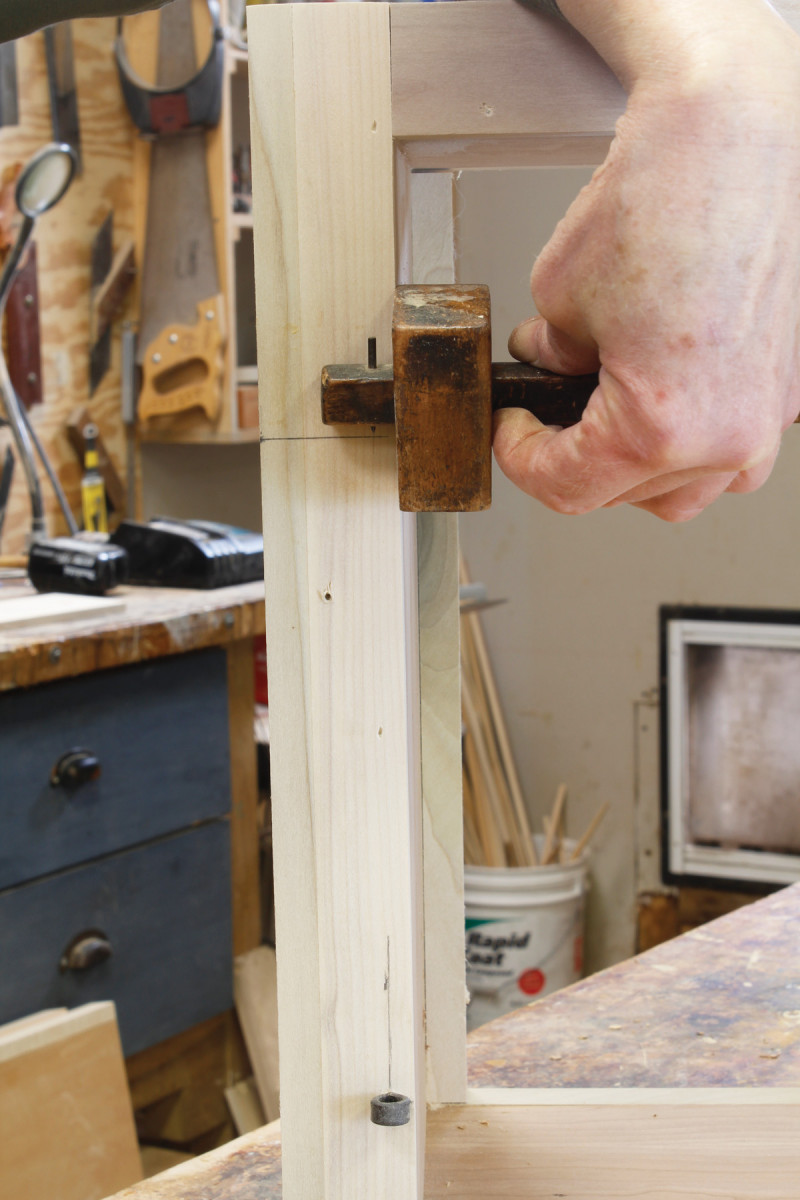
Eye first. Mark the center of the hole for the eye bolt, top and bottom.
For inset applications the hinge pin needs to be drawn up as close as possible against the face of the cabinet in order for the door to hang flush and not protrude from that plane. Use a narrow chisel to make a small hollow to accommodate the back of the eye. Now insert the bolts in their holes and fasten with nuts from the back. Drop the tail into each eye, hold it parallel with the face frame stile edge and use a bradawl to start a hole for a screw in the tail. (I like to use a temporary screw smaller than the final screw in case I need to adjust the position.)
In deep. The eye bolt may need to be let into the face of the cabinet so the tail will lie flush.
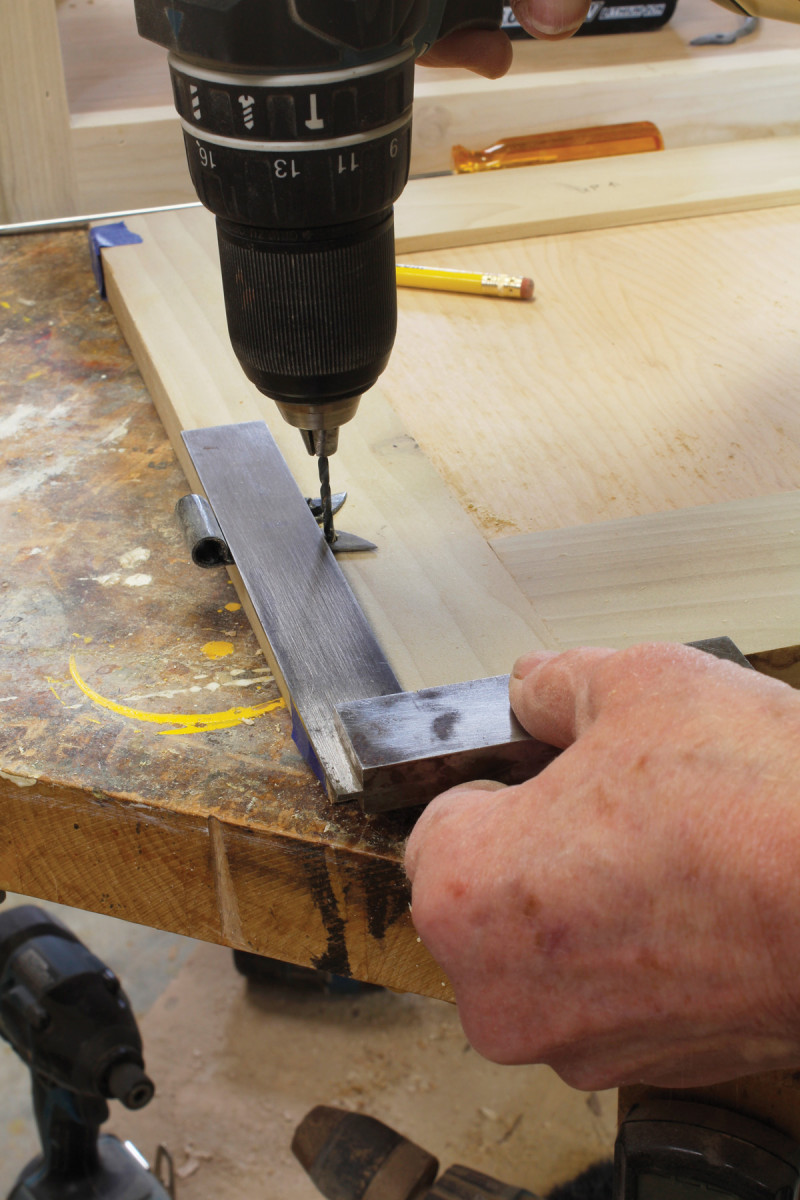
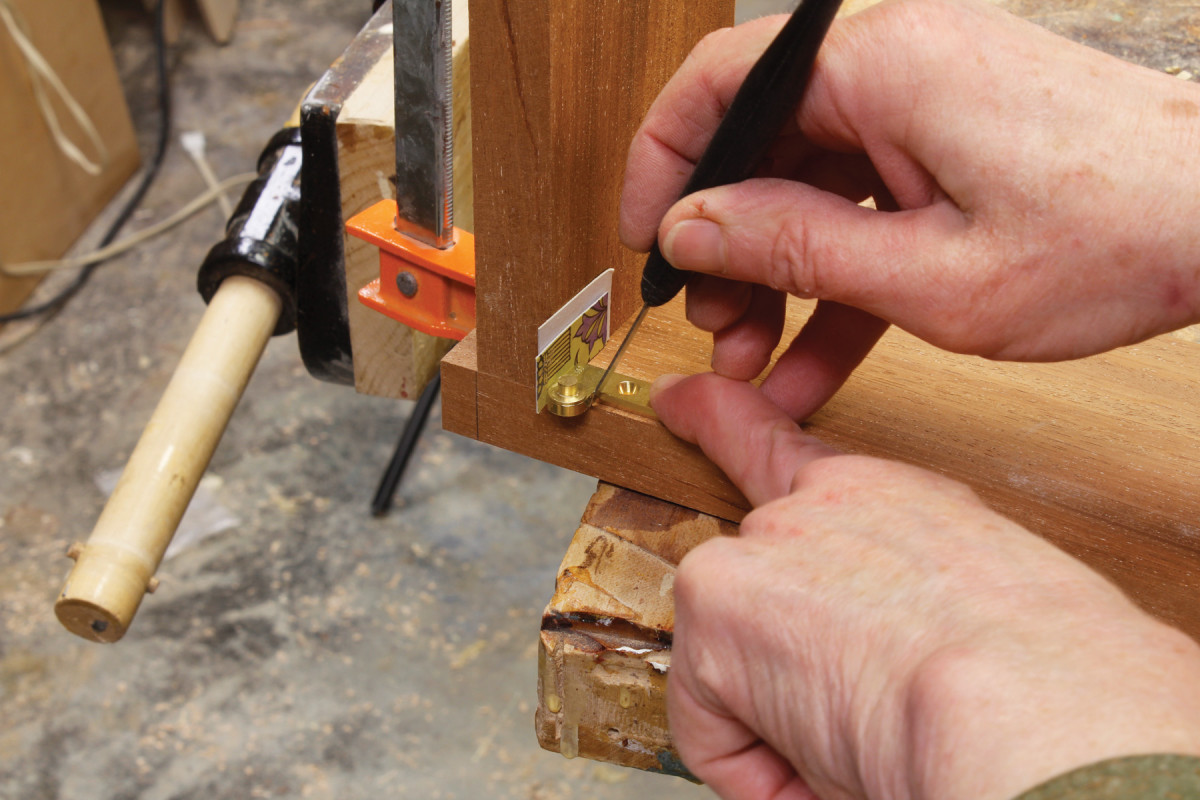
Hold it. Use a square to hold the leaf while you drill the holes.
Next, set the door back in its opening on shims. I find it helpful also to shim the hinge stile, taping pennies or dimes in place. Drop the leaf (or “flag”) onto each hinge pin and mark the holes in pencil on the door. At this point I remove the door because it’s far easier to drill the holes with the door lying down than propped up in the cabinet. I use a square to double-check that the leaf is square to the edge of the door. Drill just two holes in each leaf at this point and insert the screws.
Needs adjustment. Any adjustments mean redrilling holes. Luckily, they’ll most likely be covered by the hardware.
Hang the door and check the fit. If necessary, you can adjust the fit by shifting the position of the tail on the face frame or by moving the leaf (or both leaves) on the door. (Yes, doing so will mean adding more holes, but in most cases they’ll be hidden by the hardware, and it’s worth it to have a well-fitted door.) When everything looks good, drill and insert the last screws.
European Hinges for Bi-Fold Doors
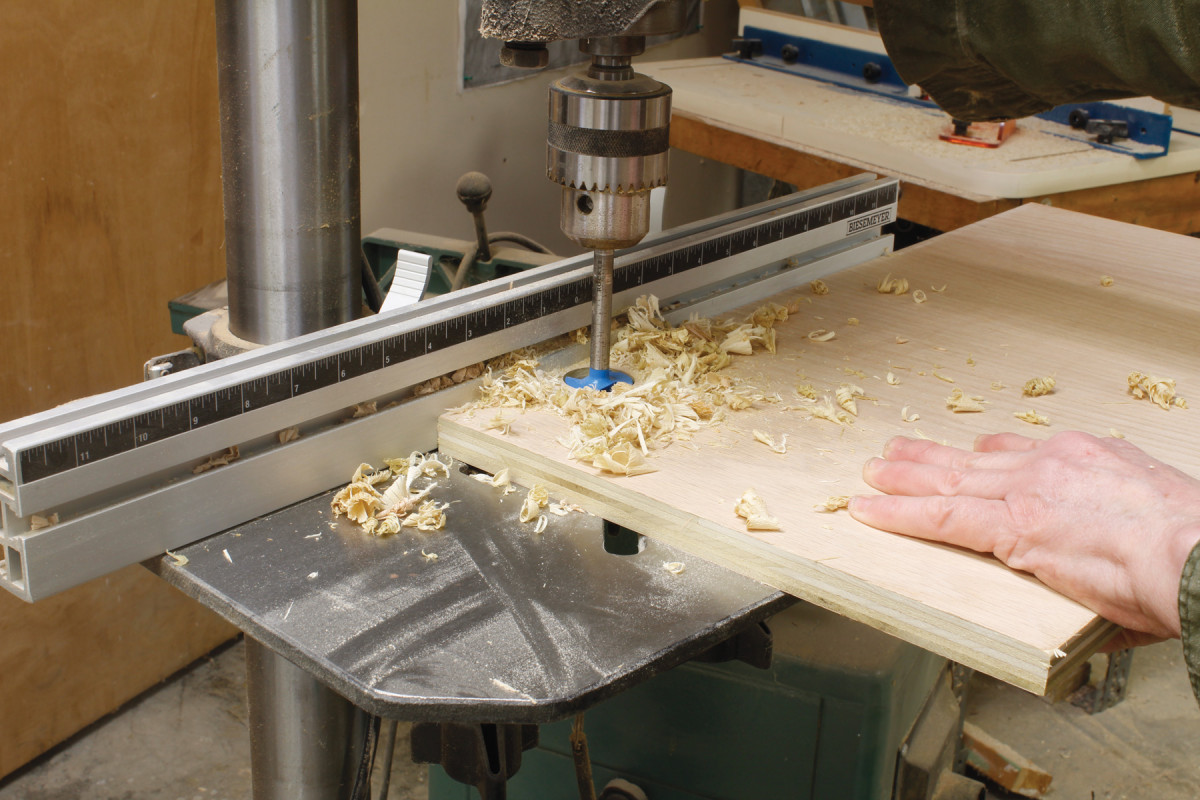
Press. A drill press is handy for drilling the hinge cup holes. The edge of the hole should be 1⁄8″ in from the hinge stile’s edge.
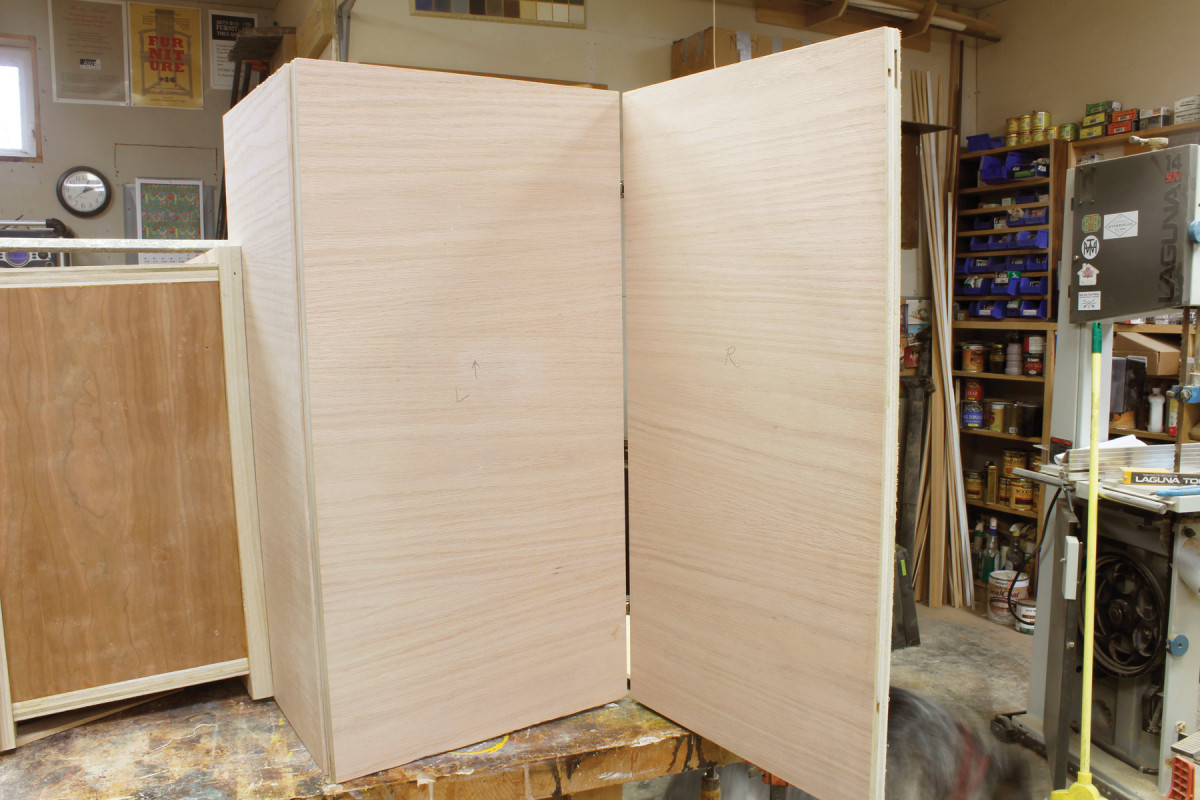
European hinges come in numerous forms, each suited to a range of applications. One handy variety is the bi-fold hinge. Well, it’s actually a pair of hinges: one to attach the primary door to the cabinet and the other to attach the secondary door to the first.
These are especially handy for full-overlay applications, though you can also make them work for inset doors by using a thicker mounting plate.
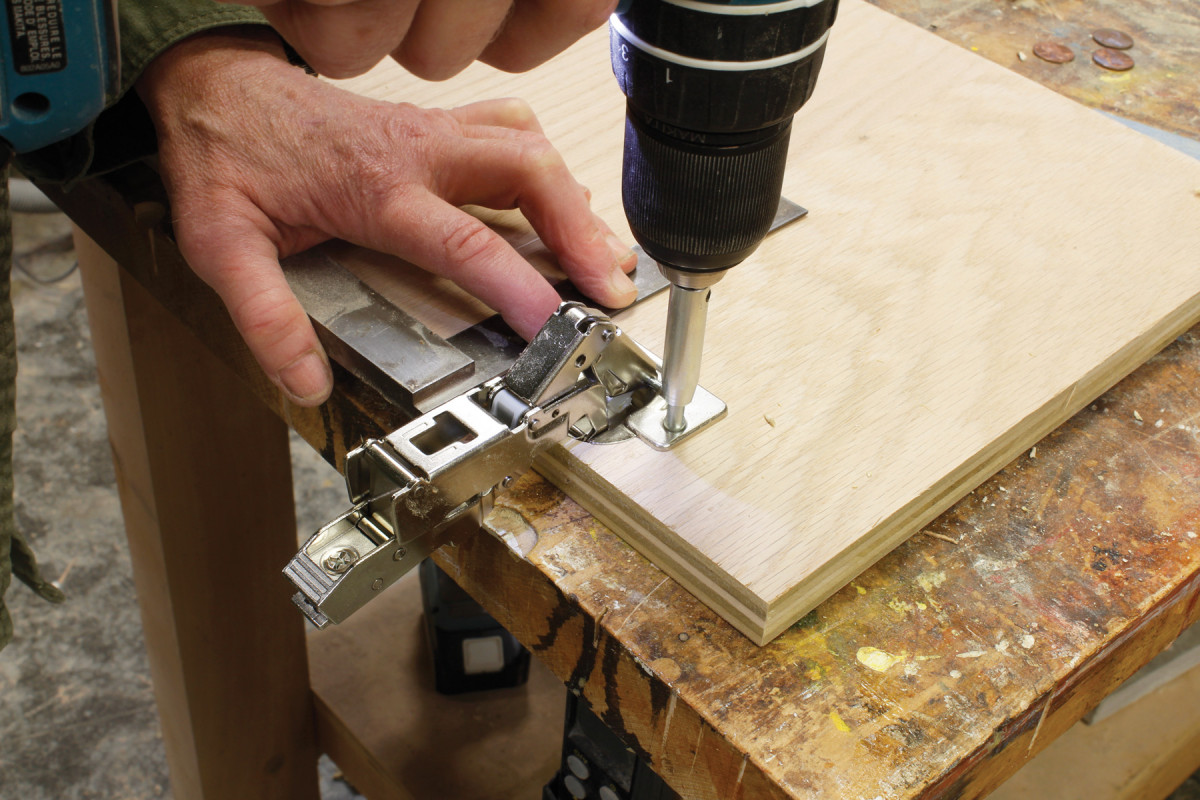
Square up. Use a square to position the hinge while drilling with a Vix bit.
As with any of the doors in this article, you should have the doors largely fitted before turning to the hinges. Decide which door will be hinged to the cabinet. I’m going to refer to this as the primary door. The secondary door will be the one you’ll pull when opening the doors to reach the cabinet’s interior.
Note: The job will be simpler if you have the luxury of installing these hinges before you apply the cabinet back.
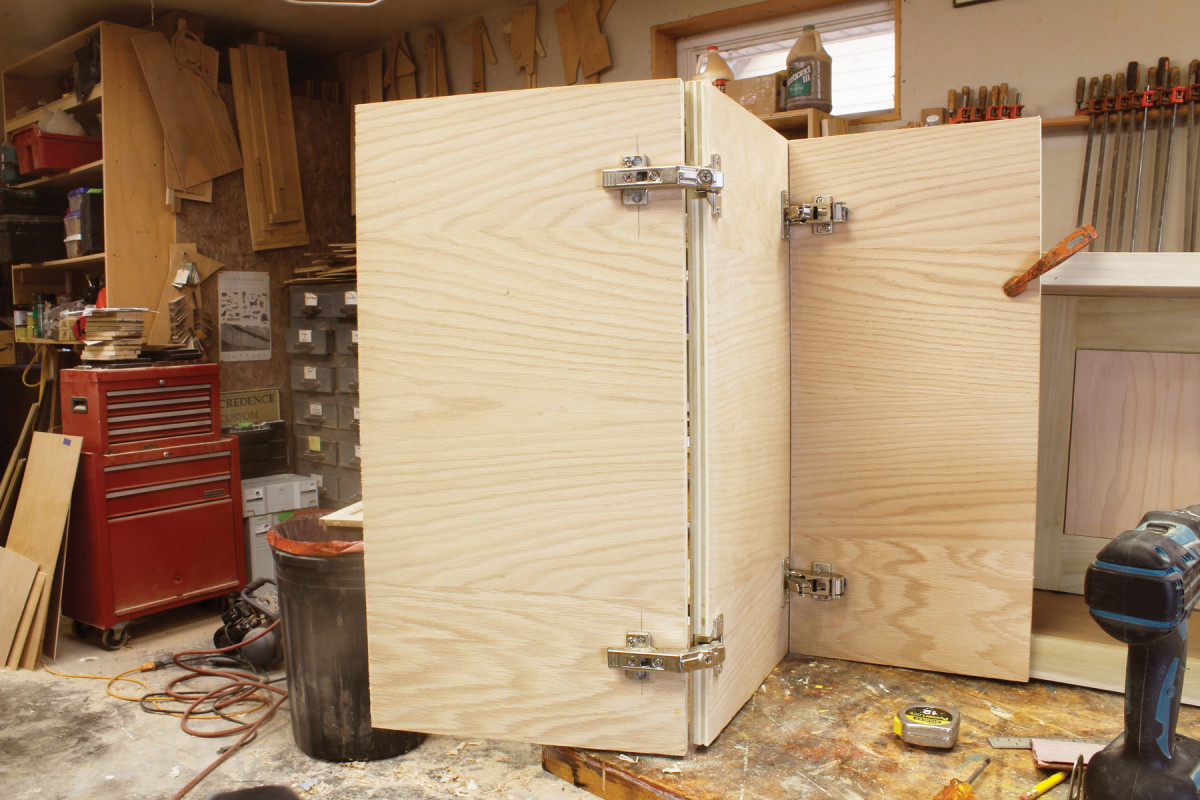
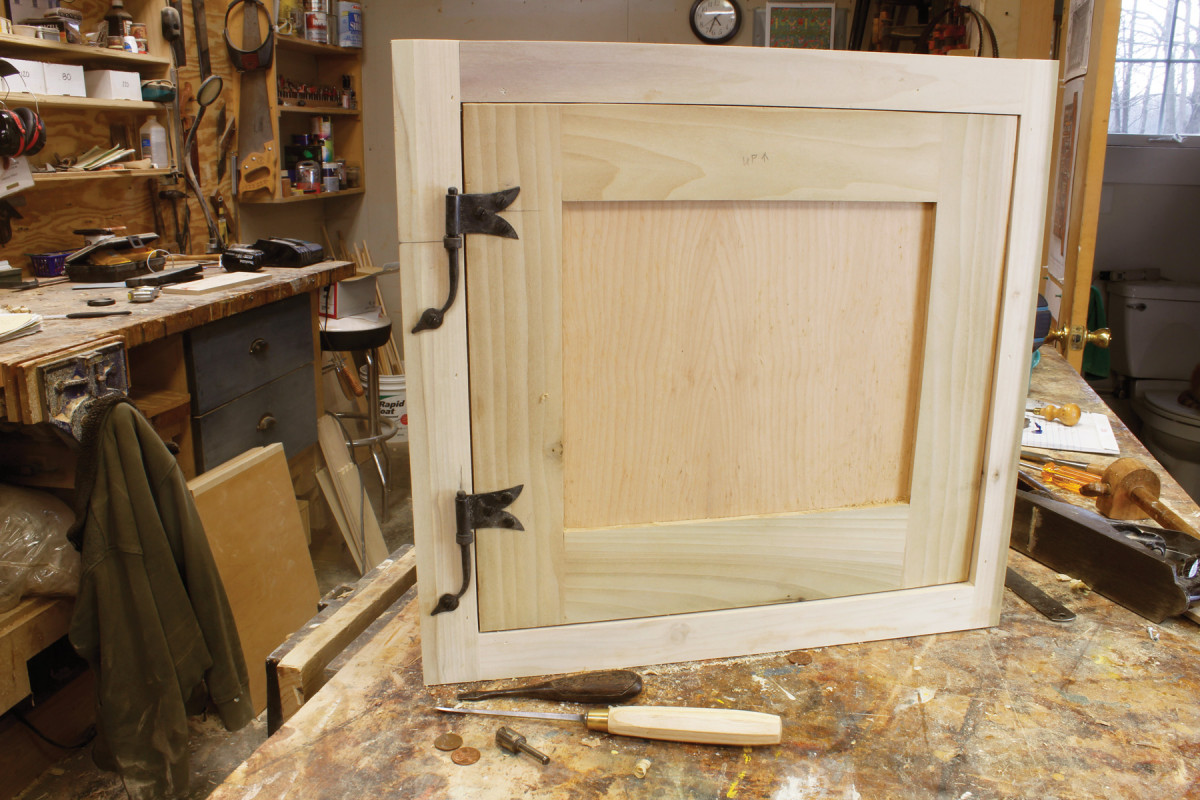
All set. The secondary door is attached by means of the bi-fold mounting plate.
Start by laying out, then drilling the 35mm holes for the hinge cups as you would for any European hinge. I spaced these 31⁄2” from the top and bottom of the door. Screw the hinges in place with #6 wood screws.
Mind the gap. You can adjust the gap between the doors by turning the adjustment screws. The vertical slot on the mounting plate allows for adjustments in height. The other two large screws allow for lateral adjustment and front-to-back tilt.
Next, clip the mounting plate onto each hinge and set the door in its opening. If the door is inset, shim it up on pennies or other material to create the gap you desire. If the door is full overlay, shim as necessary. While holding the door in place (if you have access to the cabinet interior via the back), drill one hole in the top hinge and one in the bottom hinge, using a #5 Vix bit, then insert screws. If you don’t have access from the back, hold the door in its open position and line up the mounting plates on the cabinet side; insert one screw in each, check the fit, and adjust as necessary. (Alternatively, you can make a simple template based on measurements taken from a mock-up.)
The next step is to mark and drill for the hinge cups of the bi-fold hinge that will attach the primary and secondary doors. These hinge cup holes will be drilled on the back (or inside) face of the primary door, at the opposite side.
Insert the hinges and screw in place as before. The secondary door will be attached by means of the bi-fold mounting plate. Hold the secondary door in place and transfer the center point of each hinge arm. The center of the front holes will be 37mm (or 115⁄32“) back from the edge of the door. Mark a line at this distance, intersecting with the center point of the hinge arm location, then hold the door in place against the mounting plates and drill one hole for each mounting plate using a Vix bit.
Knife Hinges
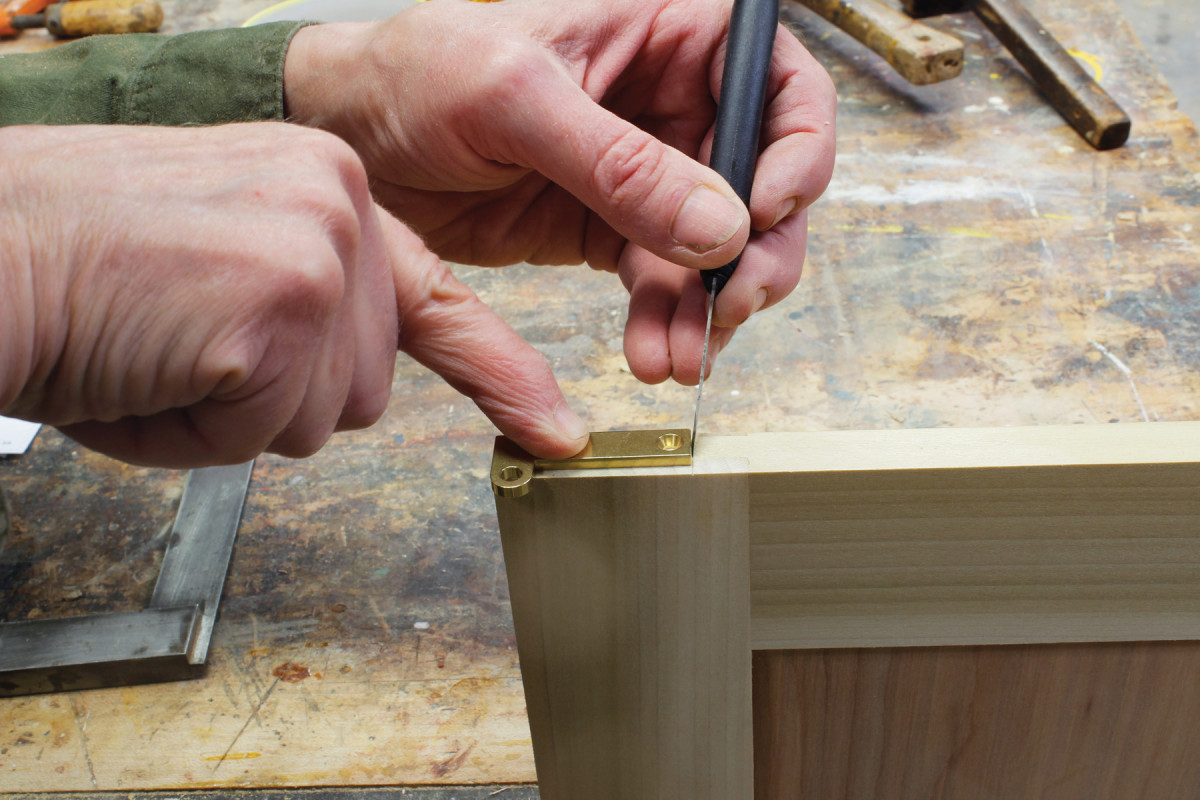
First mark. With the pivot end flush to the edge of the stile, mark the location of the other end using a knife. Also mark the edge of the pivot knuckle. Remove the hinge and scribe a square line across the edge of the door at both points.
Knife hinges come in different sizes, configurations and finishes. The most common varieties for fine furniture are center pivot hinges, for doors that overlay a cabinet’s sides but are enclosed within the top and bottom, and offset pivot hinges, for fully inset doors.
With knife hinges, the stakes are high: In most cases you will mortise the door and cabinet before gluing the cabinet together, and there is little opportunity to modify the fit once the cabinet is glued up.
This is an installation technique that uses a small router and chisels.
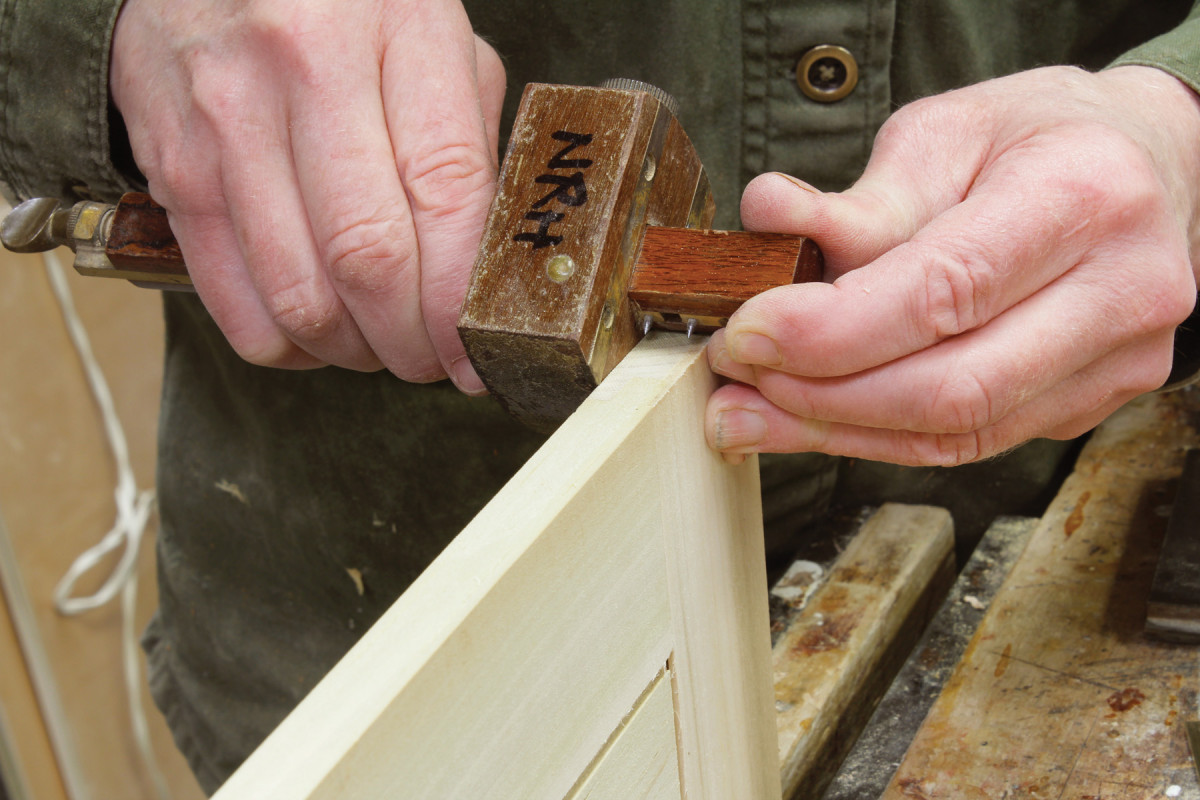
Transfer time. Set a mortise gauge to the width of the leaf and scribe the leaf width onto the door.
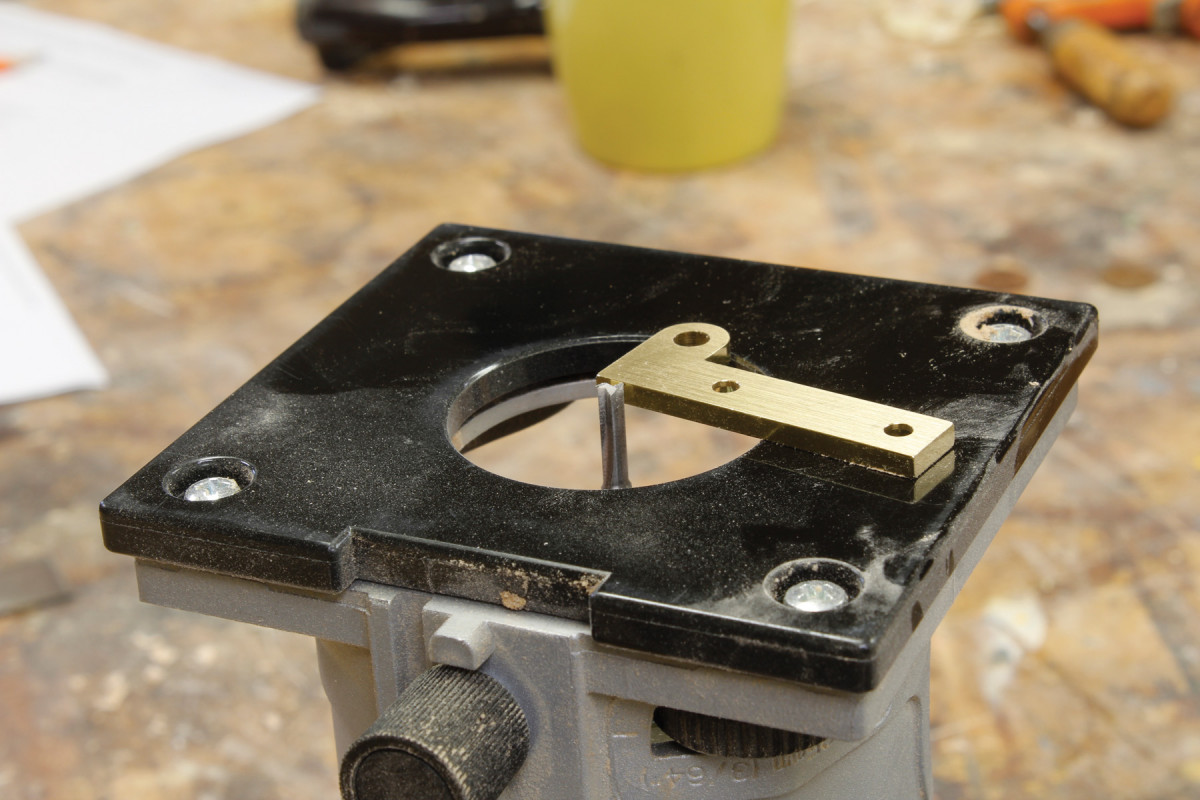
Rout. Set a small router cutter (I used 1/8” diameter) so its depth is equal to the thickness of the leaf.
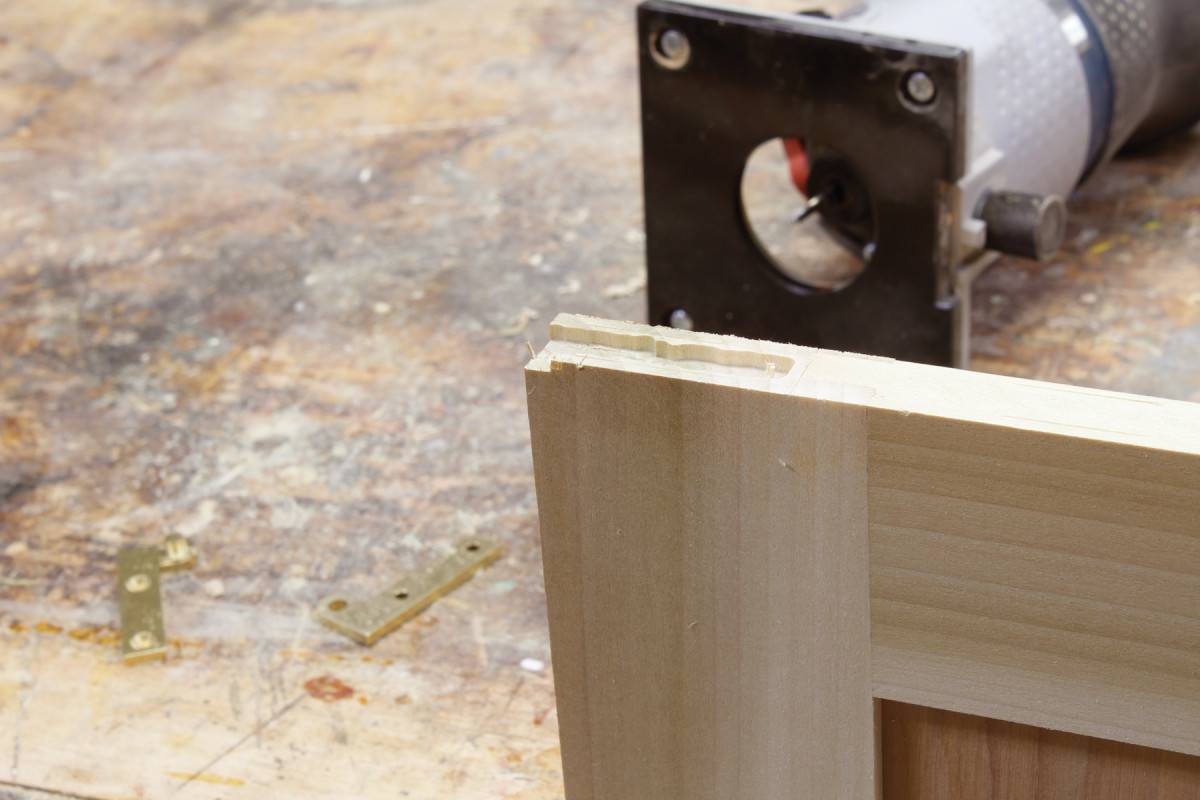
Rout out the bulk of the waste.
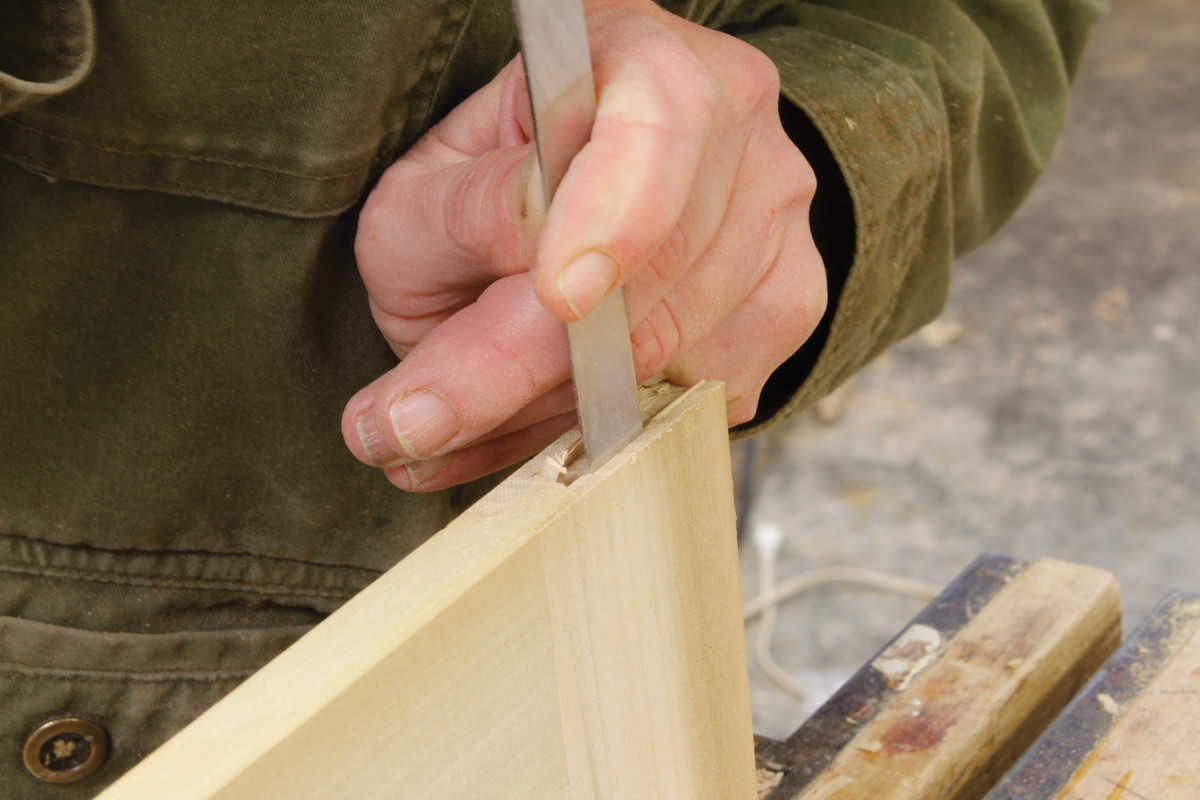
Final cut. Clean up mortise edges with a sharp chisel.
Start by clamping your cabinet together without glue. Make sure the opening is square, and fit the door to the opening with a slight gap on all sides. It’s common to use the gap between the hinge leaves, which is created automatically at the top and bottom of the door by the built-in washer, as a guide to the gap size at the sides.
Repeat, with one difference. This time the distance from the door’s edge will be offset by the width of your door gap. I used two layers of thin cardstock as a shim.
One leaf is mortised into the edge of the door at the top and bottom; the other is mortised into the cabinet.
Next set a mortise gauge to the width of the leaf. For most applications the hinge will be centered in the thickness of the door; adjust the gauge accordingly.
Slide into home. Slide the door onto the hinges, insert a screw in each, and test the fit. You can adjust the fit by modifying the mortises as necessary, but doing so is awkward and best avoided.
Hold the router squarely on the door’s edge to prevent it from tipping. Rout close, but not right up to, the scribed and gauged lines. It will be more precise to cleanup the rest with a chisel, and the lines you’ve made with knife and gauges will guide your chisel tip for a clean cut.
Architectural Hinges for Furniture and Cabinetry
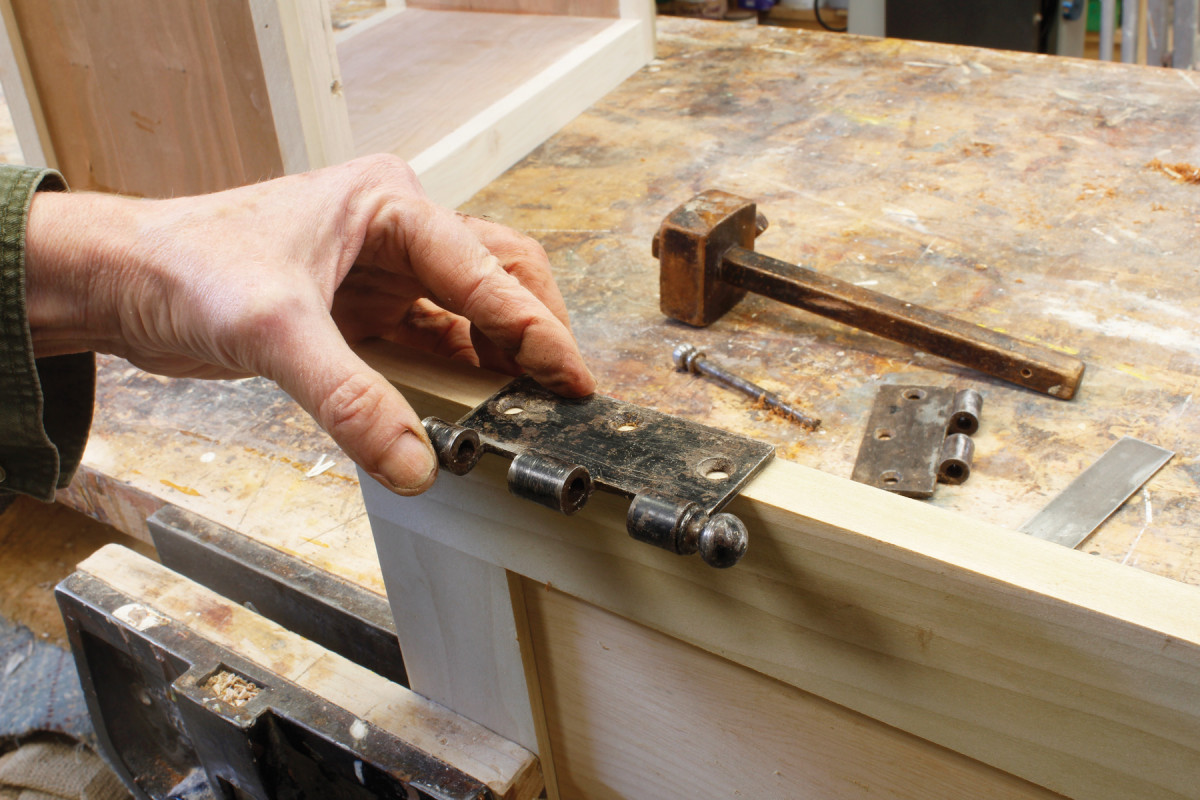
Pick your battles. Here I have the hinge flush at the back of the door, which makes it protrude awkwardly at the front. I glued a 7/16″-thick strip of the same material to the back of the hinge stile.
Every so often I have a client ask if I will build a piece using salvaged architectural hinges instead of conventional furniture hinges. If you’ve ever looked through bins of old hinges at a salvage yard, you can probably appreciate why. Between their finishes (shiny chrome! flashed copper!) and their finials (balls! acorns! menacing points!), salvaged architectural hinges offer a world of quirky decorative possibilities. Because they’re made to support full-size doors, they are also uncommonly strong.
Plan for the gap. If your leaf mortises are equal to the leaves’ actual thickness, you will end up with a large gap between the door and cabinet. I like to make one of the mortises a little deeper to make the gap more appropriate to a cabinet.
The basic installation method is the same as that for swaged butt hinges: One leaf gets mortised into the cabinet, the other into the door, with the barrel protruding. Due to their size, though, you should keep a few considerations in mind when designing a piece that will use them.
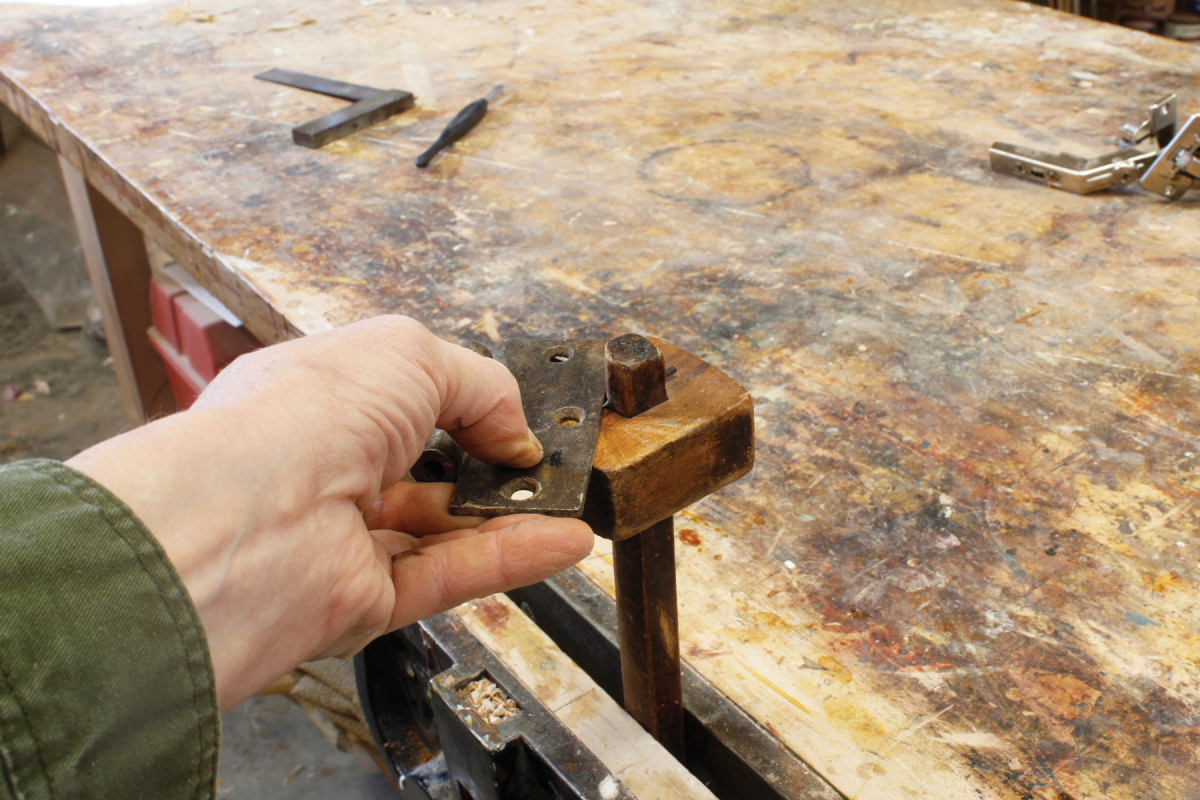
Decide which leaf will go on the cabinet and which on the door based on the end with the loose pin. The fixed finial should be at the bottom; otherwise the pin will simply fall out.
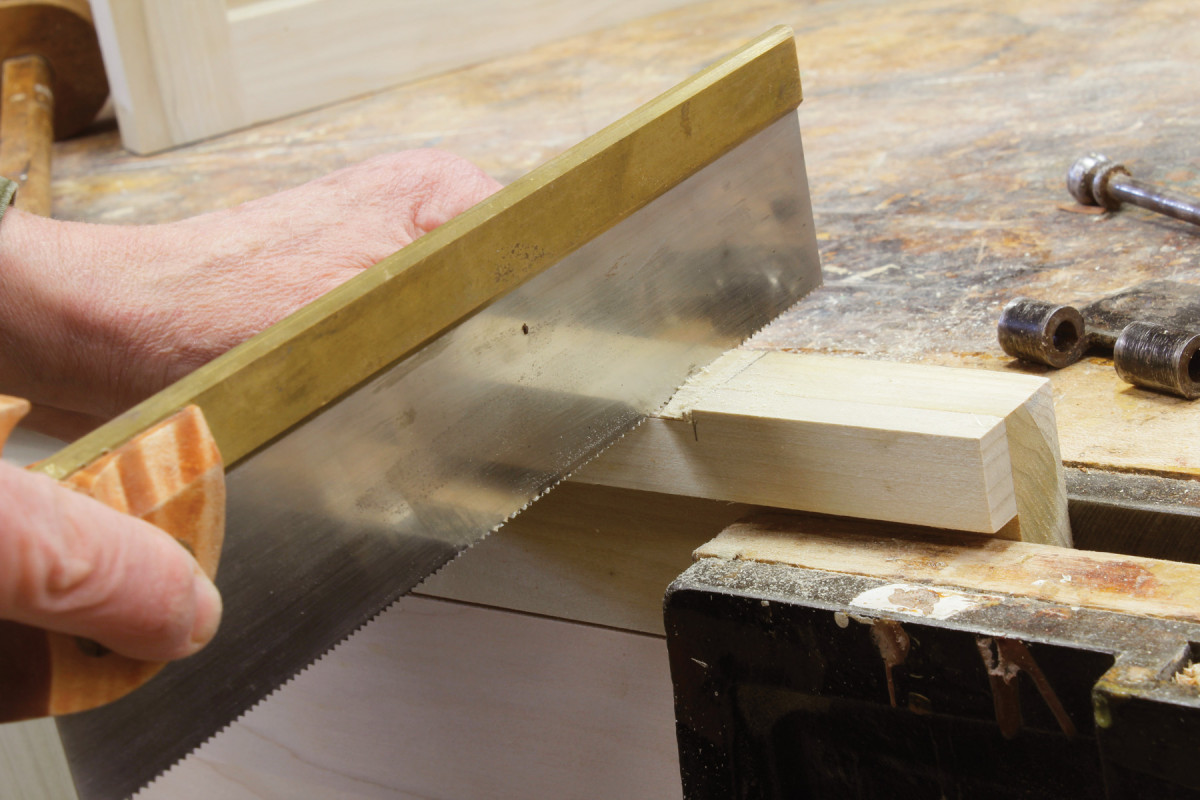
Clear cut. If your mortise is the same width as the new thickness of the door (minus the protruding barrel), as mine is here, you can begin removing waste with a saw. Stay just clear of your gauged depth line.
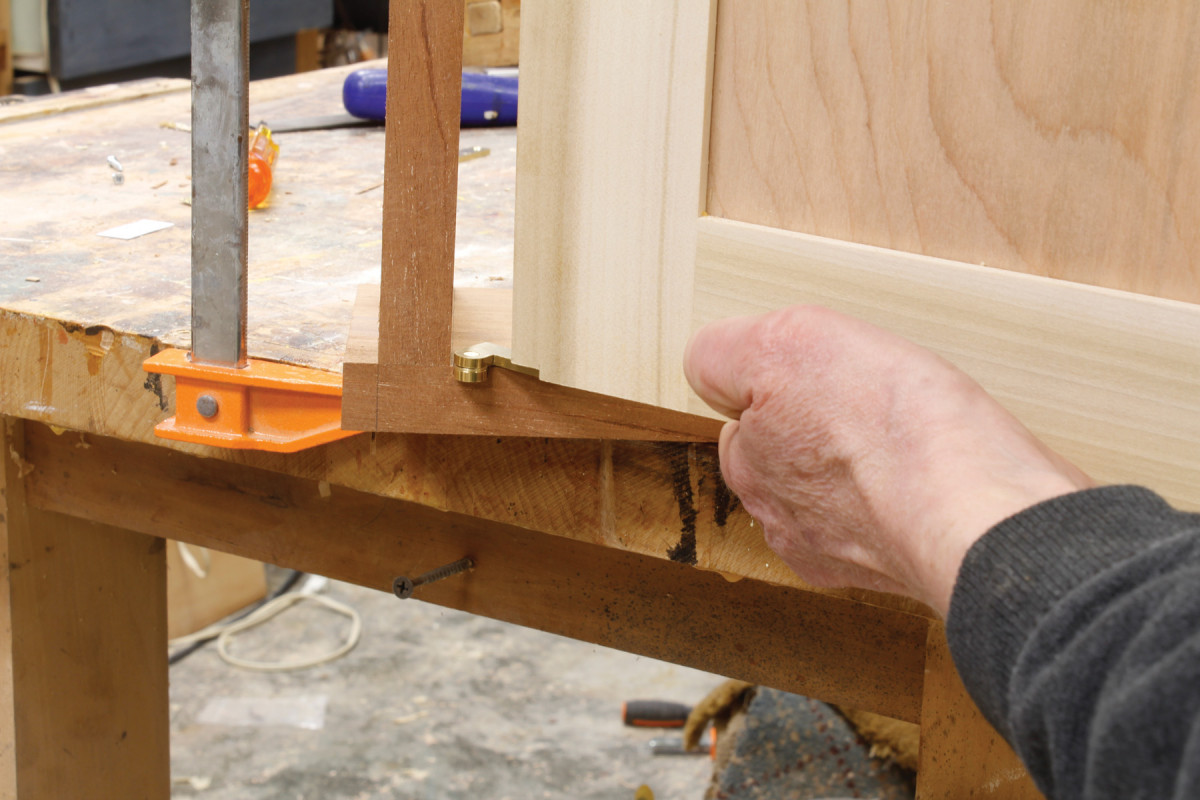
Even on full-size doors that are a standard 15⁄16” thick, architectural hinges are customarily fitted with the barrel protruding. When used on a cabinet door, which is more likely to be between 3⁄4” and 1″ thick, the barrel will protrude to an ungainly degree unless you set the leaves back so that they overhang on the interior of the cabinet. The door will look better if you thicken it with a strip of matching material on the inside face of the hinge stile. There’s nothing technically wrong with having the hinge protruding into the cabinet, but it looks less than thoroughly thought out.
If the inside edge of your face frame is flush with the cabinet side, there’s no need to thicken the face frame stile as you did with the door. If these parts are not flush, add the necessary material before proceeding. Drill and screw the second leaf onto the cabinet, then try the fit.
Here are some supplies and tools we find essential in our everyday work around the shop. We may receive a commission from sales referred by our links; however, we have carefully selected these products for their usefulness and quality.