


We may receive a commission when you use our affiliate links. However, this does not impact our recommendations.
 Get Great Results without Rubbing Out
 Get Great Results without Rubbing Out
Maybe I’m crazy, but I like to brush polyurethane. I’ve built more than 50 dining room tables, and I’ve brush-finished every one, using a simple system that consistently provides great results. I’m not a purist. I use tools that you can get at any paint store and I don’t rub out the final coat. My tabletop finishes look good and feel smooth. They’re durable…and do-able.
A tabletop requires multiple coats, of course, but each one is applied the same way. I use flat, satin or semi-gloss polyurethane, depending on the look I want and the wood. A lower sheen helps to disguise finish imperfections, but it can make dark woods such as walnut look a bit hazy.
I always sand with 280-grit paper between finish coats, and I let the polyurethane dry thoroughly before sanding. I wipe the top twice to remove the sanding dust, first with a slightly damp lint-free cloth, then with a fresh tack cloth.
You can practice my methods by finishing the bottom of your tabletop. It should have at least one coat of finish anyway, to stabilize the top for seasonal changes in humidity.
Top-Brushing Trio
My brush arsenal for tabletops includes a bristle brush for the top’s wide, flat surface, a foam brush for its long edges and a small roller for the ends.
 Choose a natural-bristle brush for oil based polyurethane. Its business end should appear wedge-shaped or tapered when viewed from the side. Most natural bristle brushes are made with Chinese hog bristles. China bristles, as they’re called, are relatively large. I prefer brushes that combine china bristles and ox hair. Ox hair is finer than china bristle (and more expensive), so it’s less likely to leave marks. The tips of china bristles are often flagged (split into multiple fibers) to imitate ox hair. I like long, flat wooden handles. They’re comfortable to hold and offer good balance. A stainless-steel ferule won’t rust—a must for any brush you plan to keep long-term. The “Demon” from Bestt-Liebco and the Purdy “Ox-O-Thin” are good, reasonably priced brushes for oil-based polyurethane. Expect to pay about $25 for a 2-1/2-in. brush.
Set up for Success
1. Use gravity to help fight brush strokes. A single spacer allows positioning your top at a slight angle, to help the polyurethane flow.
After final sanding, I vacuum the top thoroughly before moving it into my finishing area. I like to apply finishes early in the morning, when the air is still and airborne debris has had all night to settle.
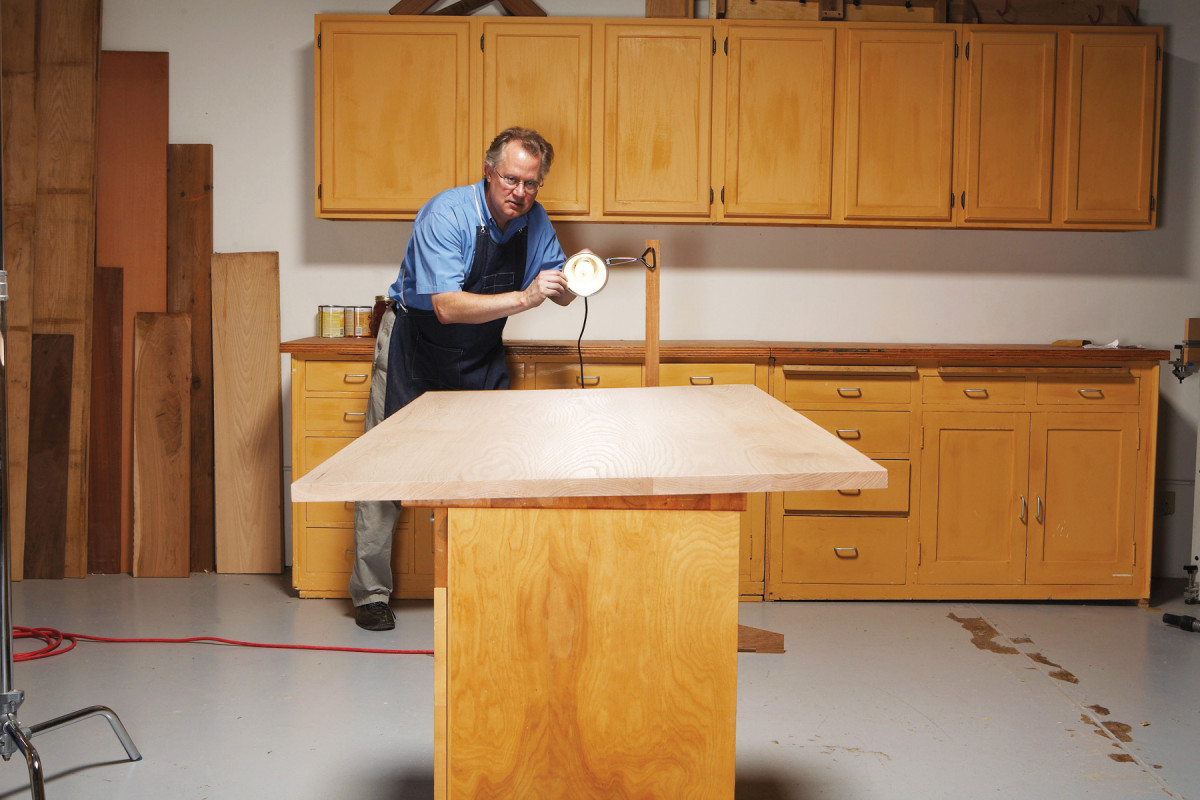
2. Set up a low-angle light to highlight imperfections. Use it’s sharp contrast to spot wayward brush strokes, loose bristles and other debris that appears in the finish.
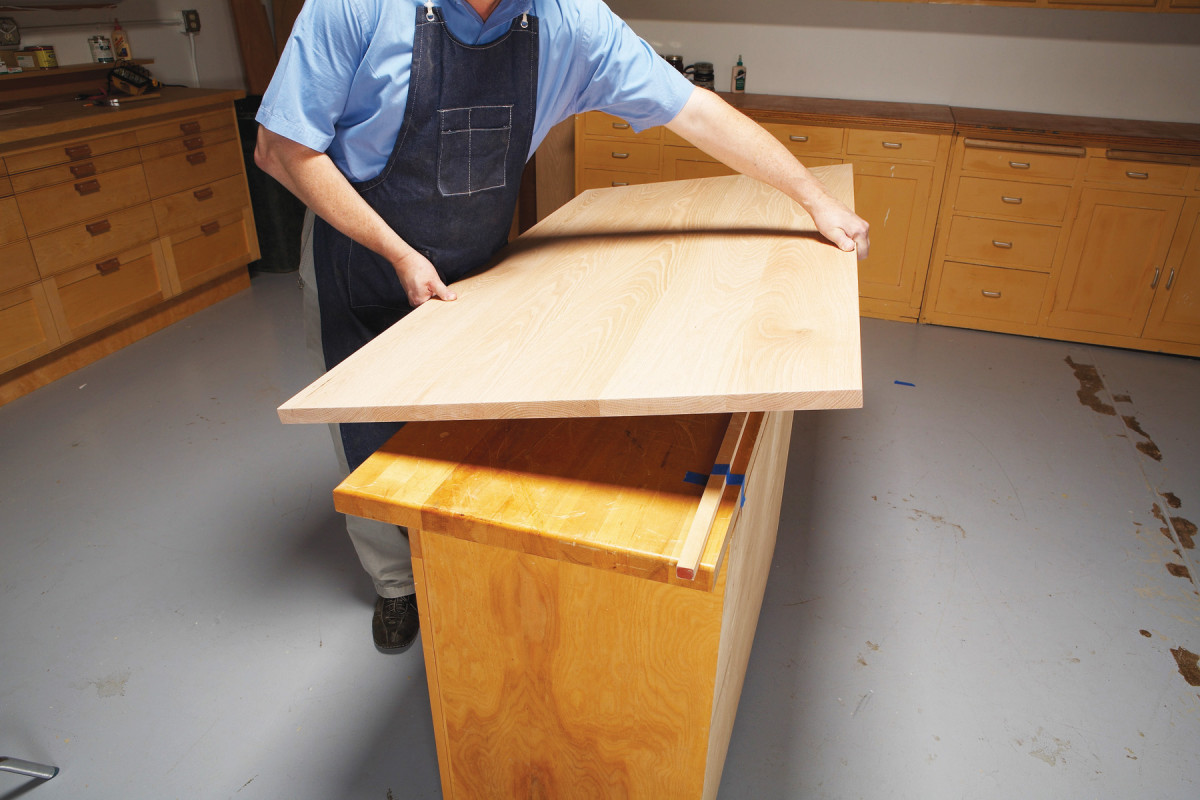
I always slope tabletops for finishing (Photo 1). Taking this step helps me think positively about the job ahead, because it makes me feel like I’m doing everything possible to insure a good outcome.

3. Wipe the surface with a tack rag after vacuuming. I never vacuum in my finishing area, though, because the vac’s exhaust stirs up the air.
A low-angle light creates shadows that make it easy to see imperfections in the finish (see Photo 2). I use this light immediately, to check for debris missed by the tack rag (Photo 3).
Prime the Brush and Prepare the Polyurethane
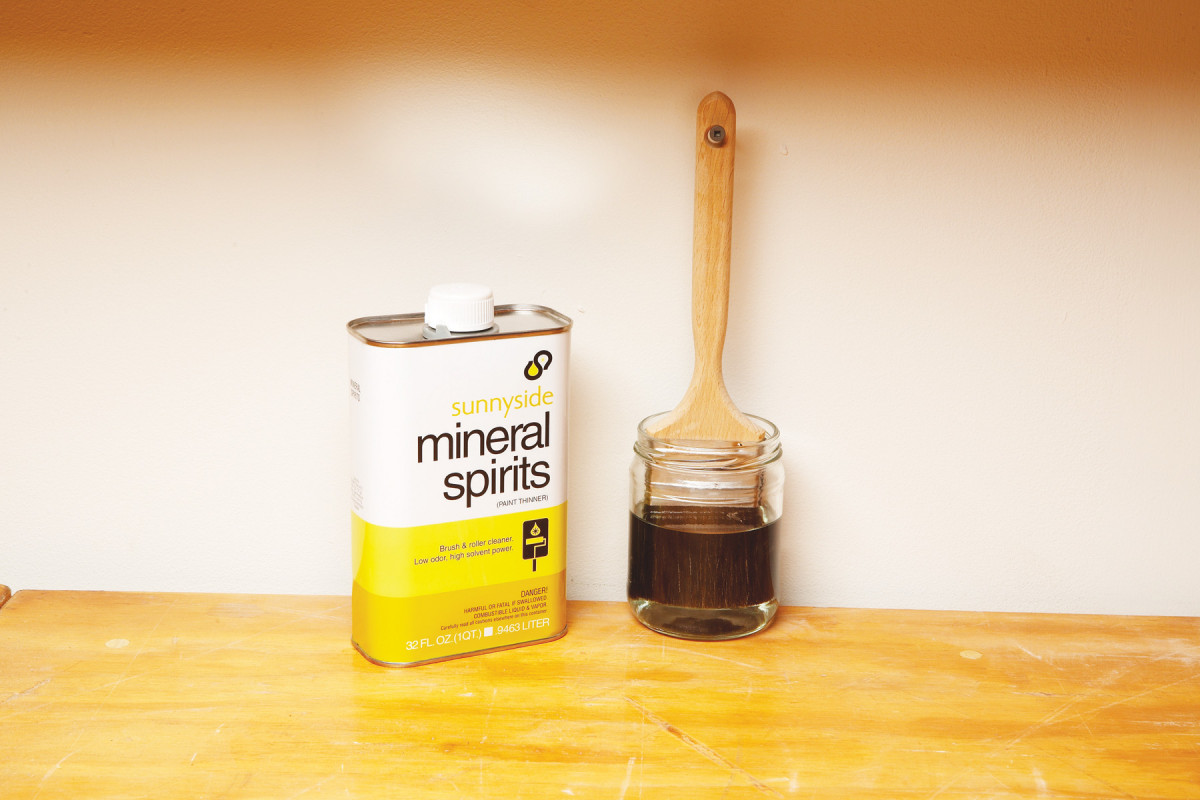
4. Prime your brush by soaking it in solvent for a few minutes. The solvent saturates the porous natural bristles, so they don’t soak up the polyurethane and become tacky. Suspend the brush so it’s the bristles don’t rest on the bottom of the glass.
Natural bristle brushes work best when the bristles are saturated with solvent (Photo 4).
Saturated bristles release the polyurethane efficiently and make the brush easier to clean.
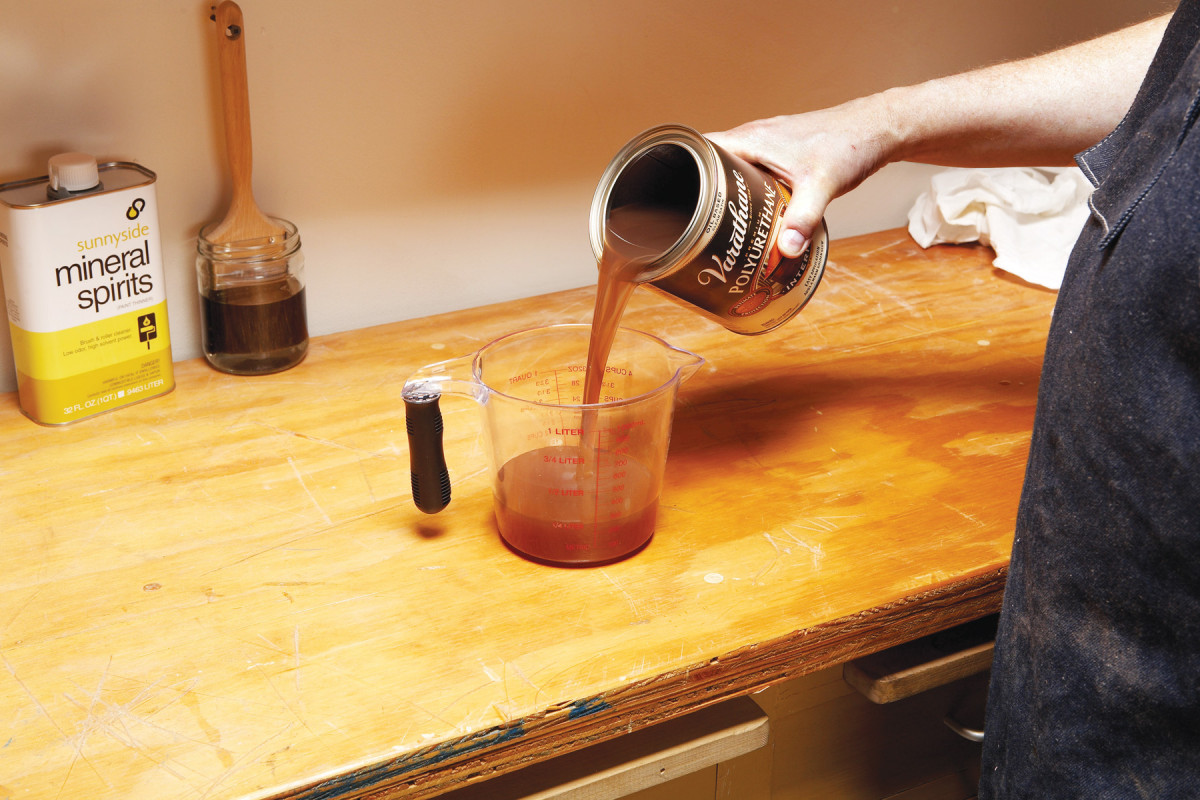
5. Pour enough polyurethane to complete the job into a clean container. I use a plastic measuring cup. It’s lightweight, easy to hold and it’s wide opening allows plenty of room for the brush.
Thoroughly stir the polyurethane. Then pour enough to complete the job into a separate container (Photo 5). I always open a new can of polyurethane for the final coat.
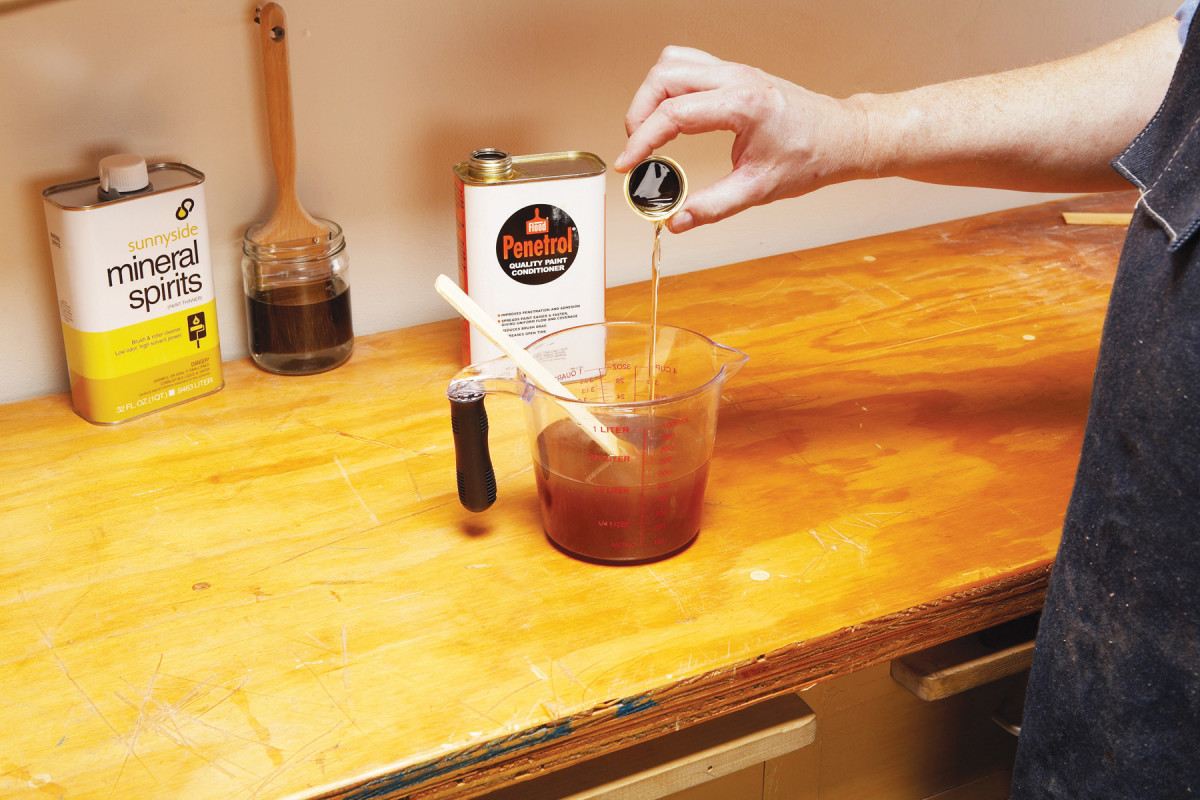
6. Make polyurethane easier to brush by adding Penetrol, a conditioner for oil-based paint and varnish. Penetrol extends the open time, increases flowablilty and improves leveling, all without thinning the finish.
My secret weapon against brush marks is Penetrol (Photo 6). Adding mineral spirits makes polyurethane easier to brush, but it thins the finish, so you might have to apply more coats. Penetrol makes brushing easier without thinning the finish, whether it’s hot, humid, cold or dry. (Polyurethane is formulated to perform best at 70- degrees F. and 50-percent relative humidity—when do you ever finish in those conditions?) I usually start by adding two capfuls per pint of polyurethane. Like mineral spirits, Penetrol slows the drying time, which increases the chances of accumulating dust in the finish.
Brush and Roll
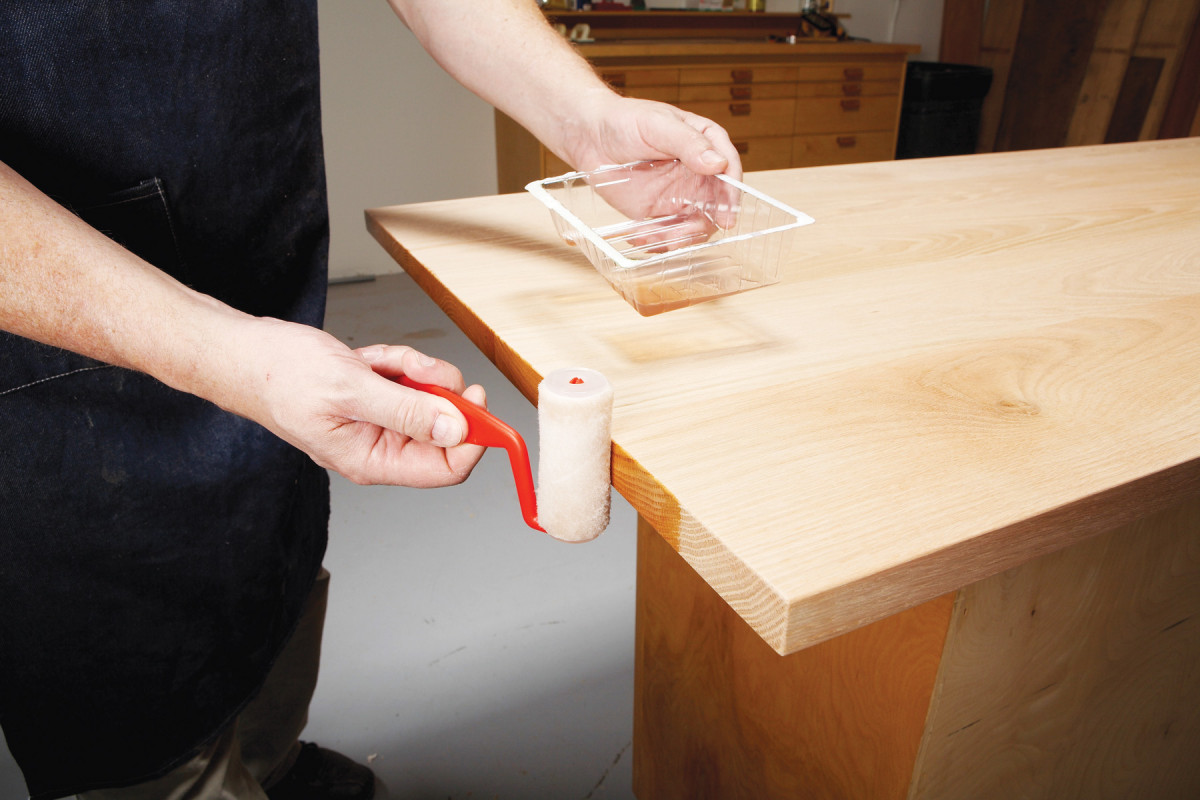
7. Start finishing the top by priming the end grain, so drips from brushing the top won’t leave permanent marks. A roller quickly applies an even, dripfree coat of polyurethane.
Before I brush the top, I prime the end grain (Photo 7). This method prevents ugly drip marks that can result when you brush the top first, because drips that soak into unfinished end grain create permanent marks.

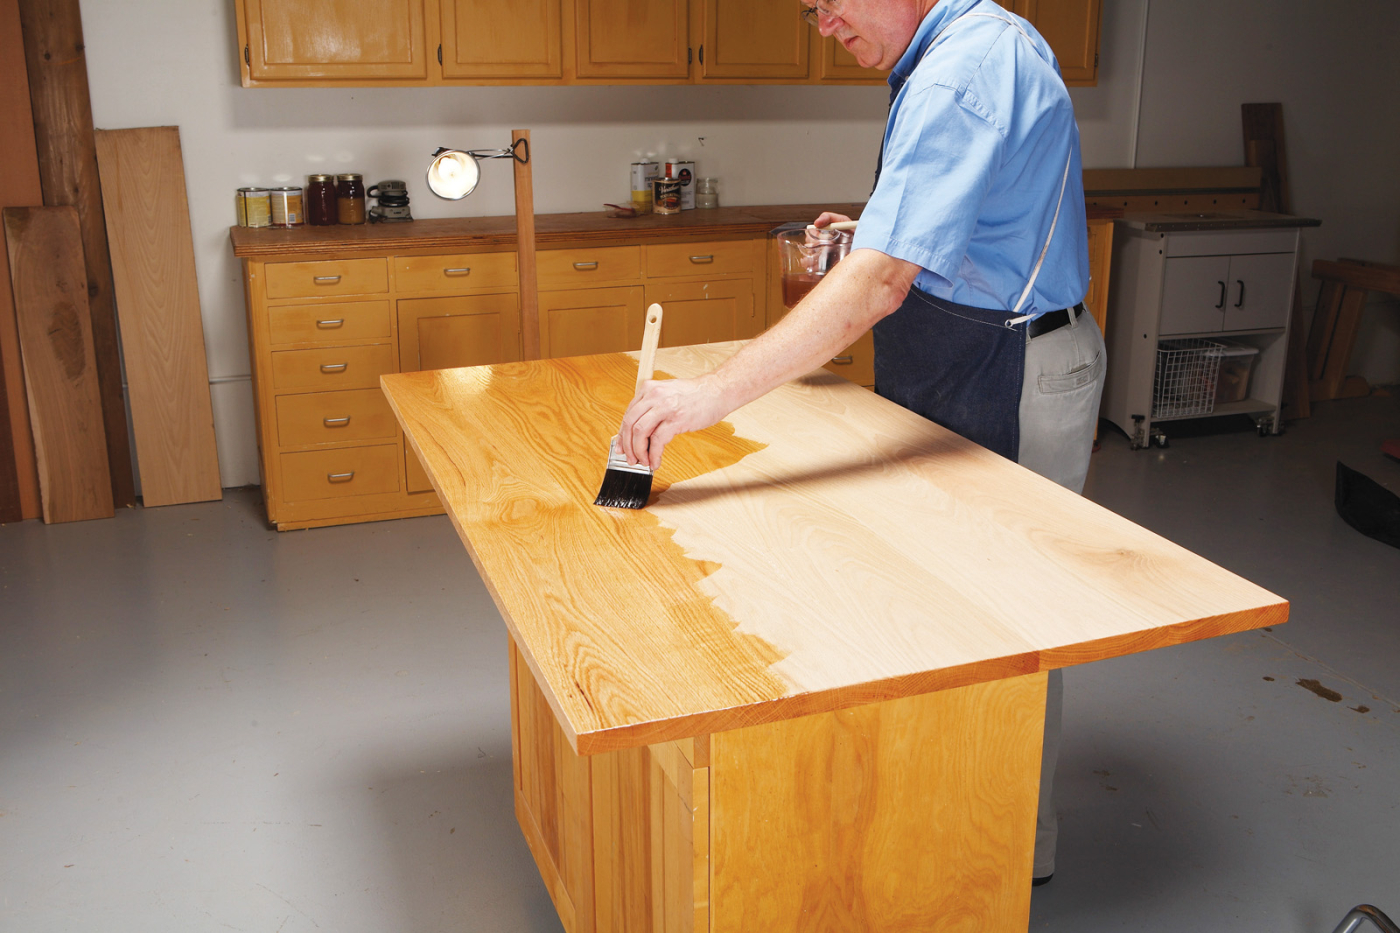
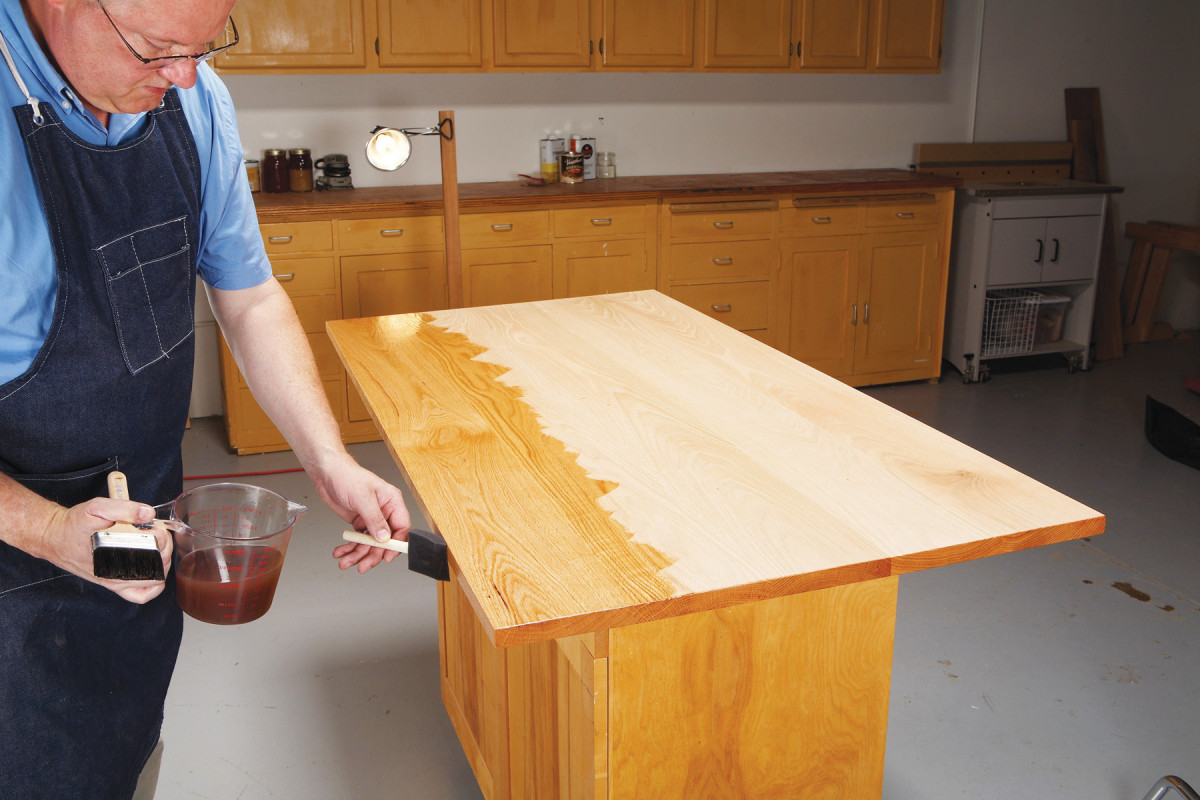
8. Finish the top in stages. Brush on the polyurethane in sections that are about 12-in.-wide. Your goals are to cover each section quickly and uniformly, using a minimum number of brush stokes. Brushing diagonally across the grain helps to evenly spread the polyurethane.
Rather than brushing the top’s entire surface, I divide it into sections that are easier to manage. For each section, brushing on the polyurethane is a two step process.
First I flow it on (Photo 8). Then I brush it out (Photo 9).

9. Brush end-to-end to level the finish and align the brush marks with the grain. Make as few strokes as possible. Over-brushing leaves visible brush marks.
I load the brush by dipping it 1/3 of the way into the poyurethane. Then, starting on the top’s low side, I go directly to the surface, without tapping the brush on the sides of the measuring cup. Just dip and go, man. I apply the polyurethane liberally and reload my brush often. While coating this section of the top, I also include it’s adjacent long edge.
About the only mistake you can make during this step is being too stingy with the polyurethane. Covering the surface quickly and uniformly is most important. Brushing direction doesn’t matter, except at the ends. There I brush parallel to the edges, to apply the polyurethane evenly and minimize drips.
After using the low-angle light to make sure the section is completely covered, I level the finish with end-to-end strokes. Before each stroke, I unload the brush by gently drawing it across the measuring cup’s rim. At the beginning of each stroke, I use an especially light touch to avoid leaving a pool of varnish.
10. Switch to a dry foam brush to clean the front edge. It soaks up the drips and sags and leaves a thin, even coat. Clean the edge of the bottom, too.
I don’t brush out the last couple inches of the section, because I’ll be brushing back into this portion later. When the raking light shows that all the brush marks run with the grain, I switch to a dry foam brush to clean the adjacent edge (Photo 10). Most bristle brushes deposit too much polyurethane for this job, creating as many drips and sags as they remove.

11. Cover the adjacent section with polyurethane. Brush back into wet area you’ve just completed to tie the two sections together. Follow with light end-to-end strokes as before. Repeat the process to finish the top.
I move to the other side of the table to brush the next section, so I’m not leaning over the wet finish (Photo 11). I cut back into the wet polyurethane as soon as possible. The longer it sets up, the more likely it is to show brush marks. I check my work in the raking light before moving on to the last section, and then again when that section—including its adjacent long edge—is completed.
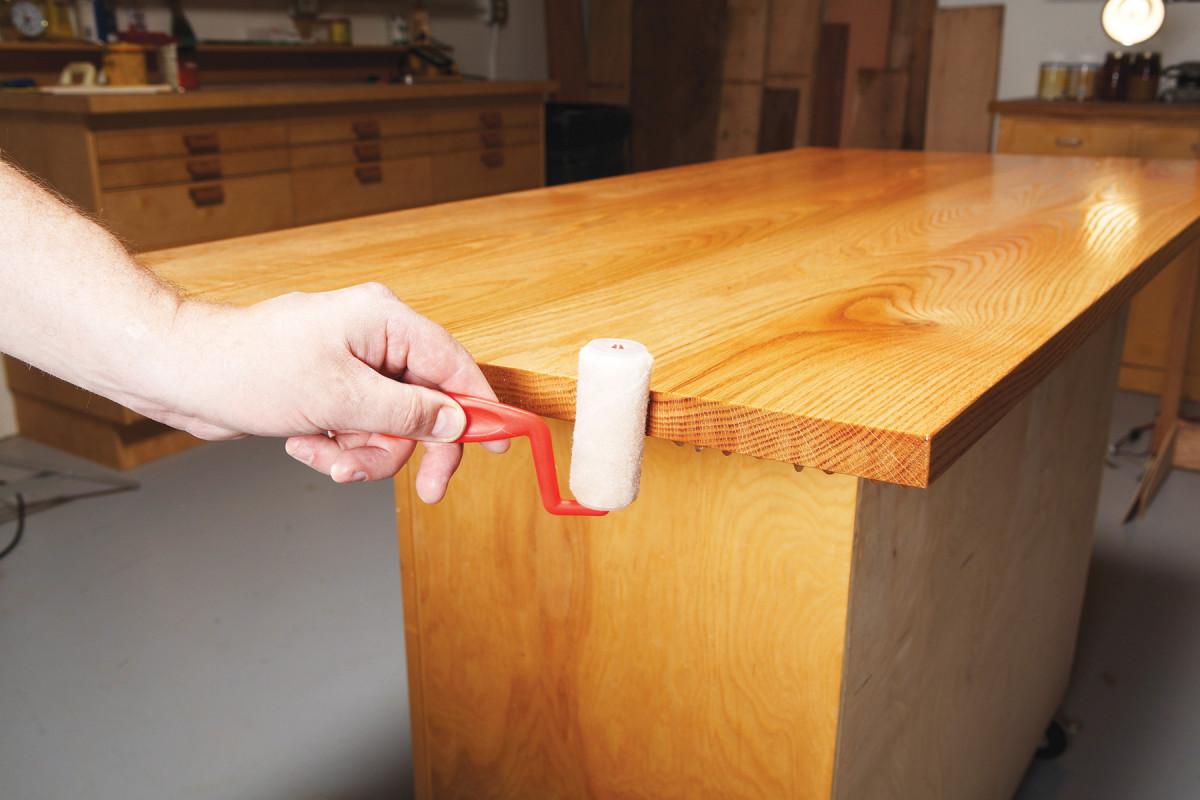
12. Remove drips from the ends. The roller re-wets the polyurethane and amalgamates the drips. Follow with the foam brush to level the finish.
When the top looks good in raking light, I complete the job by cleaning the ends with the roller and dry brush (Photo 12). Then I walk away. Experience has taught me to leave tiny imperfections. They look bad when the varnish is wet, but they virtually disappear when the varnish is dry.
Removing Debris
 Inevitably, dust, hair, bristles or bugs will lodge in the wet finish. I use the edge of the brush to lift them off the surface as soon as I see them—it’s too late if the poly has started to set up. After removing the offender, I brush lightly end-to-end to eliminate pock marks left by the process.
Here are some supplies and tools we find essential in our everyday work around the shop. We may receive a commission from sales referred by our links; however, we have carefully selected these products for their usefulness and quality.


