We may receive a commission when you use our affiliate links. However, this does not impact our recommendations.

The process for making a strike button includes turning a dowel, parting off buttons and drilling the button hole with a center bit.
In the October 2014 issue of Popular Woodworking Magazine (which mails to subscribers in about a week), Bill Anderson has an article on common fixes for vintage wooden planes – in other words, we want to encourage you to get those wooden planes off the shelf, fix them up as needed and start using them!
The article shows the five most commonly needed repairs, but here’s a sixth from Bill that might sometimes come in handy.
Repair a Strike Button
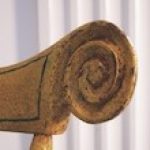
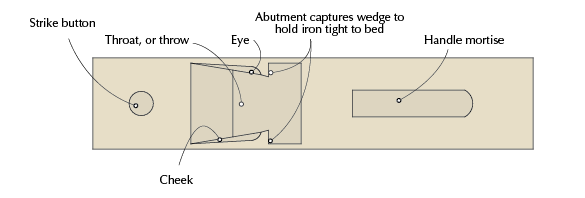
The strike button is inserted on the nose or the heel of the plane as a place to strike the plane to adjust or loosen the iron, without damaging the plane surface. The button is basically a section of end-grain dowel, domed slightly and sitting proud of the plane surface. I have seen diamond shaped and beveled buttons, but I suspect that these are user modifications.
End grain is about four times as hard or resistant to wear as long grain. It is important that the button seat flat against the bottom of the hole in order to transmit the energy of the mallet strike. If you are adding a button, be sure to match the button to the bit that will cut the hole. Bits vary enough in diameter that this can make a big difference. I use center bits to drill the holes because the diameter that the bit cuts can be easily altered to match an existing button.
I turn the buttons on a lathe and use a gauge made with the exact bit to size the turnings (usually 7/8” to 1” in diameter). I turn a 5″-6″ inch-long dowel, and turn and dome off successive 1” long buttons.
Then, I drill the hole in the plane stock such that the depth is just below the beginning of the dome. Relieve the sides of the dowel with V-cuts with a gouge to provide glue relief. If you make the hole too deep, add a penny to shim it out. Done!
Here are some supplies and tools we find essential in our everyday work around the shop. We may receive a commission from sales referred by our links; however, we have carefully selected these products for their usefulness and quality.